Turbo Windows - The Ultimate PC Speed Up Guide (Step-by-step Manual for Computer Users with Windows) by Liz Cornwell - HTML preview
Download the book in PDF, ePub, Kindle for a complete version.
Fancy Looks Come at a Cost
Optimize Windows Appearance Settings
Everybody loves nice-looking things and cool designs no matter whether it’s clothes, gadgets or your computer. That’s why most people love the way Windows 7 looks with all of its visual effects enabled. And that’s why people tend to download cool wallpapers and have elaborate screensavers. But did you know that cool looks come at a cost?
Graphics and visual effects are very resource-hungry and can severely affect system performance, especially if you have an older computer and an integrated video card that has no dedicated memory of its own. Even if you have a newer, more powerful system with a graphics card that has its own memory, you could make your computer run faster and smoother by optimizing Windows appearance settings.
62 | auslogics.com
TURBO WINDOWS® — The Ultimate PC Speed Up Guide
Turn off wallpaper and disable screensaver
The first thing I recommend is switching off your wallpaper and screensaver. Wallpapers and screensavers can take up a massive amount of RAM and a fair bit of disk space. Both your wallpaper and your screensaver are not needed by your PC and only have an aesthetic value. True, screensavers were a necessity for old CRT screens, but now they are pretty much obsolete, just like the screens that required them.
Switching your wallpaper and screensaver off is super-easy:
Windows XP:
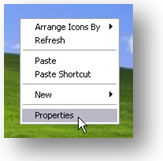
1. Right-click somewhere on your desktop and click on Properties
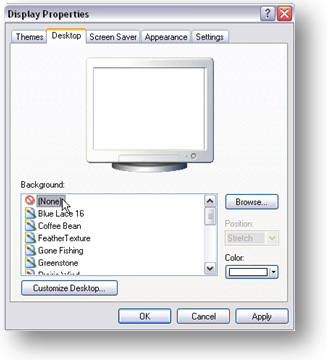
2. Go to the Desktop tab and set the background to None. You can then choose a background color that you like best.
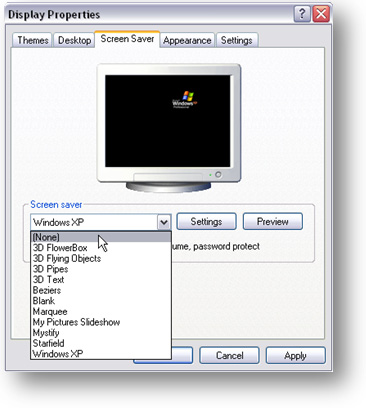
3. Now go to the Screensaver tab and set it to None. Click
Apply, then click OK and that’s it!
63 | auslogics.com
TURBO WINDOWS® — The Ultimate PC Speed Up Guide
Windows 7:
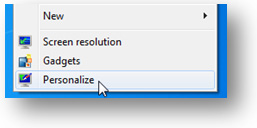
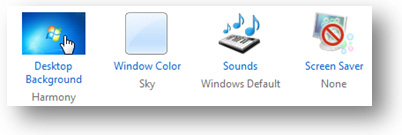
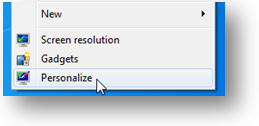
1. Right-click somewhere on your desktop and click on Personalize
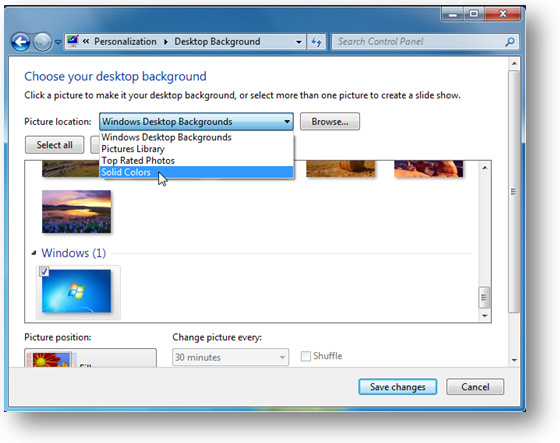
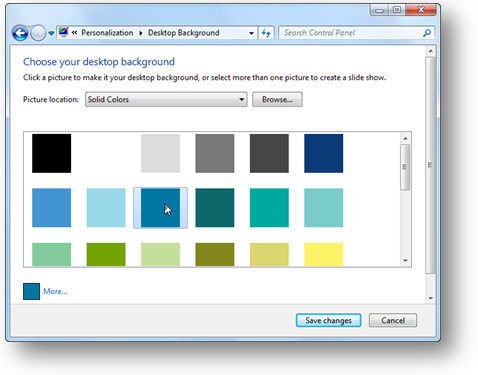
2. Click on the Desktop Background icon, then select Solid Colors in the Picture Location drop-down box and choose a background color that you like best
64 | auslogics.com
TURBO WINDOWS® — The Ultimate PC Speed Up Guide
3. Click on the Save changes button
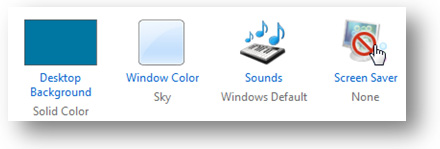
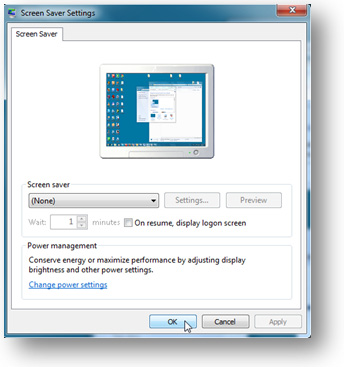
4. Now click on the Screen Saver - None icon to disable the screensaver 5. Click OK and that’s it!
Adjust color scheme and visual effects
Remember that the pretty Windows is not the fastest Windows, especially if you have the “eye candy” Windows 7 with Aero and transparency enabled. So, if in your book performance is more important than looks, you should consider choosing a more minimalistic look. Here is how:
Windows XP:
1. Press the Windows key + the Pause/Break key to open System Properties
65 | auslogics.com
TURBO WINDOWS® — The Ultimate PC Speed Up Guide
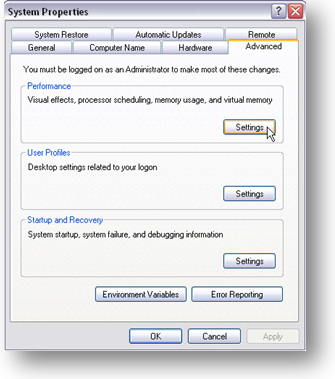
2. Go to the Advanced tab
3. Locate the Performance section and click on the Settings button
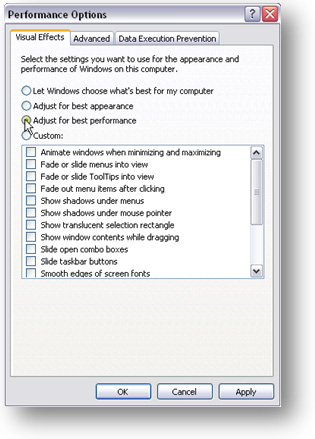
4. Now select the Adjust for best performance radio button.
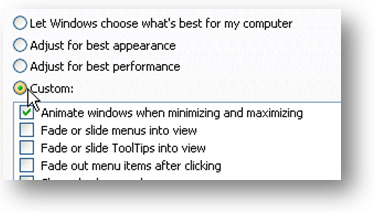
This will make your Windows look very minimalistic and even out of date. If you don’t mind that, then simply enjoy the performance gain. But if you’d still like XP to look more like XP, simply select the Custom radio button and select the visual effect you like.
66 | auslogics.com
TURBO WINDOWS® — The Ultimate PC Speed Up Guide
Windows 7:
If it’s the first time you are customizing Windows 7 appearance settings, you will need to switch Aero off. Yes, it looks nice, but it’s also exceptionally resource-hungry. Here is how you can disable Aero:
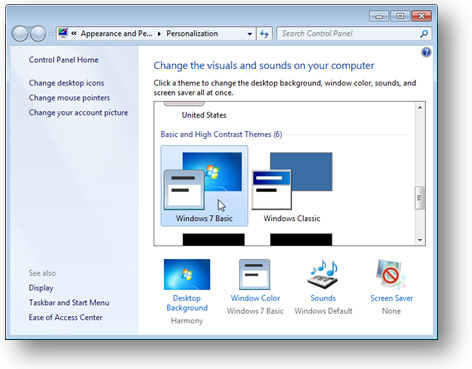
1. Right-click somewhere on your desktop and go to Personalize
2. Now you can select a less resource-hungry theme, such as Windows 7 Basic or Windows Classic.
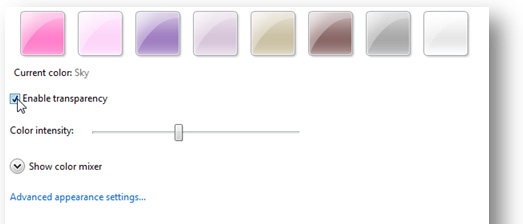
If you want to keep Aero, but still gain some performance, click Window Color
in the same window and uncheck the Enable Transparency box.
You can also use the Windows XP method described above to adjust Windows 7
for best performance.
67 | auslogics.com
TURBO WINDOWS® — The Ultimate PC Speed Up Guide
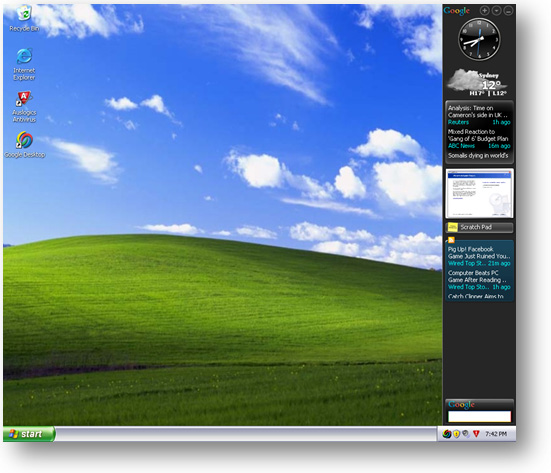
Remove desktop search bars
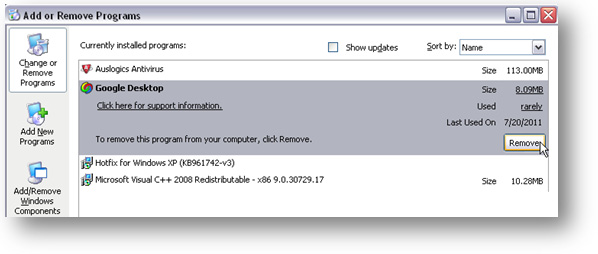
Some systems come with preinstalled features like Google Desktop or MSN Desktop, which have desktop search bars among other things. If you make heavy use of them, then there is no need to remove them and you would be better off disabling Indexing (I’ll describe how to do that in the next chapter). But if you don’t use Google, MSN or other Desktop, then removing them will speed up your computer.
Removing Desktops is as easy as removing any other pro-
gram. Just go to the Control Panel and click on Add or Re-
move Programs in Windows XP or Uninstall a program in
Windows 7. Locate the program you want to uninstall and
click on either Remove (Windows XP) or Uninstall (Win-
dows 7) to get rid of it.
68 | auslogics.com
TURBO WINDOWS® — The Ultimate PC Speed Up Guide
Disable gadgets in Windows 7
Windows 7 takes the idea of gadgets and sidebar a step further than its predecessor, Vista. It uses customisable gadgets that can be placed anywhere on the desktop. But that doesn’t make them less resource-hungry – they still take up a portion of system resources to load and update. Turning off all gadgets is one more way to speed up Windows 7.
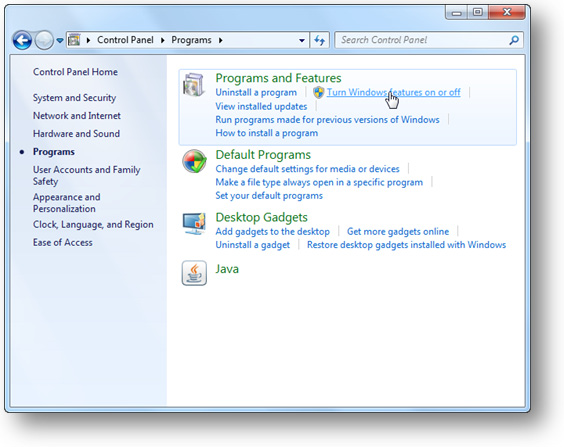
You can either turn off gadgets by right-clicking on your desktop, selecting Gadgets and disabling the ones you don’t need, or you could disable the whole gadget platform. Here is how:
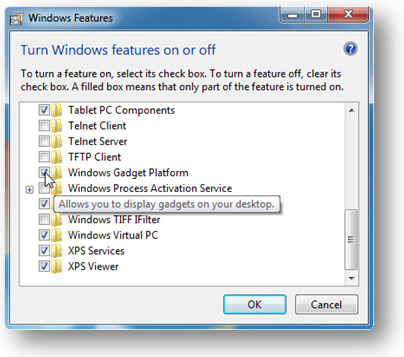
1. Go to the Control Panel, click on Programs and then choose Turn Windows features on or off under Programs and Features 2. Uncheck the Windows Gadget Platform and click OK
3. Restart your computer for the changes to take effect.
Now your system should be running a lot faster than it used to. But there is still a lot you can do to make your Windows super-fast.
69 | auslogics.com
TURBO WINDOWS® — The Ultimate PC Speed Up Guide
C 7HAPTER
Maximize Your PC Speed
The Ultimate Windows Performance Tweaks
By now you’ve already done a lot to make your computer run faster than before. But there is still room for improvement – you can speed up Windows boot and shut-down even more, make your computer access the memory faster, and tweak various Windows features for best performance. Some of these tweaks are pretty advanced, but applying them is as easy as following the instructions.
This chapter is going to be longer than the rest, but then there are a lot of Windows tweaks to cover. So, let’s get started and give Windows a real boost!
Check your CPU is fast enough
Now, before you start tweaking, you need to ensure that your CPU chip is fast enough. If it runs at less than 1.66 GHz, you really should invest into a more powerful computer. If your system is outdated and doesn’t have the right hardware, no amount of

70 | auslogics.com
TURBO WINDOWS® — The Ultimate PC Speed Up Guide
tweaking will make it fast enough.
To check your current CPU, press the Windows key + Pause/Break key to open System Properties and look for CPU frequency.
Prevent overheating
Overheating can be responsible for a bunch of computer problems, including dramatic performance degradation. That’s why you should make sure your fan is working properly and is not clogged by dust (use compressed air to clean it). In addition to that, remember to avoid direct sunlight on your computer and avoid using your laptop on your lap without a stand, as it could cause overheating and nasty burns if you use your laptop like that for prolonged periods of time.
Configure power options
Windows 7 has different power options that are suited for different ways of computer usage:
• The Power Saver option decreases screen brightness and reduces system performance to help you get the most out of your battery.
• The Balanced plan is the default Windows power plan that will suit most users. It offers full performance when you are using your PC and reduces energy consumption when your computer is idle.
• The High Performance plan maximizes screen brightness and can increase system performance in some circumstances.
If you are running off battery and feel that your computer is running slow, simply plug it in and switch to this plan by clicking on the battery icon in the system tray and selecting the High Performance radio button. Keep in mind that it will increase your power consumption and carbon footprint.
71 | auslogics.com
TURBO WINDOWS® — The Ultimate PC Speed Up Guide
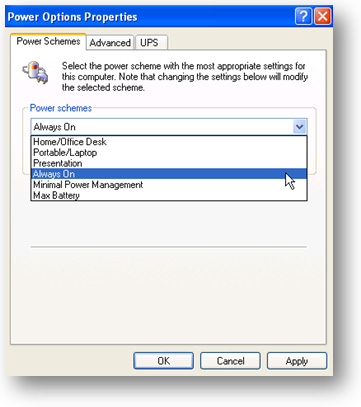
Windows XP has a different approach to power options. The closest thing to the High Performance plan is the Always On option. You can access XP’s power options by clicking on the battery icon in the tray and clicking on Adjust Power Properties.
There you will be able to select a power plan that suits you best or even create a custom power plan. To do that, simply change values for any plan, then click on Save As, name your plan and click OK to save the new power scheme.
Speed up Windows boot
We’ve already optimized your startup to make Windows load faster. Well, if you want to speed it up even more, here is a simple tweak for you.
By default, Windows waits for 30 seconds during system startup to load the operating system. To tell you the truth, 30 seconds is way too long and you can safely decrease the waiting time to something like 5 seconds. Here is how:
72 | auslogics.com
TURBO WINDOWS® — The Ultimate PC Speed Up Guide
Windows XP
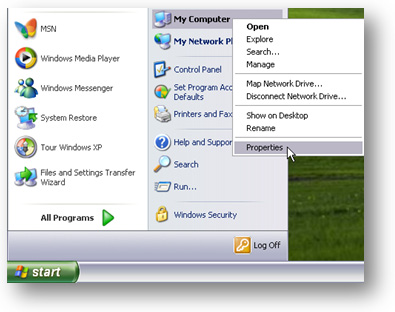
1. Right-click on My Computer and go to Properties
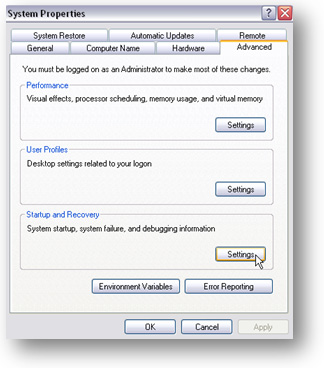
2. In the new window, go to the Advanced tab
3. Click on the Settings button in the Startup and Recovery section
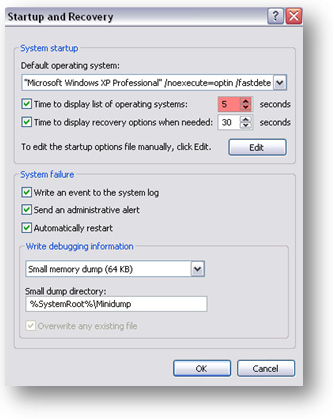
4. Under Time to display list of oper-
ating systems, set the value to 5 seconds
and click OK

73 | auslogics.com
TURBO WINDOWS® — The Ultimate PC Speed Up Guide
Windows 7
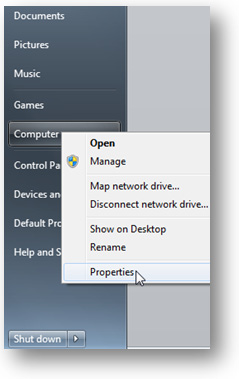
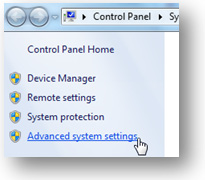
1. Right-click on Computer and go to Properties
2. In the Tasks sections, click on Advanced system settings
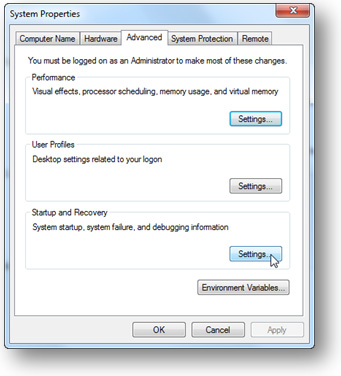
3. In the new window, go to the Advanced tab and click on Settings
under Startup and Recovery
4. Under Time to display list of
operating systems, set the value to 5
seconds and lick OK.


74 | auslogics.com
TURBO WINDOWS® — The Ultimate PC Speed Up Guide
Disable GUI boot
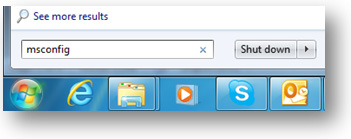
Another way to speed up Windows boot by a few seconds is to disable a feature called GUI boot. Remember that little animated progress bar you see when you boot up Windows? A pretty useless thing if you ask me. We are going to disable it: 1. Click on Start and type msconfig in the Search bar (XP users will need to click on Start – Run and type msconfig there). Hit Enter
2. In the new window, go to the Boot tab (BOOT.INI in Windows XP)
3. Find and check the No GUI Boot option (/NOGUIBOOT in XP)
4. Click Apply, close Msconfig and reboot your computer
for the changes to take effect.
Speed up Windows shutdown
Everybody wants their computers to start up faster. But what about shutdown speed? I know from experience how annoying it is to keep waiting for your PC to power down. Luckily, there are ways to fix it.
One of the reasons why Windows can take a really long time to shut down is because it clears the page file every time you power off your PC. This is good from the security point of view, as the page file stores temporary files and other data. Sometimes unen-crypted passwords can end up in your paging file, which means that clearing it on shutdown is not such a bad idea. However, if you have all your sensitive data encrypted or if extreme security is not high on your list of priorities, it’s a good idea to stop Windows clearing the page file every time you shut down your computer. To do that, you’ll need to change some stuff in the registry. Here is how:
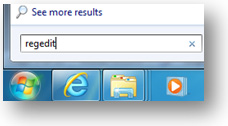
1. Click on Start and type regedit in the Search box (XP users will need to click on Start – Run and type regedit there). Hit Enter
75 | auslogics.com
TURBO WINDOWS® — The Ultimate PC Speed Up Guide
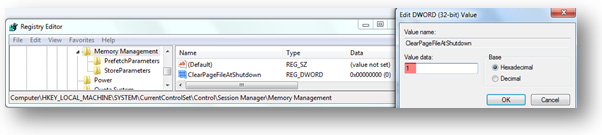
2. In the new window, locate HKEY_LOCAL_MACHINE\SYSTEM\CurrentControlSet\Control\Session Manager\Memory Management
3. Now double-click on ClearPageFileAtShutdown and change the value to 1
4. Close the Registry Editor and reboot your computer for the changes to take effect.
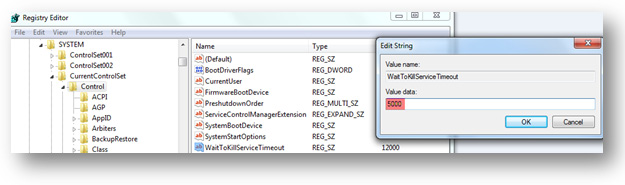
Another way to speed up Windows shutdown is to decrease the time Windows waits to kill non-responding services. To do that, we will need to open regedit again:
1. Click on Start and type regedit in the Search box (XP users will need to click on Start – Run and type regedit there). Hit Enter 2. Now navigate to HKEY_LOCAL_MACHINE\SYSTEM\CurrentControlSet\Control
3. Now double-click on WaitToKillServiceTimeout. A new window will appear
4. Change the value to 5000
5. Click OK, close the Registry Editor and restart your computer
76 | auslogics.com
TURBO WINDOWS® — The Ultimate PC Speed Up Guide
Now that we’ve made your computer start up and shut down faster, it’s time to improve its overall performance. I have to warn you that improving overall computer performance usually means disabling features and services. So, if you are not comfortable with disabling certain things, simply skip the advice and read on.
Check running processes
One thing that all operating systems have in common is that they rely on hundreds of processes to run correctly. Basically, there are three main types of processes that can be running on your system – a) essential and non-essential system processes; b) processes run by applications installed on your computer; c) viruses and malware. Ideally, you’d like to have as little of the non-essential processes as possible because having too many running processes reduces your PCs speed. And you definitely don’t want any viruses and malware!
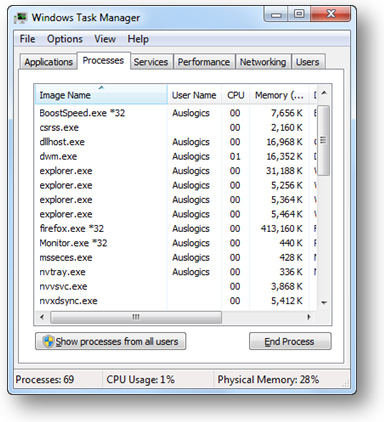
But how to check which processes are running on your system and what they are? Easy – simply launch the Windows Task Manager by pressing Ctrl+Shift+Esc and go to the Processes tab. You will see the list of all processes running on your system and information on how much CPU and RAM they are consuming. The Task Manager also provides a PID and shows under which user profile the processes are running.
77 | auslogics.com
TURBO WINDOWS® — The Ultimate PC Speed Up Guide
So, now you know what’s running. But how to find out what exactly are all those processes, which ones are essential and which ones are not? While some process names are very straight-forward and you won’t have any problems identifying the programs that run them (for example, Skype.exe), some process names won’t give you any clues. But don’t despair – there are plenty of ways to find out.
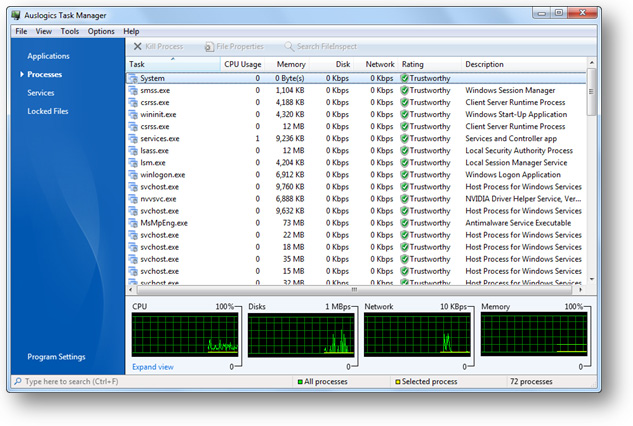
What you need is a more advanced Task Manager than the default one provided in Windows. There are plenty of alternatives, but my absolute favorites are Auslogics Task Manager and Sysinternals’ Process Explorer.
Both of these programs have features that are not present in the standard Windows Task Manager. For example, Auslogics Task Manager displays running programs, processes, services, shows you which files are locked by other files, and allows you to un-lock them. In addition to that, you can view properties for each process to find out which application is running it, view security rating for each process and look it up on FileInspect.com – a useful online process library. And it also displays network usage by each process, which is great for identifying malware. Pretty good, isn’t it?

78 | auslogics.com
TURBO WINDOWS® — The Ultimate PC Speed Up Guide
Process Explorer allows you to expand process trees and view which services are part of which process. This is especially handy when you are researching a process like svchost.exe and need to know which tasks a particular svchost.exe instance is responsible for.
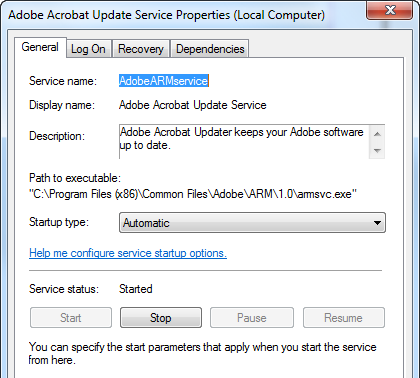
Now, if you want to disable unneeded processes, it’s best to manage them either by disabling the software that runs them on startup or simply disable unnecessary Windows services that are responsible for running these processes (see ch. 3 for details). This approach is a lot better and safer than killing the process in the Task Manager. But if you are sure a process is run by a piece of malware, it’s best to kill it immediately and run a scan with up-to-date security software. Here is how you can kill a process in the Task Manager:
1. Open the Task Manager by pressing Ctrl+Shift+Esc
2. Go to the Processes tab
3. Right-click on a process you wish to stop and select End Process
79 | auslogics.com
TURBO WINDOWS® — The Ultimate PC Speed Up Guide
Disable Indexing
Indexing is one of those Microsoft features that is good in theory and not so good when the theory is tested by everyday life. The indexing feature was designed to speed up Windows search. Basically, it indexes all files and folders on your hard drive, so that the indexes can be used to find files and folders more quickly when the need arises. In theory, your files and folders should only be indexed when the computer is idle, so that there aren’t any performance issues. A good idea, isn’t it?
Unfortunately, the indexing feature is not perfect. Even though it’s not supposed to kick in when you are using your computer, it often does just that. This causes your hard drive to start making noises and slows everything down. So, if you don’t use Windows search all that often, it makes sense to either disable indexing altogether or modify indexing options, if you are on Windows 7.
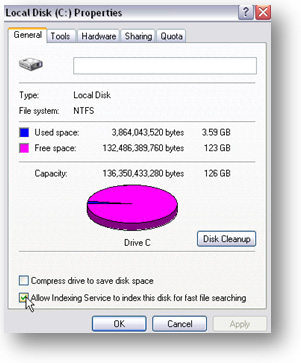
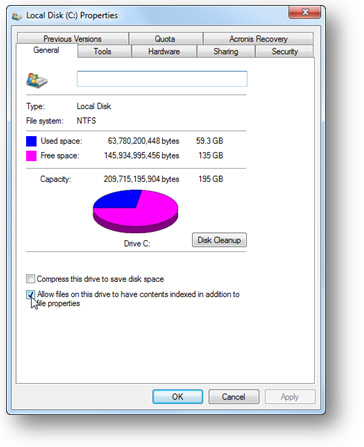
Disabling indexing is easy. You can simply right-click on your hard drive in (My) Computer, go to Properties and uncheck Allow Indexing Service to index this disk for fast file searching in Windows XP or Allow files on this drive to have contents indexed in addition to file properties in Windows 7.
Windows XP Windows 7
80 | auslogics.com
TURBO WINDOW