How to get Started Using Microsoft Access Even if You've Never Used it Before by Paul Barnett - HTML preview
Download the book in PDF, ePub, Kindle for a complete version.
CREATING A FORM
At the main database window click the forms tab and select ‘New’

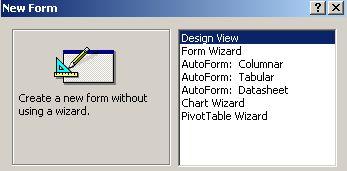
There are various options here. The form wizard option will create a quick, simple looking form. However it is better to become familiar with form design yourself and you will gain a better understanding if you select ‘Design View’.
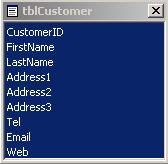
We need to bind the form to a data source. Remember the table we created earlier called ‘tblCustomers’ – this is what we will use as our data source.
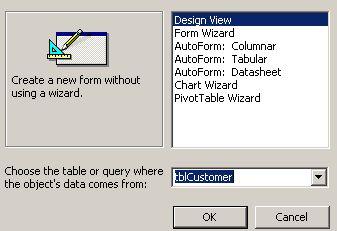 Select the data source from the dropdown box and then click the ‘ok’ button.
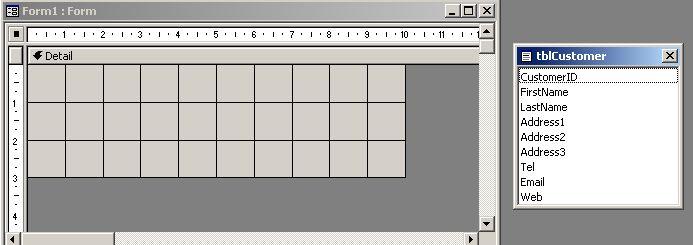
 You will see a blank form has been created and also a list of fields from the table ‘tblCustomer’ is shown.
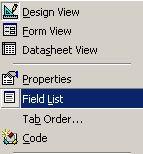
 If you don’t see the fields you can select them from the menu bar by selecting ‘View’ and then ‘Field List’.
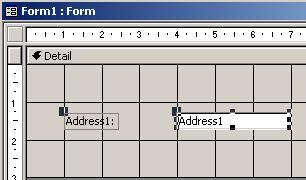
 Now we are going to add a field to the form.
 To do this click on a field and while holding the mouse down on it, drag it to the form. Release the mouse button and you will see your field on the form.
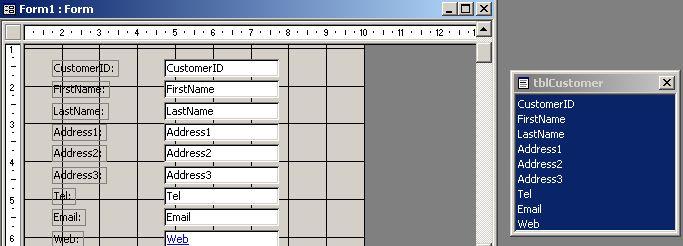
 If you want to add all the fields at once to the form simply double title at the top of the field list.
 The field list will then become highlighted.
 While these fields are highlighted hold your mouse down on any field and drag it over to the form. Release the mouse button and you will see all the fields on the form.
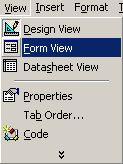
Run this form to check out how it looks. To do this go to the ‘View’ menu and select ‘Form View’
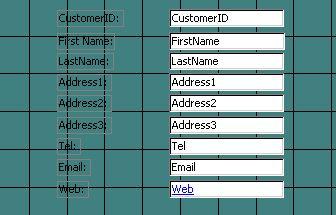
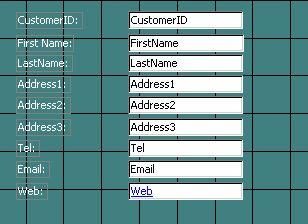
 Try entering some data here
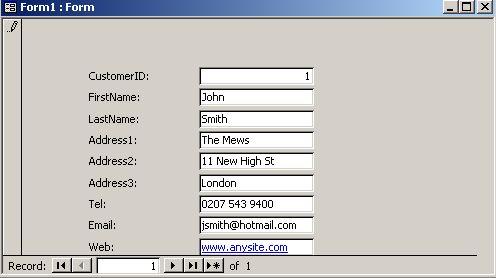
You will notice the web address turns blue to show it is a hyperlink. The data type we selected automatically handles this. This form is not the greatest design in the world and we can work on it to make it look better. If you notice the field names have their labels as one word. For example ‘FirstName’. This is due to how we entered it in the original table data source. We can change the display of the label on the form and it won’t in any way affect the table.
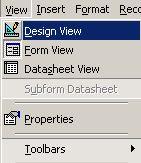
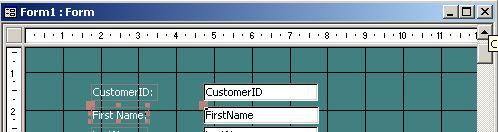
Lets now go back and make some alterations to the form. From the menu at the top select the ‘View’ option and then select the option ‘Design View’.
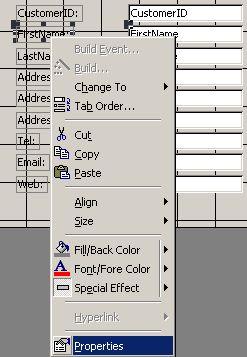
 We are now back at the design view of our form.
 Right click on the label ‘FirstName’ and select the properties option.
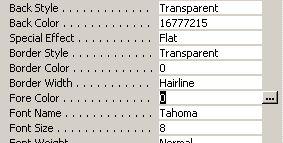
 You will now see a list of properties

We can sort out that problem of having the first name label as one word by adding a space between the words. At the caption property click on FirstName and add a space so it looks like the following:
 Now the caption has a space between the words
 If you now click back on the form you will notice that the label now says ‘First Name’ as opposed to what we had before ‘FirstName’.
This is much clearer and can be repeated for other form fields.
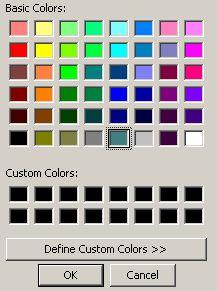
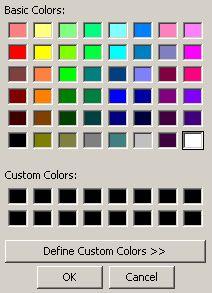
To change the background colour of the form right click anywhere on it and select properties. Click the small button next to the back color property
 Select a color and click ok.
 I have changed my form now to have a greenish background
However, the label names are now hard to see so we should change them to a lighter color.
Move the mouse just above ‘Customer ID’ and click and hold. Now drag your mouse cursor so that you form a rectangle around the labels.
Release the mouse button and the fields will have small selector icons around them
Now just move your mouse over the labels (do not press any mouse buttons at this stage). You will see your mouse pointer turns into a hand when you hover over the labels. At this point you should right click and bring up the properties window.
Click the button next to the fore color property so that it brings up the color selector box again.
 Here I am selecting the white color for my label text
Click ok and all the text in the labels you selected will have now turned white. We have now changed the background color of the form as well as the color of label text. You can of course change the color of individual labels by clicking on each one and selecting properties and then fore color.
 Close the form by clicking the X
 I am calling it frmCustomers. Notice the prefix for forms ‘frm’.
 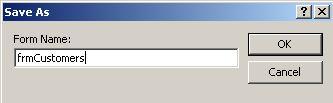 Click ok and you will now have a single form and a table in your database.