How To Make Your Own Clothes by Dress Clothing Online - HTML preview
Download the book in PDF, ePub, Kindle for a complete version.
3. HAND SEWING TUTORIAL
This DIY Guide will cover the basics of hand sewing
Tools needed: threading the needle - knotting the thread - running stitch – basting stitch - backstitch - slipstitch - blanket stitch - whip stitch and finishing with knots.
Needles - You'll want to look for "sharps" for basic sewing. "Betweens" are used for quilting. "Embroidery" or "crewel" needles have larger eyes (an eye is the hole at the top of the needle) and are used with thicker threads, like upholstery or embroidery floss
Scissors - You'll want a good pair of shears (normally sold with names like "dressmaking shears") and a pair of pinking shears. Pinking shears have small triangular teeth that cut the fabric in a such a way that it lessens unraveling. Smaller embroidery scissors are also good for cutting threads
Pincushion & Pins - You'll pin most everything you sew to keep the fabrics from slipping. A pincushion keeps them neat and tidy
Measuring tape - For measuring
Marking pens - perfect for embroidery and using patterns
Seam Ripper - This will help you correct mistakes
Beeswax - Essential for hand sewing. When you run your thread over the beewax, it gives the thread a nice coating that will keep it from tangling and make it stronger
Thimbles - These can be wood, leather or metal. They'll keep your fingers from getting sore and/or pricked
Thread or Floss - An all-purpose cotton thread is good for most things.
However, there are many threads to choose from. You'll often pick thread based on your project - cotton fabric = cotton thread, silk = silk thread, etc.
Floss is much thicker and normally comes in six-string strands. You'll use this for embroidery and finishing
Fabric - Might I recommend going to your local sewing store and buying some remnants to start off with? Remnants are small bits of fabric from the end of a fabric roll.
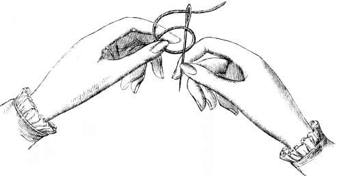
Threading the needle - When it comes to thread, more is better. Aim for cutting twice as much thread as you think you'll actually need. Taking one end of the thread between your thumb and forefinger, insert it through the eye of the needle. Then, bring the needle to the halfway point by bringing both ends of the thread together. Once there, secure the ends in a knot.
Pierce the needle through the wrong side of the fabric. That is, pierce it through the side that people won't be seeing. Pull it out and through, followed by the thread, all the way until it's stopped by the knot. If your knot goes through, simply make a bigger one.
Pierce the needle through the right side of the fabric. Close to where you pierced your material initially, push the needle back through to the wrong side. Pull the entire length of thread and keep pulling until you feel resistance.
Repeat the previous two steps. Always keeping close to your last stitch, pierce through the wrong side again. Pull all the thread out and voila - your second stitch. Continue doing this, making sure each stitch is the same length as the one before.
End by piercing the right side. You're finished! The needle and thread should now be on the wrong side, where you can finish 'er off with another knot. Get it as close to your material as possible -- otherwise your stitches will move around and stretch out.
Practice a closer stitch. The basting stitch, as described above, is good for a start. However, the bigger the stitches, the more likely it is to tear or come out.
Start zig-zag stitching. This is a stitch that goes back and forth and is used when a straight stitch just won't do, like to reinforce buttonholes or in working with stretchable fabrics. It can also be used to temporarily join two pieces together at their edges. It looks just like a zigzag (hence the name) and comes in short, medium, and long stitch lengths, too.
Sew two pieces of fabric together. If you're upgrading to this step, put your fabric together so that their wrong sides face outwards (and their right sides are together). Line up the edges along which you want to join them.
Sew in a line that follows the edges.
Patch a hole. Sewing a rip or tear isn't too difficult. Just pinch the edges of the hole together, towards the inside (the wrong side). Sew the edges together in a seam. Use a short stitch length (no space between the
stitches) to keep it from breaking open.
Video Tutorial -