Dreamweaver 8 Basics by Karthick - HTML preview
Download the book in PDF, ePub, Kindle for a complete version.
III. Creating the Next Web Page
You can follow Step A any time you want to create another Web page using the same design. Remember - never recreate the wheel. On this second page we will change the title of the page, remove the background image, put some colors in the table cells, add an ordered list and an unordered list, and an additional table inside of the existing one.
A. Save Your Existing Web File With A New Name1. Open home.html in Dreamweaver.
2. Click on the File menu.
3. Click on Save As.
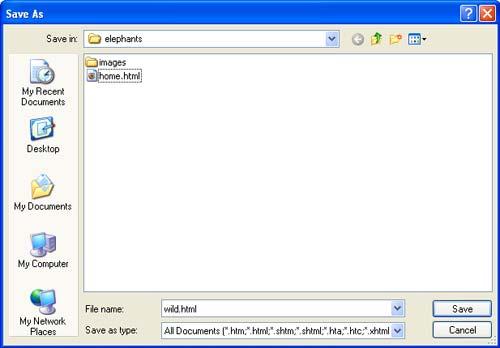
4. Make sure you are saving this file to the same place as the home.html.
5. Rename the file in the File name: box. (For example: wild.html)
6. Click on the Save button. You now have a second Web file that has the same design, structure, and links as the home page. All you need to do is change the title and change the main content area.
1. Select the text in the Title: box on the Dreamweaver toolbar. Or go to the Modify menu, to Page Properties, and change the title there by selecting Title/Encoding in the Category Window.
2. Type in a new title for your second page. For example: Elephants in the Wild. 3. Save your Web page.
 C. Remove the Background Image
1. Click on the Modify menu.
2. Click on Page Properties.
3. Select the file name in the Background Image: box.
4. Press Delete on the keyboard.
5. Click the OK button
1. Select all of the content area except the courtesy section at the bottom of the cell.
2. Press Delete on the keyboard.
3. Leave the Heading across the top and the Navigation down the left side for consistent design layout and navigation that makes for a good Web site.
1. Click in the top (first) cell of the table.
2. Click on the Bg box (background color for cell) in the Property Inspector.
3. Choose a color for that cell.
4. Click in the navigation cell.
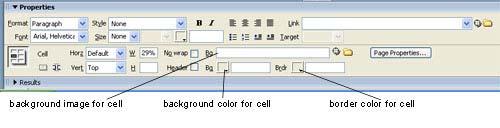
5. Click on the Bg box in the Property Inspector.
6. Choose a complimentary color for that cell.
7. Leave the content area cell white. Your content (usually the most important part of your page) needs to be readable. Background color tends to "drown out" text heavy pages.
1. Type in a new heading for the content area. For example: Elephants Going Wild.
2. Format the heading the same way you did on the first page.
3. Insert a horizontal rule under the heading.
4. Add content that explains the purpose of this page. Remember this is not the home page so you will want to briefly explain what this page is about, whom it is for, and what can be found there. As part of the content we will be including lists, anchor links and a table.
1. Place your cursor after the description of your page.
2. Press Enter on the keyboard.
3. Type the following text, pressing the Enter key after each entry. These three items will later become anchor links that jump to places further down the same page.
Feeding in the Wild
Endangered?
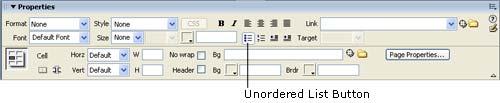
4. Select the three lines of text.
5. Click on the unordered list button in the Property Inspector.
 H. Adding Ordered (Numbered) Lists
1. Place the cursor after the bulleted list.
2. Push return/enter to move the cursor down a line.
3. Type the following text, pressing the Enter key after each entry.
http://www.pbs.org/wnet/nature/elephants/ (Nature: Elephants of Africa)
http://www.livingwithelephants.org/ (Living With Elephants Foundation)
http://www.save-the-elephants.org (Save The Elephants)
3. Select the text -- Some Great Web Resources on Elephants and format with bold.
4. Select the three web URL lines.
5. Click on the Ordered list button on the Property Inspector.
6. Link these three lines to their external Web sites. (Hint: you have the URL for the link right in the line.)
An anchor link is a hypertext link that takes you to another spot on the same web page instead of to another page or another web site. The "Back To Top" link is a common example of an anchor link that allows a person to jump back to the top of a web page without scrolling. For web pages that contain long passages of text information, the anchor link is a great way to allow your viewer to get quickly back and forth on the page without having to scroll for information.
• Create a table.
1. Place the cursor below the ordered list on your page.
2. Insert a table with three (3) rows and two (2) columns.
3. Set the table border at 6.
4. Click OK.
5. Type in a name for the table in the Property Inspector.
6. Choose a border color that compliments the cell colors you chose earlier.
7. Type Breeding in the Wild in the first row.
8. Type Feeding in the Wild in the second row.
9. Type Endangered? in the third row.
10. Change the vertical alignment in each cell to "top".
11. Change the horizontal alignment in the first cell of each row to "center".
1. Place the cursor at the beginning of Breeding in the Wild in the first row. 2. Click on the Named Anchor object
 in the Common Objects Toolbar.
 3. Type in breeding in the Anchor Name: box.
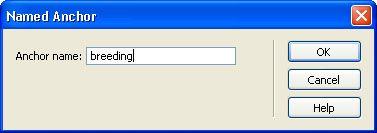 4. Click the OK button. The anchor icon is now next to Breeding in the Wild.
 5. Repeat steps 2a through e above with the rows two and three of the table. Name the anchors "feeding" and "endangered".
 • Create hypertext links to jump to the anchors.
5. Select the Breeding in the Wild text in the unordered list.
6. Type #breeding in the Link box in the Property Inspector. The # sign indicates a
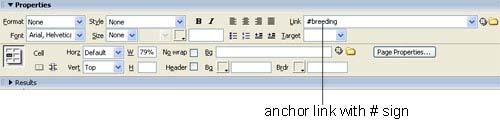 3. Select each of the next two items in the list and type in the appropriate anchor link in the Property Inspector. Don't forget to start the link with the # sign.
 • Save your Web page.