The Ultimate Guide to the Perfect Bass Setup by Jerzy Drozd - HTML preview
Download the book in PDF, ePub, Kindle for a complete version.
Chapter 1
Preparing Your Instrument
© 2009 All rights reserved. Free distribution of the unaltered content is permitted. This document is free.
Its sale is prohibited. Visit: www.jerzydrozdbasses.com y http://www.electricbasssecrets.com
10


The Ultimate Guide to The Perfect Bass Setup version 1.0
Before You Begin
Tip #1
Keep in mind that manipulating the truss-rod or
During the winter, abrupt
other elements of your bass is prohibited while
your instrument is still under warranty. If this is
temperature changes, both
the case, I recommend that you take your
outdoors and indoors, may
instrument to a professional luthier. If you are
cause the neck of some
a complete novice, I also recommend that you
instruments to move more than
practice first on an inexpensive instrument
it normally would.
before trying these procedures on your own
instrument.
This is why you should allow
the instrument time to adjust to
If something goes wrong with an instrument
you aren't using anyway, your mistake won't
room temperature before
cause any problems and you will learn from it.
making adjustments to it
Remember that trial and error is the best way
during this time of the year.
to learn, as long as you learn from your
This may take a couple of
mistakes so that you won't repeat them.
hours. Remove the instrument
from its case and place it in a
location away from any direct
Choosing a Place to Work
heat sources.
You should choose a place that has enough
room to give you unobstructed access to your
instrument. The best option would be a table
that is large enough to fit the whole instrument.
Place a blanket or towel underneath your instrument to avoid scratching it
© 2009 All rights reserved. Free distribution of the unaltered content is permitted. This document is free.
Its sale is prohibited. Visit: www.jerzydrozdbasses.com y http://www.electricbasssecrets.com
11


The Ultimate Guide to The Perfect Bass Setup version 1.0
Tools
Before you begin, you should have all of the
necessary tools
ready:
Tip #2
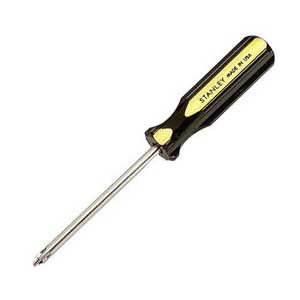
1. Standard or
Phillips
If your instrument needs
screwdrivers,
depending on the make of your
a thorough cleaning, it
instrument, in order to remove the truss-rod
will be necessary to
plate if your bass has one or to unscrew the
remove all of the strings in
battery plate if your bass has active pickups
order to access every part of
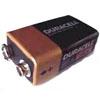
2. A battery or batteries, if your
it.
bass has active pickups;
Remember that routine
you will normally need a 9v
adjustments that don't
battery or two of them in the
involve
case of an 18v bass
a thorough cleaning
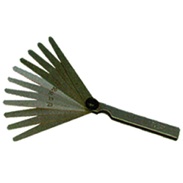
3. A set of gauges to adjust the height of the
strings; if you don't have one, you can
won't require removing
improvise with a credit card
the strings and in fact,
4. A new set of strings
it is highly
5. Allen wrenches, if you
recommended not to
need to adjust the
remove them. This
bridge
could cause the neck to
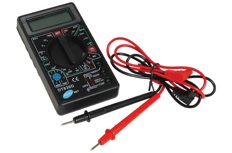
6. OPTIONAL: A battery
tester
become dislocated, due to the
7. A brush and cloth or better yet, a chamois
tension of the strings not
8. Spirit of turpentine for cleaning
the
fingerboard
compensating for the tension
9. Templates for
of the truss-rod, and as a
determining the
result, it will take even longer
curvature of the
to return the instrument
fingerboard; if they aren't
to its correct
available, you will find
alignment.
some cut-out templates at
the end of this book here
along with specific instructions
Remember:
on how to use them correctly
During routine maintenance,
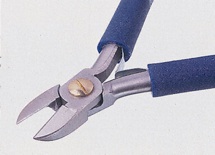
10. Small wire cutters to cut the strings
you should change the strings
one by one.
© 2009 All rights reserved. Free distribution of the unaltered content is permitted. This document is free.
Its sale is prohibited. Visit: www.jerzydrozdbasses.com y http://www.electricbasssecrets.com
12


The Ultimate Guide to The Perfect Bass Setup version 1.0
Getting the Instrument Ready
If a lot of time has passed since the instrument
Tip #3
has been adjusted, it would be a good idea to
give your bass a good cleaning.
If you are going to make
For this, you will need a brush, a piece of
adjustments after cleaning, it
flannel or a chamois, a cleaning product for
won't be necessary to loosen
finished surfaces or one that is made especially
the truss-rod in the neck.
for guitars and, last of all, walnut or teak oil and
spirit of turpentine.
If you are planning on leaving
the instrument without strings
1. Remove the strings
for more than 7-8 days after
2. If you are going to make adjustments after
cleaning it, it will be helpful to
cleaning, it won't be necessary to loosen
loosen the truss-rod so that the
the truss-rod.
neck won't warp, which can be
very difficult to correct.
3. If you are planning on leaving the
instrument without strings for more than 7-8
days after cleaning it, it will be helpful to
loosen the truss-rod so that the neck won't
Remember:
warp, which can be very difficult to correct
Loosen the truss-rod if you are
later on.
planning on leaving the
instrument without strings for
more than 7-8 days.
Cleaning the Fingerboard
If you haven't cleaned the fingerboard up until now or if a lot of time has passed since you
last cleaned it, you should take advantage of this opportunity to clean and polish the wood.
© 2009 All rights reserved. Free distribution of the unaltered content is permitted. This document is free.
Its sale is prohibited. Visit: www.jerzydrozdbasses.com y http://www.electricbasssecrets.com
13


The Ultimate Guide to The Perfect Bass Setup version 1.0
Maple Fingerboards:
If the fingerboard is made from maple and is varnished like the rest of the instrument, you
should use the same cleaning product as you use on the whole instrument. In this case, it
should be a product for finished wood surfaces. You should gently rub the surface of the
fingerboard between the frets with a cloth and a small amount of cleaning solution. This
should only take a few minutes.
Rosewood, Ebony or Brazilian Ironwood
Fingerboards
As a rule, these woods are treated with an oilTip #4
based finish to prevent them from drying out.
Spirit of turpentine is the
In this case, to clean the accumulated grime,
essential oil of turpentine.
we will use spirit of turpentine.
Turpentine is the resinous sap
from certain types of pine
Spirit of turpentine is a suitable product for
trees (originally from the
cleaning wood and, unlike mineral solvents,
terebinth tree). When
will not cause it to dry out.
turpentine is distilled, two
You should moisten a clean, dry cloth with a
products are obtained: the
little bit of solvent and then gently rub the
volatile, liquid essence, which
surface of the fingerboard until it is completely
is spirit of turpentine, and a
clean.
solid resin, called rosin.
Let the fingerboard dry for about 10 minutes
You can use spirit of turpentine
and then apply walnut or teak oil to the
to clean ALL parts of the
surface, rubbing lightly. Let the oil soak in for
instrument that are made from
about 5 minutes and then remove any excess
untreated wood or wood with
with a clean, dry cloth or paper towel. The
an oil-based finish.
wood will usually expel any excess oil, so you
should clean it several times at 5-minute
intervals.
Remember:
Never use other solvents, such
Cleaning the Bridge
as nitro solvent, alcohol or
acetone in place of spirit of
turpentine.
Basically, we will want to rid the bridge of any
small particles and debris that have
© 2009 All rights reserved. Free distribution of the unaltered content is permitted. This document is free.
Its sale is prohibited. Visit: www.jerzydrozdbasses.com y http://www.electricbasssecrets.com
14
The Ultimate Guide to The Perfect Bass Setup version 1.0
accumulated between the moving parts. A brush is very good for this purpose.
Afterwards, we will want to lubricate all of the moving pieces, such as the pins and the
saddles that make direct contact with them. In general, bridges are made up of a number
of metal pieces, which usually have a chrome finish. This finish doesn't require any
special maintenance, so to clean it, we will use a chamois. Wooden bridges should be
cleaned the same way as the fingerboards, according to the type of finish.
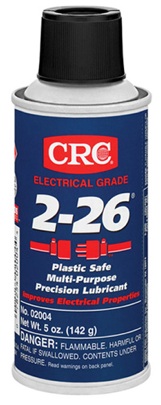
Cleaning the Electronics
Maintenance of the electronic components mostly consists of
cleaning and lubricating the volume and tone controls. An
aerosol spray designed for cleaning electronic circuits
should be used for this. The most common type is "2-26
Electro" from CRC Industries, which you can find at the
following link http://www.crcindustries.com/ei/. This cleaning
spray prevents the controls from wearing out prematurely.
Depending on the country you live in, you should be able to
find a similar product.
http://www.crcindustries.com/ei/content/prod_detail.aspx?
© 2009 All rights reserved. Free distribution of the unaltered content is permitted. This document is free.
Its sale is prohibited. Visit: www.jerzydrozdbasses.com y http://www.electricbasssecrets.com
15
The Ultimate Guide to The Perfect Bass Setup version 1.0