

15 Tradition American Dishes by Tadeusz M - HTML preview
Download the book in PDF, ePub, Kindle for a complete version.
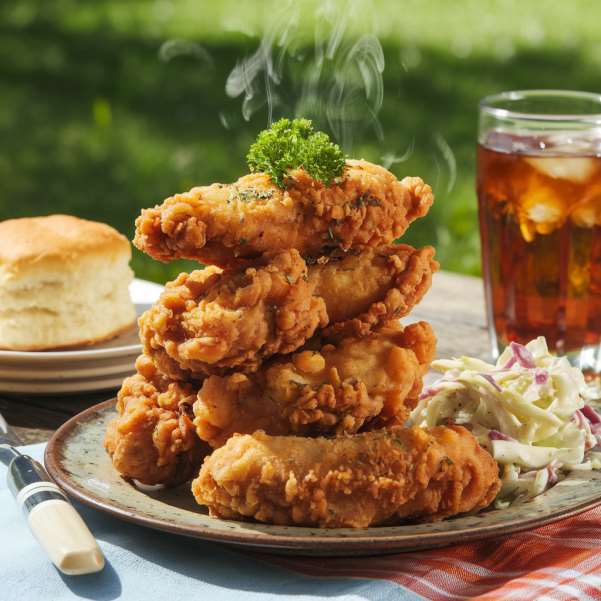
Preparation Time: 1 hour (plus marinating time, optional)
Servings: 6
Difficulty Level: Medium
Ingredients:
- 3-4 pounds (1.4-1.8 kg) chicken pieces (drumsticks, thighs, wings, or breasts)
- 2 cups (480 ml) buttermilk
- 2 cups (250 g) all-purpose flour
- 1 tablespoon smoked paprika
- 1 teaspoon garlic powder
- 1 teaspoon onion powder
- 1 teaspoon cayenne pepper (optional, for heat)
- Salt and pepper to taste
- 1 teaspoon baking powder (for extra crispiness)
- Vegetable oil or peanut oil for frying (enough to fill a skillet 1-2 inches deep)
- Fresh parsley, chopped (optional, for garnish)
Cooking Process
Fried Chicken is a crispy, golden journey that’s all about texture and taste. It starts with soaking the chicken in buttermilk, tenderizing the meat and adding a subtle tang that sets the stage for flavor. The coating – a mix of flour, spices, and a touch of baking powder – clings to every piece, promising that perfect crunch when it hits the hot oil. Frying is the star moment, with the chicken sizzling and browning as the kitchen fills with a savory, irresistible aroma that’s pure comfort in the air. It’s a hands-on process that rewards care with a payoff of juicy meat wrapped in a shatteringly crisp shell, turning humble chicken into something extraordinary with every batch.
Instructions:
1. Place the chicken pieces in a large bowl and cover with buttermilk. Season with a pinch of salt and pepper. Let it marinate in the fridge for at least 30 minutes, or up to 4 hours for best results (optional but recommended).
2. In a shallow dish, mix flour, smoked paprika, garlic powder, onion powder, cayenne (if using), salt, pepper, and baking powder until well combined.
3. Heat oil in a large, deep skillet or Dutch oven over medium-high heat until it reaches 350°F (175°C) – use a thermometer for accuracy, or test with a small piece of bread (it should sizzle immediately).
4. Remove chicken from the buttermilk, letting excess drip off. Dredge each piece in the flour mixture, pressing lightly to coat thoroughly. Shake off extra flour and set aside on a plate.
5. Fry the chicken in batches, avoiding overcrowding, for 10-15 minutes per side (depending on piece size), turning occasionally, until golden brown and the internal temperature reaches 165°F (75°C). Adjust heat as needed to maintain oil temperature.
6. Drain on a wire rack or paper towels to keep it crispy. Let it rest for 5 minutes, then garnish with parsley if desired and serve hot.
Tips:
- Double-dip in buttermilk and flour for an extra-thick crust.
- Let the coated chicken sit for 10 minutes before frying for better adhesion.
- Save the oil (strained) for frying another batch later – it’s reusable!
Nutritional Information (per serving, based on 6 servings):
- Calories: 600 kcal
- Protein: 40 g
- Fat: 35 g
- Carbohydrates: 30 g
- Fiber: 1 g
- Sodium: 700 mg
(Approximate values, may vary depending on chicken cuts and oil absorption.)
Benefits and Serving Occasions
Fried Chicken is a crowd-pleasing gem – it’s protein-rich, endlessly craveable, and adaptable with spices or sides to suit any palate. Add hot sauce for a kick or keep it mild for kids – it’s your call. It’s perfect for summer picnics, Fourth of July barbecues, or Sunday soul food feasts when you want something fun and filling. Serve it at birthday parties, game day spreads, or just a random night when you’re craving a treat that hits all the right spots. It travels well for potlucks and reheats decently, though it’s best fresh and hot. Pair it with mashed potatoes, coleslaw, or biscuits for a classic combo, or go simple with a side of pickles and a cold drink. Pile it high on a platter for a laid-back, finger-food vibe – it’s a dish that turns any meal into a crispy, juicy party.
Here’s the next dish from your list of the 20 most popular dinner dishes in the USA – “Homemade Pizza” – written in the same plain text style, in English, ready to be copied into Word without extra symbols. The dish description is detailed and expanded, as you requested:
---
Homemade Pizza
Dish Description
Homemade Pizza is a warm, cheesy canvas of creativity that’s a cherished staple in American homes, turning a simple dough into a personalized masterpiece that’s as fun to make as it is to eat. Imagine a golden crust, crisp on the edges and soft inside, topped with a bright tomato sauce, gooey melted mozzarella, and whatever toppings your heart desires – pepperoni curling at the edges, vibrant peppers, or a sprinkle of fresh basil. This isn’t just a meal – it’s a hands-on adventure, a dish that fills the kitchen with the yeasty scent of baking dough and the promise of a hot, bubbling pie fresh from the oven. In the U.S., it’s a Friday night ritual, a sleepover essential, and a family affair where everyone gets to pitch in, from kneading the dough to arguing over the best toppings. It’s the ultimate comfort food that bridges generations, offering a taste of Italy with an American twist – bigger, bolder, and endlessly customizable. The process is a labor of love, from stretching the dough to watching the cheese stretch with every slice, delivering a meal that’s both casual and celebratory. Whether you’re hosting a movie marathon or just craving something cozy, Homemade Pizza brings people together with its universal appeal, turning any night into a little pizza party that leaves everyone smiling and satisfied.
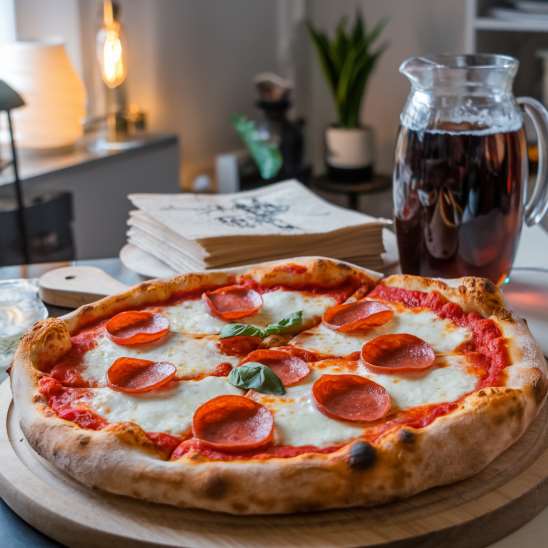
Preparation Time: 1 hour 30 minutes (including dough rising)
Servings: 4-6 (makes 2 medium pizzas)
Difficulty Level: Medium
Ingredients:
- 2 1/4 teaspoons (1 packet) active dry yeast
- 1 1/3 cups (320 ml) warm water (about 110°F / 45°C)
- 3 1/2 cups (440 g) all-purpose flour
- 2 tablespoons olive oil
- 1 teaspoon salt
- 1 teaspoon sugar
- 1 cup (240 ml) pizza sauce or marinara
- 2 cups (200 g) shredded mozzarella cheese
- 1/2 cup (50 g) grated Parmesan cheese
- 4 oz (113 g) pepperoni slices (or other toppings like bell peppers, mushrooms, olives)
- 1 teaspoon dried oregano
- Fresh basil leaves (optional, for garnish)
Cooking Process
Homemade Pizza is a delicious build from scratch, starting with a dough that’s as fun to knead as it is to eat. Yeast wakes up in warm water, mixing with flour and oil to form a soft, stretchy base that rises into a pillowy foundation. The sauce spreads out like a canvas, rich and tangy, while cheese and toppings pile on, turning simple ingredients into a flavor-packed creation. The oven does the heavy lifting, crisping the crust and melting the cheese into a golden, bubbly finish that’s pure magic. It’s a process that blends patience with play, filling the house with an aroma that’s half bakery, half pizzeria, and all comfort – a reward worth every minute of prep.
Instructions:
1. In a small bowl, dissolve yeast and sugar in warm water. Let it sit for 5-10 minutes until foamy.
2. In a large bowl, combine flour and salt. Make a well in the center, pour in the yeast mixture and olive oil, and mix until a dough forms. Knead on a floured surface for 5-7 minutes until smooth and elastic.
3. Place the dough in a greased bowl, cover with a damp cloth, and let it rise in a warm spot for 1 hour, until doubled in size.
4. Preheat the oven to 475°F (245°C). If using a pizza stone, place it in the oven to heat up now.
5. Punch down the dough and divide into 2 equal pieces. On a floured surface, roll or stretch each piece into a 12-inch (30 cm) circle. Transfer to a parchment-lined baking sheet or hot pizza stone.
6. Spread half the pizza sauce over each dough round, leaving a small border. Sprinkle with mozzarella and Parmesan, then add pepperoni or other toppings. Dust with oregano.
7. Bake for 12-15 minutes, until the crust is golden and the cheese is melted and bubbly. Rotate the pans halfway through if making two at once.
8. Let the pizzas cool for 5 minutes, garnish with fresh basil if desired, then slice and serve hot.
Tips:
- For a crispier crust, pre-bake the dough for 5 minutes before adding toppings.
- Mix up toppings – try sausage, pineapple, or even a white sauce base.
- Make extra dough and freeze it for a quick pizza night later.
Nutritional Information (per serving, based on 6 servings with pepperoni):
- Calories: 500 kcal
- Protein: 20 g
- Fat: 20 g
- Carbohydrates: 60 g
- Fiber: 3 g
- Sodium: 900 mg
(Approximate values, may vary depending on toppings.)
Benefits and Serving Occasions
Homemade Pizza is a joy for its versatility and fun – it’s a balanced meal you can tweak to any taste, from meat-heavy to veggie-loaded, and it’s cheaper than takeout with better flavor. Kids love rolling the dough, adults enjoy the customization – it’s a win for everyone. It’s perfect for casual Friday nights, sleepovers, or game day feasts when you want something interactive and satisfying. Serve it at birthday parties, movie marathons, or just a lazy weekend when you’re craving a treat that’s both easy and impressive. It’s great for rainy days indoors or summer evenings with a cold soda on the side. Pair it with a simple salad or garlic knots for a full spread, or keep it solo and let the pizza shine. Set it out buffet-style with extra toppings for a build-your-own vibe – it’s a meal that turns any gathering into a warm, cheesy celebration.
Here’s the next dish from your list of the 20 most popular dinner dishes in the USA – “Tuna Casserole” – written in the same plain text style, in English, ready to be copied into Word without extra symbols. The dish description is detailed and expanded, as you requested:
---
Tuna Casserole
Dish Description
Tuna Casserole is a creamy, nostalgic gem that’s a beloved cornerstone of American comfort cooking, a dish that turns pantry staples into a warm, satisfying hug on a plate. Imagine tender egg noodles nestled in a velvety sauce of tuna, peas, and mushrooms, all blanketed with a golden, crunchy topping of breadcrumbs or crushed potato chips that adds a delightful contrast to every bite. This isn’t just a meal – it’s a time capsule, whisking you back to mid-century kitchens, family dinners, and the kind of resourceful cooking that makes you feel cared for with every spoonful. In the U.S., it’s a classic that’s been cherished for generations, a go-to for busy moms and budget-conscious cooks who need something quick, hearty, and universally loved. The scent of it baking fills the house with a cozy, familiar warmth, promising a dish that’s both simple and soul-soothing, with a creamy heart and a crisp finish that’s pure comfort food magic. It’s the kind of recipe that invites improvisation – a splash of cheese here, a different veggie there – yet stays true to its roots as a humble, crowd-pleasing staple. Whether you’re feeding a family after a long day or bringing it to a potluck, Tuna Casserole delivers a taste of home that’s as reliable as it is delicious, wrapping you in the kind of nostalgia that makes every meal feel like a little reunion.
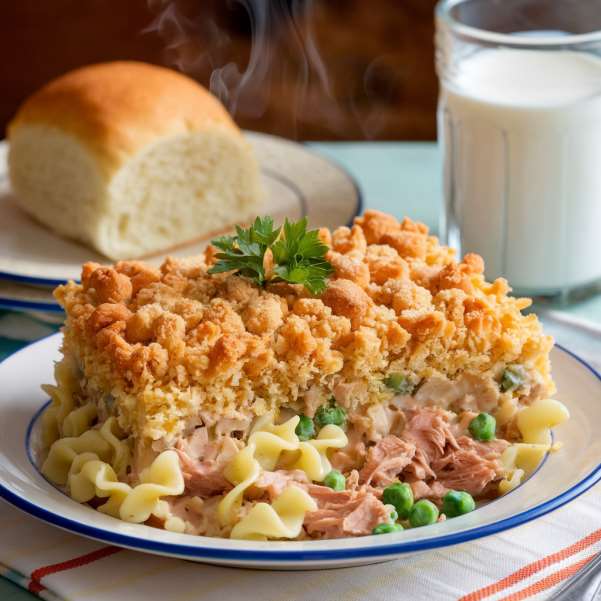
Preparation Time: 45 minutes
Servings: 6
Difficulty Level: Easy
Ingredients:
- 12 oz (340 g) egg noodles
- 2 tablespoons butter
- 1 small onion, finely chopped
- 1 cup (100 g) sliced mushrooms (optional)
- 2 tablespoons all-purpose flour
- 2 cups (480 ml) milk
- 1 can (10.5 oz / 298 g) cream of mushroom soup (or cream of celery)
- 2 cans (5 oz / 142 g each) tuna in water, drained and flaked
- 1 cup (150 g) frozen peas, thawed
- Salt and pepper to taste
- 1 cup (100 g) shredded cheddar cheese (optional)
- 1 cup (50 g) breadcrumbs or crushed potato chips (for topping)
- 2 tablespoons butter, melted (for topping)
- Fresh parsley, chopped (optional, for garnish)
Cooking Process
Tuna Casserole is a cozy, one-dish wonder that comes together with ease and heart. It starts with cooking the noodles until just tender, while a creamy sauce builds on the stove – butter and flour thicken milk into a smooth base, blending with soup for that classic casserole richness. Tuna and peas fold in, bringing protein and a pop of color, while mushrooms add an earthy touch if you’re feeling fancy. Everything mixes into a comforting blend, topped with cheese and a crunchy layer of breadcrumbs or chips that turns golden in the oven. It’s a simple process that transforms everyday ingredients into something warm and inviting, filling the kitchen with a homey aroma that promises a meal worth gathering for.
Instructions:
1. Preheat the oven to 375°F (190°C). Grease a 9x13-inch (23x33 cm) baking dish.
2. Cook the egg noodles in a large pot of salted boiling water according to package instructions (about 6-8 minutes) until al dente. Drain and set aside.
3. In a large skillet, melt 2 tablespoons butter over medium heat. Add the chopped onion and mushrooms (if using), cooking for 5 minutes until softened.
4. Stir in the flour and cook for 1-2 minutes, stirring constantly, until it forms a paste. Slowly whisk in the milk, then add the cream of mushroom soup. Cook for 3-5 minutes, stirring, until the sauce thickens.
5. Remove from heat and stir in the drained tuna, thawed peas, salt, and pepper. Add the cooked noodles and mix until evenly coated. If using cheese, stir in half now.
6. Transfer the mixture to the prepared baking dish. Sprinkle with the remaining cheese (if using) and top with breadcrumbs or crushed potato chips. Drizzle with 2 tablespoons melted butter.
7. Bake for 20-25 minutes, until the top is golden and the casserole is bubbly. Let it cool for 5 minutes, then garnish with parsley if desired and serve hot.
Tips:
- Swap peas for corn or green beans for a different twist.
- Use crushed Ritz crackers instead of breadcrumbs for a buttery crunch.
- Make it ahead – assemble, refrigerate, and bake when ready.
Nutritional Information (per serving, based on 6 servings with breadcrumbs and cheese):
- Calories: 450 kcal
- Protein: 25 g
- Fat: 20 g
- Carbohydrates: 45 g
- Fiber: 3 g
- Sodium: 900 mg (Approximate values, may vary depending on ingredients.)
Benefits and Serving Occasions
Tuna Casserole is a budget-friendly star – it’s protein-rich, veggie-packed, and a genius way to stretch pantry staples into a full meal that feeds a crowd. Tweak it with your favorite add-ins – cheese, different veggies, or even a dash of hot sauce – to make it your own. It’s perfect for busy weeknights when you need something quick and comforting, or as a cozy weekend dish that warms up the house. Bring it to potlucks, church suppers, or family gatherings where it’s sure to disappear fast. Serve it on chilly evenings to chase away the cold, or anytime you’re craving a taste of retro goodness. Pair it with a simple salad or dinner rolls for a complete meal, or let it stand alone as a hearty one-dish wonder. Dish it up straight from the pan for a casual, homey vibe – it’s a meal that feels like a warm memory, perfect for any day you want comfort without the fuss.
You may also like...
-

Learn Now Practical Black Hat SEO Course Free Previews by Black Hat SEOLearn Now Practical Black Hat SEO Course
Reads:
1Pages:
20Published:
Apr 2026Creating a powerful understanding of advanced SEO techniques starts with the right learning approach. Black Hat SEO offers a practical and easy-to-follow Blac...
Formats: PDF
-

Tata Capital’s $2 Billion IPO: A Landmark in India’s Financial Sector | Rits Capital Free Previews by Rits capitalTata Capital’s $2 Billion IPO: A Landmark in India’s Financial Sector | Rits Capital
Reads:
3Pages:
24Published:
Sep 2025A deep dive into Tata Capital’s historic $2 billion IPO — uncover its objectives, market implications, and how it shapes the future of Indian finance.
Formats: PDF, Epub, Kindle, TXT
-

Myths and Truths About Erectile Dysfunction: The Complete Guide for Men’s Sexual Health Free Previews by William LionMyths and Truths About Erectile Dysfunction: The Complete Guide for Men’s Sexual Health
Reads:
49Pages:
25Published:
Aug 2025Are you tired of conflicting advice and miracle promises about erectile dysfunction?This comprehensive guide separates fact from fiction and gives you the too...
Formats: PDF, Epub, Kindle, TXT
-

The Founder Success Formula Free Previews by Ross FranklinThe Founder Success Formula
Reads:
25Pages:
79Published:
Jun 2025Ross Franklin, founder of Pure Green, reveals how he built one of the fastest-growing juice bar franchises in America. Learn 13 leadership tools and 6 influen...
Formats: PDF, Epub, Kindle, TXT