Geography Grade 4 by Siyavula Uploader - HTML preview
Download the book in PDF, ePub, Kindle for a complete version.
2. Why do South Africans prefer that the windows of their houses be situated on the north side of the building?
……………………………………………………………………………………..
……………………………………………………………………………………..
…………………………………………………………………………………………
…………………………………………………………………………………………
When working with maps and direction, you should always know where NORTH is.
Assessment
LEARNING OUTCOME 1: GEOGRAPHICAL ENQUIRY
The learner will be able to use enquiry skills to investigate geographical and
environmental concepts and processes.
Assessment Standard
We know this when the learner:
1.1 identifies information from various sources (maps, atlases, books) [finds sources];
1.6 uses information from sources (including own observations) to answer questions about people and places (e.g. ‘Why is it like that?’) [answers the question].
Memorandum
N – Summer in the Northern Hemisphere
2. Sun
1.4. Symbols and Plans*
GEOGRAPHY
Grade 4
MAP WORK
Module 4
SYMBOLS AND PLANS
Symbols and Plans
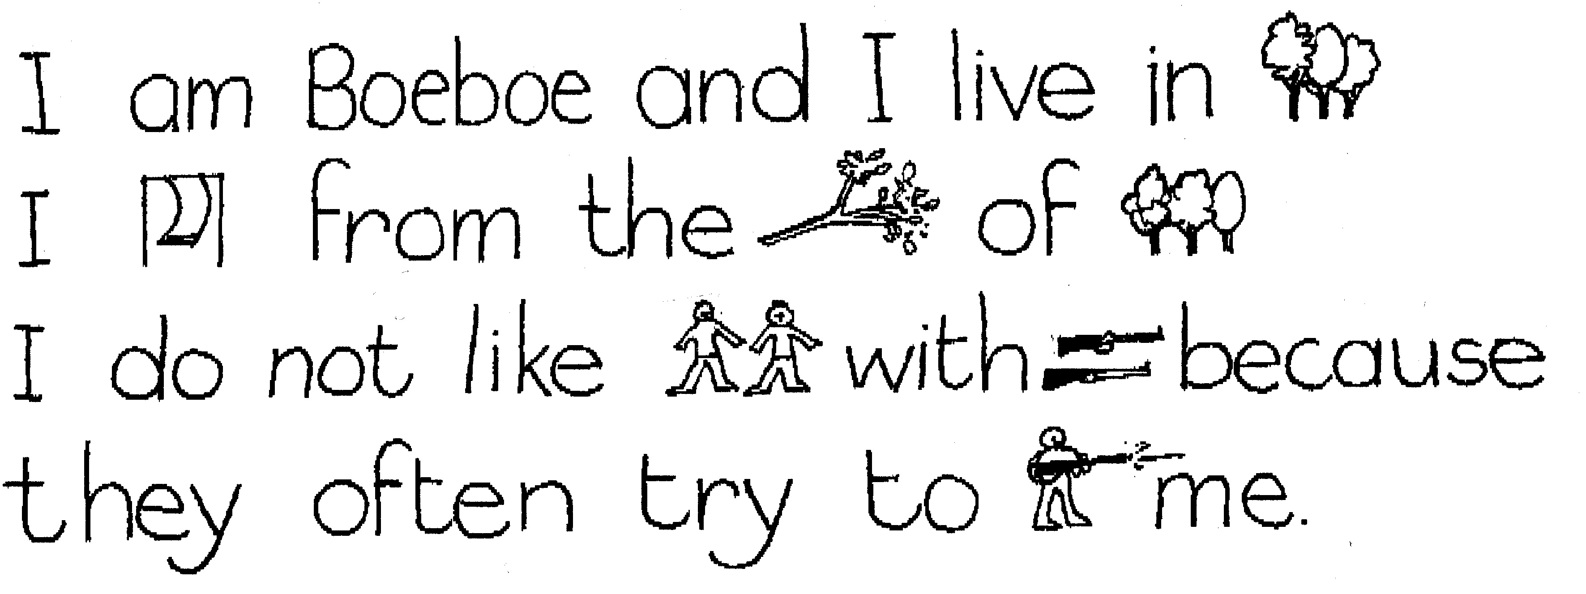
1.We tell a story with symbols (pictures)
Figure 1.7.
Activity 1
To use symbols [LO 1.3]
Pictures are used instead of words and they tell you something. Now write your own story in which you use picture symbols and words to show that you like playing with your pet.
…………………………………………………………………………………………………
…………………………………………………………………………………………………
…………………………………………………………………………………………………
…………………………………………………………………………………………………
…………………………………………………………………………………………………
…………………………………………………………………………………………………
…………………………………………………………………………………………………
…………………………………………………………………………………………………
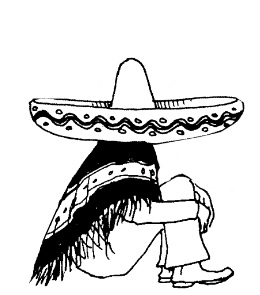
2.Symbols as seen from the above
Objects look different if they are seen from above than when you look at them from the side.
We use SYMBOLS (just like the pictures you did in the previous exercise) to represent objects as they look from above.
Activity 2
To draw the top elevation of an object [LO 1.3]
Seen from the side
Figure 1.8.
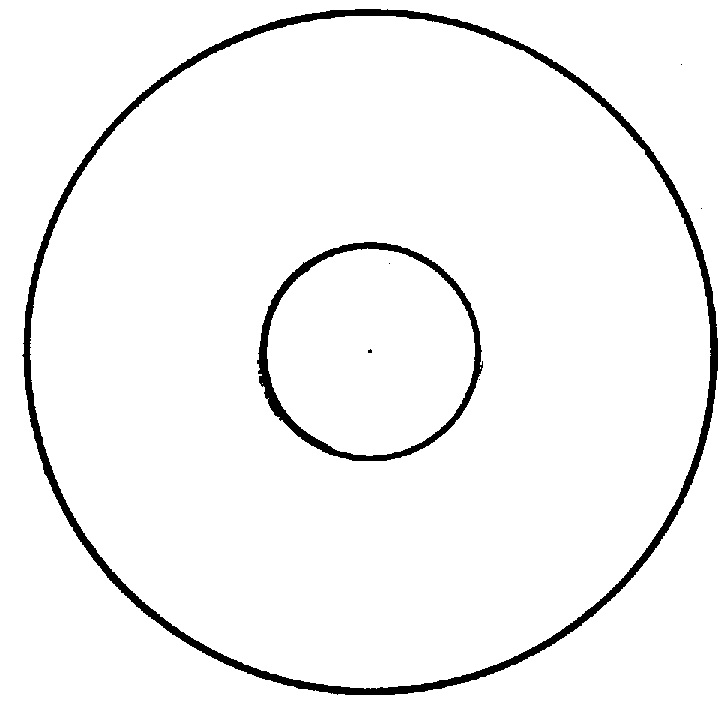
Seen from above
Figure 1.9.
Draw the following views from above:
Table 1.5.
a Tree a Pencil
Assessment
LEARNING OUTCOME 1: GEOGRAPHICAL ENQUIRY
The learner will be able to use enquiry skills to investigate geographical and
environmental concepts and processes.
Assessment Standard
We know this when the learner:
1.3 identifies symbols used in different kinds of maps (including plan view, grids and map keys)
[works with sources].
Memorandum
N – Summer in the Northern Hemisphere
2. Sun
1.5. Map Symbols*
GEOGRAPHY
Grade 4
MAP WORK
MAP SYMBOLS
Module 5
A large area is usually shown in a small picture on a map. Numbers, letters and pictures are then used to indicate rivers, roads, railway lines, buildings, etc. They are called map symbols. To explain the symbols on a map, a symbol key is used.
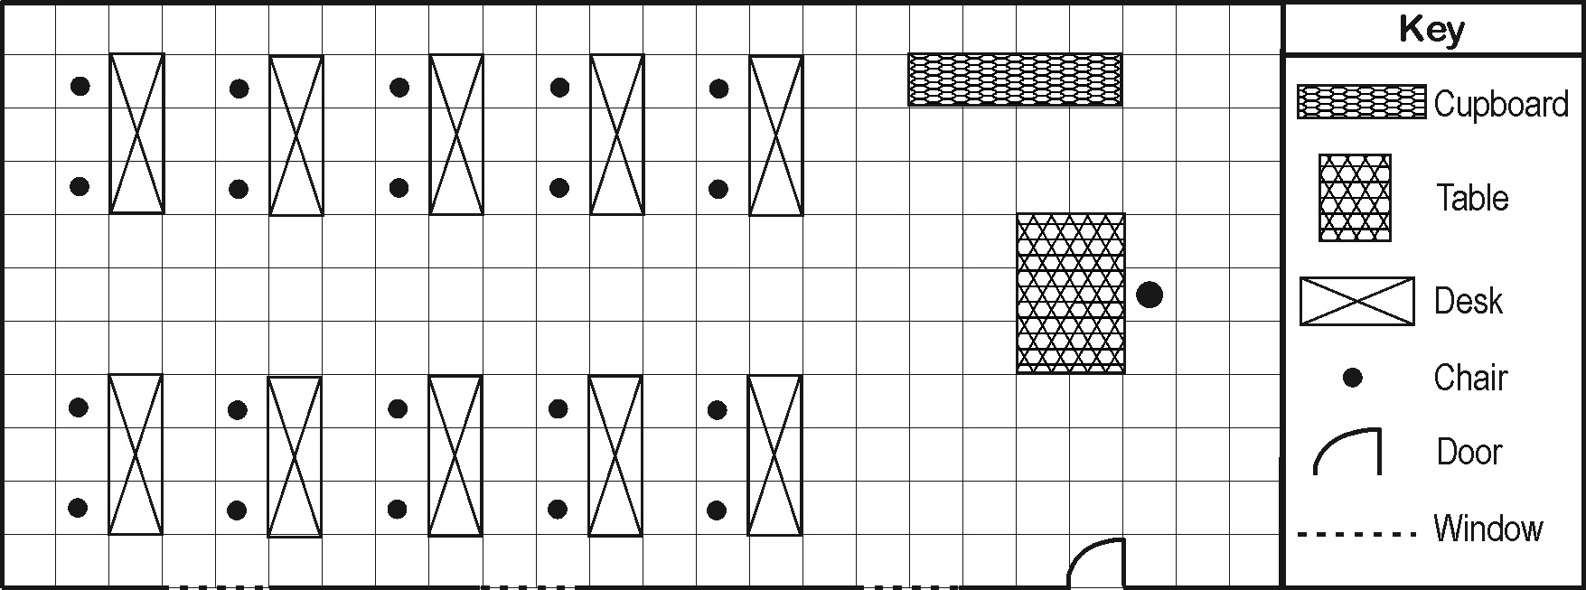
1.The plan (map) of my classroom
Tom has drawn a map (plan) of his classroom:
Tom’s classroom
Figure 1.10.
Scale: 1 square = 1 step
The classroom was too big to be drawn on a sheet of paper, and TOM had to REDUCE the
classroom. For each step that he took, he used one square on the paper. The tables and other items were also reduced in the same way.
Activity 1
To draw a plan of the classroom [LO 1.3]
Use the symbol key given and draw a plan of your classroom as you think it will look from the air.
You can add to the key if you want to. You can use colour, but work in pencil first to plan it. Use one step for each square. Work on your own.
My classroom
Table 1.6.
Key
That looks very nice!
Your educator will now give you a plan of your classroom that he/she has drawn up.
Activity 2
To compare two plans with one another [LO 1.3]
1. Compare your educator’s plan with the one that you drew for your classroom. Check to see where you made mistakes.
2. Measure the length of the classroom in steps. It is steps long.
3. Measure the width of the classroom in steps. It is steps wide.
1. Colour your desk red.
2. Draw the shortest route to the door of the classroom with a red arrow.
2.A plan of the school grounds
Today we are going to study a bigger plan. We are going to represent the ENTIRE SCHOOL
GROUNDS on a plan (map).
However, we must first do FIELDWORK to gather all the knowledge required.
Activity 3
To represent the school grounds on a plan [LO 1.4]
Take a piece of paper and a pencil with you to make notes and sketches of everything you see.
Look carefully at the following:
1. The location and shape of the school building.
2. The location and shape of other buildings on the school grounds.
3. The location and shape of the sports fields.
4. The location and shape of the playing fields.
5. The location and shape of the flower gardens.
6. The location of the main entrance gate.
7. The names of the streets on all sides of the school grounds.
8. Make sure where the four main directions are located.
Back in the classroom
Your educator will now hand out a completed plan of the school grounds:
1. Turn your desks so that you all face NORTH.
2. Study the plan of the school grounds carefully and decide where the four main directions are.
Indicate these on the plan.
3. Study the plan of the school grounds carefully and compare it with your notes. Do you agree with the location of the buildings and other objects?
4. Use the key to your plan and colour in the plan accordingly: Example: school buildings – red sports fields - green
5. If you have a problem, your educator can take you outside again to make sure of your facts.
6. Indicate the route from your classroom to the principal’s office with a red arrow.
7. In what direction does the front door of your school face?
8. Write down the names of the various streets around the school in the correct places on the plan.
3. Our immediate surroundings
This is a street plan of a portion of Cape Town
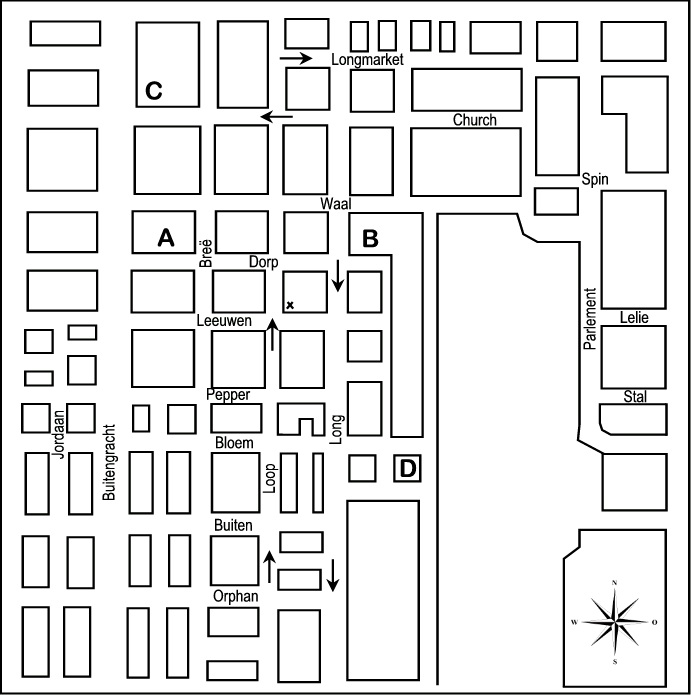
Figure 1.11.
Activity 4
To read a street plan [LO 1.5]
1. Why do we need a street plan of a city?
……………………………………………………………………………………….
……………………………………………………………………………………….
2. In what direction does building A lie from building C?
……………………………………………………………………………………….
3. Use red to indicate the shortest route from point C to point D on the map (take one-way streets into consideration).
4. You are standing on the corner of Loop and Leeuwen Streets. Explain to a tourist how to get from that position to point D.
………………………………………………………………………………………
………………………………………………………………………………………
………………………………………………………………………………………
Your educator will later give you a map just like this one of your own environment. However, today we are first going to do FIELDWORK again in our own environment.
Your educator will now give each of you a map of your immediate environment. Answer the
following questions (note the key to the map):
1. Find your school on the street plan and colour it in.
2. Find your own home, or that of someone you know well, on the map. Colour it in with a
different colour.
3. Indicate the route that you followed on your fieldwork outing on the map.
4. Which street is south of your school? ……………………………….
5. Indicate on your own map the important buildings and other features that your educator pointed out during the outing.
Assessment
LEARNING OUTCOME 1: GEOGRAPHICAL ENQUIRY
The learner will be able to use enquiry skills to investigate geographical and
environmental concepts and processes.
Assessment Standard
We know this when the learner:
1.3 identifies symbols used in different kinds of maps (including plan view, grids and map keys)
[works with sources].
1.4 locates places using a simple grid referencing system and directions [works with sources]; 1.5 identifies important political boundaries and key human and physical features on large-scale maps [works with sources].
Memorandum
1. Not to get lost
To find places
To find the shortest routes
1. S
4. 2 blocks east (in Leeuwen)
2 blocks south
1.6. A grid network*
GEOGRAPHY
Grade 4
MAP WORK
Module 6
A GRID NETWORK
To indicate the location of a specific place or characteristic is much easier if there is a grid network. These are lines drawn on the map, which divide the map into small squares. At the top of the map, each square is then numbered 1, 2, 3, and so on. In the left and/or right margins, you find the letters A, B, C, etc.
We then use these letters and numbers to give each square a name.
Example:
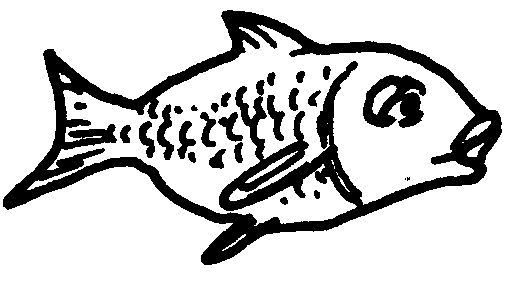
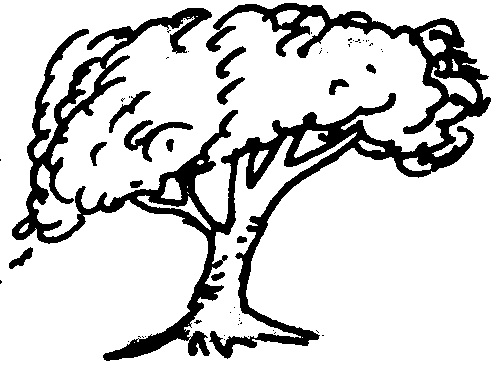
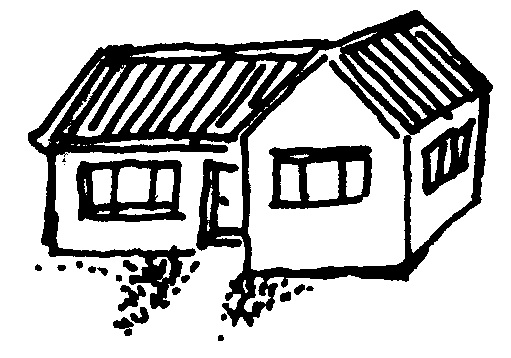
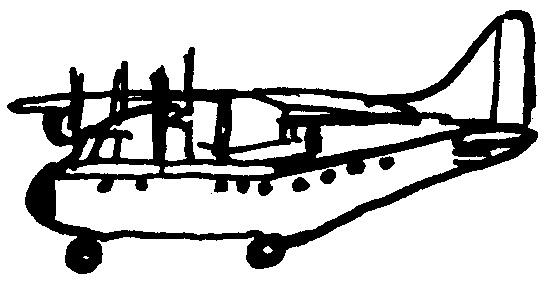
Table 1.7.
1
2
A
B
C
3
2
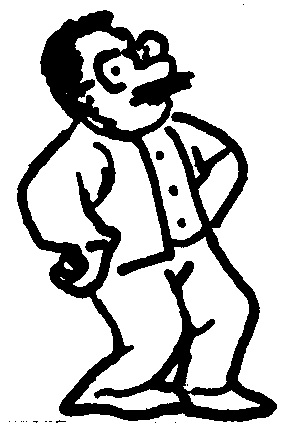
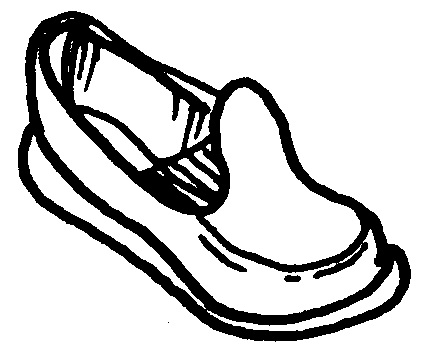
If now you want to indicate where the aeroplane is, we say it is in block B2.
Activity 1
To indicate location by means of a grid network [LO 1.3, 1.4]
Indicate the location of the following objects as they appear in the example:
1. man …………………………………………………………………………………
2. tree …………………………………………………………………………………
3. dog ………………………………………………………………………………….
4. house ………………………………………………………………………………
Study this grid:
Table 1.8.
1 2 3 4 5
A e n r g l A
B j
q b t p B
C w k v x d C
D c y o I v D
E h m f s a E
1 2 3 4 5
Now study the following coded message that has been written according to the grid network code and decipher it. A semi-colon (;) indicates the end of a word.
D4; A5 D4 D5 A1; D4 A2; D1 E5 B5 A1; B4 D3 C1 A2; C1 E1 A1 A3 A1; C5 D3; D2 D3 B2; A5
D4 D5 A1
……………………………………………………………………………………
……………………………………………………………………………………
……………………………………………………………………………………
……………………………………………………………………………………
……………………………………………………………………………………
Now write your own secret message by using the grid network code. Swap your secret message
with a classmate and decipher each other’s messages.
……………………………………………………………………………………
……………………………………………………………………………………
……………………………………………………………………………………
……………………………………………………………………………………
……………………………………………………………………………………
……………………………………………………………………………………
……………………………………………………………………………………
……………………………………………………………………………………
……………………………………………………………………………………
……………………………………………………………………………………
……………………………………………………………………………………
……………………………………………………………………………………
……………………………………………………………………………………
…………………………………………………………………………………
Assessment
LEARNING OUTCOME 1: GEOGRAPHICAL ENQUIRY
The learner will be able to use enquiry skills to investigate geographical and
environmental concepts and processes.
Assessment Standard
We know this when the learner:
1.3 identifies symbols used in different kinds of maps (including plan view, grids and map keys)
[works with sources].
1.4 locates places using a simple grid referencing system and directions [works with sources].
Memorandum
1. C3
2. A3
3. B3
4. B1
1.7. Large scale maps*
GEOGRAPHY
Grade 4
MAP WORK
Module 7
LARGE SCALE MAPS
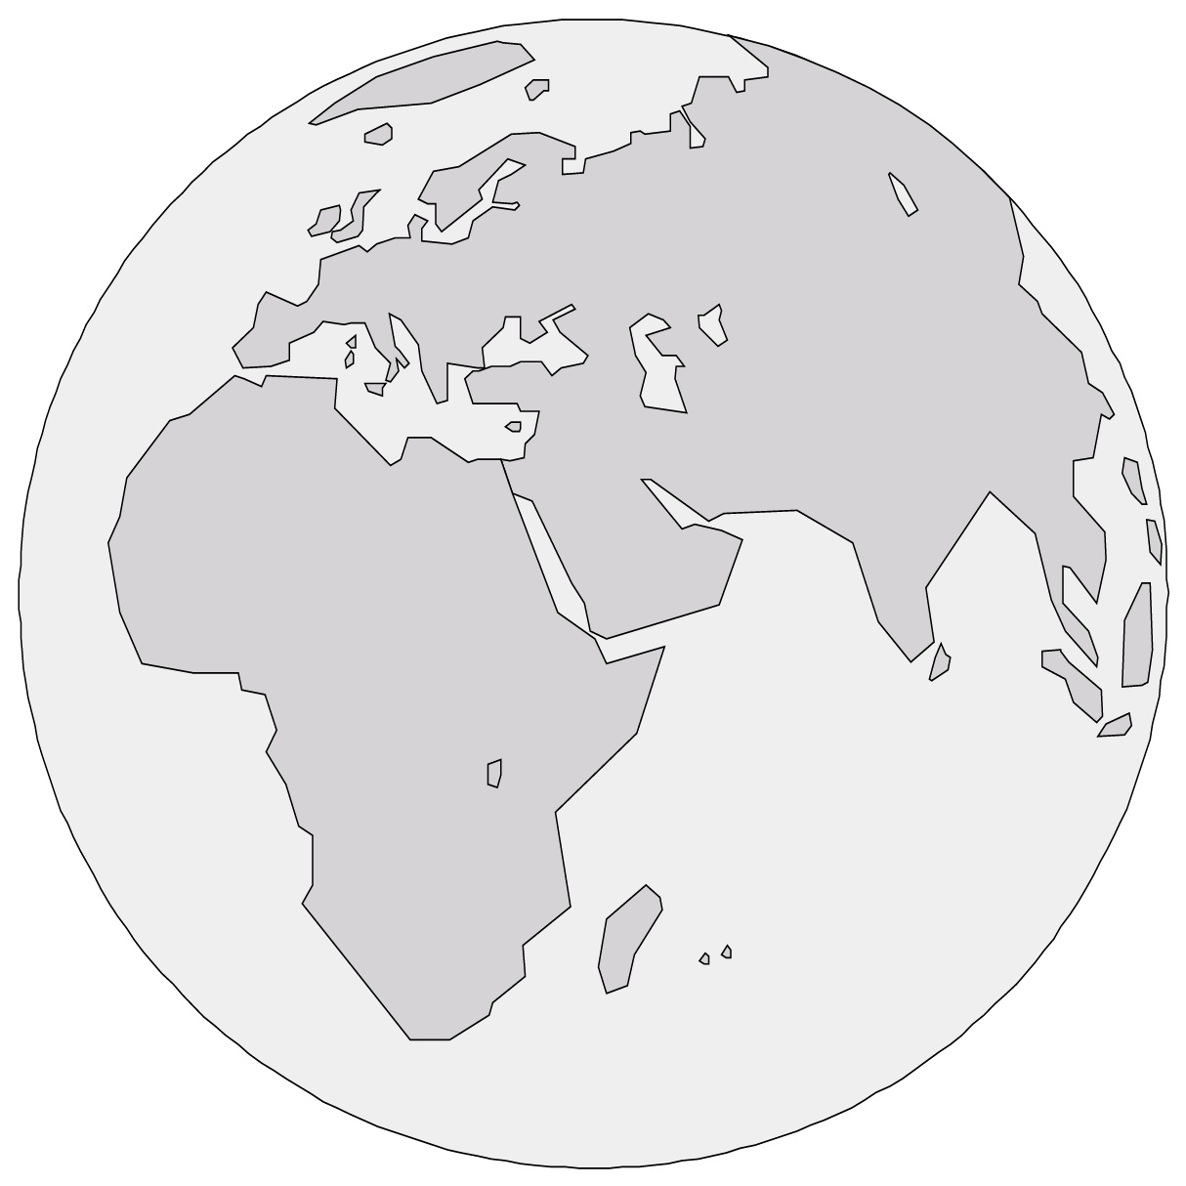
1. The World
From this picture we can deduct that the earth is round. A round map of the earth is called a globe.
Figure 1.12.
Have you ever tried to cut open and flatten a deflated ball? That is why most world maps portray the earth as “flat”.
2. Africa (my continent)
The continent on which you live, is called ……………………………………….
Africa is the second largest continent on earth. Africa consists of 49 countries. A country is a large piece of earth within fixed borders. The borders separate one country from the other.
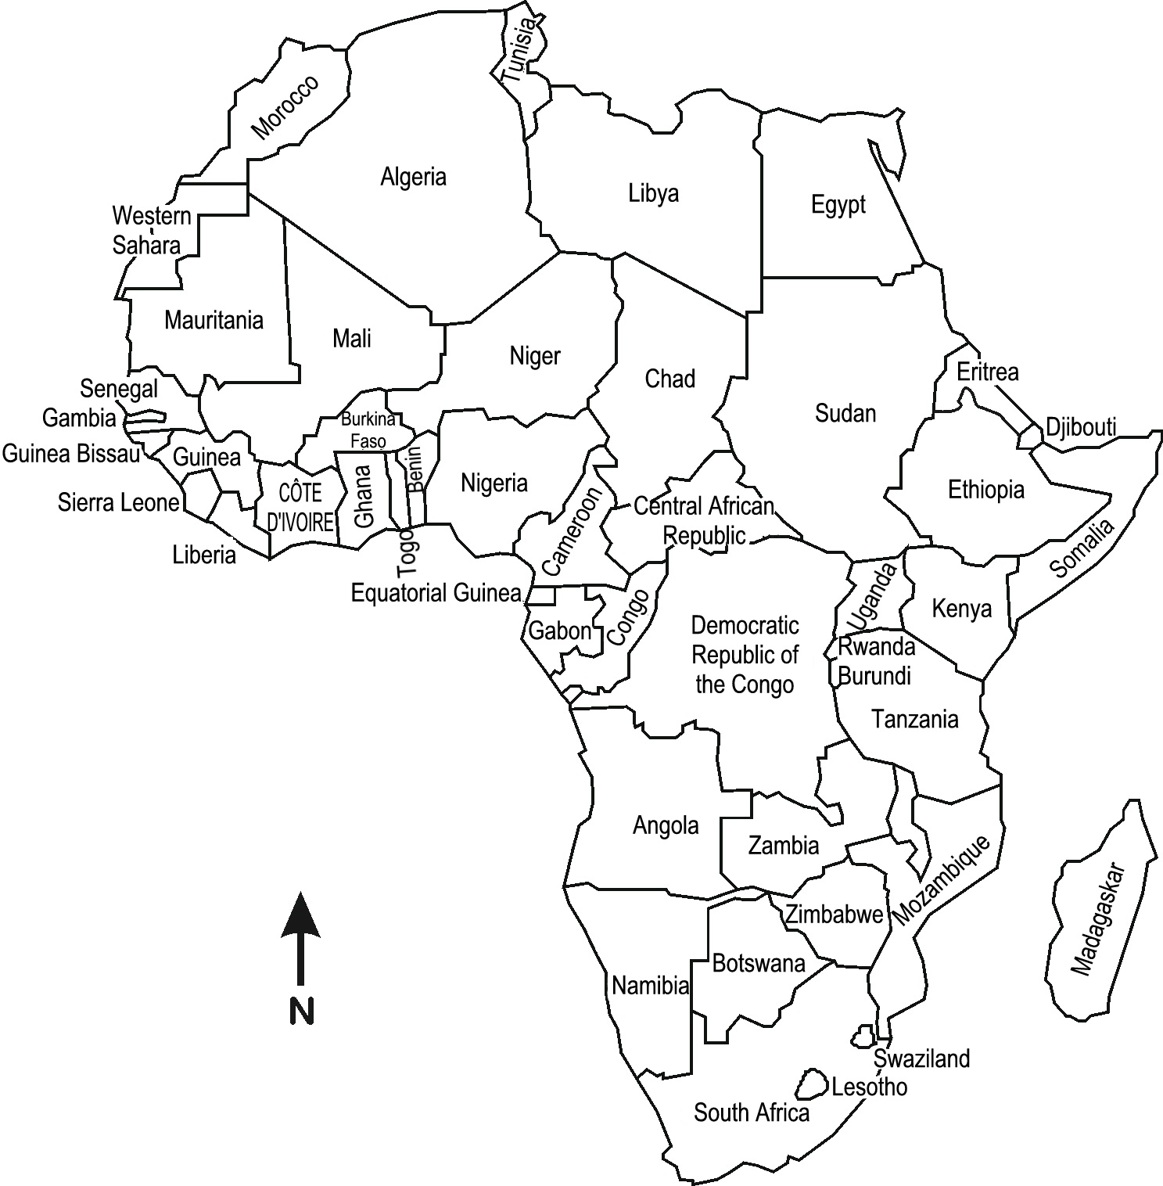
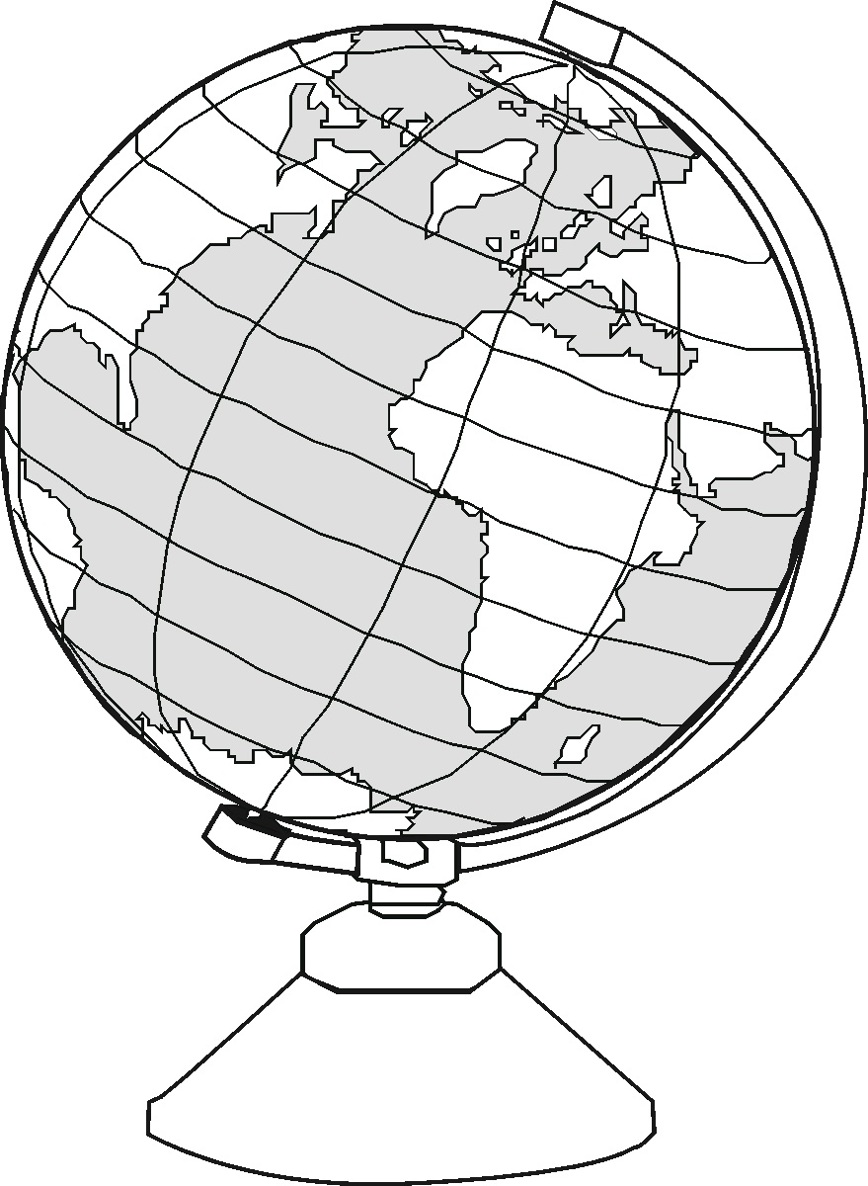
Figure 1.13.
Figure 1.14.
Figure 1.15.
Activity 1
To read a map of the world [LO 1.5]
Study the map of the world on the previous page and answer the questions.
1. How many continents are there? …………………………………………
2. Which continent is the largest? ……………………………………………
3. Which continent is the smallest?……….……………………………………
4. Which ocean is found between Africa and South America?…………………
Which ocean is found between South America and Australia?
Activity 2
Map work: Africa [LO 1.5]
Colour in all the countries on the African continent beginning with an “N” in brown.
1. Colour your country (South Africa) red.
2. Write down the names of the countries that border on South Africa.
A country that borders on another country is called a neighbouring country.
3. South Africa (My land)
South Africa lies at the southern tip of the African continent. Like other countries a government that also makes the laws of the country rules South Africa.
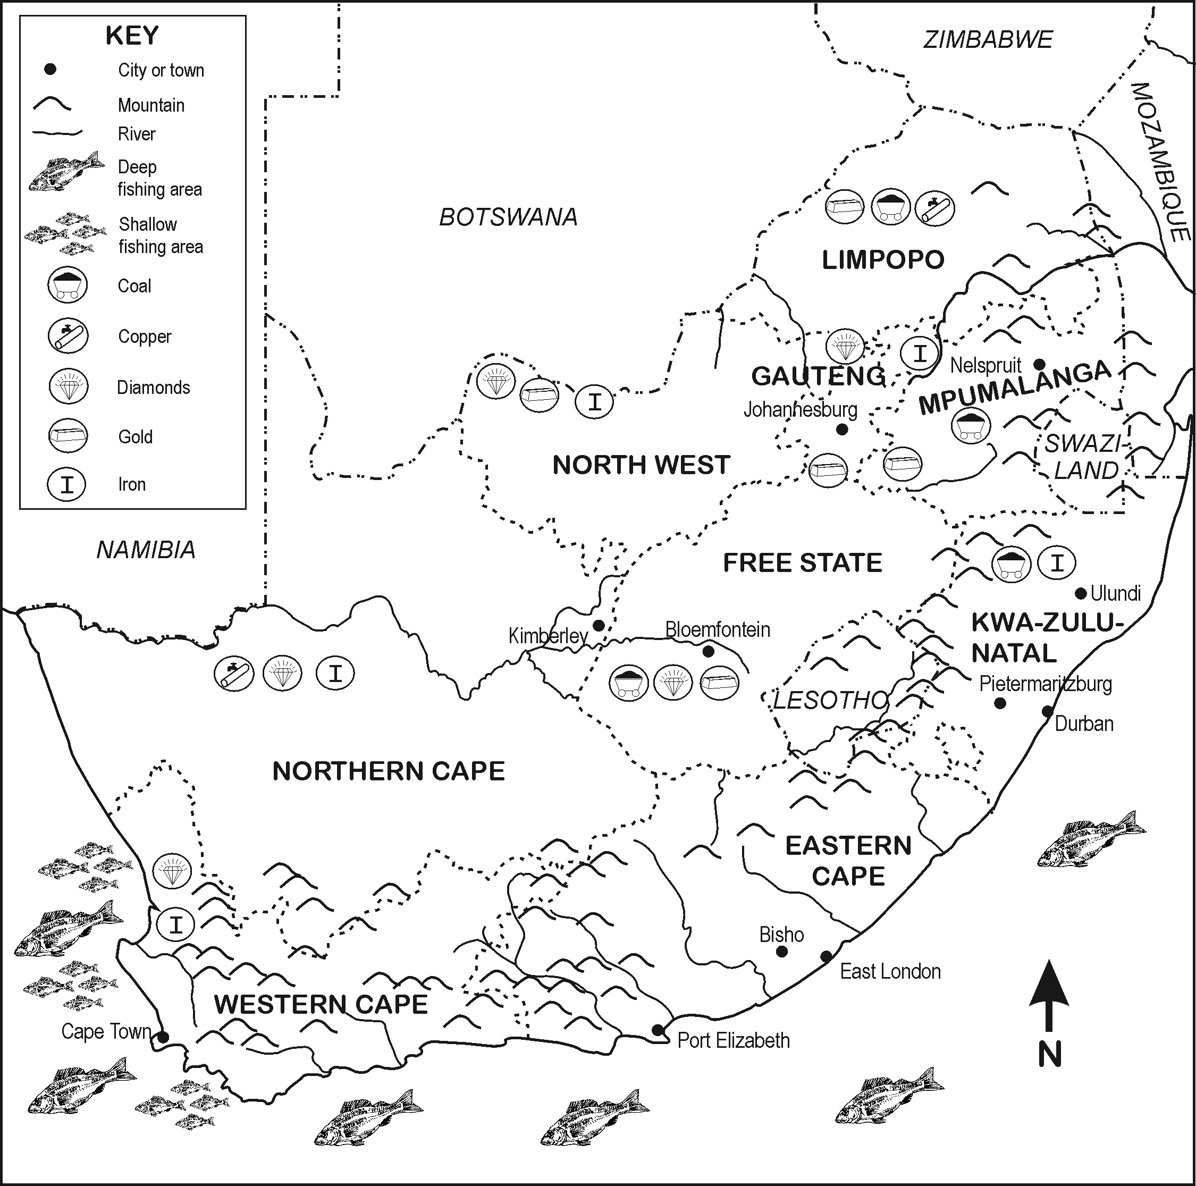
Look carefully at the map of South Africa.
Figure 1.16.
Within the borders of a country there are other borders that divide the country into provinces.
How many provinces are there in South Africa? ..............................
Borders are determined by people and can therefore be changed. Until 1994 there were only
four provinces.
Activity 3
To answer questions on map work [LO 1.5]
Look carefully at the map key of South Africa and answer the following questions:
1. Which big mountain range do we find in Kwazulu-Natal?
2. Name three minerals that are mined in the Northern Cape.
3. Which province is the farthest north?
4. Which river on the northern border of the Northern Cape flows into the Atlantic Ocean?
5. In which ocean will you be swimming when holidaying in Durban?
6. Which province is the smallest?
7. In which province are you when you are on a holiday in Port Elizabeth?
1. True / False? The coal mined in Mpumalanga can be exported to other countries by boat
Activity 4
To use information from sources to answer questions about people and places
[LO 1.5]
Your educator will hang a wall map of the world in the classroom. Listen to the world news every day and read newspapers. Bring geography articles to class and let your educator indicate with a pin on the wall map on which continent the events occurred. Discuss them and give your own
opinion.
TRY TO CONTINUE WITH THIS ASSIGNMENT UNTIL THE END OF THE YEAR.
Assessment
LEARNING OUTCOME 1: GEOGRAPHICAL ENQUIRY
The learner will be able to use enquiry skills to investigate geographical and
environmental concepts and processes.
Assessment Standard
We know this when the learner:
1.5 identifies important political boundaries and key human and physical features on large-scale maps [works with sources].
Memorandum
Africa
1. 7
2. Asia
3. Europe
4. Atlantic
Pacific
2. Namibia, Botswana, Zimbabwe, Mozambique
9
1. Drakensberg Mountains
2. Copper, diamonds, iron
3. Limpopo
4. Orange
5. Indian
6. Gauteng
7. Eastern Cape
8. E – no harbour
Solutions
Chapter 2. Term 2
2.1. Homes*
GEOGRAPHY
Grade 8
THE PLACE WHERE WE LIVE
(SETTLEMENT CHARACTERISTICS)
Module 8
HOMES
Who am I and where do I live?
Activity 1
To supply information about myself [LO 2.3]
My name is: …………………………………………………………………………
………………………………………………………………………………………….
Members of my family: …………………………………………………………….
………………………………………………………………………………………..
My place in the family (e.g. oldest child):…………………………………………
I live in (street):………………………………………………………………………
Suburb/neighbourhood:…………………………………………………………….
City/Town: ……………………………………………………………………………
How long have I been living at this address? …………………………………….
Where did I live previously? ………………………………………………………..
Which of my closest family lives nearby/with us? ………………………………..
1.Homes
People need protection against the weather and elements of nature. We must remain warm and be protected against the sun, wind and rain.
Primitive man lived in tree shelters and caves, but today we build houses to meet our specific needs.
People use different kinds of material to build their houses. It is cheaper to use material that is available locally. For that reason we find many wooden houses on the south and east coast of South Africa because of the plantations in those fertile areas.
Mostly people live in houses, but some also live in huts and tents.
Activity 2
To make a list of materials that are used to build houses [LO 2.1]
Work with your partner and complete the table below by