Delsu Blog: Guide to Blogger by George Emmanuel - HTML preview
Download the book in PDF, ePub, Kindle for a complete version.
Master Resale Rights Licensed
Congratulations! This Guide came with “Masters Resale Rights”. You may sell it at any price you wish, add it as a bonus to one of your products or give it out as a free gift to your friends or subscribers.
However, ONE RULE is you cannot make any CHANGES within this e-book.
CLICK HERE TO JOIN OUR LIST TO GET UPDATES TO THIS GUIDE
Disclaimer
The creator of this ebook nor its affiliates or members is in no way affiliated with blogger.com.
The ebook was written in 2014 and all information is / was correct at the time of writing. This information is for recreational purpose only. You and only you solely are responsible with how you use this information. In any event or claim, by reading this e-book you do not hold George Emmanuel nor its affiliate or members responsible whatsoever.
Without wasting time let’s go to the tutorial. I recommend at this time you create your blog using a computer. If you do not have a personal computer, you can use
a friend’s computer or a public computer available at libraries, cyber cafe, your place of work etc. Just follow the steps carefully to get started.
Step 1:
Go to http://blogger.com or http://blogspot.com
Step 2:
If you have a gmail account, enter your gmail address and password, then click the “Sign in button on the page.
If you do not have a Google Account click on the ͞Sign up button. You will see a page where you will create a Google Account which you will use for your blog and other Google Services. Fill the form correctly.
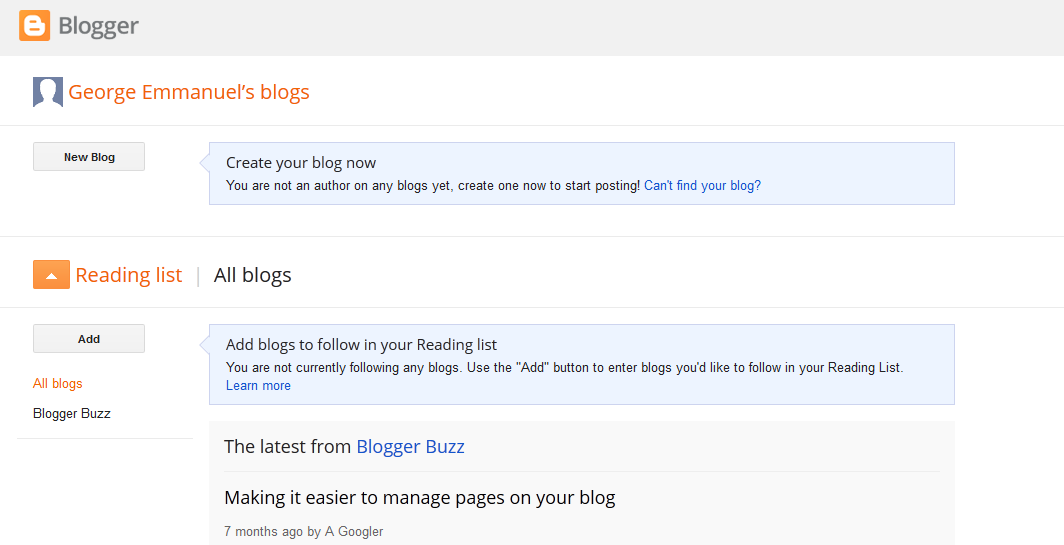
If your sign in or with creating your new Google account was successful, you will be logged into blogger dashboard.
Click on the ͞New Blog button
Step 3:
After clicking on ͞New Blog as indicated above you will see:
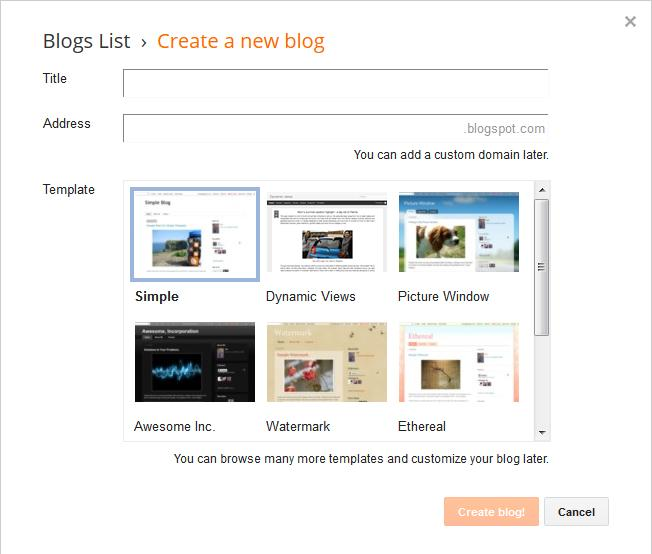
Title: This will be seen at the top of your blog and should be relevant to what you plan to be posting on the blog. For example: if you want to be talking about tips on health matters then you can give it a title like ͞Best Health tips . Be creative.
Address: Keep your address similar to your title (as above). http://www.freedomaingenerator.com can suggest address for you.
If the address you entered is not available, you will be prompted to enter another one. Make sure the .com, .net, .org, .gov and other extensions of the address you choose is not already taken. You can confirm this by entering www.your- address.com into your browser and see if it will bring up any web page. To ensure uniqueness.
If you prefer having a .com address instead of a .blogspot.com address for your new blog, do not worry. You can create and add the custom domain later.
Template Choose any template you like for your blog. It doesn’t really matter which template you choose, you can always change it later.
Once you have chosen your template, then click on the ͞Create Blog button.
Step 4:
After clicking on the ͞Create Blog , you should see a notification that your blog has been created successfully.
Your blog is now created! Click on ͞start posting as seen in the picture below:
![]()
Step 5:
After clicking ͞Start Posting you will see the ͞Post Editor as seen below

Enter the title of your post (this is what your post will be about) and enter the content of your post as seen in the picture above. You can change whatever you type there at anytime.
Also take note of the ͞Preview button the ͞Publish button and the ͞Save button.
The ͞Preview button enables you to preview what your blog post will look like once it is published. The preview button acts as a WYSIWYG (What You See Is What You Get) Function.
The ͞Publish button publishes your post to the web.
The ͞Save button saves your composed post as draft.
If you look at the right-hand side of the page you should see the ͞Post Settings as seen in the picture below.
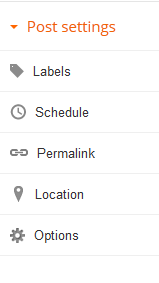
Labels: This is where you set the category of your post. For example, if your post is ͞How to create a blog you can enter ͞blogging tips in the ͞labels box and when you write another post maybe on ͞How to open a facebook account you can then enter ͞facebook tips inside the box. You can change the label of your post anytime you want.
Schedule: This is where you can set your post to be published on a future date and time.
If you select ͞set date and time below you can choose a date and time on a calendar for your post to be automatically published.
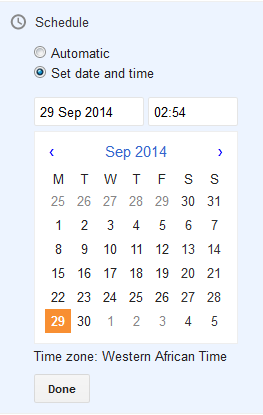
Once you’ve selected a new date and time be sure to click Done, then Published. Don’t worry - your post will only be published at the date and time that you’ve placed in the settings.
Still under ͞Post and Settings you can ignore the ͞Location while you can enable and disable comment via ͞0ptions .
Once you are through writing your post click on the ͞Publish button. You just created your first blog post. This is the same way you will be creating post whenever you want to add new post to the blog.
Whenever you want to write a new post, log in to www.blogger.com and click on the ͞New Post tab or the pen tab as seen in the picture below.
![]()
Clicking the ͞ New Post tab will open the ͞Post Editor .
Inserting Links into Blog Post
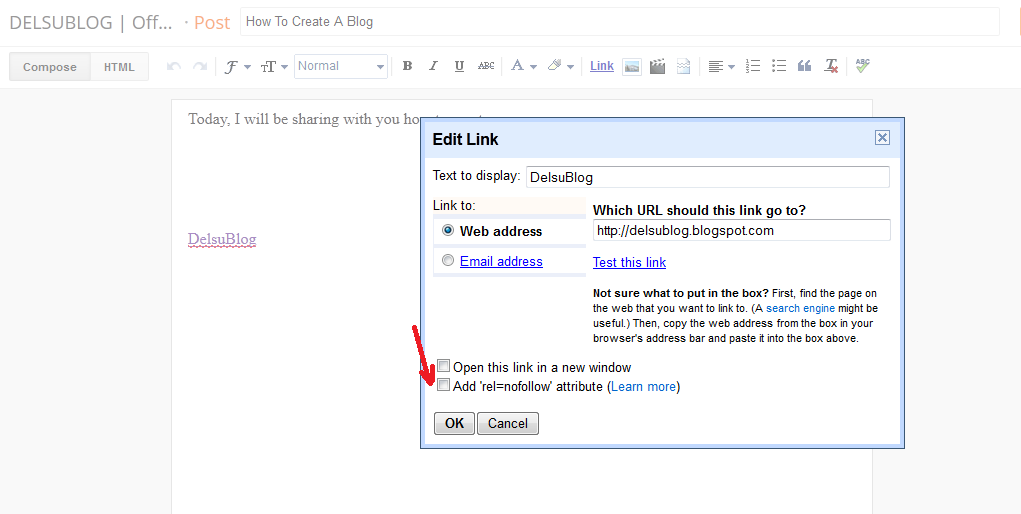
To enter links into your blog post, high-light the text you want to use as a link (e.g ͞delsublog in the picture below) click ͞LINK as shown in the picture below and enter the url you wish to link the text to. If you click ͞open this in a new window box, the link will open in another window each time anyone clicks on it when reading your article.
Changing Font Size, Color, Style etc
You can change the font size, font color, font style and also underline your text, make your text bold or in an italics by using the icon available on the top middle of your post editor.
Move your mouse on each icon to see what each icon can do for you.
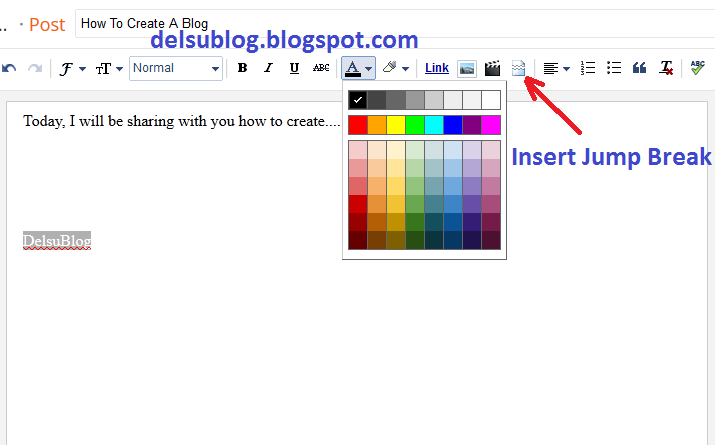
The ͞insert jump break icon allows you to add jump break to any part of your post. This breaks your post into two, so that when such post appears on the hompage of your blog your reader will have to click on a ͞read more link to read the full article.
Adding Image To Your Blog Post
To add image, click on the image icon as seen in the picture below.
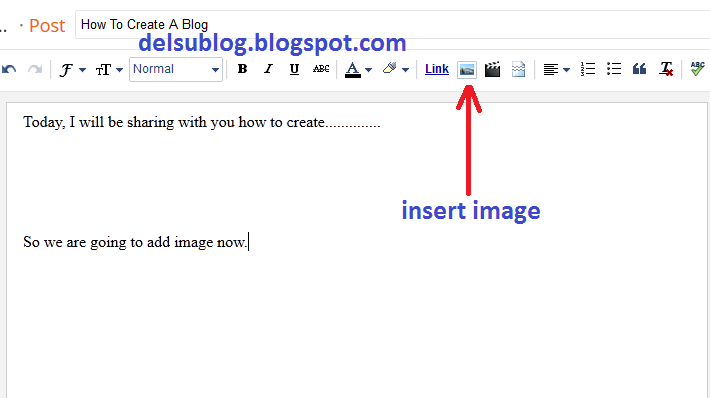
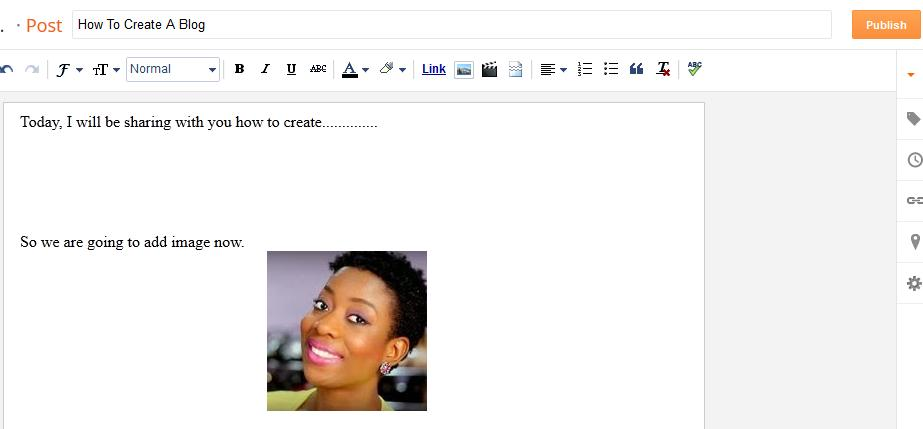
There are different options of adding image to your post. Click the ͞choose files button to select pictures from your computer. Then click ͞Add Selected . once you are happy with your post click on the ͞Publish tab at the top of the post editor.
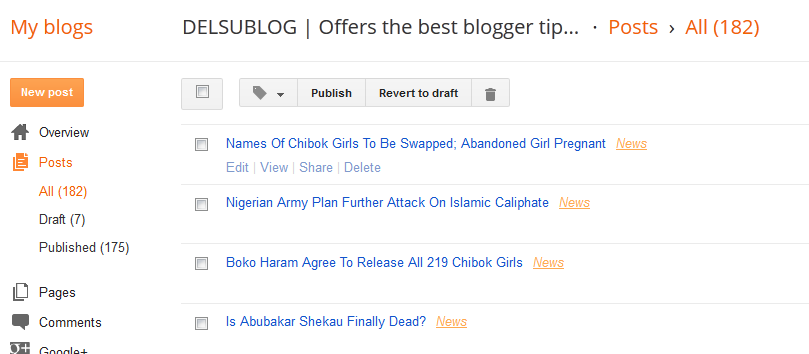
After clicking the Publish button, you will always see a list of your post similar to the picture below:
Clicking on each post in the list, will bring up the post editor, this will enable you to edit your post accordingly.