How to Convert Cassette to Audio CD by Calvin Ford - HTML preview
Download the book in PDF, ePub, Kindle for a complete version.
Record to Your Hard Drive
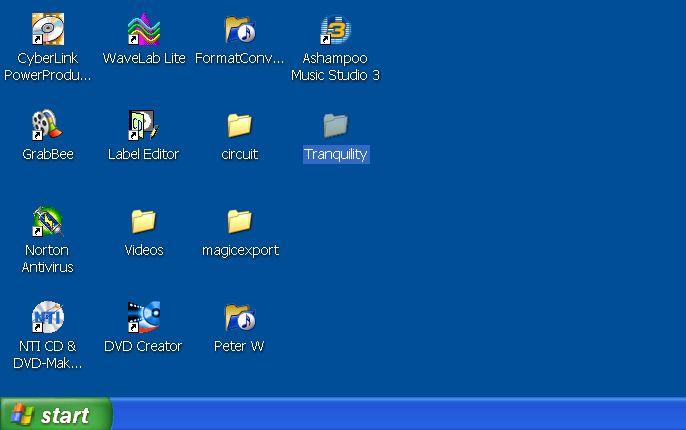
1. Before you begin recording, create a folder on your desktop and give it a name appropriate to the type of album music you are about to record. I have called my folder Tranquillity (Fig 6).
2. Double click the Ashampoo Music Studio 3 icon (Fig 6).
 1 2
1 21
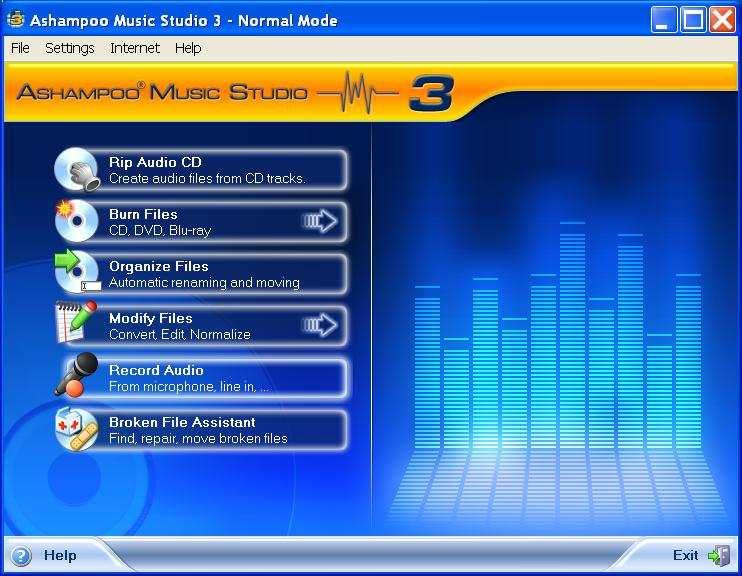
Figure 6 3. The application interface appears (Fig 7)
 3
34
4
4. Click the Record Audio bar (Fig 7) where indicated.
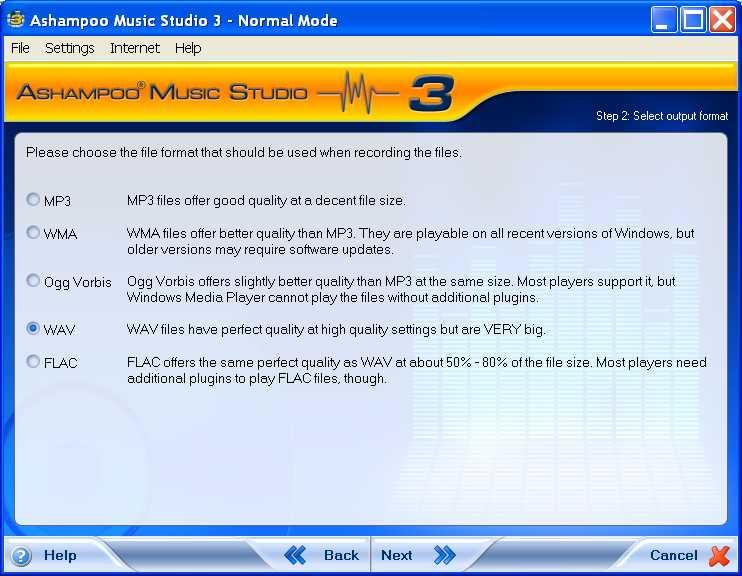
5. Your screen display should be the same as the one below (Fig 8).
6. Click wav format option (Fig 8) where indicated.
7. Click Next button for the next screen display (Fig 8).
 76 6
76 65
7
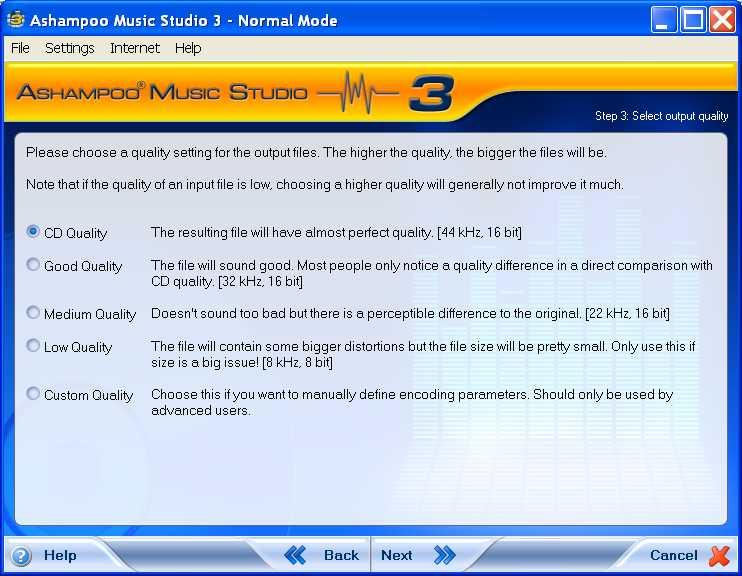
Figure 8 8. In the next screen display, click the CD Quality (Fig 9) option where indicated if necessary. 9. Click Next (Fig 9).
8 8
 99
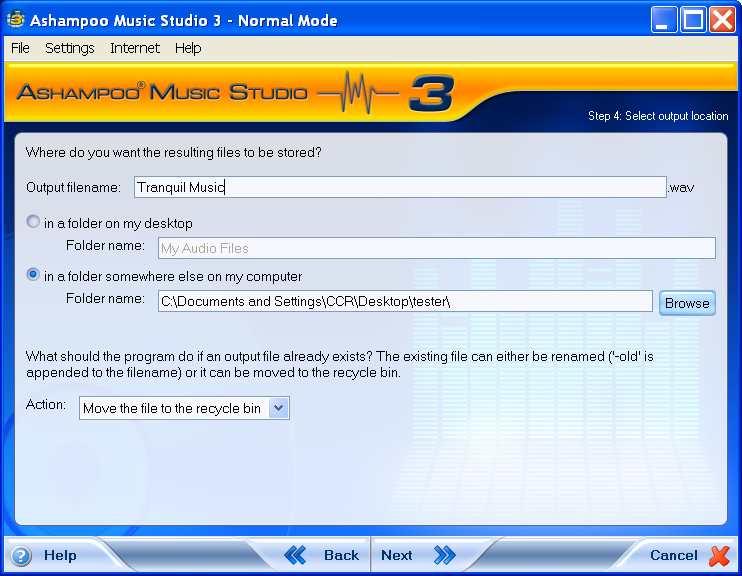
9910. In the following screen type a memorable file name (Fig 10) or similar to the file or album you are creating where indicated.
11. Select the option which says ‘in a folder somewhere else on my computer’ (Fig 10).
12. Click Browse button (Fig 10).
10
 12 11
12 1111
Figure 10
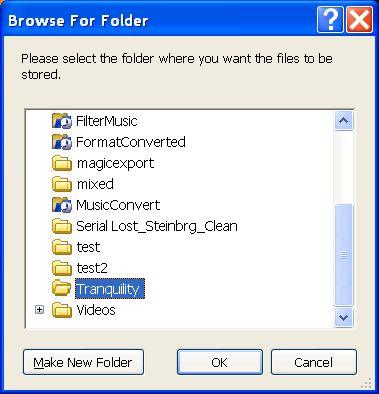
13. In the Browse For Folder window, click the folder that you created on your desktop, using the scroll bar on right to locate it if necessary (Fig 11).
14. Click OK button to confirm (Fig 11).
 13
13 14 15. The files you record will be saved to the folder that you created on your desktop (Fig 12). 16. Click Next button to go to the recording screen (Fig 12).
 15
1516 16
Figure 12
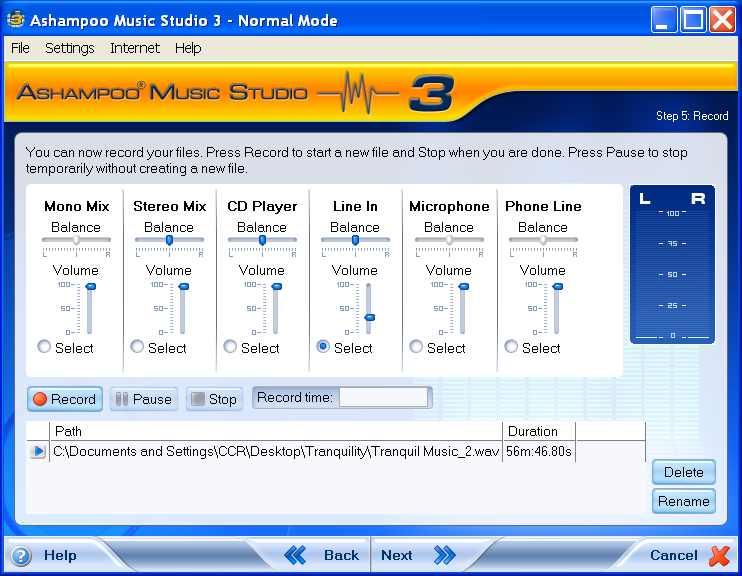
17. Your screen should display Recording Screen (Fig 13).
18. Line in should be balanced. If necessary click, hold and drag the slide control to correct the balance if necessary (Fig 13) .
19. Notice that Line in option is also selected (Fig 13).
18
 22
2219
18
19
20
20
20. You are now ready to start the recording. Click the Record button to begin (Fig 13). 21. Click the Play button on your cassette system.
22. Music Studio 3 should capture the sound level as the recording commence and display it (Fig
13).
23. If the volume level shows a constant red (Left/Right channel), then the volume is too high. Just
turn the cassette volume down.
Sit back and relax whilst one side of tape plays. In the next step ( Step 24-25) of this tutorial you will pause the recording while you change the tape over. If you are recording a 90 minute tape, go to step 28. Treat one side of a 45 minute tape as one file for this tutorial. When you complete this tutorial you can create a second file using the same process from the beginning of this tutorial.
24. Listen for the end of the last song on first side of your tape (side A).
25. Click the Pause button (Fig 14) and change tape over to side B or A.
26. Click Pause button again to continue the recording.
27. Click the Play button on your cassette.
25Figure 14
Sit back and wait for the tape to finish.
28. When the last track finishes playing click the Stop button (Fig 15).
29. The duration of the whole recording will display in the file Path area. Mine displays a total showing 56 minutes and 46 seconds ((Fig 15).
30. The file name is indicated (Fig 15) – Tranquil Music_2.wav.
31. Also the folder containing the file is showing (Fig 15).
32. Click Next button (Fig 15)
 2831 302931 30 29
28 3232
Figure 15
33. The final screen of the recording should show that 1 file was recorded successfully (Fig 16). If not, you will need to start again, especially if the CD disc is faulty.
34. Click Exit button to close the application and take a break (Fig 16).
33
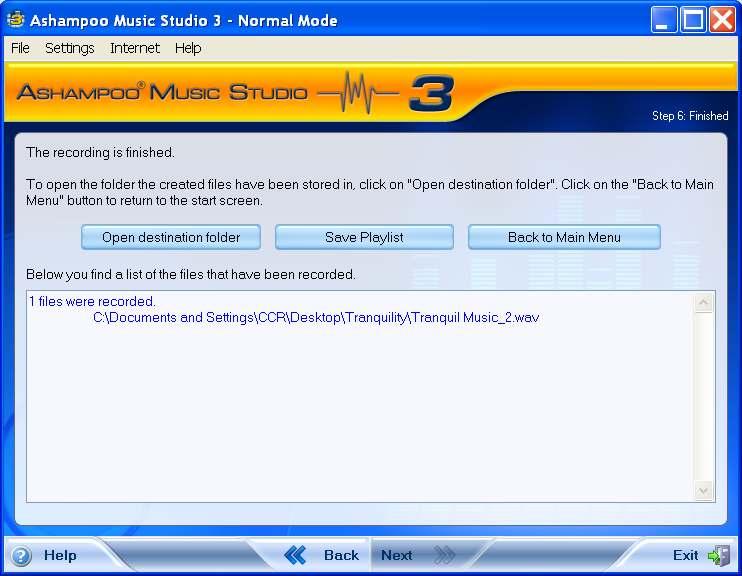
34 In the next section you will re-enable the audio control for play back. This has to be done before you can split and edit the tracks.