Home Business School Guide to Traffic Exchanges by Dean - HTML preview
Download the book in PDF, ePub, Kindle for a complete version.
LESSON 02
SETTING UP TRAFFIC EXCHANGES
In this lesson I will take you through the process of adding your websites, banners and text ads to the exchanges as well as setting the Auto-Assign values. You will also learn how to add credits and impressions to them. Remember that you can get credits either by surfing or purchasing them in the exchange itself. Once you have them you can assign them to your websites so they will be displayed in the exchange to other surfers.
For this lesson I will be using Traffic Splash. If you are a member then login into your account. You will be presented with the following screen.
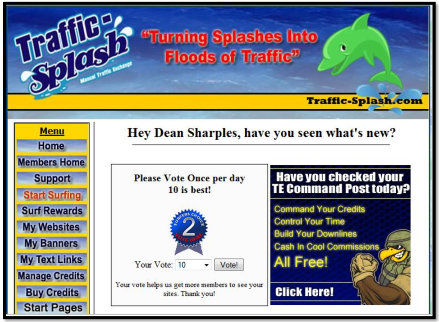
Notice the menu bar on the left hand side of the screen. This will take you to the various sections of the exchange by clicking on one of the buttons. Note that other exchanges may have a different layout.
ADDING WEBSITES
Click on the My Websites button. The following screen appears. Scroll down to the section displayed below which says: Step One: Add Your Website.
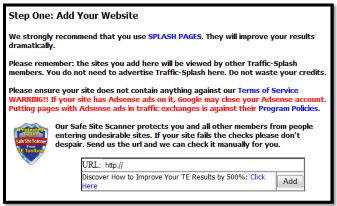
If you are promoting an affiliate program then you will be provided with an affiliate link. This link is the special URL I mentioned earlier. Notice the text box at the bottom that says “URL: http://”. This is where you will enter the affiliate link you want to promote. You will need to look around the website of the affiliate program you want to promote in order to find your link. You will usually find it in an Affiliate or Promo Tools section of the site. If you can’t find it then contact the company or your sponsor.
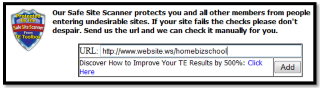
Once you have the URL you need, copy and paste it into the text box. In the screenshot below I have added my affiliate link for GDI. Now click the Add button.
SITE CHECKING
A traffic exchange surfing screen is made up of two parts. The Surf bar and the Surfing Frame. The frame is where the websites are displayed. Some websites are designed in a certain way that can cause problems when they are displayed in frames and are known as Frame Breakers. A website needs to display in the surfing frame otherwise it can cause problems. For this reason the exchanges will check your website for problems before they will accept it.
Sometimes an exchange will add your website then ask you to click something to verify it. Other exchanges will require the owner (admin) of the exchange to check it personally before it will be added. If the exchange produces an error message it will usually be a “redirect error” or an “iframes error”. Even if you get this error your website may still be accepted but with error warnings.
If the website fails then all is not lost. Most exchanges allow you to contact the admin so you can mail them the URL and ask them to add it manually. Website checkers don’t always get it right.
Most exchanges will allow you to add more than one website. Experienced members will use a rotator, so they can promote all their websites with one URL.
If your site is accepted you should get this message displayed over your website.

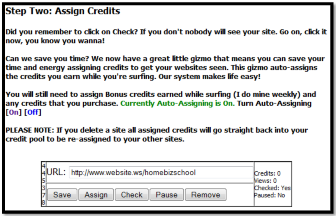
Click on the link that says Return to Members Area. Now scroll down to the following section of the page which says: Step 02: Assign Credits.
ASSIGNING CREDITS
As you already know, credits are used to display your websites in the exchange to other surfers. Each time someone views your website – a credit is deducted from your account. You can earn credits when you start surfing and add them later. Or you can tell the exchange to automatically add the credits to your website either in part or in full.
Notice this section gives you the opportunity to turn the Auto-Assigning feature on. If you want to turn it on then click on the “(On)” link or the “(Off)” link to turn it off. If you turn it on then Traffic Splash will automatically assign credits to your website. This way you can concentrate on surfing in the knowledge that your credits are automatically added and being used to display your websites.
If you turn it off then you will have to add them manually. This is good if you want to build up a lot of credits first then assign them all at once. Let us have a closer look at the website Box.
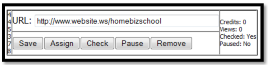
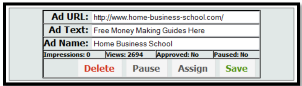
The website box tells us how many credits are assigned to this website and how many views it has received. It also has a row of buttons along the bottom.
SAVE: If you make changes to your website URL or change it for another one then SAVE will update it.
ASSIGN: Allows you manually assign credits to your website.
CHECK: Check your website for frame breakers. Only use if you change your URL.
PAUSE: Pause the website to stop the exchange displaying it.
REMOVE: Remove your website from the exchange completely.
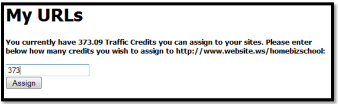
Click on the Assign button to see the following box. Here is where you enter your credits. Simply enter the amount of credits you want to assign and click the Assign button.
ASSIGNING PERCENTAGES
In some exchanges you get the opportunity to automatically assign a percentage of your credits to one or more websites. If you added two websites you could set the exchange to assign 50% of your credits to one and 50% to the other. Or you could assign 75% of the credits to one website and the remaining 25% could be stored for manual assigning later on. Look at the following screenshot from Hit Safari.
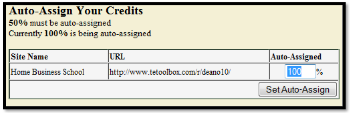
Notice the Auto-Assign box that says “100%”. I have set the percentage to have all my credits automatically transferred to my ONE website which happens to be a rotator URL. When you use a rotator URL you only need to add it once.
ADDING DUPLICATE URLS
When an exchange comes across your account in the rotator it will automatically cycle through all the websites it finds and then move onto the next member. If that exchange is slow then you can get double the hits to the same URL by entering it twice. So you have added two sites with the same URL. This will ensure that the same site gets twice as many hits as the exchange will display them one after the other.
FORBIDDEN WEBSITES
Most websites are accepted by exchanges as long as they stick to the rules. When you add a site you will most likely get a list of websites that are forbidden. These are usually ones with content that may cause offence such as porn or hate sites. Some exchanges forbid rotators unless you use a TE Toolbox rotator.
Traffic Splash as well as many other exchanges will offer you a rotator but it means that you have to have their advert on the top. I recommend you use your own TE Toolbox rotator which I will cover in lesson 05.
SPLASH PAGES
In this lesson I have added my GDI affiliate link to my list of websites. However it is not recommended to use the links supplied by the affiliate program as surfers don’t pay much attention to them and it would take thousands of hits before you got someone to sign up. Many exchanges recommend the use of Splash pages which are small and get to the point, often including a link or form pointing to more information. I will be covering List Building and Splash Pages in lessons six and seven.
BANNERS
Banners are small images that display a marketing message and appear in the Surf bar area. They come in various sizes but the most common side is 468x60. When someone clicks on them they go to the website they are advertising. Exchanges mostly use the 468x60 banners.
Here is an example banner…

Many affiliate programs provide banners for you to use. Look around the website to see where they are located. They will provide you with two URLS: the Site URL and the Image URL. The Site URL is a website address that points to the website you want to go to and the Image URL is the location of the banner graphic on the company’s server. For example, here is the URL information for the above banner.
SITE URL: http://www.home-business-school.com/
IMAGE URL: http://www.home-business-school.com/images/system/hbsban.gif
As you can see, the Image URL points to a picture file on the Home Business School server. Banners are usually in GIF format.
I am going to add this banner to the Tezak Traffic Power exchange in the banners section. If you are a member of this exchange then you can follow my example.
1. Login to Tezak Traffic Power
2. From the left hand menu click on the My Banners button.
3. Scroll down the page and stop when you locate the following section.
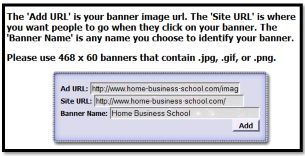
The banner details are filled in already. I have given the banner a name and now all I have to do is to click the Add button. Now my banner is added and ready for me to assign impressions to it.
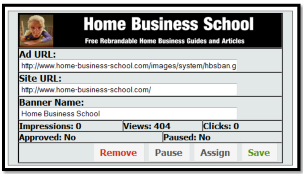
As you can see the banner is displaying perfectly. Now all I need to do is add impressions to it so it will appear to other surfers. Banners may need to be approved by the admin before they are displayed.
TEXT ADS
Text ads are easy to add. They only require a Site URL and a short description. The text ad appears as a clickable link in the surfbar. As with the banner I am going to add my text ad to Tezak Traffic Power.
1. Login to Tezak Traffic Power
2. From the left hand menu click on the My Text Ads button.
3. Scroll down the page and stop when you locate the following section.
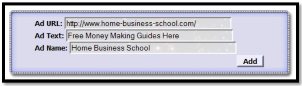
Notice the Ad Text field. I have written a short description of my website. You need to think of a short text ad to encourage the surfer to want to click on your text ad link.
Once you are happy with your Text Ad then click the Add button. Now we can see the following screen.
In a surfing session your banner and text ads will appear on the surfbar like this.

Notice this text ad says “Need Gifts for Children”? A good Text Ad catches the surfer’s attention by asking a question. Maybe you could think of a question to ask your prospects to get them to click through.
In the next lesson you will learn about surfing and multi-surfing.