Starting An Online Business by Sandra Mae - HTML preview
Download the book in PDF, ePub, Kindle for a complete version.
Part 3
Domains, Hosting & Nameservers

There are many different companies that you can go to – to get a domain name. These companies are called Registrars.
The most popular of these Registrars are Godaddy and Namecheap.
I personally use Godaddy so we will be using that particular Registrar throughout this section.
Before we get started however – I want to go over some domain name rules you need to keep in mind when choosing your domain name.
Domain Name Rules
There are only a few rules that you want to keep in mind when you are choosing your domain name and they are fairly easy to remember.
![]() Keep your domain name short
Keep your domain name short
![]() Make it easy to remember
Make it easy to remember
![]() Don’t use anything clever – Keep it simple
Don’t use anything clever – Keep it simple
![]() Keep it relevant to your particular market
Keep it relevant to your particular market
![]() Always use dot com (.com)
Always use dot com (.com)
The reasons for these rules are - many people get stuck at this point and spend hours and perhaps even days trying to come up with a name for their website.
This doesn’t have to be if you follow these 5 simple rules.
Keeping your domain name short, easy to remember, simple and relevant to your market helps your visitor to remember your website so they can come back to your site easily without racking their brain trying to remember where it is.
You will also discover that there are many different extensions for a domain name such as .com, .org, .info, .ws, .co, etc. etc.
The .com extension is more widely and commonly used and users are more familiar with it. Plus – it just looks more professional.
It’s a universal extension to begin with so try your best to always use this instead of the others.
Okay – Let’s go get a domain name…
In your URL address bar type in – www.godaddy.com and hit “Enter” on your keyboard.
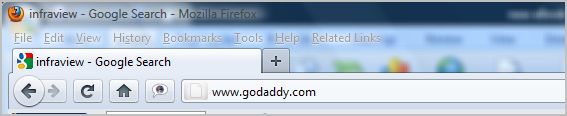
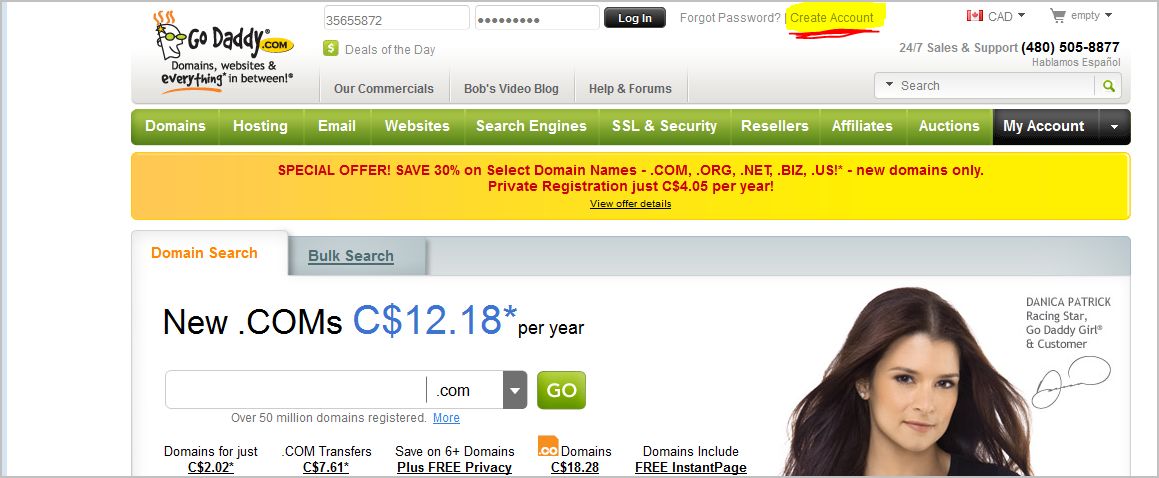
You will then be brought to the GoDaddy main web page.
Here you will need to create an account if you don’t already have one.
Just click on the “create an account” link and follow the online instructions.
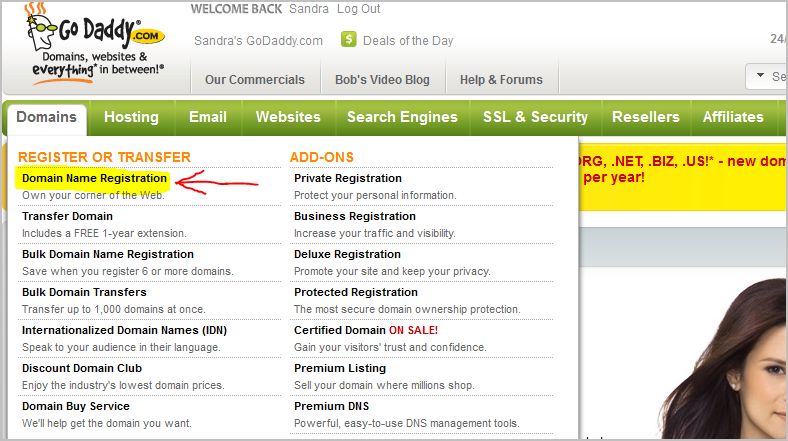
Once you have an account – you can hover over the “domains” tab at the top left of the page and a drop down box will appear.
In that drop down box – select “Domain Name Registration”.
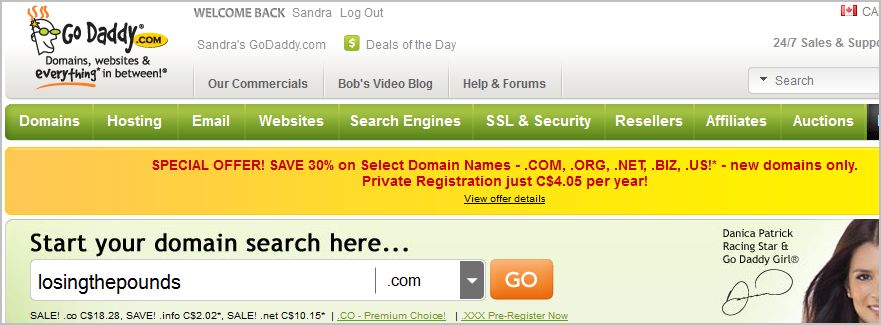
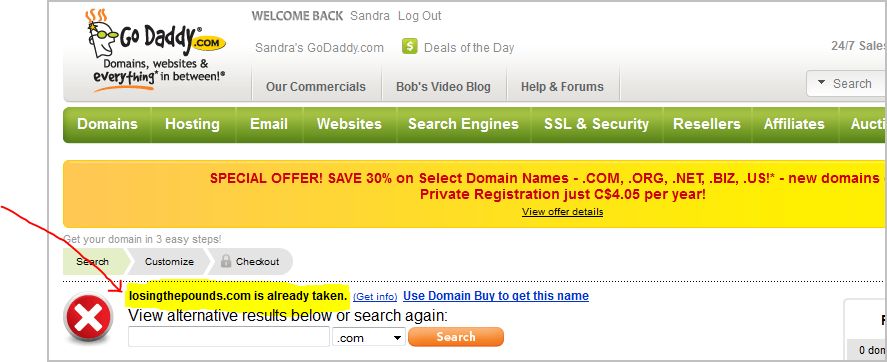
You will then be brought to a page that will allow you to type in a name to do a search to determine if that name is available.
In the search box – type the name of your niche that you chose earlier.
For example: I typed in “losingthepounds” (without the quotation marks)
REMEMBER here – try to have a name that is relevant to the niche you are getting into. Remember when we went through researching a profitable niche to get niche ideas?
Example: The “Losing Weight” niche – could be – “weightlossbasics”, or something like, “countingcalories”, or maybe even “losingthepounds”.
These could be super niche ideas that you got from researching your profitable niche ideas – you know - the titles of some of those chapters we looked at.
I think you get the idea here.
Godaddy will then tell you whether or not that particular name is available.
If your name IS available - then continue with registering your domain name by proceeding through to the checkout.
NOTE: You will have the opportunity to choose how long you want your domain before renewing it. You can choose from 1 to 5 years. Choose 1 for now. Later on you can always choose 2 years or more.
As you proceed through to the checkout – Godaddy will make you many different offers. YOU DON’T NEED THESE so don’t buy any of them.
We are trying to make it as inexpensive for you as possible at this point so just keep continuing to the checkout.

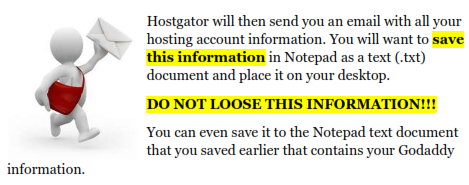
What I usually do is – I save it to my Desktop as a text (.txt) document in Notepad for the time being.
You now have a domain name and it’s YOURS!!
Hooray!!

How about we take a break for right now? Sound good to you? Let’s say we take about 10 minutes or so…
I’m going to go grab a coffee and stretch my bones. I’ll see you back here in 10!

Okay…!
Are you ready to continue…?
I’m excited here!!
Are YOU…!? You should be!!
Getting a Hosting Account

After getting your Hosting account – you will begin to feel as though things are taking shape.
Just keep in mind that these steps are some of the basic web skills that are important and you WILL NEED to know and understand in order to get started with your online business correctly.
Let’s do this…!
Now – like registrars - there are many different hosting companies that are available on the web for you to choose from. With this said – I use Hostgator so we will refer to Hostgator in this eBook.
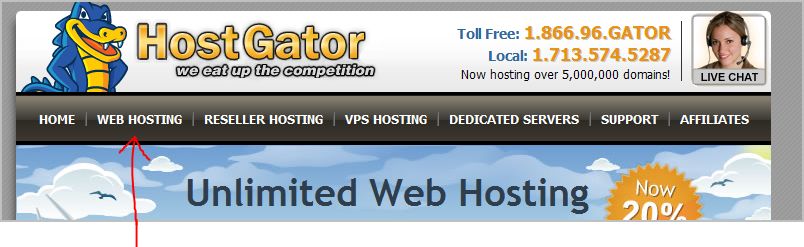
In your URL address bar type in – www.hostgator.com (without the quotation marks) and hit “Enter” on your keyboard.

You will then be brought to the Hostgator homepage. Click on the “Web Hosting” tab at the top of the page.
Okay - so far – so good…
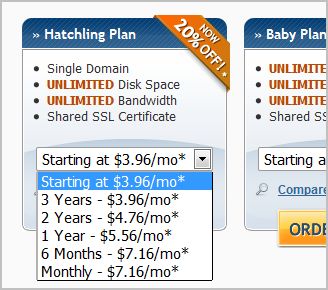
You then will be brought to the web page that shows different web hosting plans. For now – all you will need is the “Hatchling” plan. Later on – you can invest in the “Baby” plan when you have more than one domain to host.
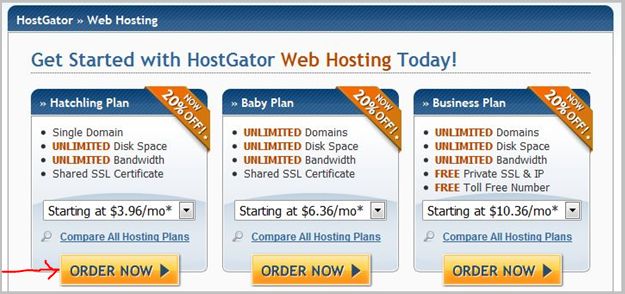
Make sure you open the drop down menu and select your choice of a monthly payment. The $3.96/mo. is for 3 years – not 1 year so make sure you choose the right amount of years for yourself.
Once you have chosen your hosting plan – click on the “Order Now” button.
In the next window you will type your domain name in the “I Currently Have a Domain Name” box and then click “continue to step 2”
Continue through the order process filling in all your necessary information and finalize the purchase of your hosting account.
This way – your registrar AND hosting account information for your domain name are all in one place.
You now you have a Hosting account!! 
It really IS easy isn’t it? Like I’ve said before – once you learn a skill – you will always know it. It will become a second nature for you to do.
Learning how to start an online business takes lots of work in the beginning but once you have it all set up – you never have to do it again.
It makes a whole lot of difference when you are shown HOW to get started doesn’t it?
I am the type of person that needs to be taken by the hand and shown exactly what to do, where to go, HOW to do it and in what order to do it in.
Does this sound familiar to you?
Let’s continue…
Nameservers
What is a Nameserver?
A nameserver simply links your host - with your registrar.
You will need to link GoDaddy with your hosting via nameservers.
*********A VERY IMPORTANT NOTE: You only need to change your nameservers IF your Host is different to your Registrar. To put it another way – you only need to be concerned about nameservers IF your Host and your Registrar are two DIFFERENT companies. **********
Changing Nameservers in Your Registrar
Now – you remember me telling you to save your hosting account information that you received in your confirmation email when you bought your hosting account?
Well – you are going to need that information for this next step so get it out and ready to use.
Make sure you copy your nameserver (ns) information before going to the next step.
Just highlight your information – right click on it and select “copy”.
We are going to go back to GoDaddy (this is your registrar). Once you are signed into your account – click on “Domain Manager” on the left hand side.
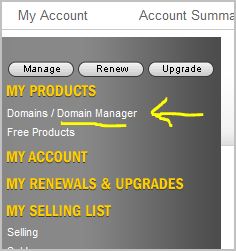
You will be brought to a web page that lists all your domain names that you have bought. If you are just starting out and you only bought one domain name so far – then you will only see that one domain name listed here.
Find your new domain name and click on it.
Doing so will take you to a page that gives all kinds of information about your domain name. On this page – hover over the “nameservers” icon at the top and select “set nameservers.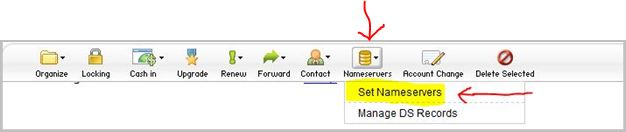
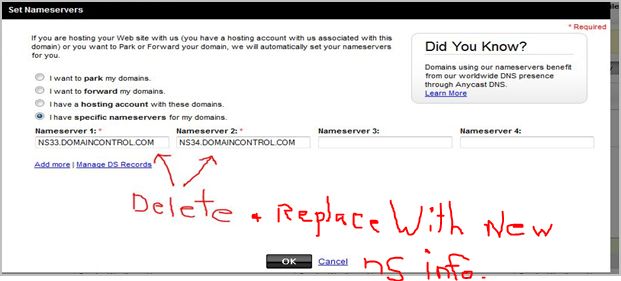
A smaller window will appear on your screen. See the image below. You will then tick the statement that reads, “I have a specific nameservers for my domains.”
Under that – there are four boxes with titles that read, “Nameserver 1:”, “Nameserver 2:”, “Nameserver 3:” and “Nameserver 4:”
What you want to do is delete the first two Nameservers that are in the first two boxes.

Now –
Remember I told you to copy the saved hosting information that you have in your email from your hosting company?
You should have ns1 and ns2 nameserver information that your hosting company sent you in that email.
You will now paste your ns1 and ns2 information that your hosting company sent you - in the nameserver 1 and nameserver 2 boxes that are located in your Registrar.
In the first box paste your ns1 information and in the second box paste your ns2 information.
Highlight the information in the ns1 box – right click and select “paste”. Do the same in the ns2 box.
Make sure everything is spelled and typed correctly. If it is – click on the “ok” button.
That’s it! You are done changing your nameservers.
Once you complete this step – you are ready to start creating your website!
I am very proud of you coming this far!
Congratulations on a job well done!!