

All About Cake Business by Thokozani Chirwa Musachi - HTML preview
Download the book in PDF, ePub, Kindle for a complete version.
Introduction
Cake business is booming in Malawi. And there’s a reason for the success story!
People are always celebrating about something—and they don’t want to celebrate alone. They throw parties and invite friends and loved ones to celebrate with them.
Be it a birthday, wedding, engagement, valentine’s day, anniversary or farewell party—name it, the party is not complete without a beautiful, well designed, baked cake to spice up the occasion.
So, if you happen to know how to bake a professional cake, party organizers will always be knocking your door, asking you to bake a cake for their special occasion.
When your cake spice up their celebration, there will always be inquisitive people who can’t just eat without making enquires as who baked the delicious cake. Of course, your cake should be well baked and appealing to solicit such comments!
And before you know it; your phone is beeping and ringing continuously as party attendees flood your phone with compliments for a cake well baked. A few days later, people are asking you to bake another cake for their special occasions. You are now a household name in the cake industry and all roads lead to your house.
Your clients smile all the way from your house to their party, carrying a well baked beautifully decorated delicious cake. And they leave you smiling too, because of the money they have dropped into your purse.
And you don’t need to be a full-time baker to run a successful cake business. You can be a professional in any career but run a successful cake business too. For example, I’m a professional person with a full time, busy job. But like the average woman in Malawi, I always have time to spend in my kitchen to cook for my family—and even bake something delicious for my loved ones.
So, baking a cake for a client isn’t tasking at all. I just have to spend an extra hour or two in my kitchen—and hip, hip, hooray, the job is done!
That extra hour is rewarding as it brings in money that I can use to meet some personal needs, and even family needs. Of course, there’s another reward too: an opportunity to bake for my family (You don’t expect me to bake a cake for a client and not to use the opportunity to bless my family too!).
9
A lot of women would love to make extra cash in the comfort of their kitchen. Gone are the days when women were just daydreaming and praying that God would bless them financially through their husbands. Today’s woman is advanced; she is a career person with a stable job or business. And cake business is ideal for her because it doesn’t demand a lot.
Unlike the traditional businesses that demand more of your time, energy and resources, cake business is so simple because you do it in the comfort of your home—and of course, in your own time. Once people taste your cake and give you a good rating, word spreads around like a bush fire. Everyone—including your friends and relatives—advertises your cakes, and your business goes viral. All of a sudden, clients line up for your cake services. Cake business becomes a cash cow that adds extra cash into your purse.
You might think I am just another academic theorist with no experience; but hold on because I have considerable hands-on experience in baking cakes and selling them.
I share my experience in cake business in this book so that I can encourage my fellow women to go into cake business—a business they can do in the comfort of their homes.
My journey in the cake business, however, has not been a smooth one. I’ve had many ups and downs but was determined enough to learn from my mistakes and move on.
It is said that you can get it if you really want it. I was determined to make it and I always picked myself up whenever I fell. I finally had a safe landing, and I can boast that I now have a successful cake business that brings in extra cash into my purse. If I could do it, then you can also do it! Or to use President Idi Amin language, ‘If I did it, then you can also did it’.
Where It All Began
Perhaps I’ve to begin from where it all started. Once upon a time I was nine years old. I watched my mum bake in the house and I was intrigued. I bombarded her with a lot of questions about baking. My mum could no longer ignore my interest in baking; so one Saturday afternoon she dispatched me to her friend’s house (we didn’t have a cooker by then). I discovered upon arrival that my mum had arranged a class for me to learn baking.
The house had a professional cook who took me through a three-hour session of how to bake a cake. I was taught through ‘monkey see, monkey do’ schooling. I was asked to watch carefully everything she was doing as she explained every procedure 10
and the ingredients she was using. She took ingredients, measured them, put them in a bowl, mix them up, and finally placed the dough into the oven.
Thereafter I was asked to do exactly as I had seen her do. The nine-year-old girl squared up, took the bull by the horn, seized the opportunity, and with zeal and excitement went about doing exactly—so I thought—as my teacher had done. And my first cake came out of the oven, yummy and hot, and was greeted by my smiling face!
I walked back home smiling from ear to ear, my freshly baked cake in my hands.
My mum welcomed the new chef into the house with pride. I carefully placed my trophy into her expectant hands, and sat down with the smile of a winner. How proud I was, watching my family members eating and enjoying the cake cooked by the youngest chef in the house!
Don’t ask me if it were a good one or not; but from the way everyone congratulated me as they ate the cake, it must have been the best cake they had ever eaten!
However, I would soon discover that my family must have been patriotic when they congratulated me because the cakes I began to bake in the house often tuned out to be disasters. That’s when I realized that baking was not as easy as I had thought it would be.
My cakes suffered from inconsistencies because I couldn’t get the ingredients right most of the time. I often put in more or less of a particular ingredient—and the cakes were often messed up. But I wasn’t discouraged at all; I kept on baking and perfecting my skills.
I looked forward to perfecting my baking skills in secondary school because I had heard that Home Economics class teaches baking. Unfortunately, I went to a private secondary school that didn’t have a Home Economics class. But I didn’t give up learning; I decided to perfect my baking on my own through trial and error.
So, I continued baking during my secondary school days and continued when I went to college. Every time I attended a birthday party, I would pay attention to how the cake looked like and tasted. I was fascinated with the design of the cake, especially the decorations. I was inquisitive enough to learn that cake decoration was done with icing sugar. But I didn’t know how it was done, and I wished someone could teach me how to do it. However, I couldn’t find a person to teach me.
I decided to take matters into my own hands one day. It was during my college days.
I bought icing sugar and was ready to decorate my first cake. To my surprise and delight, the back of the packet contained instructions on how to use the icing sugar 11
to decorate a cake! My experiment was made simpler as I just followed the instructions to the letter—and there it was: my first decorated cake!
The decorations came out so well—so I thought (remember dust is yourself!)—that I felt I could now bake a birthday cake and decorate it accordingly. That obstacle overcome, I was now confident I could compete in the cake business.
My college days over, I got a job and stayed with my elder sister in Lilongwe. One day I decided to pull a surprise at my workplace. I baked a cake, decorated it nicely, and took it to the office. I invited my colleagues to the ‘cake’ party. As they munched the decorated cake, my colleagues were grinning ear to ear and could not help but comment. “Who baked this cake?” one said with a mouthful of cake. “I like the icing; it’s spot on!” another one said, his mouth lip-sticked with the colorful icing.
“It’s my baking!” I exclaimed.
I received compliments from everyone. I went back home happy that my baking had now matured. It was a matter of days before I could turn professional. And surely, I got my first professional order within a month. A work colleague ordered a birthday cake!
Imagine the excitement as I baked my first commercial cake. It was no small achievement to be paid for baking a cake. My confidence grew and I quickly put an advert on the gate of our house, advertising my baking services. I got another client—a couple that wanted a wedding cake. It wasn’t the wedding cake that you see in city weddings. The couple was looking for a simple cake for a village wedding.
So, it was no big deal baking it. However, I was proud that I had managed to get a client for my baking services.
The door was finally open: orders were continuously coming in, especially for birthday cakes. Instead of being an exciting time for my baking business, it turned out to be a challenging moment because some clients were making impossible demands. They wanted cake designs that were complicated, and some had specifications that were almost impossible to make.
So, I went back to class to learn more about baking so I could meet the impossible demands of my clients. It wasn’t easy because I lacked a mentor. It was self-education, often relying on the internet for my baking lessons. I still struggled with consistence as I continued baking; this compromised the quality of my cakes. My greatest challenge was getting the right combination of the ingredients. I often baked three or four times before getting the right quality. Of course, my family was delighted to eat the discarded cakes while my clients got the highest quality.
12
It was a trial and error approach. But I persisted until I mastered the skill and became an expert. Some people noticed my expertise and began asking me to teach them how to bake cakes. I began to do a one-on-one mentorship for free. As the numbers grew, I realized that more women wanted to venture into cake business but didn’t know how. They wanted someone to teach them. That’s what motivated me to write this book.
This book is a simple guide to help you with the basics for starting your own cake business. I have shared tips for starting a cake business from the scratch. Of course, I have also shared my personal journey in the cake business—how I started, the mistakes I made, and how I have succeeded. This book could be the missing link to your success in cake business. So, sit down and relax as you enjoy reading the book that will usher you into a successful cake business.
13
1
Knowledge is Everything
“The only true wisdom is in knowing you know nothing,” said Socrates. You can’t dive blindly into the cake business and expect to succeed. You need adequate knowledge. Otherwise, you are likely to struggle and give up. People often see what others do and conclude that it’s so easy that you can also do it without anybody’s help. So, you copy what other people are doing. You think it is doable because everyone else is doing it. However, when the tire hits the road, you wake up only to discover that it’s not as easy as you thought. You struggle and finally throw in the towel.
Don’t get me wrong here. I am not saying it is wrong to venture into a business that others are doing. My point is: don’t just copy and paste someone’s business. Take time to get all the information and knowledge about the business. Interestingly, the more people join a particular business, the greater the competition, and the greater the need for you to be an expert if you are going to survive the competition.
Competition in the market is both good and bad. It is good because it promotes quality in the product or service being offered. But if you don’t constantly improve the quality of the cakes you are making, you lose clients to those who are ever improving the quality of their cakes.
If you lack adequate knowledge in cake business, your products and services will be of low quality and you won’t survive the competition on the market. You cannot afford to venture into cake business ignorantly. You need all the knowledge to survive the competition on the market.
Resourcefulness
Resourcefulness is vital when starting a cake business. You have to be very resourceful. Just like a farmer doesn’t begin farming until he has figured out all the resources he would need in that growing season, the person who ventures into cake 14
business should know the resources that would be needed, and how and where she will get them.
My passion for baking ushered me into the baking business. However, it wasn’t a smooth sailing journey. I had mixed fortunes as I baked at home. Interestingly, I only knew how to bake a basic vanilla cake; but I had little knowledge about recipes. I would use 3 cups of cake flour and 3 tea spoons of baking powder. The next day I would use 4 cups of flour and 3 tea spoons of baking powder. The following day I would change the mixture again. It was a guess game and my baking lacked consistence.
One day I would bake very yummy and moist cakes—delicious to eat and everyone would congratulate me. The next day my cake would come out raw and doughy ( yachinsima nkati) and no one would enjoy eating it. But I couldn’t figure out why my baking was inconsistent.
My passion kept me going despite the setbacks. I kept encouraging myself that sooner or later I shall get it right. I always dreamt of having a cake business, so I never gave up. I felt I just needed time to perfect my baking skills before my dream would come true.
I decided to start with birthday cakes. But I didn’t know a lot of things. I didn’t know how to frost a cake, so I sought help from experienced people. But people were not willing to help me; so I embarked on a journey of self-education. I bought snow white icing sugar made by Universal Industries—and guess what—luck was on my side! An angel had placed recipes for royal and butter cream icing at the back of the packet. I went to work as soon as I reached home: I tried out the recipes and—
boom—I decorated my first cake!
You don’t have to struggle for recipes today. The internet has brought recipes closer home; in fact, they are only a phone away. You just have to pick up your smart phone and Google, YouTube or Facebook. You’ll find all the information about cakes and recipes.
As I close this chapter, let me give you tips that will help you start and grow your cake business.
• Read as many books and articles about baking (cakes) as you can. Of course, don’t forget to read the recipes that are printed on the packets of flour, icing sugar, mixed fruits etc. Try out whatever new thing you learn. Remember: Education never stops, so keep educating yourself.
15
• Watch baking video tutorials on YouTube—you might as well stop wasting your precious time and data downloading or forwarding less useful videos.
The internet is loaded with enough information to steer your cake business to success.
• If someone is conducting cake baking lessons, humble yourself and attend.
You might grasp a tip that can transform your business. Such trainings help one to have hands-on experience and gives you a platform to interact with other bakers and you may benefit from their experience
• Bake new things all the time. When you get a new recipe, try it out. The more you bake, the better you get. Practice makes perfect.
16
2
You need Capital
Business requires resources; so is cake business. You need money to buy the right equipment for baking. Apart from investing in knowledge, you should be ready to sacrifice some money to acquire good equipment. High quality baking is a product of good equipment—the right utensils that perform the exact thing you want.
I will tell you the right materials and equipment you need to invest in. I will also list down the shops where you can get equipment and ingredients for baking. An oven is a must for baking. If you don’t have a cooker, you need to get one. But if you don’t have money to get a modern cooker, you might start with a low budget mini cooker. You can also use a charcoal brazier if you are adventurous enough. I am a member of Bakers Chat Forum group on Facebook and I was amazed that our friends in Nigeria have local ovens. They use sand to control the heat; it’s so fascinating. I hope engineers in Malawi will be able to produce them in the future.
1. Ingredients
A good cake is a product of the right ingredients. There are different qualities of ingredients out there, but if you want a high quality cake, then go for high quality ingredients. I have bought cakes that were made out of cheap ingredients, and they taste terrible. You taste a strong odor of cooking oil on one side and you have flour that smells like weevils or cockroach poop on the other side…phew. Worse still, I have seen a well decorated cake that tastes awful.
Don’t compromise on the quality of ingredients if you want to excel in cake business.
Your customer wants a quality cake—well blended and flavored to melt on their tongue. If one is celebrating, she doesn’t want anything to mess up that occasion, let alone a terrible cake. It’s better to use highest quality ingredients and make the client pay more to be happy than use cheap ingredients just because you want to charge less but spoil someone’s celebration.
In any celebration, organizers go for quality: from hiring of decorators, Master of Ceremonies, photography—you name it. So, your baking ought to be of high quality too. Don’t go for smelly cooking oil; don’t use cheap butter, don’t use cheap baking 17
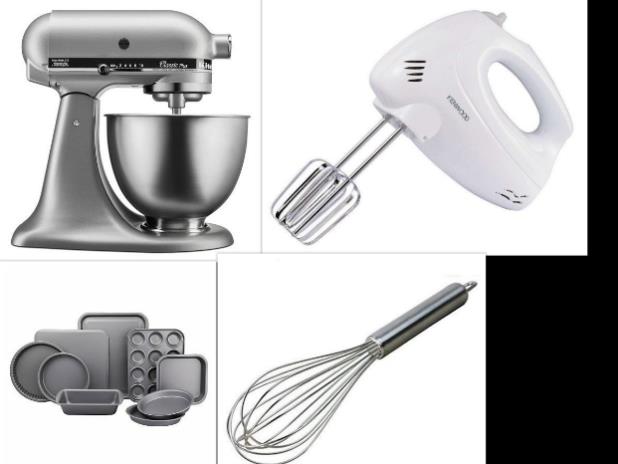
flour, don’t use low quality baking powder. Get the right ingredients of high quality and produce a cake that will spice up your client’s celebration.
2. Baking trays and mixing equipment
After procuring good ingredients, it’s time to learn beating if you are going to produce a high quality cake. According to BBC Good Food, Beating is the rigorous mixing of ingredients using a wooden spoon, electric whisk, food mixer or food processor. The purpose is to thoroughly combine ingredients and to incorporate air, making cakes light and fluffy.
I have used wooden spoon, electric whisk (hand held mixer and stand mixer) and food blender. But I have discovered that using a wooden spoon requires a lot of energy and hard work to create the smooth batter. So, I wouldn’t recommend a wooden spoon to a novice.
Electric mixers are the best because they are
very easy to use. They do all the beating for
you and help you save time and give you
outstanding results. I recommend an electric
mixer for a novice. But if you can’t afford it,
then go for a wooden spoon.
Once you have the mixer, then get baking
trays of different shapes (round, squared,
heart, Mickey/Minnie mouse heads, cupcake
trays etc.). Don’t stress yourself to buy everything at once unless you have the money. You can buy in phases depending on the present need. Do not compromise on quality. Some low quality baking trays will stick to your cake and damage it as you remove it.
Measuring cups, spoons and weighing scale
The recipe will state the number of cups for flour or the number of spoons for sugar to use in your baking. However, it doesn’t mean you can use your favorite mug cup or any other cup or spoon of your choice. There are standardized measuring spoons and cups that are used in baking. And you need to have them in your baking closet so you can measure the right quantities of both dry and wet ingredients.
18
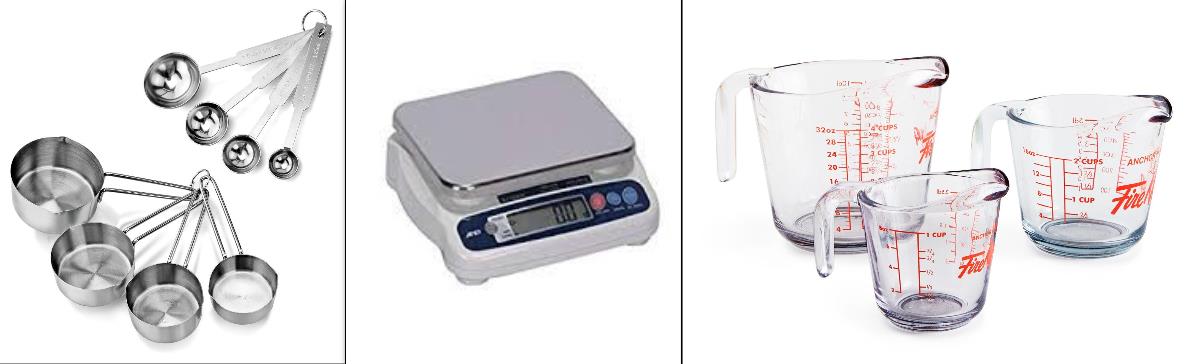
For instance, if a recipe requires 2½ cups of cake flour and 1¼ spoons of baking powder, you need to have the right equipment for measuring otherwise you will end up with a different cake that might not taste well. Using standardized measuring cups and spoons simplifies baking for you.
Some authors of recipes often recommend that you have to weigh your ingredients before mixing them up. If you have the weighing scale, please do it so you can produce the right baking.
3. Icing and decorating tools
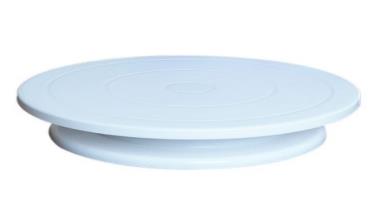
Cake turntable
A cake turntable is a stand that is used for
decorating cakes and it can rotate left or
right. This is a must have when it comes to
frosting your cake. The cake turntable gives
you the freedom to spin or revolve your
cake, making frosting your cake to be easy.
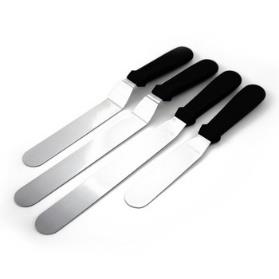
Spatulas
A spatula is used to spread icing onto a cake.
They come in different shapes and sizes,
some spatulas are made out of rubber, silicon
and steel. A steel spatula is ideal for frosting
a cake. The rubber or silicon spatulas are
handy when spreading the batter evenly in a
baking tray.
19
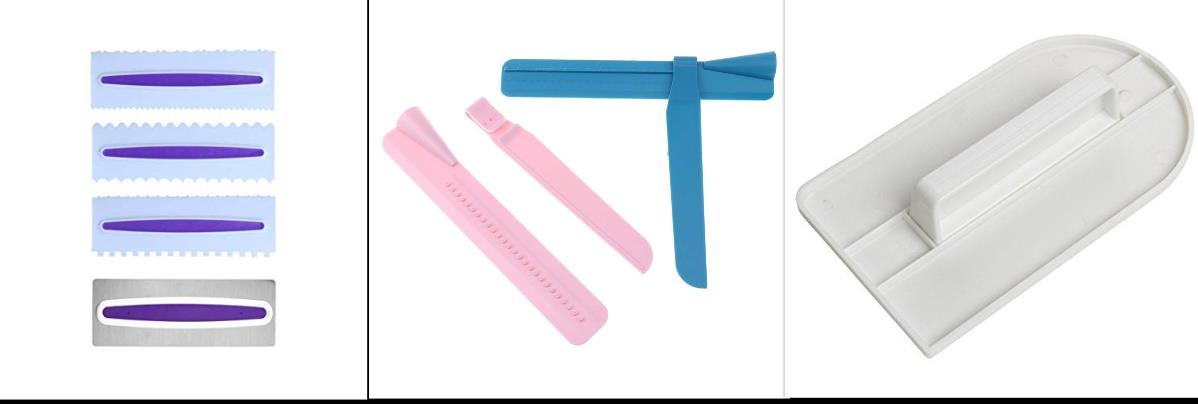
Icing scrapers and smoothers
Icing scrapers and smoothers come in different shapes and sizes and they are found in most cake supplies shops.
When you have finished spreading icing onto
your cake, the scrapers come in to smooth and
give the frosting a perfect finish. If you want to
become your own ‘cake boss’ then this is a must
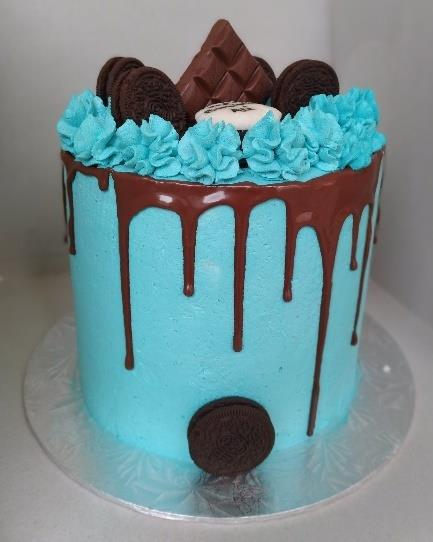
have in your pantry. I used an icing scraper to
smooth the cake that you see in the picture on
your left. You may struggle at the beginning to
get it right; but the more you practice, the better
you become.
Decorating tools
Once you are done with icing your cake, it is time to
add decoration and color to your cake. You will need
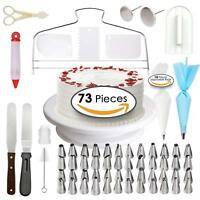
piping bags and tips, fondant cutters, flower nails and flower lifters and many more. As you can see in
the picture on your left, there are so many icing tips.
I ordered this decorating kit on eBay and the seller
was beautydesigns, a well rated eBay seller.
The kit has some spatulas, icing scrapers, flower
nails, a cake turntable and many more. If you are interested you can order yours online. All you need is an eBay account and a visa card. The only 20
problem with eBay is that the item takes long to arrive—especially if you are ordering from far away countries such as China.
In my case I got my kit after four weeks. If you
want more information on how to order online,
you can contact Lilaga Essentials on their
Facebook page. Please, take note that we have
shops in Malawi that sell kits like the one I
ordered.
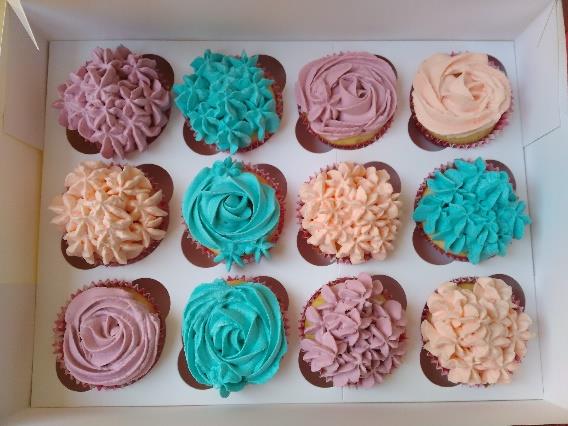
I used the decorating kit to decorate the
cupcakes that you see on the picture on your left. If you get this starter pack, then you are good to go—and roll out your cake business.
If you are in Lilongwe (some shops are found in Blantyre), you can buy cake ingredients and equipment from the following shops:
Anathu Food Supplies (shop in Area 18B also check them on Facebook)
Glamorous Creations Supplies (shop in Area 49 Shire Shopping complex check them on their Facebook page)
SC cakes & baking utensil suppliers (shop in old town opposite Bwaila Hospital check them on Facebook)
Tutla’s
Chipiku Stores
Shoprite
Sana Cash n Carry
The list, however, is not exhaustive. You will discover many suppliers as you continue with baking.
21
3
Marketing
Now that you have your oven and all the necessary equipment, and you are all set to kick start your business, you need to come up with a marketing strategy. How do people get to know that you bake good cakes? Of course, people might know you, but they don’t know that you have started a baking business.
Marketing is the fuel that will get your cake business going and growing. It will broadcast your rare baking skills to the general public, and people will flock to you with orders. Marketing was a bit of a challenge when I started my cake business because I didn’t have many options as I do now. So I used word of mouth and put a poster at the gate of our house. Of course, this conventional way of advertising is still relevant today, and continues yielding results—but just minimal.
We are now living in the digital (information) age that has brought a lot of marketing options—and better ones. Today you can use any of these marketing platforms: 1. Social media platforms
There are a number of options of Facebook to market your cake business. The first and easiest method is to post your cakes on your Facebook wall—of course, with catchy captions. Your Facebook friends will follow up your baking activities and the cakes you are baking. The advantage is that your friends will be kept abreast with all they need to know about your cake business.
But this marketing method is limited because you can only reach out to those who are in your friends’ list on Facebook. So you have to up your marketing strategy and join business groups on Facebook, and advertise your cakes on these business forums that often have a following of more than 100,000 people.
The third and most effective method is to create a business Facebook page, bearing the name of your business. Then you can send requests to your friends to like your business page. Thereafter, you can sponsor the page periodically to reach out to the 22
audience of your choice. Of course, you will pay some money, but it is worth it. The more likes your business page gets, the more valuable your business will become—
and you will get more clients.
WhatsApp can be used to advertise your baking business. You can use your WhatsApp status to post your cakes and sell them out. You may also share your cakes adverts in various WhatsApp groups and more people will get to know your business. The WhatsApp method is also very effective.
Instagram and Twitter
The above social platforms have been used effectively by business people to market their products and services. If you know someone who is a genius in using Instagram and Twitter, please humble yourself and learn from her. Then take advantage of these platforms to market your cake business.
2. Promotions
Companies always run promotions to either promote certain products and services or promote their business. A lot of people come forward to buy during promotions because of price reductions and other incentives. For instance, you can slash your prices on a selected day within the week or on holidays such as Mother’s Day. In the end, your business has more publicity and more clients.
3. Promotional Materials
A lot of materials can be used to promote your cake business. You can produce business cards and distribute to people. You may also print T-shirts and other stuffs to make your business known.
Branding
Branding is an important aspect in marketing. There are so many cake businesses out there, so your business must be unique to stand out in the crowd of many cake businesses. People should identify your products with a special quality. In branding, you create a name, symbol or design that identifies and differentiates your cake products from the other cake products in the market. When branding your cake business, you should first define your business, the core mission and what you want to achieve, and how you want your customers to think of your business.
23
When someone gives you a glass of Sobo Quench, for example, even if they don’t tell you that it is Sobo Quench, you will know from its smell and taste that it is Sobo Quench. Similarly, when people see or eat your cakes, they should be able to identify the cake with you because your cakes have a distinct quality that cannot be imitated by anybody else.
So how can you achieve this rare quality in your cakes so that people should easily know it’s your cake—even if it doesn’t have your label on it? Here are a few tips to help your cake business become a brand:
• Be creative in your cake designs; set a trend for your cakes. You can come up with a unique cake design, for example, that defines your cakes. Don’t just do what everyone else is doing. Be unique!
• Create a business logo that you put on your cake pictures, promotions, your car(s) or any public place where people can easily see it.
• Develop a tagline. This is a short statement that is catchy but defines your business. For example, the tagline for Colgate Maximum Cavity Protection is
‘Save the world from cavities’. Likewise, create a tagline for your cakes
• Get your business registered. It is very important that you register your business
So, go ahead and market your cakes!
24
4
Networking
Networking is very crucial to growing your cake business. When you see other people doing cake baking business, don’t see them as your opponent or a threat. For your business to grow, you need to connect with people who are doing the same business like you. Networking involves meeting fellow business people and making business relationships while you recognize, create, or act upon business opportunities that you meet. Such networking becomes a forum for sharing information and finding potential partners for your business.
My Testimony
Networking has helped my cake business. Besides running a cake business, I also have a fulltime job. My work involves travelling a lot. I used to be afraid to market my business in case I got an order to bake a cake but, at the same time, my work required me to go to the field where I couldn’t access baking equipment. I was afraid I might disappoint clients, and lose them.
But after giving it a thought, I decided to use the services of a friend who is in the cake business. One day I was supposed to make a birthday cake for a relative, but I got sick. I decided to order a cake from my friend Maneka to serve as the birthday cake. I brought the cake home and we celebrated the birthday. Everyone enjoyed the cake—it was well baked. And that marked the beginning of a business relationship with her.
I had to make a cake for a client but an emergency issue took me out of town. I asked my friend to bake the cake instead. She readily agreed. Since then whenever I am out of town or busy, I refer my clients to her. And when she is busy, she refers her clients to me.
Needless to say, you need to take caution when making business relationships and connections. Before referring my customers to my friend, I had tasted her cakes and I was satisfied. Similarly, she had also tasted one of my cakes I had baked for her 25
colleague a couple of years ago and she gave me positive feedback. You don’t want to refer a customer to a business acquaintance you are not familiar with otherwise you will disappoint your clients. So, get to know your business acquaintance’s work and style; taste their products, and if they are good, you can partner or network with them.
You should have the courtesy of seeking their permission before referring your clients to them. On the other hand, you need to convince and assure your clients that they will get good products from your business friend.
26
5
Know your strengths and weaknesses
As you begin your journey in the cake business, it is very important to be true to yourself by knowing your strengths and weaknesses. What do I mean by strengths?
Well, when you look at the whole process of baking a cake—all the way to decorating, you should be able to know what you can do best. For example, there are different types of cake icing: whipped cream, fondant, butter cream, royal icing, meringue and many others. Some people are best working with fondant, some butter cream, while others are able to work across the different types of icing. Knowing your strengths will help you save time and money. The same applies to the different cake designs. Some people are good at simple cake designs while others are good at complicated cake designs.
For example, a client comes to you, asking for a complicated design of a cake that you can’t do. You should be humble enough to tell them that you cannot do that design, and refer them to someone you know can do it. When you do that, the client will appreciate your professionalism.
I once got an order from a client who was referred to me by a friend. The friend first asked me if I could do the design the client was looking for. I jumped on the opportunity and asked her to bring the client over. But I failed to make the design and I ended up disappointing both the client and my friend. The client refused to take the cake and I ended up eating the cake with my family. So, be humble and refuse jobs that you can’t do. It will save you time, money and some dignity.
There are different types and kinds of cakes for different occasions, and some people prefer to major in birthday cakes or wedding cakes only. But others do both. It’s up to you to major in all types of cakes, or just focus on one type but perfect it.
27
6
Cake costing
Costing is crucial to the growth of your business. You don’t want to overcharge your clients or they will flee from you. But you also don’t want to give them a price that will bring loss or deny you the reward of your hard work. Striking a balance is the golden rule in coming up with prices for your baking products.
When I started my cake business, I surveyed cake prices on the market. I asked around and got prices from different bakers. This is a helpful method but it has its own challenges too because bakers buy ingredients from different suppliers.
Therefore, their prices will differ depending on whether they are buying in wholesale or retail.
The pricing differs also depending on where the bakers are operating from. Those who operate from home will have cheaper prices than those operating in rented shops.
Your pricing should take into consideration the following factors in order to make a reasonable profit from your cakes. You can’t survive in the cake business if you are not making profits. Here are a few tips to help you in pricing:
• Cost your ingredients. You need to total the amount of money that has gone into producing the cake. The sizes of cake pans and number of layers of cakes should also be factored in.
• Cost of icing. Calculate the costs of the different icing that has gone into the cake: be it butter cream, whipped cream, fondant, et cetera. Bear in mind that the bigger the cake the more icing you need.
• Cost the decorations. All the decorations that have gone into the cake, i.e.
sprinkles, bling balls, edible flowers, have to be factored in as you do the costing.
• Cost the cake board and cake box. Packaging costs have to be factored in whether you use an old carton and foil paper for a cake board or use actual cake boards. Whatever you choose has to be factored in the cost of the cake.
28
• Cost edible picture. Cakes with pictures are trending but it is quite expensive to print an edible picture on the cake. When a customer orders a cake with an edible picture, you have to include its cost in the pricing.
• Cost accessories. Accessories for cakes—especially wedding cakes—such as cake stands, candle holders, candles, knives and glasses can cost a fortune.
You have to factor their costs in the pricing of the wedding cake.
• Time. A lot of work and art is involved to bake and decorate a cake. You should therefore calculate the amount of time you have spent in baking a cake, frosting and decorating it. For example, you can spend one hour to prepare and bake a cake, and another hour to frost and decorate it. You have to cost the time and include it in the pricing.
• Bills. Factor in the bills such as electricity and water bills that have gone into baking. If you are renting a business premise then factor in rentals, employees’
wages, taxes, waste collectors, et cetera.
• Transport. As part of being innovative, I introduced a cake delivery service in my business, and I charge for the delivery services. So if you decide to offer cake delivery services, you have to factor in car expenses such as fuel and wear and tear.
The above tips will help you price your cake accordingly and get a reasonable profit that will help your business survive on the market. Your pricing depends on the various factors stated above.
29
7
Assess your business
You have now done all the branding and marketing; cake orders are pouring in every week, and you are happy and overwhelmed with the success. You might be tempted to relax and be complacent. However, this is not the time to relax. You have to assess your business. You have to know if you are making profit and growing, and most importantly, if your customers are satisfied with your products. Here are a few tips to assess your business:
Assess customer’s satisfaction.
It is very important to get feedback from your customers in order to have a true reflection of your business. Let your clients give you a feedback on the quality of your cakes, whether it was best, good, average or even poor. I always ask my customers for feedback. And I have received both positive and negative feedback, but I don’t get feedback at other times. Therefore, customers will come with three types of feedback;
• Positive feedback. This is good for you and it will give you the energy and vibes to keep going. It inspires you and shows that you are on the right track
• Negative feedback. Though it may sound upsetting and keep your stomach roaring, it serves as a learning opportunity for you, challenging you to correct your shortfalls and do better the next time. Don’t be offended or get sad or upset when a customer says, ‘I didn’t like the cake; it wasn’t moist… it was stale’ or ‘the icing wasn’t done the way I wanted’. Learn from the feedback and improve your baking. If the negative feedback is more than positive feedback, it should wake you up from your slumber. It’s a signal that you have to up your game or lose clients.
• No feedback. Don’t stress yourself if you get no feedback from customers.
Some customers will reserve their comments; so, you have to respect their right to remain silent even after you asked them for their feedback.
30
Assess growth of business. Like a seed planted in a garden, your business has to grow and flourish. So, monitoring growth of your business is very important. You can assess the growth of your business through the following factors:
• Number of customers. Increase in the number of customers indicates that your business is growing
• Profits. Increase in profits also indicates growth in business Go start your own business
Now that you have learnt the tips of starting a cake business, it is time for you to start your own cake business. The major challenge you will have in starting your business is not the opposition from other people. Rather, it is the fear from within you.
Someone has said that opposition from outside only accounts for twenty percent of the resistance you face when you want to begin something. Eighty percent resistance, however, comes from within you. This means if you can make your mind to start a cake business, then you have eighty percent going for you, and the twenty percent resistance from people can’t stop you.
If baking is your passion, then take advantage of the eighty percent energy within you and go for it. Apply the tips I have shared with you and feel free to contact me for feedback. I would be more than ready to provide more information when you contact me.
The greatest tips to remember is that you have to be consistent in your brand and don’t stop learning. These two will bring you success in the cake business.
This book is just a starting point for you. For more information, updates and recipes visit my Facebook pages—Izon Cakes and All about Cake Business. You will find plenty of information to equip you for a successful cake business. Like and follow the pages so you won’t miss out of any of the goodies there.
31
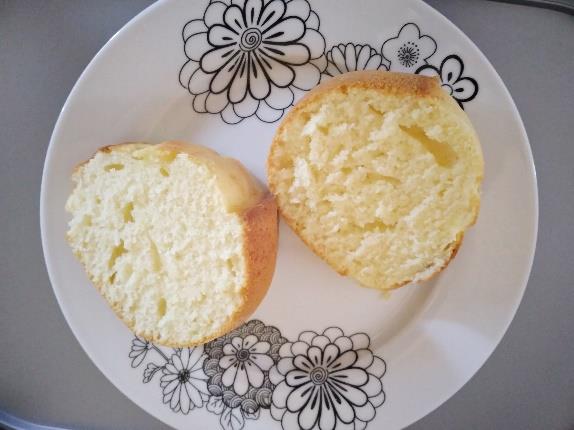
RECIPES
Vanilla Cake
Recipe by Izon Cakes
INGREDIENTS
• 3 cups cake flour (or all-purpose flour)
• 3 tsp baking powder
• ½ tsp salt
• 1 cup white sugar
• ¾ cup butter
• 3 large eggs
• 1¼ cups milk
• 1 tsp vanilla
Butter Cream Frosting
• 250g Snowhite icing sugar
• 120g butter or Margarine
• 20ml (1½ tbsp) milk
32
METHOD
1. Preheat oven to 350 degrees. Butter two 8 inch cake pans, add a little flour and tap out the excess (this helps the cake not to stick to the cake pan when baked) 2. Sift together flour, baking powder and salt in a medium sized bowl and set aside 3. Add butter, sugar and vanilla in a large bowl and beat together until light and fluffy 4. Add in one egg at a time until well combined. Make sure you scrape down the sides of the bowl to ensure all ingredients are well incorporated
5. Add half of the dry ingredients and half milk to the batter and mix gradually adding the remaining dry ingredients and milk
6. Divide batter evenly among the cake pans and bake for about 25 minutes or until the toothpick inserted at the centre has few crumbs
7. Cool the cakes on wire racks until at room temperature Frosting
1. Cream butter and then add sifted Snowhite Icing Sugar
2. Add milk gradually while beating until reaching a desired consistency 3. Add 1 tsp of flavoring and a pinch of color if desired
1 Butter cream frosting recipe by Snowhite Icing Sugar (Universal Industries) 33
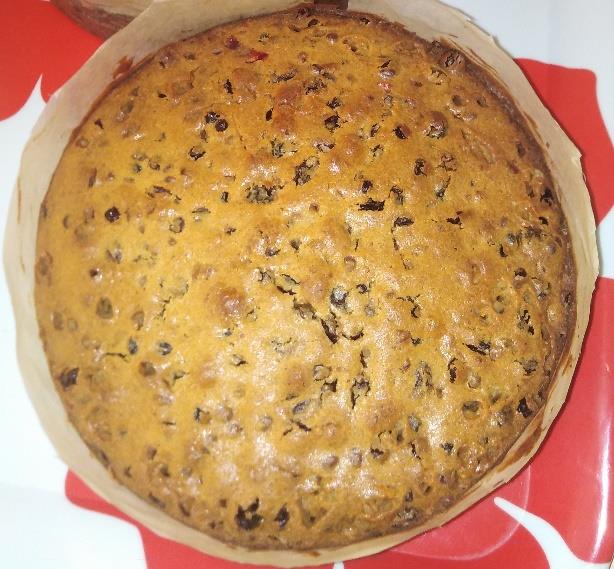
Rich Fruit Cake (Wedding Cake)
Recipe by Izon Cakes
INGREDIENTS
• 500g cake flour
• 250g butter
• 500g mixed fruit
• 200g glacé cherries
• 2 tsp mixed ground spice
• 1 tsp ground cloves
• 1 tbsp vanilla
• 250g sugar
• 7 eggs
• 1 cup brandy
Method
Crucial step: Wash the mixed fruits and drain the water. Put the drained fruits in an airtight container and pour brandy over the fruits. Leave it to sit overnight.
1. Grease and line two 8 inch cake pans with non-stick baking paper.
2. Preheat the oven to 150°C
34
3. Sift together flour and spices. Add the fruits and glacé cherries to the flour mixture (the glacé cherries should be washed and halved)
4. Cream the butter and sugar until light and fluffy. Add vanilla and gradually add one egg at a time.
5. Add in the flour mixture to the butter mixture and stir with a wooden spoon until well combined.
6. Spoon the mixture into the prepared cake pans level the top with a rubber spatula or back of a spoon and bake for 3 to 4 hours or until a toothpick/bamboo stick inserted into the centre of the cakes comes out clean. Let the cakes cool.
7. Once completely cold, take the cakes out and wrap in a double layer of greaseproof paper and a layer of foil and store in an airtight container. Feed the cakes with 2 to 3 tablespoons of brandy every 7 days until it matures for a month. The cake is at its best after a month Note: brandy helps in preserving the cake to keep longer
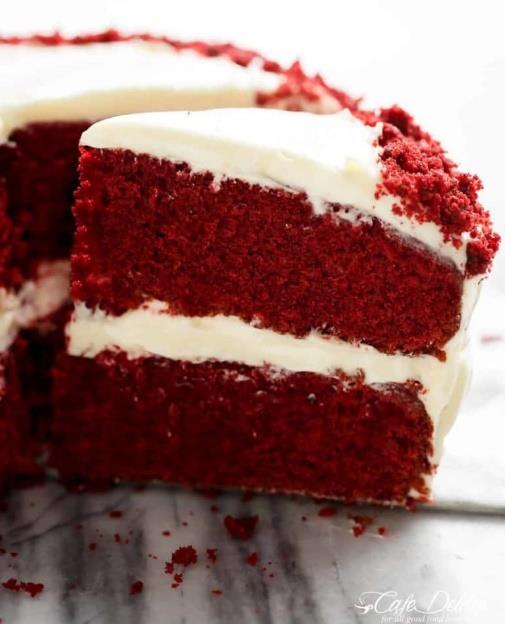
Red Velvet Cake
Recipe by Cafedelites
INGREDIENTS
• 1/2 cup (120g) unsalted butter, at room temperature
• 1 1/2 cups (300g) caster sugar (or fine white granulated sugar)
• 2 large eggs
• 1/4 cup cooking oil
• 1 tablespoon (10g) unsweetened cocoa powder plus 1 tablespoon extra for dusting 35
• 2 1/2 tablespoons (45ml) red food colouring (liquid, not gel)
• 2 teaspoons (10ml) pure vanilla extract
• 1 tablespoon (20ml) white vinegar
• 2 1/2 cups (350g) plain cake flour, sifted (or all-purpose/plain flour)
• 1 teaspoon baking soda (bi-carb soda)
• 1 teaspoon salt
• 1 cup (250ml) buttermilk*
Cream Cheese Frosting:
• 14 ounces (400g) cream cheese (not spreadable), at room temperature
• 1/2 cup (120g) unsalted butter, at room temperature
• 2 teaspoons pure vanilla extract
• 4 cups confectioners (or icing) sugar
• 1 tablespoon lemon juice (optional -- adds subtle hint of lemon) INSTRUCTIONS
1. Heat oven to 350°F | 175°C. Lightly grease two 8-inch cake pans with butter or nonstick oil spray and lightly dust with 1 tablespoon of the sifted cocoa powder.
2. Cream butter and sugar together until light in colour. Add eggs one at a time, beating well after each addition to combine well.
3. In a smaller bowl, mix together oil, remaining cocoa powder, red food colouring and vanilla until smooth. Stir colour mixture and vinegar through the creamed sugar mixture to combine.
4. Sift together flour, baking soda and salt in a separate bowl. Add half of the dry ingredients and half of the buttermilk to the wet ingredients; mix well. Repeat with remaining dry ingredients and buttermilk.
5. Divide batter among the 2 prepared pans and bake for about 25 to 30 minutes, or until a toothpick inserted into the centre of the cake comes out clean. Cool on a wire rack completely.
Cream Cheese Frosting:
1. Beat together cream cheese, butter and vanilla until smooth lighter in colour (about 3-4
minutes). Beat in icing sugar until frosting is light and fluffy (if frosting is too thin, add more icing sugar and beat again until reaching your desired consistency). (Optional if using: mix in the lemon juice.)
36
Assemble Cake:
1. Transfer 1 cake onto a serving dish/plate, flat-side down. Trim the top dome off of the cake to create a flat bottom later. Scoop about 1 1/2 - 2 cups of frosting onto cake and spread evenly over the top.
2. Place second cake layer on top and use remaining frosting to cover top and sides of cake.
3. Crumble trimmed pieces of cake to decorate.2
The Most Amazing Chocolate Cake
Recipe by The Stay at Home Chef
INGREDIENTS
• butter and flour for coating and dusting the cake pan
• 3 cups all-purpose flour
• 3 cups granulated sugar
• 1 1/2 cups unsweetened cocoa powder
• 1 tablespoon baking soda
• 1 1/2 teaspoons baking powder
• 1 1/2 teaspoons salt
• 4 large eggs
• 1 1/2 cups buttermilk
• 1 1/2 cups warm water
• 1/2 cup vegetable oil
2 https://cafedelites.com/best-red-velvet-cake/
37
INSTRUCTIONS
1. Preheat oven to 350 degrees Fahrenheit. Butter three 9-inch cake rounds. Dust with flour and tap out the excess.
2. Mix together flour, sugar, cocoa, baking soda, baking powder, and salt in a stand mixer using a low speed until combined.
3. Add eggs, buttermilk, warm water, oil, and vanilla. Beat on a medium speed until smooth. This should take just a couple of minutes.
4. Divide batter among the three pans. I found that it took just over 3 cups of the batter to divide it evenly.
5. Bake for 30-35 minutes in a 350 degree oven until a toothpick inserted into the center comes out clean.
6. Cool on wire racks for 15 minutes and then turn out the cakes onto the racks and allow to cool completely.
7. Frost with your favorite frosting and enjoy!
Chocolate Cream Cheese Buttercream Frosting
1. In a large bowl, beat together butter and cream cheese until fluffy. Use a hand mixer or stand mixer for best results
2. Add in cocoa powder and vanilla extract. Beat until combined.
3. Beat in powdered sugar, 1 cup at a time. Add milk as necessary to make a spreadable consistency. The frosting should be very thick and will thicken even more if refrigerated.3
3 https://thestayathomechef.com/the-most-amazing-chocolate-cake/#jump-to-recipe
38
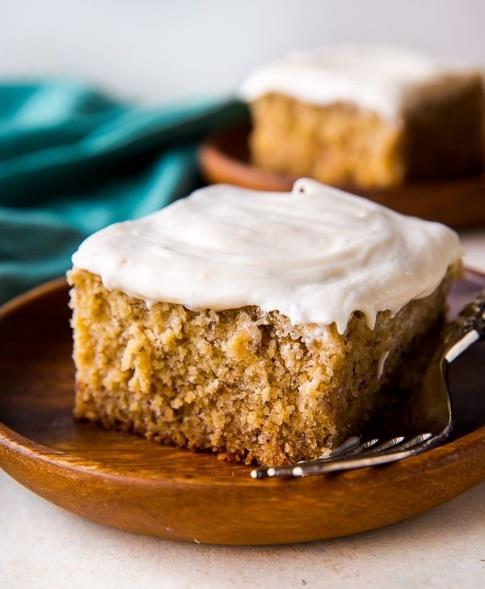
Banana Cake
Recipe by Sally’s Baking Addiction
INGREDIENTS
• 3 large ripe bananas (about 1 and 1/2 cups mashed)
• 3 cups (375g) all-purpose flour (spoon & leveled)
• 1 teaspoon baking powder
• 1 teaspoon baking soda
• 1/2 teaspoon ground cinnamon
• 1/2 teaspoon salt
• 3/4 cup (170g) unsalted butter, softened to room temperature
• 1 cup (200g) granulated sugar
• 1/2 cup (100g) packed light or dark brown sugar
• 3 large eggs, at room temperature
• 2 teaspoons pure vanilla extract
• 1 and 1/2 cups (360ml) buttermilk, at room temperature*
Cream Cheese Frosting
• 8 ounces (224g) full-fat block cream cheese, softened to room temperature
• 1/2 cup (115g) unsalted butter, softened to room temperature
• 3 cups (360g) confectioners’ sugar, plus an extra 1/4 cup if needed
• 1 teaspoon pure vanilla extract
• 1/8 teaspoon salt
INSTRUCTIONS
1. Preheat the oven to 350°F (177°C) and grease a 9×13 inch pan.
39
2. Make the cake: Mash the bananas. I usually just use my mixer for this! Set mashed bananas aside.
3. Whisk the flour, baking powder, baking soda, cinnamon, and salt together. Set aside.
4. Using a handheld or stand mixer fitted with a paddle attachment, beat the butter on high speed until smooth and creamy – about 1 minute. Add both sugars and beat on high speed for 2 minutes until creamed together. Scrape down the sides and up the bottom of the bowl with a rubber spatula as needed. Add the eggs and the vanilla. Beat on medium-high speed until combined, then beat in the mashed bananas. Scrape down the sides and up the bottom of the bowl as needed. With the mixer on low speed, add the dry ingredients in three addi-tions alternating with the buttermilk and mixing each addition just until incorporated. Do not overmix. The batter will be slightly thick and a few lumps is OK.
5. Spread batter into the prepared pan. Bake for 45-50 minutes. Baking times vary, so keep an eye on yours. The cake is done when a toothpick inserted in the center comes out clean.
If you find the top of the cake is browning too quickly in the oven, loosely cover it with aluminum foil.
6. Remove the cake from the oven and set on a wire rack. Allow to cool completely. After about 45 minutes, I usually place it in the refrigerator to speed things up.
7. Make the frosting: In a large bowl using a handheld or stand mixer fitted with a paddle or whisk attachment, beat the cream cheese and butter together on high speed until smooth and creamy. Add 3 cups confectioners’ sugar, vanilla, and salt. Beat on low speed for 30
seconds, then switch to high speed and beat for 2 minutes. If you want the frosting a little thicker, add the extra 1/4 cup of confectioners sugar (I add it). Spread the frosting on the cooled cake. Refrigerate for 30 minutes before serving. This helps sets the frosting and makes cutting easier.
8. Cover leftover cake tightly and store in the refrigerator for 5 days.4
4 https://sallysbakingaddiction.com/best-banana-cake/
40
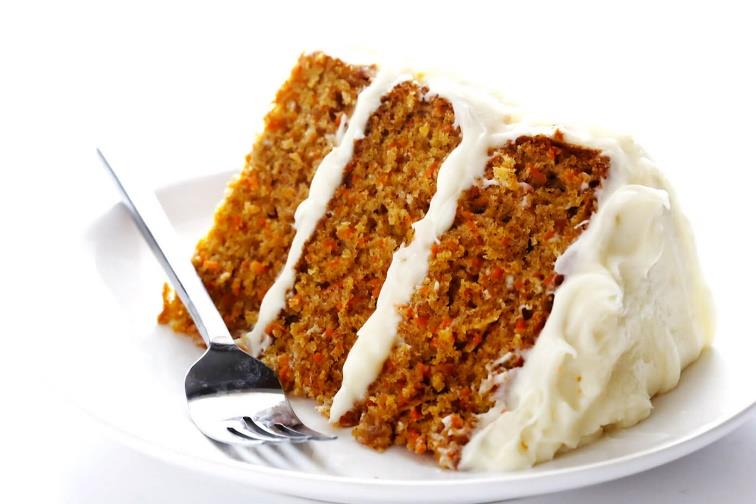
Carrot Cak e
Recipe by Gimme Some Oven
INGREDIENTS
• 1 2/3 cup avocado oil (or vegetable oil, or any mild-flavored oil)
• 1 cup granulated sugar
• 1 cup packed brown sugar
• 6 eggs
• 1 tablespoon vanilla extract
• 3 1/4 cups all-purpose flour
• 1 tablespoon ground cinnamon
• 2 teaspoons baking soda
• 2 teaspoons fine sea salt
• 1 teaspoon baking powder
• 1/2 teaspoon ground nutmeg
• 1/4 teaspoon ground cloves
• 1 pound finely-grated* fresh carrots
• optional: 1 cup chopped nuts or 1/2 cup raisins
Cream Cheese Frosting Ingredients:
• 3 (8-ounce) bricks cream cheese, room temperature
• 1 cup (2 sticks) salted butter, room temperature
• 1 tablespoon vanilla extract
• 1/2 teaspoon fine sea salt
• 6 cups powdered sugar (or more, if needed to thicken) 41
1. Preheat oven to 350°F. Grease and flour three 8-inch round baking pans. (Or to save a step, you can coat them with baking spray, which already contains flour.) 2. In a large mixing bowl, whisk together oil, granulated sugar, and brown sugar until combined and smooth. Add in the eggs and vanilla, and whisk until smooth.
3. In a separate bowl, whisk together the remaining dry ingredients (flour, cinnamon, baking soda, salt, baking powder, nutmeg and cloves) until combined. Gradually add the dry ingredient mixture into the egg mixture, and stir until smooth. Fold in the grated carrots and stir until combined. If you would like to add nuts and/or raisins, stir them in at this time as well.
4. Portion the batter evenly into the prepared baking pans. Bake for 25-30 minutes, or until a toothpick inserted in the middle of the cakes comes out clean. Transfer the baking pans to a wire cooling rack and let the cakes cool until they reach room temperature.
5. Meanwhile, to make the cream cheese frosting, combine the cream cheese, butter and vanilla in a large mixing bowl and stir until combined and smooth. (You can either do this with a spatula, or with a hand or stand mixer.) Gradually stir in the powdered sugar and mix until it is completely combined. You want the frosting to be pretty firm for a 3-layer cake, so add more/less powdered sugar as needed to reach the correct consistency.
6. Once the cakes reach room temperature,* use a cake leveler or a bread knife to slice off the rounded tops of the cakes so that they are completely flat on top. Place the first cake on your serving platter, add a large scoop of frosting on top of it, and spread the frosting so that it covers the cake evenly and extends a bit over the edges. Repeat with the second and third layers of the cake. Then use the remainder of the frosting to frost all around the side edges of the cake.
7. Once you’re ready to serve the cake, slice it up and enjoy! Or cover and refrigerate for up to 4 days.5
5 https://www.gimmesomeoven.com/best-carrot-cake/
42
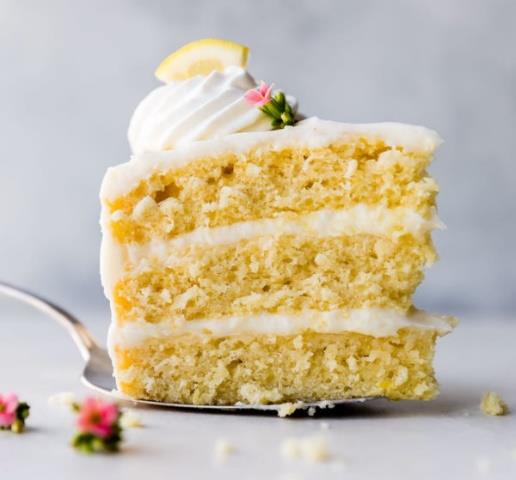
Lemon Cake
Recipe by Sally’s Baking Addition
INGREDIENTS
• 3 cups (345g) sifted all-purpose flour* (spoon & leveled)
• 2 and 1/2 teaspoons baking powder
• 1/2 teaspoon baking soda
• 1/2 teaspoon salt
• 1 cup (230g) unsalted butter, softened to room temperature
• 1 and 3/4 cups (350g) granulated sugar
• 3 large eggs, at room temperature
• 2 teaspoons pure vanilla extract
• 1 cup (240ml) buttermilk, at room temperature
• 1 heaping Tablespoon lemon zest (about 2 lemons)
• 1/3 cup (80ml) fresh lemon juice (about 2 lemons) Cream Cheese Buttercream Frosting
• 1 cup (230g) unsalted butter, softened to room temperature
• 8 ounces (224g) full-fat brick style cream cheese, softened to room temperature*
• 5 cups (600g) confectioners’ sugar
• 2 Tablespoons (30ml) fresh lemon juice
• 1 teaspoon pure vanilla extract
• pinch salt, to taste
INSTRUCTIONS
1. Preheat oven to 350°F (177°C). Grease three 9-inch cake pans, line with parchment paper, then grease the parchment paper. Parchment paper helps the cakes seamlessly release from the pans.
2. Make the cake: Whisk the flour, baking powder, baking soda, and salt together. Set aside.
43
3. Using a handheld or stand mixer fitted with a paddle or whisk attachment, beat the butter and sugar together on high speed until smooth and creamy, about 3 minutes. Scrape down the sides and up the bottom of the bowl with a rubber spatula as needed. Beat in the eggs and vanilla extract on high speed until combined, about 2 minutes. Scrape down the sides and up the bottom of the bowl as needed. With the mixer on low speed, add the dry ingredients just until combined. With the mixer still running on low, add the buttermilk, lemon zest, and lemon juice and mix just until combined. You may need to whisk it all by hand to make sure there are no lumps at the bottom of the bowl. The batter will be a little thick.
4. Pour batter evenly into cake pans. Bake for around 21-26 minutes or until the cakes are baked through. To test for doneness, insert a toothpick into the center of the cake. If it comes out clean, it’s done. Allow cakes to cool completely in the pans set on a wire rack.
The cakes must be completely cool before frosting and assembling. The baked cakes are fluffy, but they are not thick– about 1 – 1.5 inches.
5. Make the frosting: In a large bowl using a hand-held mixer or stand mixer fitted with a whisk or paddle attachment, beat the butter on medium speed until creamy, about 2
minutes. Add the cream cheese and beat until completely smooth and combined. Add confectioners’ sugar, lemon juice, and vanilla extract with the mixer running on low. Increase to high speed and beat for 3 minutes. Add more confectioners’ sugar if frosting is too thin, more lemon juice if frosting is too thick, or add a pinch of salt if frosting is too sweet. (I always add a pinch of salt!)
6. Assemble and decorate: Using a large serrated knife, slice a thin layer off the tops of the cakes to create a flat surface. Discard (or crumble over ice cream!). Place 1 cake layer on your cake stand, cake turntable, or serving plate. Evenly cover the top with about 1 cup of frosting. Top with 2nd cake layer and evenly cover the top with about 1 cup of frosting.
Top with the third cake layer. Spread the remaining frosting all over the top and sides. I like to top mine with homemade whipped cream (I used Wilton 8B piping tip).
7. Refrigerate for at least 30-45 minutes before slicing. This helps the cake hold its shape when cutting.
8. Cover leftover cake tightly and store in the refrigerator for 5 days.6
6 https://sallysbakingaddiction.com/lemon-cake/
44
Italian Sponge Cake
Recipe by As Easy as Apple Pie
INGREDIENTS
FOR AN 18-20 CM (7-8 INCHES) PAN:
• ½ cup + 1½ tablespoon (120 grams) granulated sugar
• 4 extra large eggs at room temperature
• a pinch of salt
• 1 teaspoon grated lemon zest or vanilla extract optional
• 1 cup + 1 tablespoon (120 grams) cake flour, sifted *you can use all-purpose flour: 120
grams=1 cup
INSTRUCTIONS
• Take the eggs out of the refrigerator ahead of time as the eggs need to be at room temperature or soak them for a few minutes in a bowl of warm water.
• Preheat the oven to 170 degrees C (338 degrees F).
• Butter and flour (or spray with baking spray) a 20 cm (8 inches) pan.
• Put the eggs, sugar, salt, and lemon zest in the bowl of your stand mixer.
• Beat the eggs until very fluffy and pale yellow (about 15/20 minutes on medium/high speed). To test that it has been beaten enough, let a small amount of batter fall into the bowl. If it remains "sitting" on top, it means that it's ready.
• Sift the flour on top of the egg mixture, a little at a time, and fold it gently with a wooden spoon.
• Pour the batter into the prepared pan. Don't smooth the top or bang the pan on the counter, leave it as it is!
• Bake for 40 minutes or until a toothpick inserted into the center comes out clean. (Remember: do not open the oven for the first 30 minutes!)
• Turn off the oven but leave the cake inside (keep the door slightly open using a wooden spoon) for 5/10 minutes so it can cool down slowly.
45
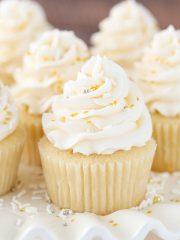
• Remove the sponge cake from the oven, let it cool for 10 more minutes, then loosen around the edges with a knife, and flip it on a wire rack upside down (without the pan) to cool completely.7
Vanilla Cupcakes
R e c i p e b y L i f e , L o v e a n d S u g a r I N G R E D I E N T S
• 2 1/2 cups (325g) all purpose flour
• 2 cups (414g) sugar
• 3 tsp baking powder
• 1 tsp salt
• 1 cup (240ml) milk
• 1/2 cup (120ml) vegetable oil
• 1 tbsp vanilla extract
• 2 large eggs
• 1 cup (240ml) water
V a n i l l a F r o s t i n g
• 1/2 cup (112g) salted butter, room temperature
• 1/2 cup (95g) shortening
• 4 cups (460g) powdered sugar
• 1 1/2 tsp vanilla extract
• 2–3 tbsp (30-45ml) water or milk
7 https://aseasyasapplepie.com/italian-sponge-cake-pan-di-spagna/
46
I N S T R U C T I O N S
1. Preheat oven to 350°F (176°C) and prepare a cupcake pan with liners 2. Add the flour, sugar, baking powder and salt to a large mixer bowl and combine. Set aside.
3. Add the milk, vegetable oil, vanilla extract and eggs to a medium sized bowl and combine.
4. Add the wet ingredients to the dry ingredients and beat until well combined.
5. Slowly add the water to the batter and mix on low speed until well combined. Scrape down the sides of the bowl as needed to make sure everything is well combined. Please note that the batter will be very thin.
6. Fill the cupcake liners about half way and bake for 15-17 minutes, or until a toothpick comes out with a few moist crumbs.
7. Remove the cupcakes from oven and allow to cool for 2 minutes, then remove to a cooling rack to finish cooling.
8. To make the frosting, combine the butter and shortening in a large mixer bowl and mix until smooth.
9. Add 2 cups of powdered sugar and mix until smooth.
10. Add the vanilla extract and 1 tablespoon of water or milk and mix until smooth.
11. Add remaining powdered sugar and mix until smooth.
12. Add remaining water or milk as needed and mix until smooth.
13. Pipe the frosting onto the cupcakes. I used Ateco tip 844. 8
8 https://www.lifeloveandsugar.com/moist-vanilla-cupcakes/
47
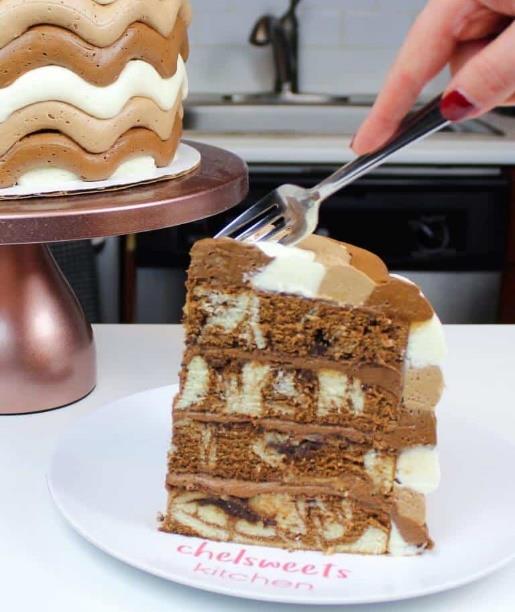
Marble Cake
Recipe by Chel Sweets
INGREDIENTS
Vanilla Cake Recipe*
• 3 cup all-purpose flour (390 grams)
• 3 cups granulated sugar (600 grams)
• 2 1/2 tsp baking powder (10 grams)
• 1 tsp salt (5 grams)
• 1 cup unsalted butter, room temperature (226 grams) – 2 sticks
• 1 cup egg whites (or about 7 egg whites) (244 grams)
• 1 1/2 cups buttermilk, room temperature (360 grams)
• 2 tsp vanilla extract (9 grams)
• 1/8 cup vegetable oil (28 grams)
Additional Ingredients: (to be added after the vanilla cake batter is made, to change it into chocolate batter)
• 1/3 cup unsweetened baking cocoa (33 grams)
• 1/4 cup granulated sugar (50 grams)
• 1/4 cup egg whites (60 grams, or 2 egg whites)
48
• 1/4 cup buttermilk (45 grams)
• 1/4 tsp salt (1 gram)
• 1/2 tsp baking powder (2 grams)
Chocolate Fudge Swirl:
• 1 cup chocolate chips (150 grams)
• 1/4 cup unsalted butter, room temperature (56 grams)
• 1/4 cup heavy cream, room temperature (60 grams)
Buttercream Frosting
• 3 cups unsalted butter, room temperature (650 grams)
• 11 cups powdered sugar (1375 grams)
• 1 tsp salt (6 grams)
• 1/2 cup heavy cream (or whipping cream) (60 grams)
• 1 1/2 Tbsp vanilla extract or vanilla bean paste (18 grams)
• 1 cup unsweetened baking cocoa (85 grams)
• 1 cup dark chocolate chips, melted and cooled (175 grams)
INSTRUCTIONS
Marble Cake Layers:
1. Preheat oven to 350°F / 175 C. Grease and line four 8" cake pans and set aside.
2. Begin by making the vanilla cake batter. Mix together the dry ingredients (3 cups flour, 3 cups sugar, 2 1/2 tsp baking powder, and 1 tsp salt) in a stand mixer with a paddle until fully combined.
3. Mix 1 cup of room-temperature butter into the dry ingredients on a low speed. Continue to mix until no large chunks of butter remain and the mixture looks like moist sand.
4. Pour in 1 cup of egg whites and mix on low until just incorporated, then mix in 1 1/2 cups of buttermilk on a low speed.
5. Add in 2 tsp vanilla extract and 1/8 cup oil, and mix at a low speed until fully incorporated.
Scrape down the sides of the bowl with a spatula, then beat on medium-low speed for about 30 seconds.
6. Pour half of the batter into a separate bowl (roughly 950 grams) and set aside.
49
7. In the other bowl, convert the vanilla cake batter into chocolate cake batter. Mix the additional 1/3 cup baking cocoa, 1/4 sugar, 1/4 cup buttermilk, 1/4 tsp salt, and 1/2 tsp baking powder into one bowl of vanilla batter on a low speed until combined and set aside.
8. If desired, make the chocolate fudge swirl. Combine the chocolate chips, butter, and heavy cream into a heatproof bowl. Heat in two 30-second intervals, stirring in between. Allow the mixture to sit for 1 minute, then stir until smooth and set aside to cool.
9. Alternate spoonfuls of chocolate and vanilla cake batter into the prepared cake pans, filling them roughly one inch high with batter (I like to use a digital kitchen scale to make sure each pan has the same amount of batter).
10. Add small drops (about one inch in diameter) of the chocolate swirl on top of the cake batter, then drag a small offset spatula or butter knife through the batter in horizontal and vertical lines to create a marbled pattern.
11. Bake for 33-35 minutes (or until a toothpick comes out with a few moist crumbs).
12. Once the cake layers are out of the oven, run a small offset spatula around the edges of the pans to help separate the cake layer from the pan.
13. Allow the layers to cool in the pan for about 15 minutes, then flip them onto a wire rack to finish cooling.
14. Once the cake layers have finished cooling use a serrated knife to level the tops and set the cake layers aside.
15. If you're making these cake layers in advance, wrap and freeze them like this. When you're ready to assemble the cake, unwrap the frozen layers and allow them to thaw for about 30
minutes before you plan to frost the cake.
Buttercream Frosting:
1. Beat the butter on a medium speed for 30 seconds with a paddle attachment, until smooth.
2. Mix in the vanilla extract and salt on a low speed.
3. Slowly add in the powdered sugar, 1 cup at a time. Alternate with small splashes of cream.
4. Mix on low for a couple minutes until the ingredients are fully incorporated, and the desired consistency is reached.
5. If the frosting is too thick, add in additional cream (1 Tbsp at a time). If the frosting is too thin, add in more powdered sugar (quarter of a cup at a time).
6. Place half of the buttercream into a separate bowl. Mix in 1/2 cup of baking cocoa, and the melted chocolate chips. This will be used to fill the cake, and will be the darkest buttercream of the squiggles. Place in a large piping bag.
7. With the remaining vanilla buttercream, place half of the into another large piping bag.
50
8. Color the rest of the frosting with the other 1/2 cup of baking cocoa, to create a light brown colored frosting. Place in a large piping bag.
To Assemble the Cake
1. Once all the different components of this cake are ready, begin to assemble the cake!
2. Stack the cake layers on a greaseproof cardboard cake round.
3. Spread a thin dab of buttercream on the center of the board, to help your cake layer stay in place.
4. Next, center the first cake layer the cake board.
5. Spread an even layer of the dark chocolate buttercream onto the cake layer with a large
offset spatula. Repeat with remaining cake layers.
6. Place the top cake layer upside down.
7. Cover the cake in a thin layer of frosting, and smooth using a bench scraper.
8. Chill the cake in the freezer for about 5 minutes, until the frosting is firm to the touch.
9. Pipe squiggly lines of buttercream around the cake, alternating between the vanilla, chocolate, and dark chocolate buttercream.9
9 https://chelsweets.com/easy-marble-layer-cake-recipe/
51
About the author
Thokozani Chirwa Musachi is a seasoned self-taught baker with over 10 years of experience. She was introduced to cakes in the late 90s at a tender age while watching her mum and sister bake. At age 9, her passion for cakes provoked her mum to arrange a baking lesson for her. Thokozani’s journey in baking hasn’t been a smooth one mainly due to limited knowledge in the industry then unlike now when information is at the click of a finger. She has experimented, made so many mistakes and often times thought of giving up but her passion for baking kept her going.
She has written this book to share the knowledge she has accumulated over the years to assist and inspire upcoming bakers how they can set up and manage a cake business. Currently, she runs a cake business called Izon cakes and has served many customers to date. She also has a page on Facebook named All about cake business where she shares information about where to get cake supplies, recipes and more.
Thokozani holds a Bachelor of Arts in Media for Development from University of Malawi, Chancellor College. She works as a Communications Consultant at Centre for Development Management (CDM).
52
53
You may also like...
-

Veggie Magic: Tasty Plant-Based Recipes Food/Recipes by Angelia GriffithVeggie Magic: Tasty Plant-Based Recipes
Reads:
46Pages:
127Published:
Sep 2025Discover the magic of vegetables with Veggie Magic: Tasty Plant-Based Recipes, your ultimate guide to creating 125+ irresistible dishes that transform everyda...
Formats: PDF, Epub, Kindle, TXT
-

Art of Smoking Food: What Others Won't Tell You... Food/Recipes by StollingerArt of Smoking Food: What Others Won't Tell You...
Reads:
64Pages:
38Published:
Mar 2025"The Art of Smoking Food" – a concise yet comprehensive guide for beginners and those looking to enhance their food smoking skills. This book provides essenti...
Formats: PDF, Epub, Kindle, TXT
-

Effortless Aegean Flavors Food/Recipes by S. G MALIKEffortless Aegean Flavors
Reads:
35Pages:
82Published:
Mar 2025Do you love the rich, vibrant flavors of the Mediterranean diet but feel overwhelmed by complex recipes? Are you looking for a way to enjoy authentic Aegean d...
Formats: PDF, Epub, Kindle, TXT
-

Wendy's Fast-Food Menu Guide Food/Recipes by Millie BrownWendy's Fast-Food Menu Guide
Reads:
36Pages:
71Published:
Mar 2025This book takes a deep dive into Wendy’s menu, uncovering its history, secret hacks, fun facts, and fan-favorite items. From Wendy's classic hamburgers and cr...
Formats: PDF, Epub, Kindle, TXT