
How to Make a Podcast with 1 Million Subscribers by Taha Atef - HTML preview
Download the book in PDF, ePub, Kindle for a complete version.
Chapter 4: Equipment and Software
What Equipment Do You Need to get started ?
Hey there, future podcaster! Ready to dive into the world of podcasting? It’s an exciting adventure where you get to share your voice, stories, and ideas with the world. But before you hit that record button, let’s talk about the essential equipment you need to get started. Here’s a friendly guide to help you gather all the necessary gear!
1. Microphone: Your Voice's Best Friend
The microphone is the cornerstone of your podcast setup. It captures your voice in all its glory and delivers it to your audience with clarity.
Dynamic Microphones:
Great for beginners and for recording in less-than-perfect environments.
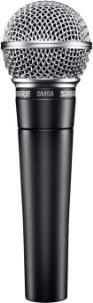
They’re durable and handle background noise well. The Shure SM58 is a classic choice.
Condenser Microphones:
These are more sensitive and capture a wider range of sounds.
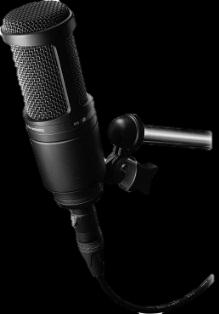
They’re perfect if you have a quiet recording space. The
Audio-Technica AT2020 is a popular option for its excellent sound quality and affordability.
2. Headphones: For Crystal Clear Monitoring
Quality headphones are crucial for monitoring your recordings. They help you hear exactly what your listeners will hear, allowing you to catch and correct any issues.
Closed-back Headphones:
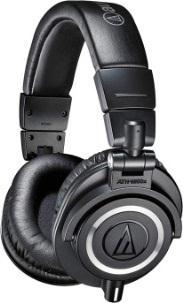
These are ideal because they block out external noise and
prevent sound leakage. The Audio-Technica ATH-M50x is highly recommended for its comfort and superb audio quality.
3. Audio Interface: The Bridge Between Mic and Computer
An audio interface converts the analog signal from your microphone into a digital signal that your computer can process. It also improves sound quality and reduces latency.
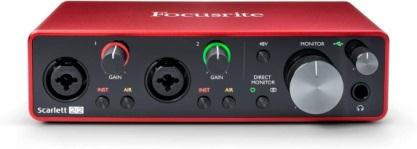
Focusrite Scarlett 2i2: This is a popular choice for its reliability and ease of use. It offers two inputs, which is perfect if you plan on having guests or co-hosts.
4. Pop Filter: Say Goodbye to Plosives
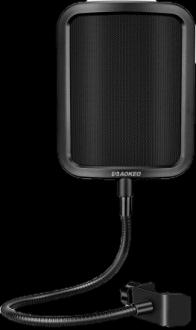
A pop filter is a simple but effective tool that eliminates the harsh "p" and "b" sounds that can occur when speaking closely into a microphone.
Inexpensive and easy to attach to your microphone stand, it’s a
must-have for any podcaster.
5. Boom Arm: Keep Your Mic Steady
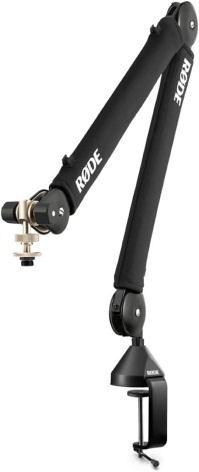
A boom arm helps you position your microphone exactly where you need it while keeping your desk space clutter-free.
Known for its flexibility and durability, this boom arm is a
favorite among podcasters.
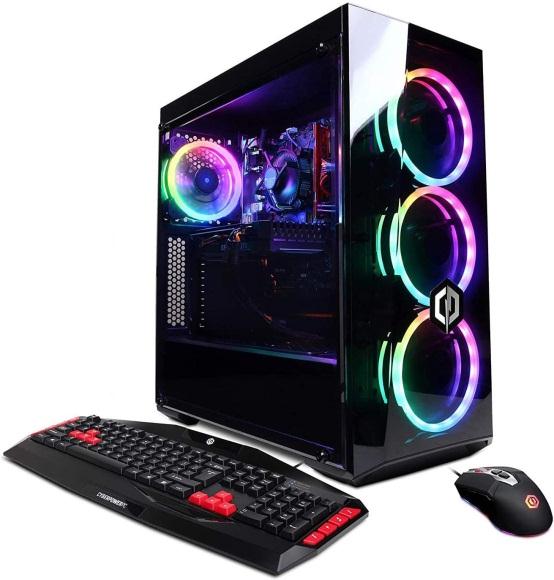
6. Computer: Your Digital Workstation
Your computer is where you’ll record, edit, and produce your podcast.
Make sure it’s up to the task!
Reliable Laptop or Desktop:
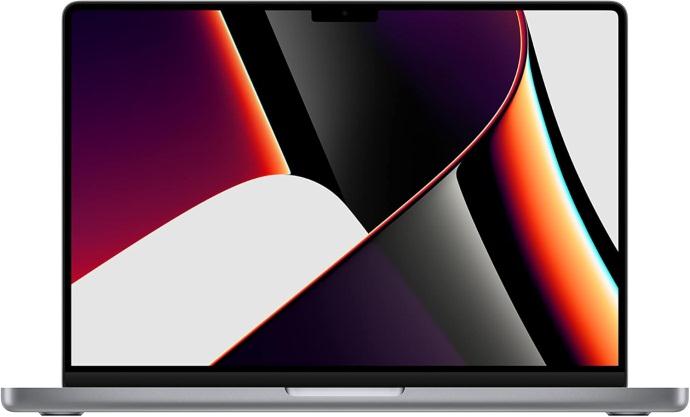
Whether you’re a Mac or PC person, ensure your computer has enough
processing power and storage. Popular choices include the MacBook Pro or a
7. Recording and Editing Software: Craft Your Episodes
You’ll need software to record and edit your podcast. There are both free and paid options available.
Audacity: Free, open-source, and perfect for beginners. It has all the basic tools you need to get started.
Adobe Audition: A more advanced and professional option, offering a wide range of editing features for those ready to take their podcasting to the next level.
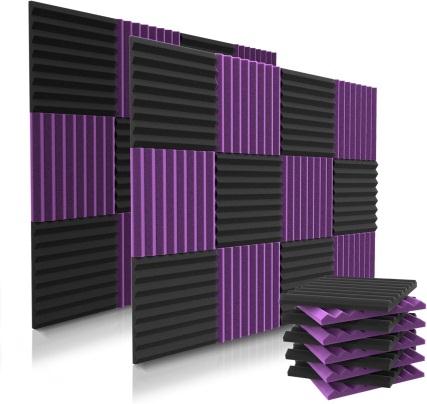
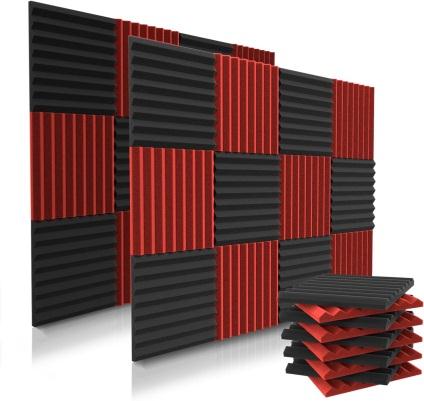
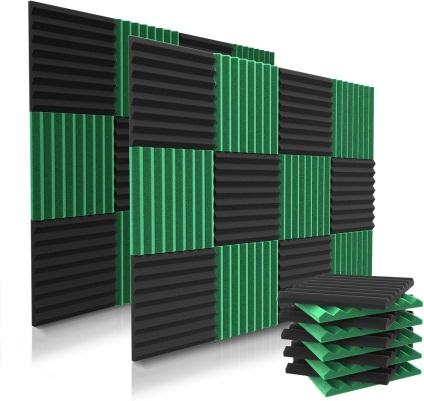
8. Acoustic Treatment: Create a Soundproof Space
A quiet, echo-free space is essential for professional-sounding recordings. You don’t need a fancy studio; a few simple adjustments can make a big difference.
Acoustic Panels: These help absorb sound and reduce echo. You can also use items like blankets, rugs, and curtains to improve your recording environment.
Microphones: Types and Recommendations
When you're just starting out in podcasting, choosing the right microphone can feel overwhelming, but it doesn’t have to be. The good news? You don’t
need to break the bank to sound professional. Affordable, high-quality
microphones are available that will help your voice come through loud,
clear, and captivating just like the pros.
For beginners, USB microphones are a fantastic starting point. They’re
simple to use, often plug-and-play, and offer great sound quality for the
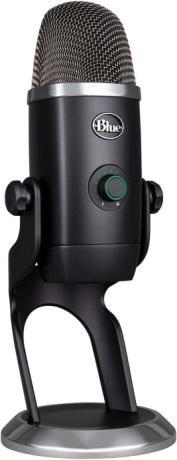
price. One of the best options on the market is the Blue Yeti USB
Microphone. This mic consistently ranks at the top of beginner-friendly recommendations, boasting thousands of high ratings on
Amazon. Its versatility allows you to switch between recording solo, interviewing guests, or even capturing group discussions with ease. Plus, it's incredibly user-friendly just plug it into your computer, and you're ready to go.
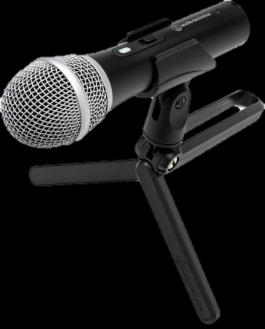
Another budget-friendly option is the Audio-Technica ATR2100x-USB. This dynamic microphone is perfect for those wanting to dip their toes into podcasting without the complexity of professional studio equipment. It’s durable, easy to set up, and comes with both USB and XLR connectivity, which means it
can grow with you as your podcast evolves.
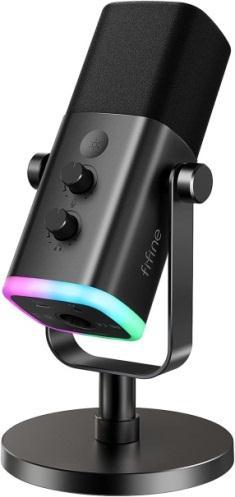
For a truly affordable yet solid option, the
FIFINE USB Microphone is worth considering. It's a compact, no-nonsense
microphone that delivers clear audio, making it
perfect for beginners who want to keep things simple and cost-
effective.
Remember, the goal is to get started, and these microphones will
help you do just that. Once you’ve recorded your first episode and
heard your voice coming through crisp and clean, you’ll feel the
excitement that comes with building something of your own.
Podcasting is all about connection, and with the right mic in hand, you’ll be ready to connect with your audience one episode at a time.
Audio Interfaces and Mixers
When you’re setting out on your podcasting journey, one of the most crucial decisions you’ll make is how you’ll capture your audio. Whether you’re recording solo episodes, interviewing guests, or hosting roundtable discussions, the quality of your sound can make or break your listener’s experience. That’s where audio interfaces and mixers come into play. But don’t worry you don’t need to break the bank to get professional-grade audio. Let’s break down what these devices do and which ones are perfect for beginners.
Audio Interfaces: Simple, Powerful, and Perfect for Beginners
If you’re just starting out, an audio interface is likely the best option for you. Audio interfaces act as the middleman between your microphone and your computer, converting your analog voice into digital signals that your computer can process.
Most of them are designed with simplicity in mind, so you can focus on content creation rather than getting bogged down in tech.
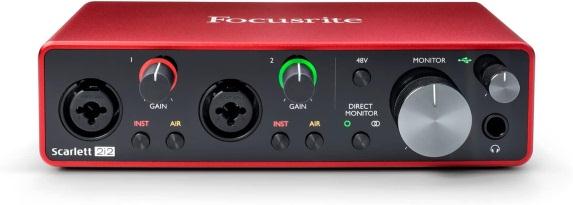
One of the most popular audio interfaces for beginner podcasters is the Focusrite
Scarlett 2i2. This compact, durable device has gained a strong reputation for delivering excellent audio quality without overwhelming you with features you don’t need right away.
Advantages:
The Scarlett 2i2 is equipped with two high-quality microphone preamps,
allowing you to plug in two mics at once a must-have if you’re recording with a co-host or interviewing a guest. Its plug-and-play setup means you can start recording almost immediately after unboxing it. Plus, it’s bus-powered, which means you won’t need an external power source just plug it into your
computer via USB, and you’re ready to go. And let's not forget Focusrite’s software bundle that comes with free DAWs and plugins, making it easier to produce polished episodes.
Disadvantages:
On the flip side, while the Scarlett 2i2 is easy to use, it has limited
expandability. With only two inputs, you might feel constrained if your
podcast grows and you need to connect more microphones or instruments.
However, for most beginners, this limitation won’t be an issue until further down the line. Also, if you’re unfamiliar with gain staging, you might need a bit of a learning curve to ensure your levels are balanced.
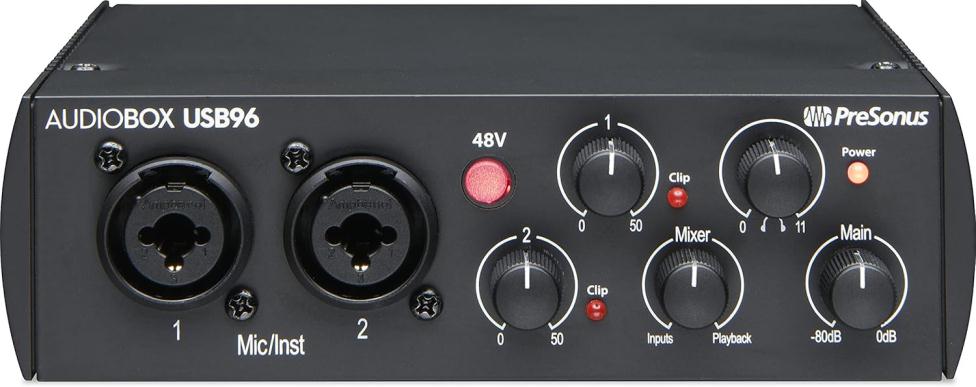
Another beginner-friendly option is the PreSonus AudioBox USB 96. This interface is highly portable and offers solid audio quality at an even more affordable price point.
Advantages:
The AudioBox USB 96 is small and lightweight, making it ideal if you need to record on the go. Like the Scarlett 2i2, it also has two inputs, allowing for co-hosts or guest interviews. What sets this interface apart is its inclusion of PreSonus’ Studio One Artist software, which is a fantastic digital audio
workstation (DAW) for editing your podcast episodes. The built-in preamps
are also solid for the price, ensuring your recordings sound clear and
professional.
Disadvantages:
The downsides are similar to the Scarlett 2i2 in that it only has two inputs, so expanding beyond that will require an upgrade. Additionally, some users have reported that the knobs feel a bit less sturdy compared to more expensive
models. But again, for the price, these are minor concerns for a beginner.
Mixers: More Control, More Flexibility
If you’re feeling ambitious or anticipate needing more control over your sound from the get-go, a mixer might be a better fit. Mixers allow you to adjust levels, equalize, and even add effects to your audio in real-time. This can be incredibly useful if you’re recording multiple guests or want to add music and sound effects on the fly. However, mixers do come with a steeper learning curve, so make sure you’re prepared for a bit of experimentation.
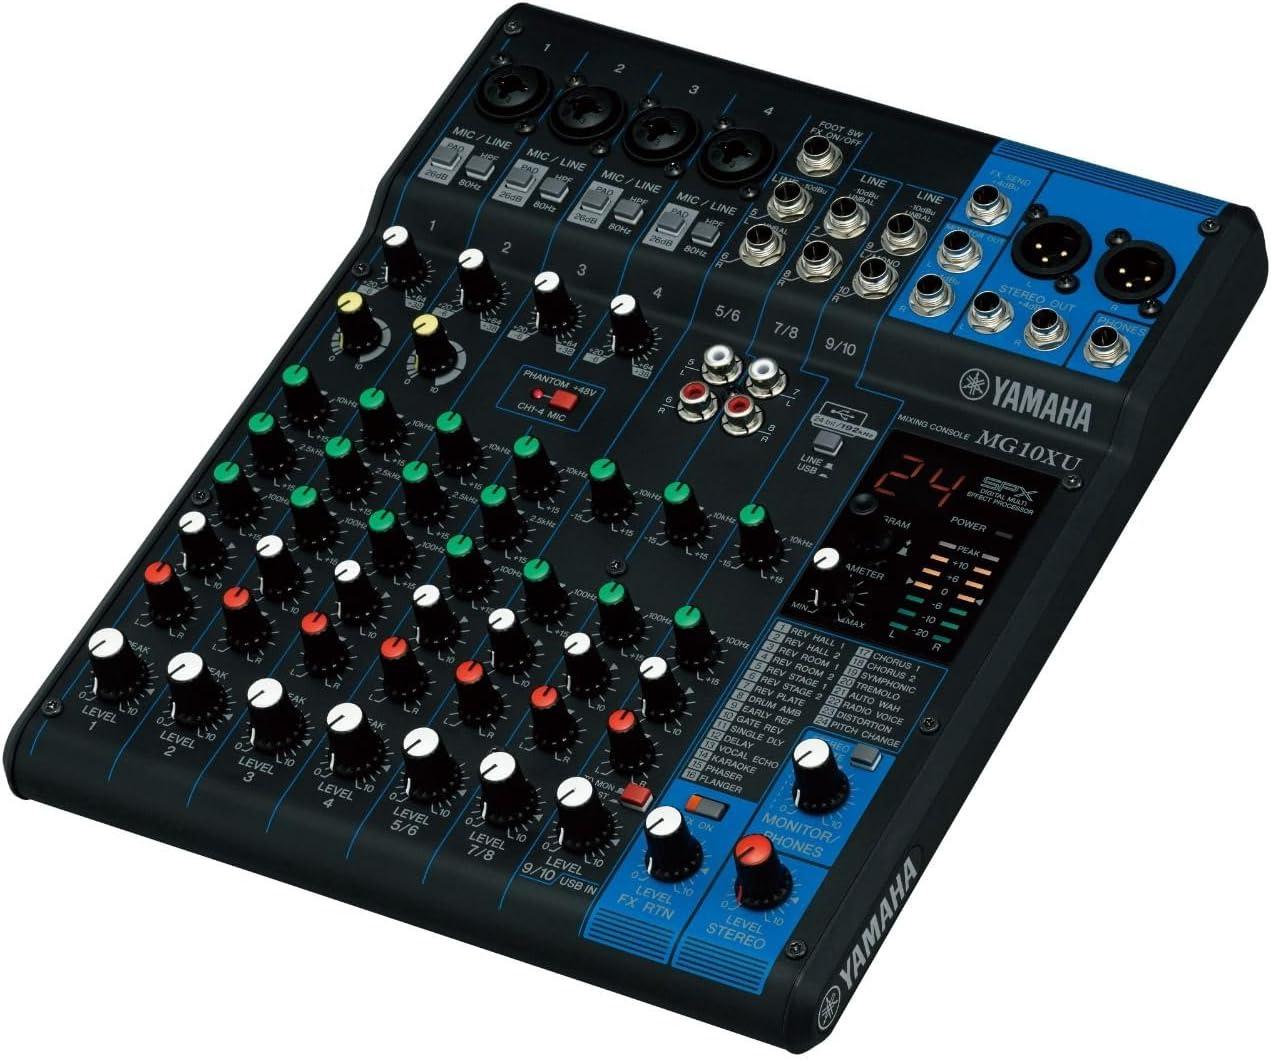
The Yamaha MG10XU is an excellent choice for podcasters who want more control without feeling overwhelmed. It offers ten channels, which means you can connect multiple microphones, instruments, or other audio sources simultaneously. This makes it ideal if you plan on having multiple guests or want to add more complexity to your show.
Advantages:
One of the standout features of the MG10XU is its built-in digital effects processor, which allows you to add reverb, delay, and other effects to your audio without needing external plugins. This can add a professional polish to your recordings, especially if you’re working in an environment that isn’t acoustically treated. The mixer also offers USB connectivity, meaning you can record directly into your computer, just like with an audio interface. The build quality is exceptional, with durable knobs and faders that feel solid in hand.
Disadvantages:
On the downside, the MG10XU is larger and more complex than an audio
interface, so it’s not as portable. It also requires external power, which means more cables to manage. Beginners may find the number of knobs and settings a bit overwhelming at first, but with patience, it becomes a powerful tool.
Additionally, while the digital effects are a nice touch, not everyone will find them necessary for podcasting.
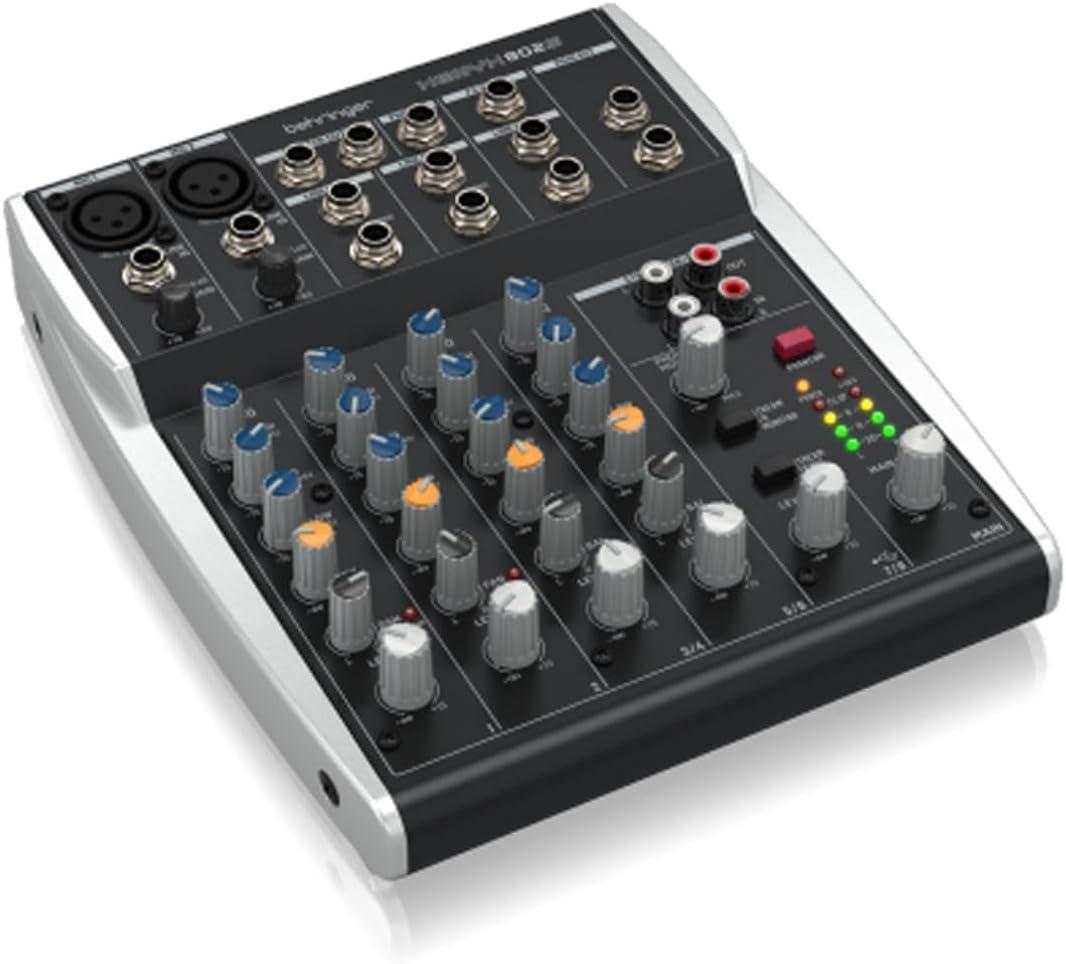
For those on a tighter budget but still wanting the flexibility of a mixer, the Behringer Xenyx Q802USB is a strong contender. This eight-input mixer offers USB
connectivity, making it easy to plug into your computer, while also giving you more control over your sound.
Advantages:
The Xenyx Q802USB includes built-in preamps that provide decent sound
quality for the price. It also features a basic EQ section, allowing you to tweak your sound on the fly. The mixer is compact, making it a good option if you’re limited on space but still want to go beyond the capabilities of a simple audio interface. The USB functionality is straightforward, and it can double as a basic audio interface if needed.
Disadvantages:
The Xenyx Q802USB does come with some trade-offs. The build quality isn’t
as robust as more expensive mixers, so it might not withstand heavy, frequent use as well. The sound quality, while decent for beginners, may not satisfy more advanced users or those seeking higher-end production values. The
interface can also be a bit noisy at higher gain levels, which could be a
concern in quieter recording environments.
By now, you can see that both audio interfaces and mixers have their own unique advantages and potential drawbacks. If simplicity and ease of use are your top priorities, an audio interface like the Focusrite Scarlett 2i2 or PreSonus AudioBox
USB 96 will serve you well. But if you’re ready to dive deeper into sound control and production, mixers like the Yamaha MG10XU or Behringer Xenyx Q802USB
provide more flexibility and creative possibilities. The key is to start with what feels right for you and your podcast's needs, knowing that you can always upgrade as you grow. Your audience will thank you for investing in quality sound, but more importantly, they’ll keep coming back for your compelling content!
Recording and Editing Software
Creating a podcast that captivates your audience goes beyond just hitting the record button—it’s about refining your sound and making your voice shine. The right recording and editing software can help you do just that. For beginners and intermediates, finding a tool that’s easy to use yet powerful enough to deliver professional results is key. Let’s explore some of the top-rated software options that will help you elevate your podcasting game.
Audacity has been a staple in the podcasting community for years, and for good reason it’s free, user-friendly, and surprisingly powerful. This open-source software works on both macOS and Windows, and it offers a range of editing tools to help you clean up your recordings. With Audacity, you can trim, splice, and add effects to your audio with ease. It also supports various plugins, making it flexible for different needs.
Advantages:
The best part about Audacity is that it’s free and easy to learn. Its interface is straightforward, which is great for beginners who want to jump in without a steep learning curve. It offers a range of effects, such as noise reduction, EQ, and compression, helping you achieve better sound quality without needing to invest in expensive software.
Disadvantages:
While Audacity is perfect for basic editing, it lacks advanced features that professionals might need, such as multitrack recording or sophisticated
automation tools. It also doesn’t offer the sleek, modern interface found in paid software, which can feel outdated to some users. Additionally, it’s not as intuitive when dealing with large projects, so managing episodes with multiple tracks may require more manual effort.
Overall, if you’re just starting out and need something reliable without a cost barrier,
Audacity is a fantastic option.
GarageBand: The Mac User’s Delight
If you’re a Mac user, GarageBand might just be your best friend. Pre-installed on most Apple devices, GarageBand is known for its intuitive interface and integration with the macOS ecosystem. It’s an excellent choice for podcasters who want to record and edit their episodes with minimal hassle.
Advantages:
GarageBand offers a simple drag-and-drop interface that makes it easy to edit and arrange your podcast episodes. You can quickly add music, sound effects, and voiceovers without needing a lot of technical know-how. Plus, it
integrates seamlessly with other Apple products, which is a huge plus if you’re
already invested in the ecosystem. Its built-in library of loops and sound effects can add a professional touch to your podcast without additional costs.
Disadvantages:
While GarageBand is user-friendly, it’s limited in terms of advanced editing features. As your podcasting needs grow, you might find its features too basic, especially if you need more control over sound editing or want to work with multiple audio tracks. It’s also only available for macOS, so Windows users will need to look elsewhere.
If you’re a Mac user looking for a free, beginner-friendly option, GarageBand is an excellent starting point.
For podcasters ready to invest in a more professional-grade tool, Adobe Audition is a top contender. Known for its powerful multitrack editing and advanced audio restoration capabilities, Audition is a favorite among podcasters who need full control over their sound. This software is perfect for those who want to fine-tune every detail of their audio and create episodes with impeccable quality.
Advantages:
Adobe Audition offers a wealth of advanced features, including multitrack
editing, noise reduction, and dynamic processing. Its integration with other Adobe products, such as Premiere Pro, makes it a great choice for creators who need to work across different media formats. The software also excels in restoring damaged audio, allowing you to clean up background noise, remove hums, and produce crystal-clear sound.
Disadvantages:
The downside to Adobe Audition is its complexity and price. While its
features are powerful, they come with a steep learning curve, which can be daunting for beginners. Additionally, it operates on a subscription model, which can add up over time. If you’re not ready to commit to a monthly fee or spend time learning its many tools, Adobe Audition might be overkill for your current needs.
For podcasters seeking ultimate control and professional-quality sound, Adobe Audition is hard to beat but be prepared to invest both time and money.
Descript: The Future of Editing
Descript is one of the most innovative tools in the podcasting world, combining traditional audio editing with AI-driven features like transcription and text-based editing. Descript allows you to edit your podcast as if you were editing a document, cutting out the hassle of traditional waveform editing.
Advantages:
Descript’s standout feature is its automatic transcription, which turns your audio into text and lets you make edits by simply deleting words from the
transcript. It also offers tools like filler word removal (e.g., ―um‖ and ―uh‖), making your editing process much faster. Descript also includes screen
recording and video editing features, making it a versatile tool for content creators working across multiple formats.
Disadvantages:
While Descript’s innovative approach to editing is appealing, it may not offer the same level of control as more traditional DAWs (Digital Audio
Workstations). Audio quality can sometimes be affected during the editing
process, and for podcasters who are very particular about their sound, Descript might feel limiting. Additionally, its transcription feature is impressive but not always 100% accurate, meaning you’ll still need to do some manual editing.
Descript is ideal for podcasters who want to streamline their workflow and incorporate AI-driven features to save time.
Recommended Equipment List
Diving into podcasting? Let’s gear you up with the essentials to make your journey smooth and successful. First off, you’ll need a solid microphone. The Audio-
Technica AT2020 is a top pick among podcasters for its crisp sound and affordability, striking a perfect balance between quality and cost. It’s easy to set up and delivers professional-grade audio without the hefty price tag. Pair it with the
Focusrite Scarlett 2i2, a versatile audio interface that’s praised for its stellar preamps and simple plug-and-play operation. This combo ensures your voice is captured with clarity and richness.
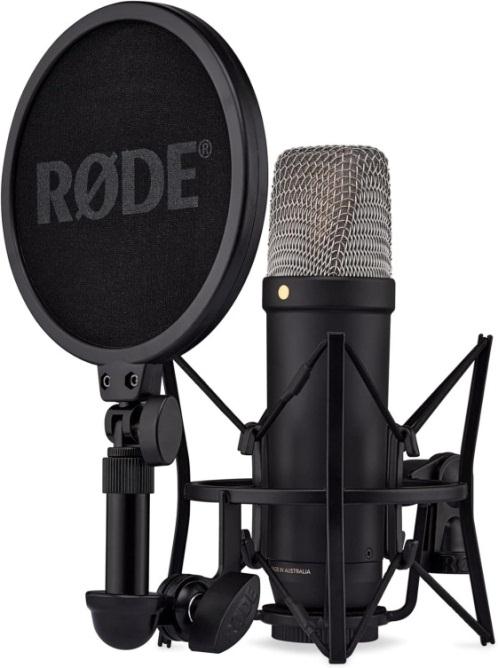
For those who want to eliminate background noise, the Rode NT1-A is a stellar choice, renowned for its ultra-low self-noise and detailed recording. It’s a bit of an investment, but the results are well worth it for a polished, studio-quality sound. Don’t forget a sturdy boom arm like the InnoGear Boom Arm Microphone Mic Stand,
which gives you flexibility in positioning your
microphone and keeps your setup tidy.
On the software side, Audacity is an excellent free tool for editing your episodes, offering a
user-friendly interface that’s perfect for beginners.
If you’re looking for something more advanced,
Adobe Audition provides a suite of professional features to refine your audio and add finishing
touches. Both options will help you craft your
podcast into a polished, engaging product.
With these high-rated tools in your arsenal, you’ll be well on your way to producing a podcast that stands out. Remember, great content starts with great equipment invest wisely and let your voice shine!
Setting Up Your Podcast Studio
Welcome to one of the most exciting parts of your podcasting journey setting up your podcast studio! This space will be the heart of your creative process, where ideas come to life and your voice connects with listeners around the world. Whether you're a newbie eager to dive in or an intermediate podcaster looking to elevate your game, this comprehensive guide will walk you through everything you need to know to set up a top-notch podcast studio. Let’s get started!
1. Introduction to Setting Up Your Podcast Studio
Setting up a podcast studio is more than just buying equipment; it’s about creating an environment that inspires creativity and professionalism. A well-designed studio not only enhances your audio quality but also makes the recording process smoother and more enjoyable. This chapter will guide you through choosing the perfect space, selecting the best equipment, and optimizing your setup to make your podcasting experience as seamless as possible.
2. Selecting Your Space
Finding the Right Location
The first step in setting up your podcast studio is selecting the right space. Ideally, you want a quiet, relatively isolated area where external noises are minimized.
Whether you’re using a spare room, a corner of your home office, or even a dedicated studio space, consider the following:
Size and Shape: A larger room might be more comfortable, but smaller spaces can often be easier to soundproof. Irregularly shaped rooms can help reduce sound reflections, but be prepared to use acoustic treatments to manage sound quality.
Noise Control: Choose a location away from busy streets, noisy appliances, or any other sources of disruptive sound. If your options are limited, focus on improving the acoustics with treatments.
Soundproofing and Acoustic Treatment
Creating a quiet, controlled environment is crucial for high-quality recordings. Here are some tips for soundproofing and acoustic treatment:
Acoustic Panels and Foam: These help absorb sound and reduce echo. Brands like
Auralex Acoustics Studiofoam Panels are highly rated for their effectiveness.
They come in various shapes and sizes, allowing you to customize your setup.
Heavy Curtains and Rugs: These can help dampen sound reflections, especially if you're on a budget. Look for RHF Blackout Curtains and thick, plush rugs to enhance your space.
DIY Solutions: If professional treatments are out of your budget, consider DIY
options like hanging blankets or creating makeshift panels using dense materials.
3. Essential Equipment for Your Studio
Microphones
Your microphone is arguably the most important piece of equipment for podcasting.
Here are some top-rated options to consider:
Audio-Technica AT2020: This condenser microphone is a favorite among podcasters for its affordability and clear, detailed sound. It’s known for its versatility and ease of use. With a price point that’s accessible for beginners and quality that satisfies even intermediate users, it’s a great choice to start with.
Rode NT1-A: If you're looking for a higher-end option, the Rode NT1-A offers ultra-low self-noise and a rich, professional sound. It’s ideal for those who want to capture every nuance of their voice. Though it’s a bit pricier, the investment pays off with exceptional audio clarity.
Audio Interfaces
An audio interface connects your microphone to your computer and translates analog signals into digital. Here are two top picks:
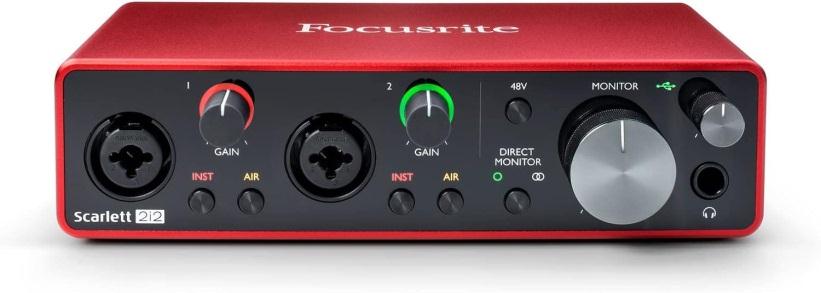
Focusrite Scarlett 2i2: This interface is praised for its ease of use and excellent preamps. It’s a reliable choice for beginners and seasoned podcasters alike. The 2i2
offers a simple setup and high-quality audio, making it a staple in many podcasting setups.
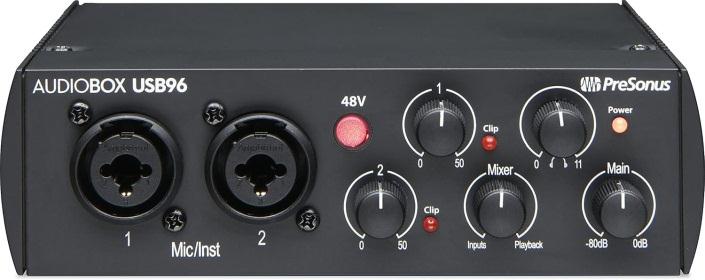
PreSonus AudioBox USB 96: Another great option, the AudioBox USB 96, offers robust performance at a competitive price. It provides reliable sound quality and comes with useful software for recording and mixing.
Headphones
Good headphones are essential for monitoring your recordings and editing your episodes. Consider these options:
Audio-Technica ATH-M50x: These headphones are renowned for their accurate sound reproduction and comfortable fit. They’re a popular choice among podcasters and audio professionals for their reliability and excellent sound
isolation.
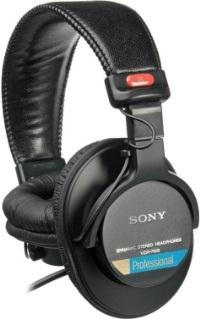
Sony MDR-7506: Another industry favorite, the MDR-7506 offers precise audio monitoring with a clear and detailed sound profile.
They are durable and comfortable, making them a great choice for
long recording sessions.
Boom Arms and Stands
Positioning your microphone correctly is crucial for capturing the best sound. Here’s what you need:
InnoGear Boom Arm Microphone Mic Stand: This boom arm is favored for its sturdy build and adjustable design. It allows you to position your microphone exactly where you need it, keeping your workspace organized and free from clutter.
Rode PSA1: Known for its durability and smooth operation, the PSA1 is a highly-rated boom arm that provides flexibility in positioning your microphone. It’s easy to mount and adjust, making it a top choice for many podcasters.
Pop Filters and Shock Mounts
These accessories help enhance audio quality by reducing unwanted noises:
Aokeo Professional Microphone Pop Filter: This pop filter effectively reduces plosive sounds and sibilance, ensuring your recordings are clean and clear. It’s an affordable addition that makes a noticeable difference.
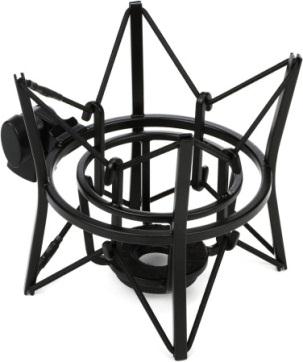
Rode PSM1 Shock Mount: Designed for the Rode NT1-A,
this shock mount minimizes vibrations and handling noise,
ensuring that only your voice is captured. It’s essential for
maintaining high audio quality.
4. Software for Recording and Editing
Audacity is a popular, free audio editing software that’s perfect for beginners. It offers a range of features to help you record, edit, and enhance your podcast episodes. Its user-friendly interface and extensive online resources make it an excellent choice for those just starting out.
For more advanced editing and production, Adobe Audition provides a
comprehensive suite of tools. It’s known for its professional-grade features, including multi-track editing, noise reduction, and various effects. While it comes with a subscription fee, its capabilities make it worth the investment for serious podcasters.
GarageBand
Mac users will appreciate GarageBand for its ease of use and built-in features. It offers a straightforward interface with a range of recording and editing tools, making it a great choice for beginners who are using Apple products.
Online Platforms
For those who prefer cloud-based solutions, platforms like Anchor and Podbean offer integrated recording and editing features. They simplify the process by combining recording, editing, and publishing in one place. These tools are particularly useful if you’re looking for a streamlined workflow.
5. Additional Gear and Accessories
Acoustic Panels and Foam
Investing in acoustic panels can drastically improve your studio’s sound quality.
Auralex Acoustics Studiofoam Panels are highly recommended for their effectiveness in controlling sound reflections and minimizing echo. Installing these panels on your walls can create a more professional-sounding environment.
Lighting
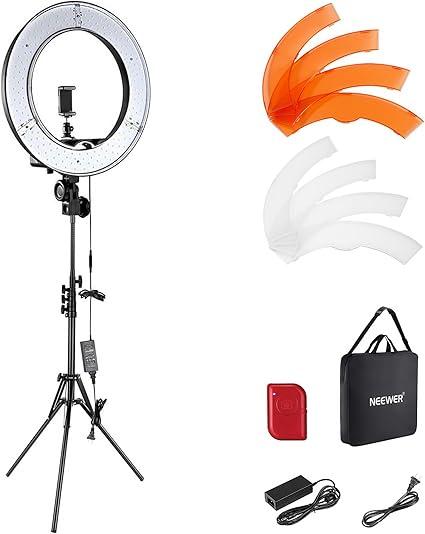
If you’re recording video podcasts, proper
lighting is crucial. Neewer Ring Light
Kit provides even, flattering light that helps you look your best on camera.
Adjustable brightness and color
temperature settings ensure you can
achieve the perfect lighting for your video
content.
Furniture and Ergonomics
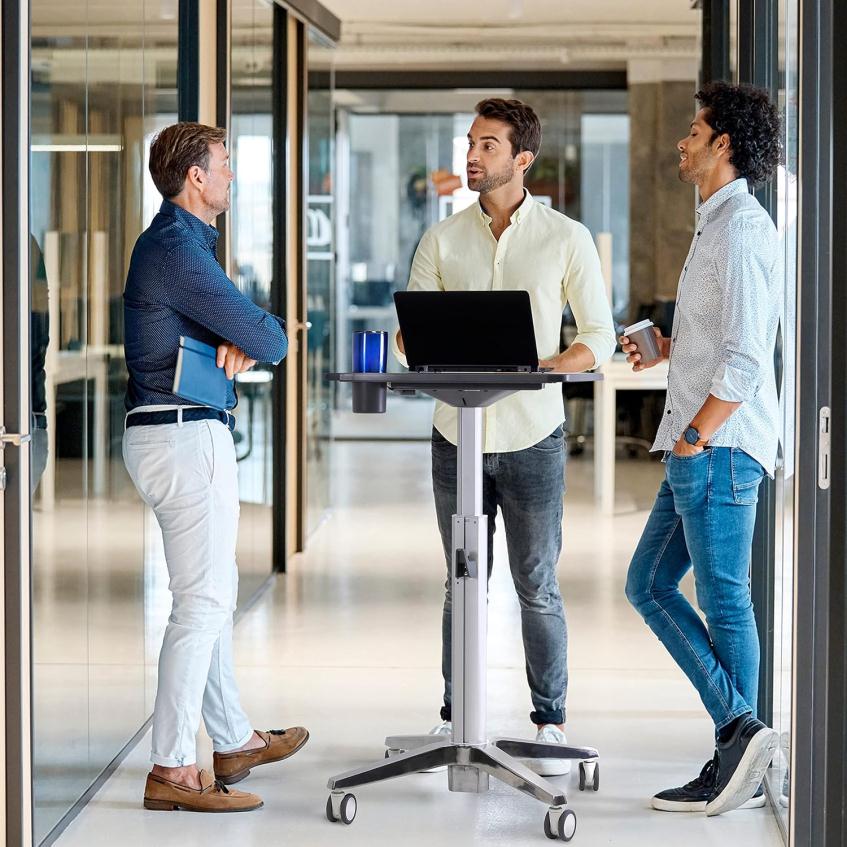
Comfort is key when you’re spending long hours recording and editing. Invest in a good-quality chair that supports your posture, and arrange your desk to keep everything within easy reach. Ergotron Adjustable Standing Desk is a great choice for maintaining good ergonomics and allowing you to switch between sitting and standing.
6. Setting Up Your Studio
Step-by-Step Guide
1. Choose and Prepare Your Space: Select a quiet, controlled area and implement basic soundproofing measures. Set up your acoustic panels and arrange any other sound-dampening materials.
2. Set Up Your Equipment: Position your microphone on the boom arm or stand, connect it to the audio interface, and plug the interface into your computer. Ensure all connections are secure and test the setup to check for any issues.
3. Configure Your Software: Install and configure your chosen recording and editing software. Set up your recording preferences and familiarize yourself with the tools you'll be using.
4. Test and Adjust: Conduct a few test recordings to ensure everything is working correctly. Adjust microphone placement, software settings, and acoustics as needed to achieve the best sound quality.
Tips for Creating an Efficient Workflow
Organize Your Space: Keep cables and equipment neatly arranged to avoid clutter.
Use cable management solutions to keep your workspace tidy.
Create a Recording Schedule: Establish a routine for recording and editing to stay consistent with your content production.
Backup Your Work: Regularly back up your recordings and edits to avoid losing valuable content. Use cloud storage or external hard drives for added security.
7. Maintaining Your Studio
Regular Maintenance
Keep your studio in top condition with regular maintenance. Clean your equipment, check for any wear and tear, and ensure that all components are functioning properly.
Regularly update your software to benefit from new features and improvements.
Troubleshooting Common Issues
If you encounter issues such as unwanted noise, audio dropouts, or software glitches, consult online forums, product manuals, or customer support for assistance. Common problems can often be resolved with minor adjustments or troubleshooting steps.
8. Budgeting for Your Studio
Balancing Quality with Cost
You don’t need to break the bank to set up a great podcast studio. Prioritize your spending based on what will make the most impact on your audio quality. Invest in a good microphone and audio interface, and consider budget-friendly options for other equipment. As your podcast grows, you can gradually upgrade and expand your setup.
Recommendations for Different Budget Ranges
Budget-Friendly: Start with the Audio-Technica AT2020 microphone and
Focusrite Scarlett 2i2 audio interface. Pair them with budget headphones and a basic boom arm.
Mid-Range: Upgrade to the Rode NT1-A microphone and consider higher-end headphones like the Audio-Technica ATH-M50x. Invest in acoustic panels and a quality boom arm.
Premium: For the best setup, go for the Rode NT1-A, a high-end audio interface like the Universal Audio Apollo Twin, and professional-grade headphones.
Incorporate extensive acoustic treatment and high-quality accessories.