
Before continuing, I assume you know/have a few things. They are:
Ï You have cPanel access
Ï Do not have shell access (having an access will make it far easier to migrate)
Ï Know how to transfer file to/from your pc using FTP.
Ï Understand English (yeah! I was trying to be funny here)
Ï and oh! Patience. Make sure you got that.
My Migration story
I had to migrate my Wordpress blog to another host recently and was trying to find a way to do it. I found a few pages on this topic but some of it requires shell access. Others seemed to be using words from Planet Zurich or too simplified I did not know what to do.
For Newbies
This guide is for newbies like me who have limited/zero knowledge on MySQL database and Wordpress.
I also keep this in pdf form just in case I need to migrate my Wordpress blog to another host sometime in the future (arghh!!)
1. Go to the old hosting account's cPanel to get all your database. This 'database thing' stores all your posts, comments, categories and other settings. So you definitely want them. To do it, click on the MySQL icon and browse to the bottom. Click the phpMyAdmin link.
2. You will get to the phpMyAdmin interface. I know you would probably want to go back when you get to it's interface. Don't worry. I'll try to make it easy.
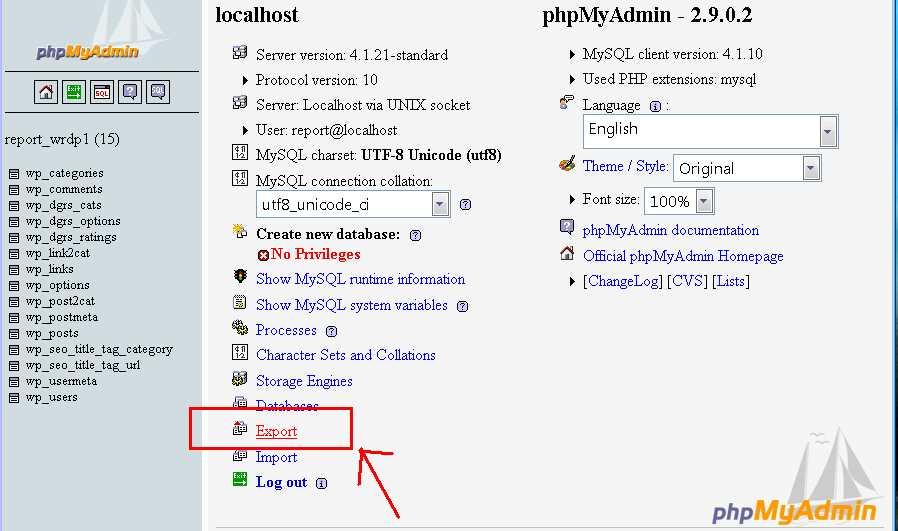
3. What's important for us right now is the Export link. We want to use this feature to get the database down to our pc. Click on that link.
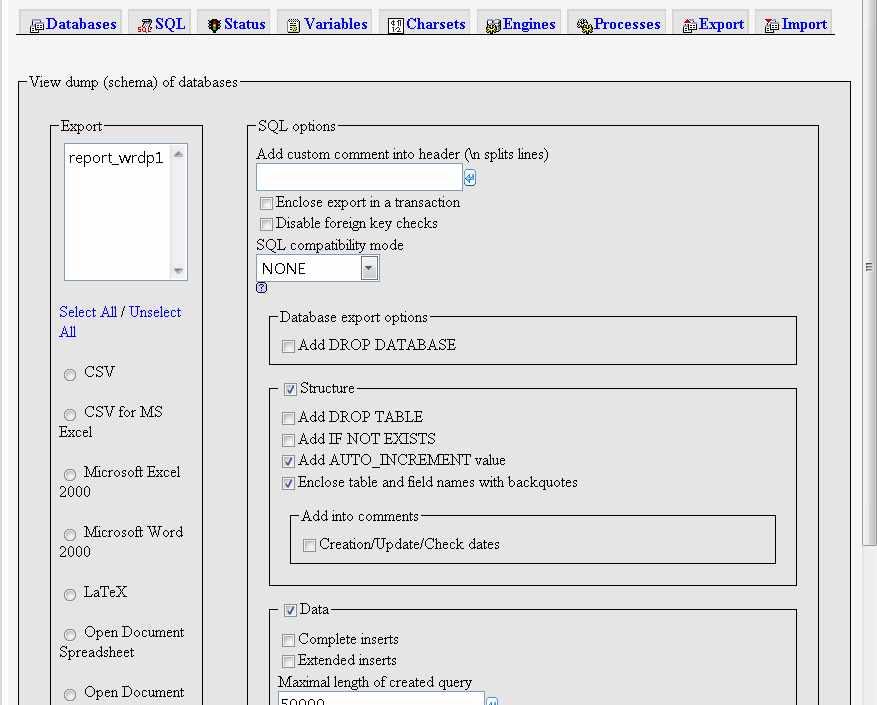
4. Now you'll get to an even more confusing interface. Don't worry. You just need to do a few things here.
5. Firstly, you have to make sure there are a few things that are ticked. ( They are ticked by default) So, you just need to do a quick check. If they are not ticked, do it now:
Ï On your left, under the export setting, tick SQL
Ï On the right, tick STRUCTURE, Add AUTO_INCREMENT value, Enclose table and field names with backquotes
Ï Also, tick DATA, Use hexadecimal for binary fields
6. Because my pc screen is too small you can't see the bottom of the page. It's important, so I'm gonna attach it here.
7. Tick the Save As File option. Put any name you like in that box.
Use your favorite FTP pro gramme like FileZilla and grab all those files into your pc. I would just grab the whole public_html folder.
 5. A note:Even if the database name you enter just now is just “wrdp”, the real name of the database will normally be like above. Mine is report_wrdp. Yours will depend on your domain name. Nothing to worry about.
 6. Right now we have report_wrdp database but it is still of no use. To use it we need to add “user”.

7. Below the Create Database option, you'll see the above options to create a new user. Enter your username and password. It can be anything you like but keep the username short.
8. I put my username: wrdp1 and password: w3ar3champN. After you clicked Create User, a new user will be created with the password you specify.3. Open your database file that you just downloaded. Find a similar line like the one below. It should be somewhere near the top (if it looks gibberish, open it using other programs – like Wordpad or something). Mine would have `report_wrdp1` in it but yours will be different.
Ï CREATE DATABASE `report_wrdp1` DEFAULT CHARACTER SET latin1 COLLATE latin1_swedish_ci;
USE `report_wrdp1`;
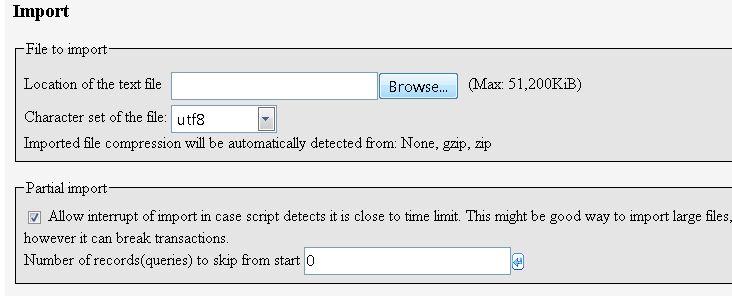 4. Browse for the database file we just edited and click Go.
Okay Time To Get All Our OLD Wordpress files (like themes, pictures etc into
1. Get your FTP program to transfer all your saved wordpress files (remember the FTP part earlier?) to the new host. After you have done that click the wp-config.php . We need to alter a small but important piece of code.
2. Change the database name to the one we just created. Mine was report_wrdp1. And also change do the same to the username and password. Put the one we just created. Mine would be report_wrdp1 and password w3ar3champN.
If you have done that, your wordpress should be live right now.
Go to your Domain registrar and change your DNS to the new one. Okay, if all goes well your wordpress is already successfully setup on your new host.
- The end

Reads:
100
Pages:
90
Published:
Sep 2023
I hope you enjoy this FREE ebook. Thanks for downloading it.
Formats: PDF, Epub, Kindle, TXT

Reads:
82
Pages:
74
Published:
Sep 2023
Databases are crucial for managing and utilising data effectively in various industries and applications. The aim of this book is to enable the reader to revi...
Formats: PDF, Epub, Kindle, TXT

Reads:
26
Pages:
293
Published:
Jul 2023
How-to's are step-by-step tutorials that are designed to help you learn more about Maya.
Formats: PDF, Epub, Kindle, TXT

Reads:
100
Pages:
176
Published:
Apr 2023
"No Filter, No Problem" by Famium is your ultimate guide to creating a visually stunning, engaging Instagram presence. Packed with insider secrets and practic...
Formats: PDF, Epub, Kindle, TXT