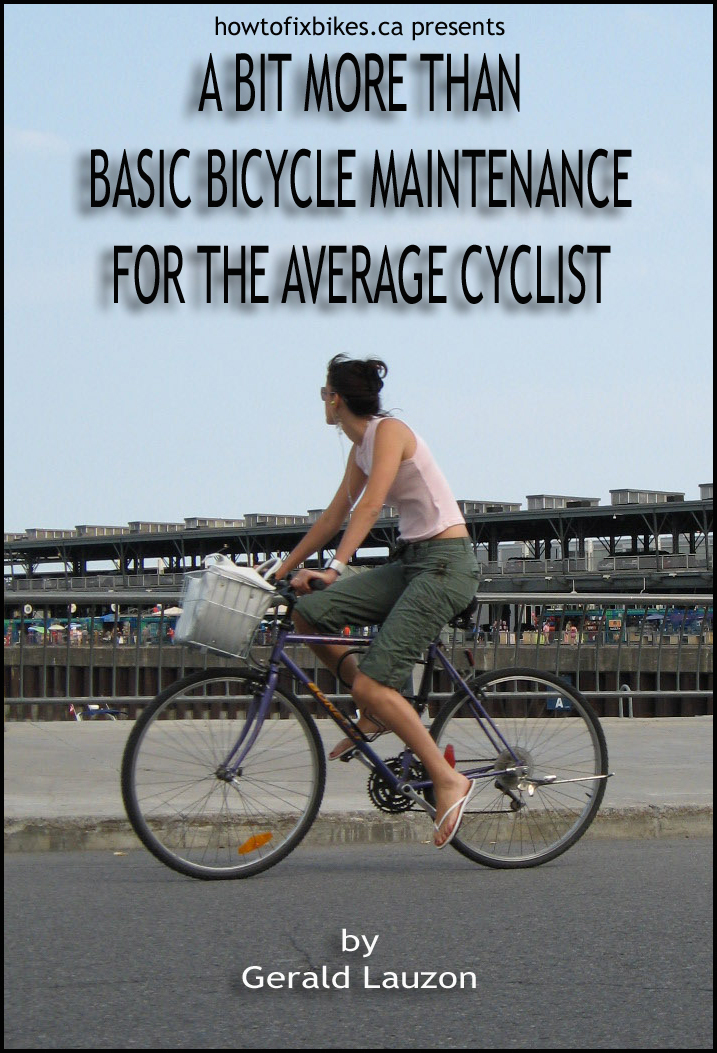
1
In memory of
Sheldon Brown
May you ride free in Heaven
2
TABLE OF CONTENTS
ACKNOWLEDGMENT
5
DISCLAIMER
AND
LEGAL
STUFF 6
INTRODUCTION
7
BASIC TOOLS
8
BICYCLE TERMS
9
Chapter One:
10
WHEELS AND TIRES
Wheel
Removal
10
Front
wheel 10
Rear
wheel 10
Flat tire
12
Wheel
Alignment
14
Chapter Two:
16
BRAKES
Coaster
brakes
16
Brake
handles
17
Brake
cables
and
cable
housing
18
Side
pull
caliper
brakes 18
V-type
brakes
19
Pad
and
cable
replacement
20
3
TABLE OF CONTENTS (suite)
Chapter Three:
DERAILLEUR, CHAIN MAINTENANCE AND PEDALS
22
Cable
replacement
24
Jammed
derailleur
24
Crooked
derailleur
24
Rear
derailleur
25
Front
derailleur
25
Chains
27
Chain
replacement
28
Pedals
30
Chapter Four:
31
SEATS, HANDLEBARS AND BASIC BIKE FIT
Seats
31
Seat height
32
Handlebar
34
Brake
levers
and
shifters
34
Grips
35
Chapter Five:
36
ACCESSORIES
Reflectors
and
lights
36
Bar
end
grips
36
Fenders
37
Racks
37
Kickstands
38
FINAL WORD
38
BONUS FEATURE
39
4
ACKNOWLEDGEMENTS
There are many things that made the existence of this book possible. My passion for bikes is of course at the source of it but if it wasn’t for the support of my wife and kids, I would have never took the time to sit down to write.
Of course the source of all this knowledge sharing is my blog that was inspired by Sheldon Brown. How better to leave your mark on the world than by sharing what you know freely with the world. Information is power and the power is yours to give.
My cousin Sebastien was the one who introduced me to blogging and made me ask this now famous question inside this family unit: “What is a blog?”
Finally, to all the readers out there who read me, share with me and participate in the making of the blog, your contribution also made this book possible.
So again, a thousand thanks to all of you.
5
DISCLAIMER AND LEGAL STUFF
This book is intended to provide information and it does not claim in any way to be the last word about bicycle maintenance or repair. If, during any stage of doing maintenance on your bicycle, you are unsure about anything or feel that you may put yourself or others in jeopardy by doing work on your bicycle, be smart and consult a professional bicycle mechanic at your local bike shop. I will not be held liable by any mistake done by you, the reader.
I am a certified bicycle mechanic and I have learned much of my craft by actually repairing thousands of bicycles. I have made mistakes before and I will make mistakes in the future. Keep this in mind, always double check your work and remember that you are ultimately responsible for your own safety.
Last words of caution, bikes are addictive and there is no known cure. Just ask my beloved wife. ☺
I am the sole owner of this book and all its content. This book may be copied for individual purposes only and cannot be resold. Although this book can be downloaded for free, you are invited to make a donation of the
amount of your choice at http://howtofixbikes.ca if you feel that it brought
you something of value. If you wish to use any part of the book’s content, just ask me and I will gladly hear you out. You can contact me at
6

INTRODUCTION
This book is written for you, the average bicycle owner, who suddenly wants to do more than just ride around unconsciously on your store bought bike and wants to empower him or herself with some knowledge on how to keep the thing running without spending an arm and a leg, or at least for less than you actually spent on the bike.
Store bought bicycles are for the most part, steel-framed bikes that were built with low-end components. They are meant to be sold en masse and are oftentimes considered as disposable. With a few basic tools and knowledge, these bikes can last a lifetime. This will give you a better return on your investment and might even propel you further into bicycle ownership. Who knows, you could start upgrading the components or even go as far as rebuilding the entire bike!
When attempted for the first time, bicycle repair is not easy, but it’s not complicated either. Give yourself some time to learn and you will be comfortable with it soon enough. You already had the courage to pick up this book and look into it, so you have gone over the very first hurdle.
Before you start on a particular process, take the time to go over the entire book first so that you can cross reference easily from one task to another.
The steps listed in this book are not limited to store-bought bikes, they apply to any bicycle. There are a lot of inexpensive bikes out there and often times they are tossed away when just a little maintenance could have prevented their untimely demise. So get your tools and prepare to get your hands dirty.
Gerry Lauzon
7
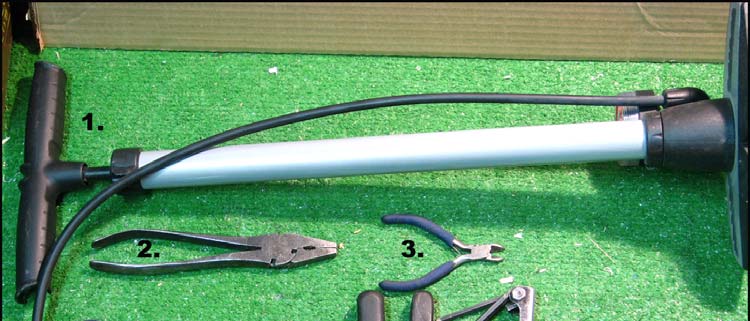
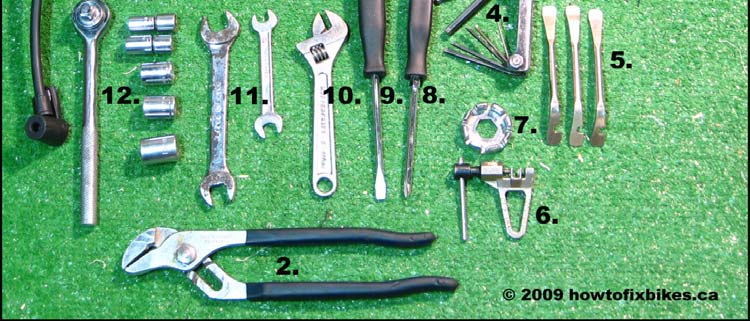
BASIC TOOLS
Before we even get started, we need some tools. Here’s a list of the basic stuff you’ll need to get you going.
1. Floor pump with pressure gauge
2. Pliers
3. Wire Cutters (Those are not great. If you have the money, spend the $30 for a bike specific one)
4. A set of hex keys
5. Tire spoons (Careful, metals ones have a tendency to pinch tubes.) 6. Chain breaker tool
7. Spoke wrench (This one is not the best but it has all possible sizes on it.) 8. Phillips head screwdriver
9. Flat head screwdriver
10. Open ended adjustable wrench
11. Open ended wrenches in 10mm and 15mm 12. Ratchet wrench and sockets in 9mm, 10mm, 13mm, 14mm, 15mm sizes With this basic set, you’ll be able to tackle almost any task on your ride. Of course there are mazes of other tools that you can get, but these are the basic ones to get you started.
8
BICYCLE TERMS
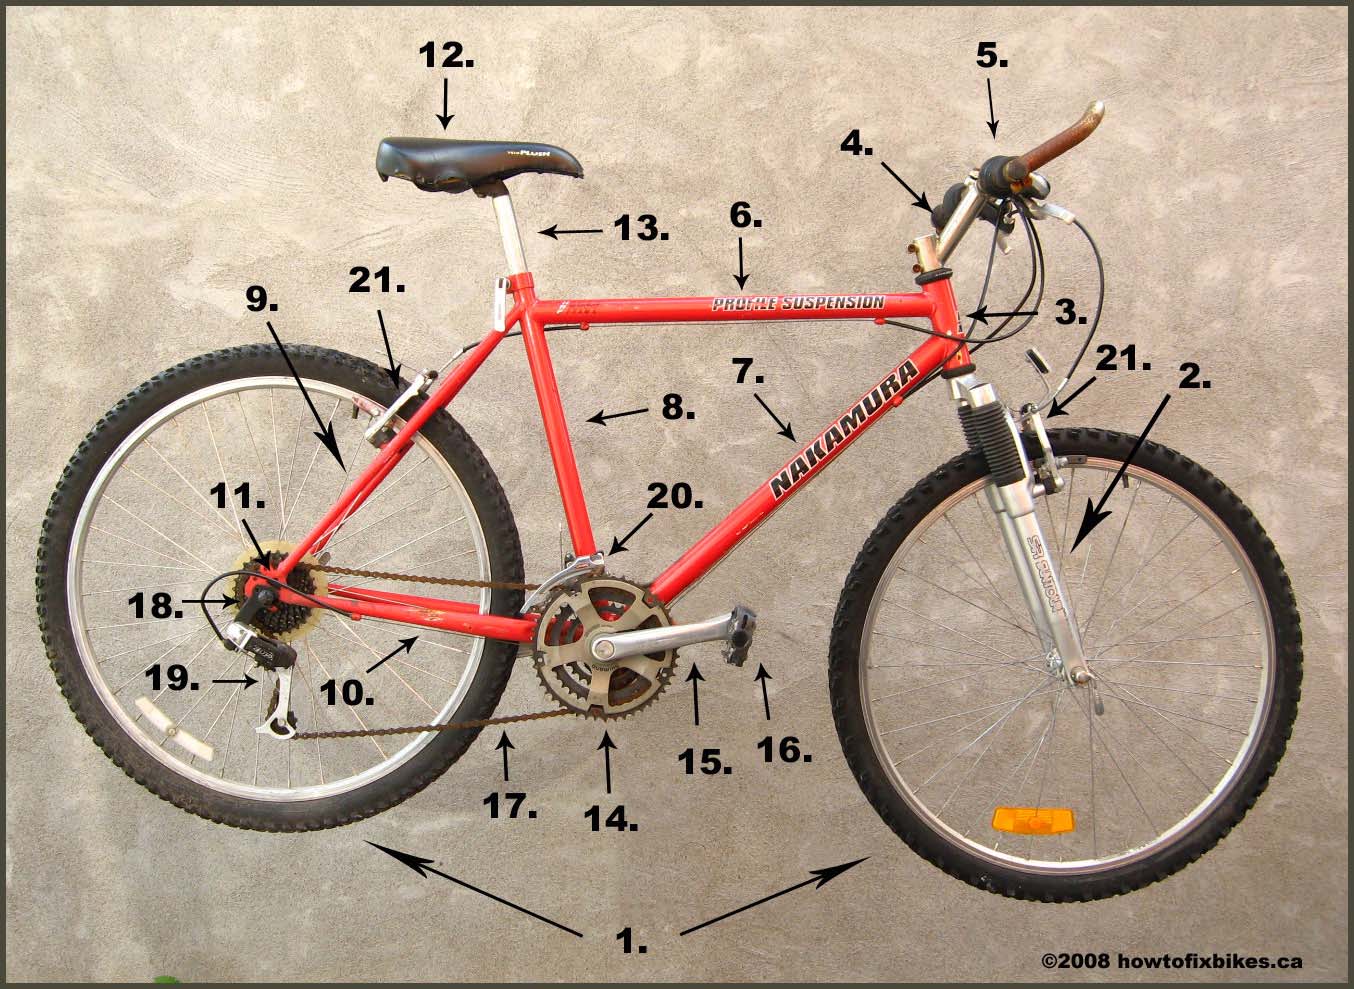
In order for you to understand the terms that will be used in this book, please refer to the images below that list the main components of a bicycle.
For any future reference in this book, the right side of a bicycle refers to the side with the chain and drive train and the left, the one without.
1- Wheels
12- Seat
2- Fork
13- Seat post
3- Head tube
14- Chain ring
4- Stem/Gooseneck
15- Cranks
5- Handle bar
16- Pedals
6- Top tube
17- Chain
7- Down tube
18- Gear cogs
8- Seat tube
19- Rear derailleur
9- Seat stays
20- Front derailleur
10- Chain stays
21- Brake Caliper
11- Drop outs
9
Chapter One
WHEELS AND TIRES
Wheels and tires are the things that allow you to maintain contact with you and the road. Anything goes wrong here and you’ll know right away. First things first, let’s start by figuring out how to remove the wheels.
Wheel removal
Front wheel
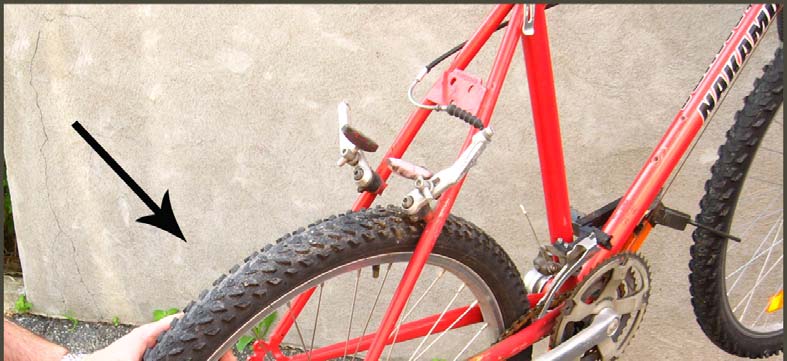
If the bike is equipped with front brakes, disconnect them first so that the tire will clear the pads once you remove the wheel.
Simply unscrew the two (2) nuts on each side, pull the washers and remove the wheel.
When reinstalling the wheel, make sure that the axle is properly seated in the slots on both sides of the fork.
Once you are done, you can confirm this by eyeballing the middle of the tire thread and the top of the fork to see if everything is lined up straight.
Reinstalling a front wheel is always best done with the bike on the ground, so that the weight of it sits on the axle in the fork, allowing for a straight fit every time.
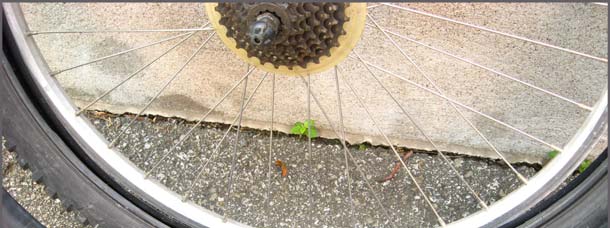
Rear wheel
With a derailleur-equipped bicycle, first you must shift the chain to the last gear, the one closest to the frame, that’s the smallest one. This will make the job of removing it easier by getting tension off the chain and will simplify the reinstallation of the wheel later.
Disconnect the brake so that the pads will clear the tire.
10
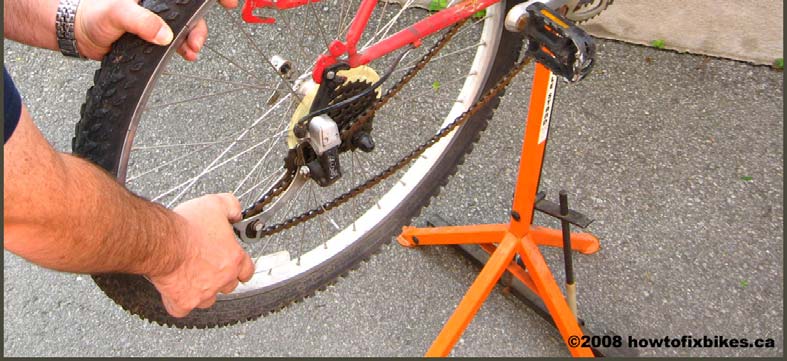
Unbolt the wheel, grab it with one hand, push on the derailleur cage toward the front of the bike with the other hand and it should come right off the frame.
To reinstall the wheel, sit the top of the chain on the smallest gear.
Push the derailleur cage forward to clear the gear cluster and pull it in place in the frame.
You will tighten the right nut first while the axle is sitting at the very end of its slot in the drop out.
Once that nut is secured, pull the wheel sideways at the front, near the bottom bracket, until it is centered.
You can now tighten the left nut, reinstall your brakes and you are done.
One gear rear wheels are removed in the same way, with the exception of the coaster brake arm on the left side that has to be disconnected first and, of course, reconnected once the wheel is put back on the frame.
11
Flat tire
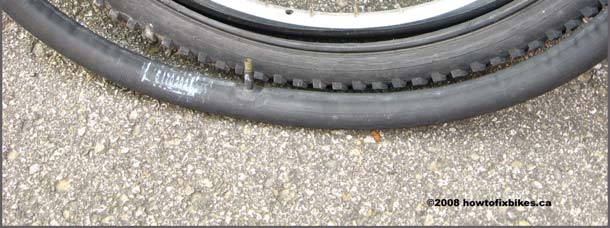
Flat tires are the most common occurrences in bike maintenance. It is a pretty straightforward thing to do, but some knowledge is necessary to avoid having to start over.
You’ll need to remove the wheel from the bike and then remove the tire from the rim.
Some tires are easily removed with your hands once all the air is let out.
However, some will require the use of tire spoons.
Simply put the scoop end of one spoon between the tire and the rim.
Pry that section of the tire off the rim.
Now use the end with the hook and have it grab a spoke.
The tire should now be popped out at that spot and this leaves your hands free to use another spoon to go in again between the tire and the rim a bit ahead of that one to start prying the rest of the tire off.
You might have to do this as well on the other side of the tire.
12
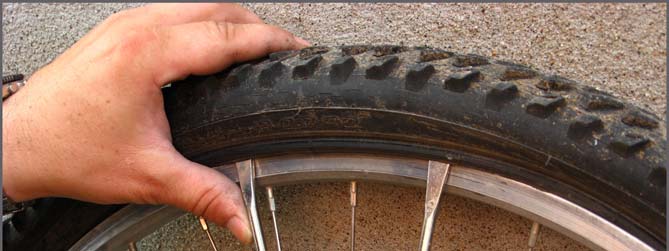
Now that the tire is off, place the wheel against a wall, remove the tube from the tire, place the tire in front of the wheel the same way it was inside it and now place the tube in front of the tire the same way it was in it. You can use the valve stem as a guide.
Now you’re probably wondering why we are doing all this, right? Well before we go replace or patch up the inner tube, we need to determine what caused the puncture and where. Sometimes you have a big ugly nail sticking out of your tire and it’s pretty darn obvious to figure out where the puncture occurred. Sometimes it’s not. There are many reasons for a puncture, we can figure this out by the type of hole you have in the inner tube:
Small hole on the outside diameter of the tube: Foreign object in the tire.
Small hole on the inside diameter of the tube: Protruding spoke.
Line slash on the side or top of the inner tube: Tube was pinched because of low tire pressure followed by a hard hit.
Star shaped puncture: Caused by too much air pressure. (You probably heard a loud BANG!)
In the last two examples, simply replace the tube and make sure you follow the indications on the sidewall of the tire to inflate at the proper air pressure.
In the other cases, that’s where our set up becomes obvious. For the protruding spoke diagnosis, you can now locate exactly which spoke is coming through and you can replace it. In the case of the outer puncture, and without the obvious presence of a 6-inch nail sticking out of your tire, you can now find what the cause of the blow out was and remove it. Take and old nylon sock and run it inside the tire, this will help you locate small nails, staples or pieces of glass that you would otherwise miss with your naked eye. Remove the object and replace the tube. You can also patch the tube with a patch kit (simply follow the instructions), but don’t forget to scrape the tube with the provided grater to give adherence to the patch.
To reinstall the tire on the wheel:
Insert the tube in the tire.
Start by inserting the valve stem in the wheel and go from there by gradually inserting the tire moving outward from the valve. You may need the help of the tire spoons at the very end.
13
Make sure you don’t pinch the tire between the spoon and the rim.
Now with the wheel flat on the ground put between 5 and 10 psi of pressure.
Stop and look on both sides of the wheel to make sure that the tire is seated evenly and everywhere on the rim.
Make corrections if need be and then you can set the wheel upright and go for full pressure as indicated on the sidewall of the tire.
The previous step will prevent any air bubbles from coming out, between the tire and rim, and exploding with the equivalent blast of a shotgun going off. Your ears would ring for half an hour, trust me on that one!
Tip: Inner tubes are porous
at a certain level, even
though they are made of
rubber. Don’t be surprised
to find your tires low on
pressure after long periods
of storage. It is also for this
reason that you should
check your tire pressure
once a month at the very
least. Properly inflated
tires will make your bike
more efficient and a lot
easier to pedal.
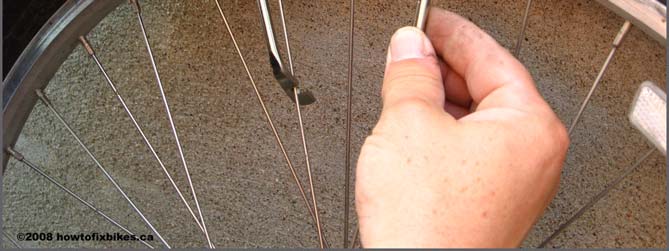
Wheel alignment
Wheel alignment and wheel building are subjects that could fill an entire book by themselves. We will stick here to the very basics. If you find that your wheel is going a bit from side to side and touching the brake pads on occasion while turning, you can align it with a spoke wrench, to a point. If your wheel resembles a taco, we are way beyond small adjustments. I strongly suggest you bring it to a bike shop where an expert can take care of it if it requires too much work. You would need a truing stand and some 14
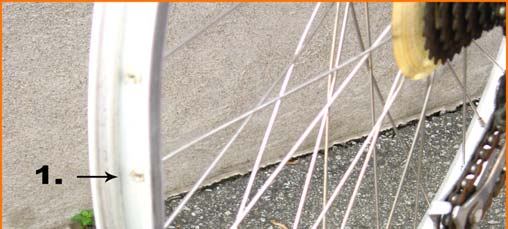
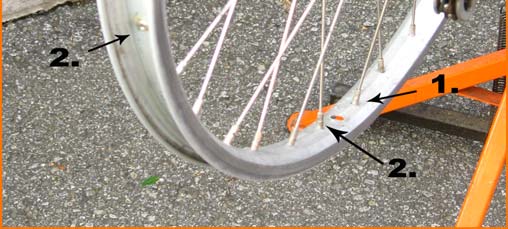
additional information not provided in this book. (Mind you that information is available online and elsewhere if you want to take the time to find it.) However, with a spoke wrench and with the brake pads as guides, it’s still possible to do some minor adjustments with the wheel on the bike. Before you start though, make sure the brake pads are centered (Refer to Chapter Two for brake adjustments).
Bicycle wheels are composed of a hub in the center and a rim at the outer edge that are held together by spokes on both sides of the wheel. The spokes are tensioned by brass nipples screwed into them at the rim and this is what gives the wheel its strength. When new, the spokes on a wheel are more or less tensioned equally. With time this changes and the tension has to be adjusted to keep the wheel aligned or, as we mechanically inclined bike people (that includes you as well now☺) call it, true.
When you tighten a spoke nipple,
this will pull the rim towards the
center and, when loosened, it will
push the rim outward. It basically
pulls and pushes the rim to the
right or left depending on which
spoke and on what side of the rim
it is. To make things easier, I will
list some situations with their
solutions. You will use the brake
pads as your guides. That means