The PC Technician's Tune Up Manual by Jarvis Edwards - HTML preview
Download the book in PDF, ePub, Kindle for a complete version.

NOTICE: You Do NOT Have the Right to
Reprint or Resell this manual.
COPYRIGHT© 2011 TekTime IT Consulting & Computer Repair - All Rights Reserved
Disclaimer:
While every attempt has been made to verify the information provided in this publication, neither the Author nor the Publisher assumes any responsibility for errors, omissions, or contrary interpretation of the subject matter herein.
This publication is not intended for use as a source of legal advice. The information contained herein may be subject to varying state and/or local laws or regulations.
The Purchaser or Reader of this publication assumes responsibility for the use of these materials and information.
Adherence to all applicable laws and regulations, federal, state, and local, governing professional licensing, business practices, advertising, and all other aspects of doing business in the United States or any other jurisdiction is the sole responsibility of the Purchaser or Reader.
The Author and Publisher assume no responsibility or liability whatsoever on the behalf of any Purchaser or Reader of these materials. Any perceived slights of specific people or organizations are unintentional.
PREFACE
First, I would like to thank you purchasing your copy of The PC Technician’s Virus Removal Manual!
In case you are wondering why I wrote this Tune-Up Manual, I will explain why now.
All computers seem to be very fast, responsive and (usually) reliable when first purchased. Clicking the mouse usually opens up the intended program, or windows, instantly. The computer can remain powered on for long periods of time, without any problems such as crashes, freezes, blue screens, stutters, strange pop-ups and more. After using a computer for several months to several years, it can slow down dramatically and become a literal pain in the butt to use!
Also, malware infections such as viruses, spyware, Trojans and rootkits, usually cause harm to a computer that remains even after the malware has been removed. More often than not, a computer infected by malware may have unpredictable errors, the loss of certain services within Windows (such as Security Center being disabled permanently), programs that fail to install correctly, intermittent lock-ups and freezes caused by a damaged registry, and much more. The fact is, tuning up a computer is no longer a luxury for those that have had a virus infection, or an old computer; it is a NECESSITY.
How many people throw their computers in the trash or give them away once the performance and reliability starts to decrease? How about very few? Many people in the time of dire computer need, will rush to their nearest local shop, technician or consultant, IF they are lucky. The majority of people however, are forced to visit the nearest “big-box,” name-brand, expensive (for example: Geek Squad & Staples) retail stores, to pay a hefty premium. If you could survey the majority of these people who know nothing other than these stores, most will tell you that their problems weren’t fixed, or that the amount of money paid was very high compared to the service given and the final results. Meaning: RIPPED OFF!
The PC Technician’s Tune-Up Manual, was designed to show you step by step details on how to properly and successfully tune up a computer. The “secrets” shared in this manual are tricks that many
“technicians” (especially the retail store techs) do not even know exist. That is 100% fact! Also, this manual was free to you, but the value is priceless. You are being taught the same resources, tools and tricks, that we have used for years, doing business at TekTime IT Consulting. Just ask any of our customers here, or search us in your favorite search engine online, for proof! This stuff is no fluff, and when you have the time to read through this manual and perform the steps shown, you will notice that you can tune-up a computer in an instant. You WILL have customers/clients/family/friends applauding you!
So go ahead, read this manual and get to tuning up those computers, starting with your own. If you have received any value from this manual, feel free to drop me a line/testimonial by emailing us here.
Thanks for taking the time to read this handbook!
TABLE OF CONTENTS
I.) Speeding up the drive by disabling “search indexing”
II.) Speed up the programs menu (applies to XP mostly)
III.) Defragmenting the drive and preventing fragmentation
IV.) Cleaning the Windows registry and correcting registry errors
V.) Managing virtual memory and allocating memory space
VI.) Cleaning temporary & prefetch files to speed performance
VII.) How to “streamline” startup programs to improve loading time
VIII.) Checking for malware infections which will slow down a computer
IX.) Changing the appearance of Windows to speed performance (as needed)
X.) Cleaning computer fans for maximum airflow and heat prevention
XI. ) Uninstalling software that “hogs” resources unnecessarily
XII.) Diagnosing and monitoring free hard drive space
XIII.) Turning off services that are not needed by Windows
XIV.) Separating folders that in Windows to make data back-ups easier
XV.) Updating software drivers for maximum reliability
XVI.) Updating the motherboard BIOS for improved stability and/or functions
XVII.) Verify hard drive mode is set properly for maximum performance
XVIII.) Disabling unneeded graphics and power robbing images
XX.) Configuring Mozilla Firefox for faster internet browsing
Speed up the hard drive by disabling “search indexing”
The “indexing” feature isn’t necessary in Windows. It can be disabled, which will improve disk speed, without negatively impacting the “search” feature.
__
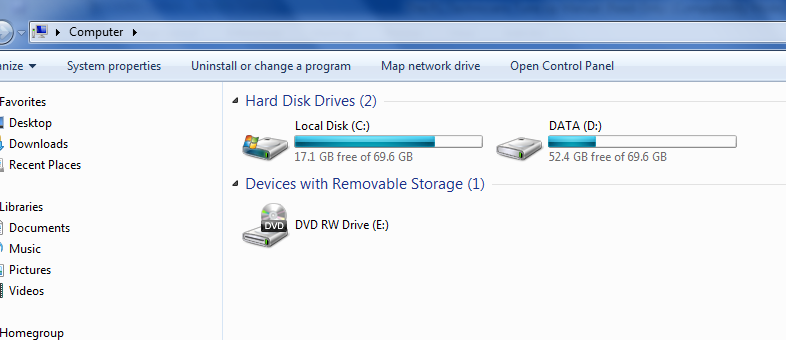
Navigate to My Computer.
Right click on the root drive - the hard drive that contains your installation of Windows.
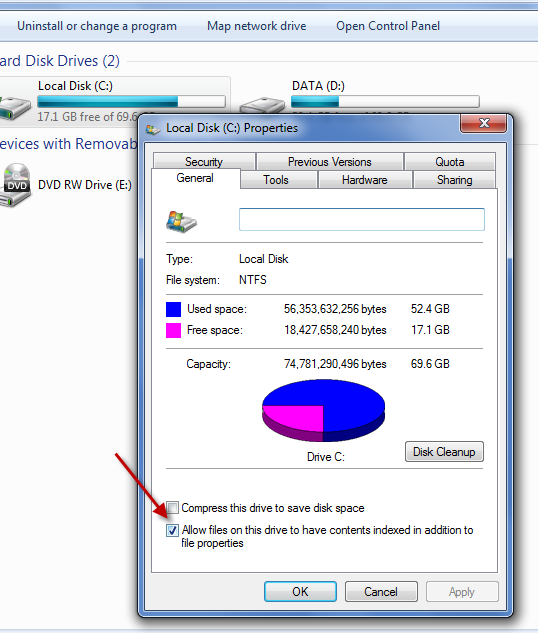
Choose Properties
Next, uncheck the box that refers to “Indexing” or “Search indexing” etc.
Click Apply and wait for the drive to scan and make the changes!
Speed up the program menu by editing the registry
This procedure will decrease the time it takes for programs to show in the start menu when browsing through programs, documents and menus. The speed increase is more noticeable in Windows XP, as well as certain themes in Windows 7 and Vista.
__
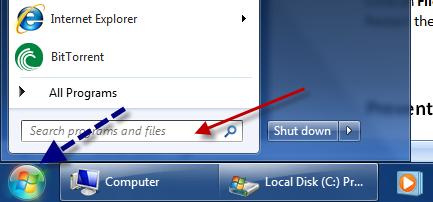
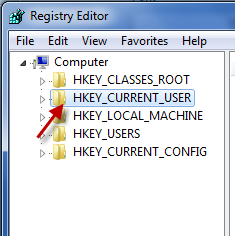
Go to the Search box as shown below (Windows Vista and 7); or the Run box (XP and prior) Next, type: regedit and hit Enter (the Registry Editor will appear) Then, double click on: HKEY_CURRENT_USER
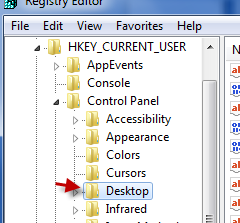
Double click on Desktop
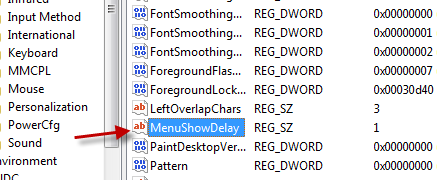

On the right hand pane, navigate to Menu Show Delay and Double Click it Under Value Data, change the value to 1 (it should have been 400 previously) Next, click OK
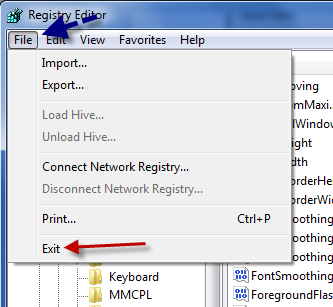
Now, click on File, then choose Exit in the Registry Editor Restart the PC, and the program menu should load much faster!

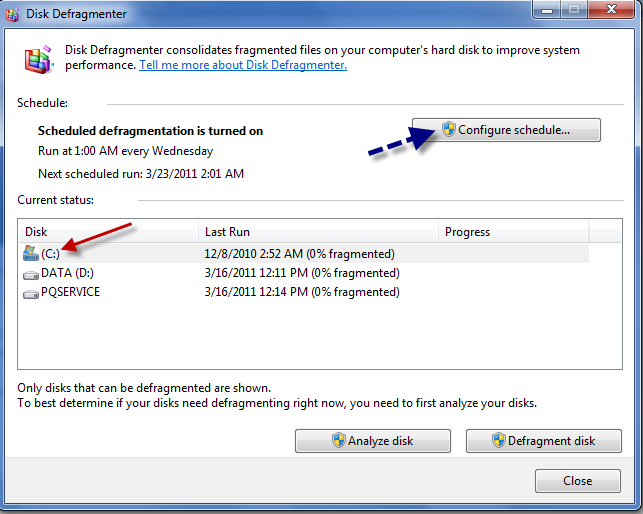
Prevent drive fragmentation - turn on auto defragment
Hard drives become “fragmented” or “disarranged” after long periods of computer usage. In order for a hard drive to continue working efficiently, the files on the drive must be “sorted”
regularly for better access. Defragmenting files helps to ensure reliable computer performance.
__
Go to the Search box (Windows Vista and 7) or the Run box (XP and prior) Type defragment and press Enter. The Disk Defragmenter utility will then pop up.
Click on: Configure Schedule and choose a custom scanning schedule that you prefer.
Click OK when done, then close. The disk will be defragmented at the time that you have selected. If you desire, you can actually click on Defragment disk, as shown above, for immediate defragmenting of the drive!
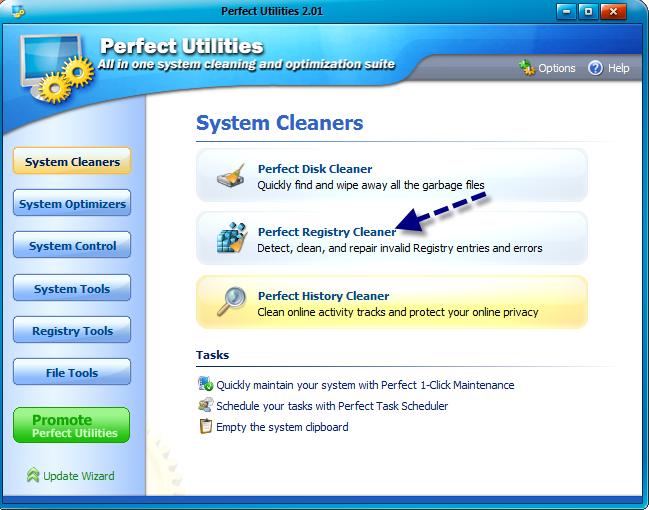
Correct registry errors and clean the registry
Registry cleaners will remove errors from the registry that may have been remnants of uninstalled software, improperly installed software, icons deleted, malware entries and more.
It is important to clean the registry after a tune up. Please be careful; make a backup copy of the registry in case the original registry becomes corrupt or damaged as the PC may not boot.
__
Download Win Utilities by clicking here.
Install the software after it has downloaded.
Run the software, and under System Cleaners (default), click Perfect Registry Cleaner.
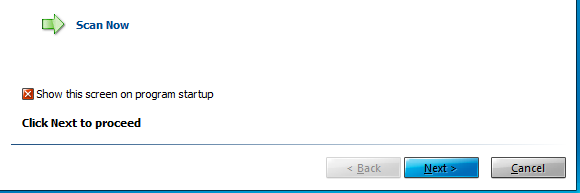
Click Scan Now

Click Next
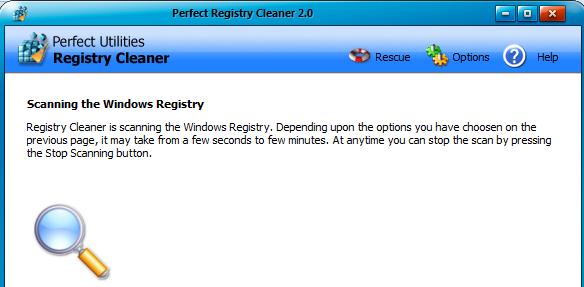
Now, allow the software to check for errors (it could take several minutes) Once it reads “Found [amount of] errors,” click Next to fix the errors.
Click Next again, to allow the software to Create A Restore Point.
Click Finished once completed and exit the program.

Defragmenting the Windows swap file
Defragmenting the swap file may not show any noticeable difference at all, but is handy in increasing the overall performance of the computer when performing a tune-up. The swap file is virtual memory used by Windows in many instances such as when RAM is low or to access drive data quicker (without necessarily accessing the drive for that data). Can’t hurt to try it!
__
Go to the Search box (Windows Vista and 7) or the Run box (XP and prior) This “box” can be found by clicking on the Windows icon on the left lower side of the desktop Type in the box: defrag c/b
Hit Enter
You will then notice a very quick command prompt flash on the screen, and exit momentarily.
It should take a total of 2 seconds, all done now!
Clean temp files
Temporary files should be deleted, to recover hard drive space and to increase the performance of a computer significantly! Did you know that many viruses and Trojans like to hide in temporary files and can remain there even after the virus is removed by antivirus software? Also, remember that temporary files can and will clutter a PC quickly, and bring it to a crawl. This is why new computers seem to “slow down” after only several months of use.
__
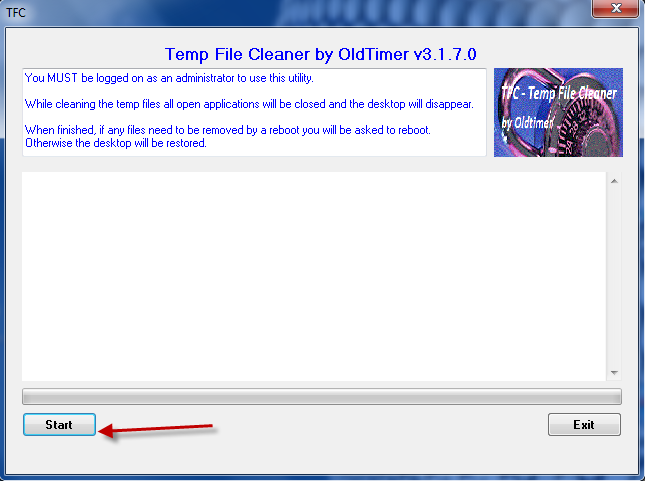
Temp File Cleaner is an excellent program to use for cleaning temp files that most other software “misses.” Our technicians use it religiously when performing tune ups, and for computer maintenance.. *Note this software will delete internet cookies, possibly browsing history, and other temporary files not “needed.”
Temp File Cleaner can be downloaded by clicking here!
Install Temp File Cleaner
Open the program and click Start (make sure no programs are open that are needed) The program will usually need to restart the computer after scanning, if not it will return you to the desktop.
Encourage the PC user (or yourself) to do this regularly (weekly) for best performance!
Clear saved browser cache etc
Browser cache is data that is stored by your internet browser, for quicker page loading, faster image loading and many other reasons. Unfortunately, saved browser cache can eat into a computer’s hard drive space and can cause slow internet browsing as well as web pages failing to load at all. Always clear or delete browser cache during any tune up.
__
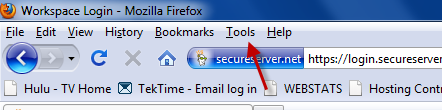
Mozilla Firefox Users:
Click Tools
First, go to Options
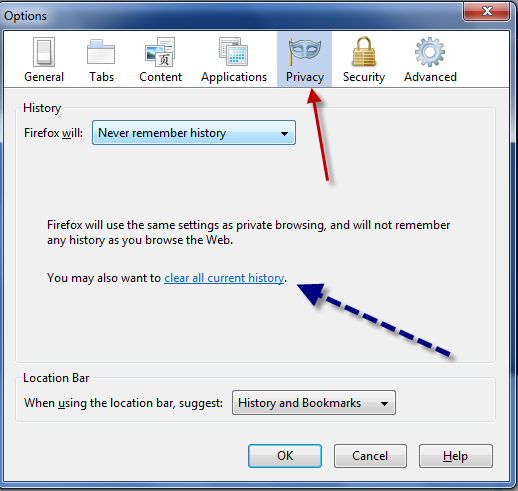
Next, navigate to the Privacy tab
Then, choose Clear All Current History
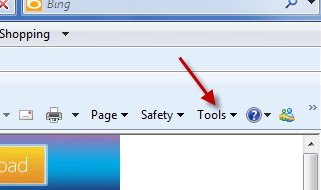
Internet Explorer Users:
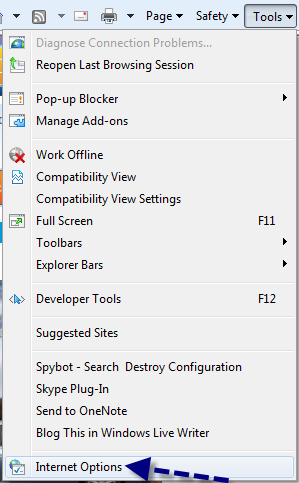
Click Tools
Next, click on Internet Options
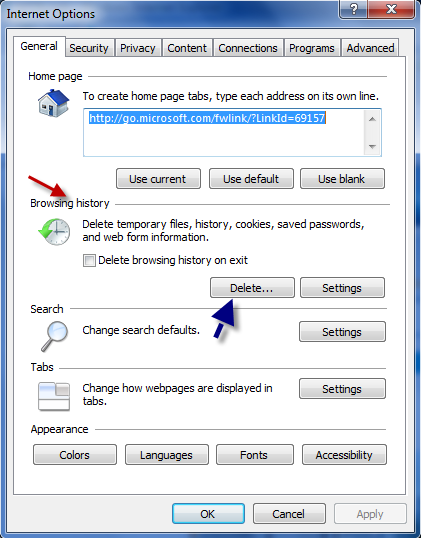
Now, click on the General tab
Under Browsing History, click on Delete (see next page for diagram)
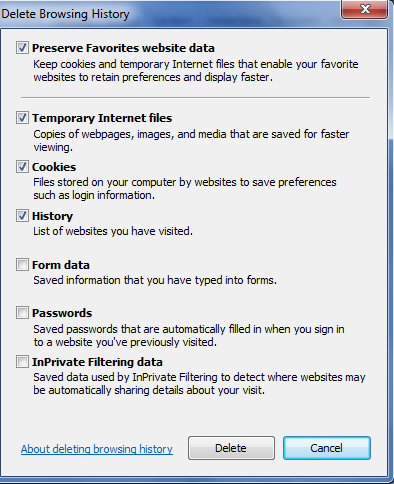
Make sure everything is checked, except Form Data, Passwords and the last box.
Click Delete, and you are all done!
Streamline startup programs to gain speed
Programs that don’t need to startup with Windows, can be removed from the startup menu to increase loading time, increase the amount of available memory (RAM), and overall improve a computer’s speed and performance.
_
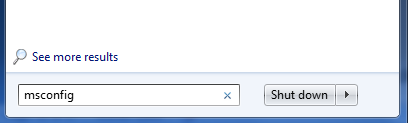
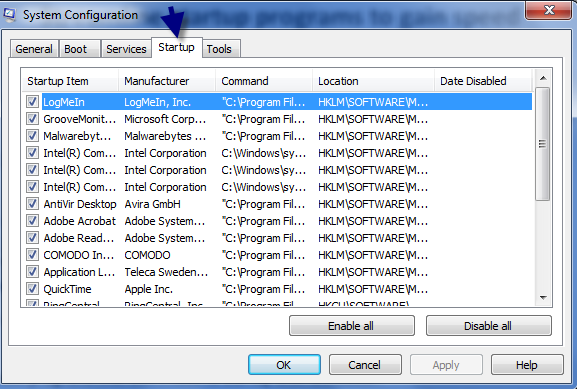
Go to the Search box (Windows Vista and 7) or the Run box (XP and prior) This “box” can be found by clicking on the Windows icon on the left lower side of the desktop Type: msconfig and hit Enter (the system configuration tool will appear) Click on the Startup tab
Uncheck programs that don’t need to startup with Windows!!
** Rule of thumb – for instance: If the computer has an Intel CPU, Intel graphics card, Intel chipset etc, then don’t uncheck any programs that show Intel in the Manufacturer column.
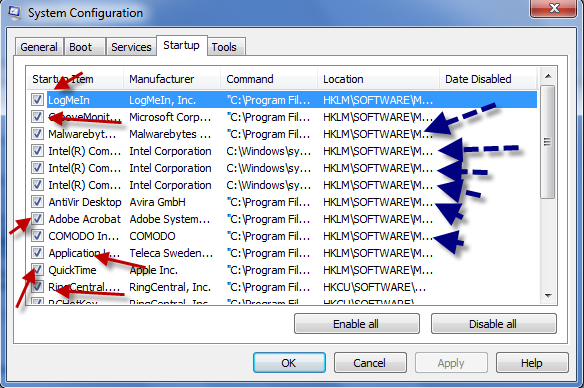
Make sure that antivirus software remains checked, third-party firewall software remains checked, and any other program that NEEDS to startup with Windows. When in doubt, use your favorite search engine to check the software in the startup menu to make sure it isn’t a program that is needed to start with Windows for proper functionality and security of the PC.
In the example below, programs that are needed for the functioning and security of Windows, have a BLUE arrow. Programs that aren’t needed by Windows during startup, have a RED arrow.
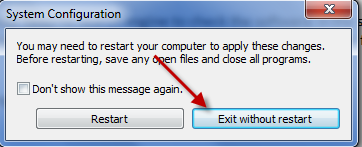
After the changes, click Apply
Next, click OK
Next, choose Exit without restart to avoid restarting the PC
If you would like to test the computer out after making the changes, restart the computer.
Check for malware infections such as trojans & viruses
__
Use your virus scanning software and check for malware such as viruses and Trojans, and remove any that are found. It is always best to do a full scan, as well as updating your antivirus definition files prior to doing any scanning. The PC Technician’s Virus Removal Manual is the step by step detailed manual that technicians prefer, to remove any and all types of malware.
Click here for more information and to download a sample copy that will teach you the professional’s approach to preparing a computer for scanning. If you do not want to visit the website to request a copy, feel free to email us by clicking here, to request a FREE sample copy of The PC Technician’s Virus Removal Manual!
Change Windows appearance to “Classic”
___
This will eliminate most of the “eye candy” in Windows, but is very effective in freeing up processor and video resources for faster gaming, video editing, audio production and more. You will notice at LEAST a 30% increase in overall speed and responsiveness of the computer. This procedure is NOT recommended for those interested in keeping their current theme, color scheme, AERO desktop; such as corporate offices, internet surfing home users, picture lovers, etc. This Windows mode is recommended for video production, video editing, graphic design, audio production, gaming and other processor hungry tasks or professional tasks.
Windows Vista and 7:
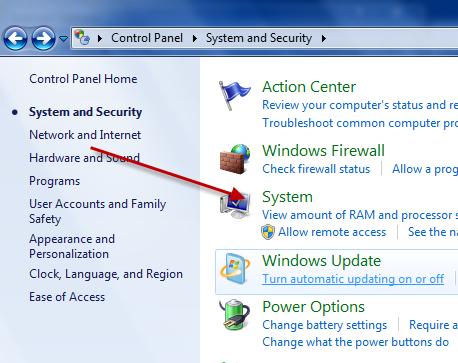
Navigate to Control Panel
Then go to System and Security
Next, click on System
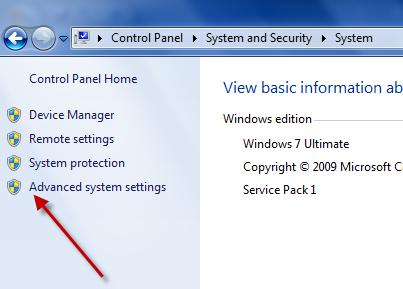
Then click Advanced System Settings

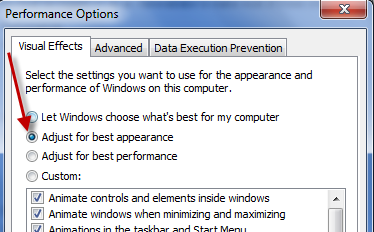
Click on the Settings button, under Performance
Choose Adjust for best performance
Click Apply, then Ok
Windows XP: (illustration shown only in the premium version of this manual) Right click the mouse on the desktop
Click Themes (tab)
Choose Windows Classic
Click Apply
Click OK
All done now!
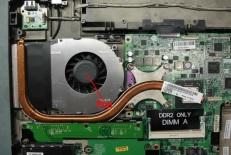
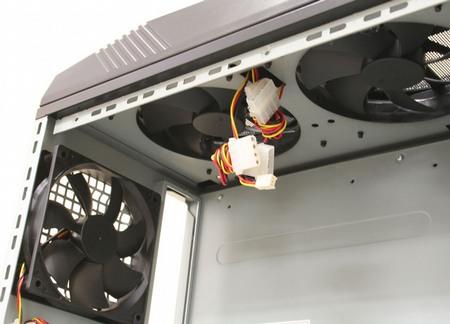
Clean fans in PC, PSU, ducts, etc
___
This may seem like a “no-brainer”, but cleaning the fans on/in the computer can really help with prevent
You may also like...
-

Technical Product Management in the age of Artificial Intelligence Computer & Internet by Hamza MobeenTechnical Product Management in the age of Artificial Intelligence
Reads:
0Pages:
181Published:
Apr 2026Technical Product Management in the Age of AI is a practical guide for professionals looking to break into product management and build meaningful careers in ...
Formats: PDF
-

Web 3.0: Unleashing the Power of Decentralized Connectivity Computer & Internet by Michael McNaughtWeb 3.0: Unleashing the Power of Decentralized Connectivity
Reads:
44Pages:
42Published:
Jul 2025Web 3.0: Unleashing the Power of Decentralized Connectivity explores the future of the internet through decentralized technologies, blockchain, and user-first...
Formats: PDF, Epub, Kindle, TXT
-

Come, Let Me Tell You About The Crypto Election Project! Crypto & Blockchain by Michael McNaughtCome, Let Me Tell You About The Crypto Election Project!
Reads:
27Pages:
49Published:
Apr 2025Blockchain is one of the 21st century’s most transformative technologies—decentralized, transparent, and secure. Yet, it can feel complex at first. This book ...
Formats: PDF, Epub, Kindle, TXT
-

U-TECH (Understanding Technology) 2023 Computer & Internet by Kris AyreU-TECH (Understanding Technology) 2023
Reads:
166Pages:
95Published:
Sep 2023I hope you enjoy this FREE ebook. Thanks for downloading it.
Formats: PDF, Epub, Kindle, TXT