4. Getting Started
Important note: If you have just received your hardware or you are not sure what firmware is loaded on it, you MUST update the firmware. This page summarizes the firmware update steps http://wiki.tinyclr.com/index.php?title=Firmware_Update
Also, make sure to read the “firmware/assembly matching” section in this book.
4.1. System Setup
Before we try anything, we want to make sure the PC is setup with needed software. First download and install Visual C# express 2010
http://www.microsoft.com/express/vcsharp/
Now, download and install .NET Micro Framework 4.2 SDK (not the porting kit) and the GHI package installer. Both are found on this page
http://www.ghielectronics.com/support/dotnet-micro-framework
By the way, you may want to bookmark this page as it has about everything you need to use NETMF.
4.2. The Emulator
NETMF includes an emulator that allows you to run NETMF applications right on your PC. For our first project, we will use the emulator to run a very simple application.
Create a Project
Open Visual C# Express and, from the menu, select file -> New Project. The wizard should now have the “Micro Framework” option in the left menu. Click on it, and from the templates, select “Console Application”.
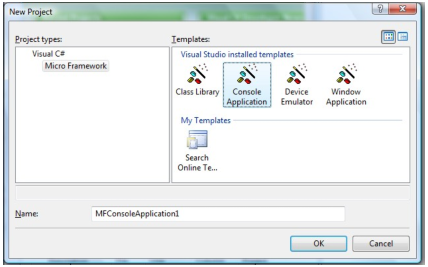
Click the “OK” button and you will have a new project that is ready to run. The project only has one C# file, called Program.cs, which contains very few lines of code. The file is shown in “Solution Explorer” window. If this window is not showing then you can open it by clicking “View->Solution Explorer” from the menu.
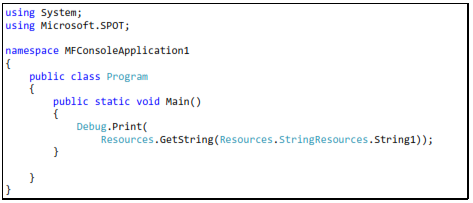
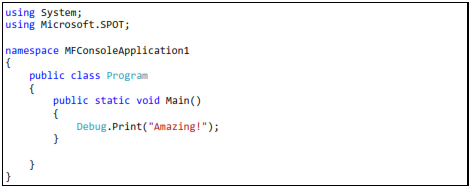
For simplicity change the code to look like the listing below
Selecting Transport
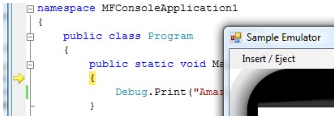
Don't worry if you do not understand the code. I will explain it later. For now, we want to run it on the emulator. Let's make sure you have everything setup properly. Click on “Project>Properties” from the menu. In the new showing window, we want to make sure we select the emulator. On the left side tabs, select “.NET Micro Framework” and make sure the window looks like the image below.
Transport: Emulator
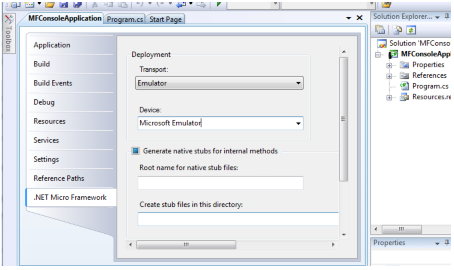
Device: Microsoft Emulator
Make sure the output window is visible, click on View->Output
If you are not seeing such option, then you need to enable expert settings first, found at Tools-> Settings-> Expert Settings.
Executing
Finally, we are ready to run our first application. Press F5 key on the computer. This is a very useful shortcut and you will be using it a lot to run your applications. After you press F5, the application will be compiled and loaded on the emulator and in couple seconds everything will stop! That is because our program had finished execution so fast that we didn't see much.
We want to “debug” the code now. Debugging means that you are able to step in the code and see what it is doing. This is one of the greatest values of NETMF.
This time use F11 instead of F5, this will “step” in the application instead of just running it. This will deploy the application on the emulator and stop at the very first line of code. This is indicated by the yellow arrow.
C# applications always start from a method called Main and this is where the arrow stopped. Press F11 again and the debugger will run the next line of code, which is the line you changed before. You probably have guessed it right, this line will print “Amazing!” to the debug window. The debug window is the output window on Visual C# Express. Make sure Output window is visible like explained earlier and press F11 one more time. Once you step on that line, you will see the word “Amazing!”, showing in the output window.
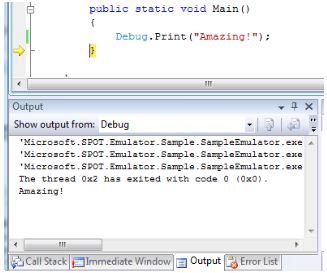
If you now press F11 again, the program will end and the emulator will exit.
Breakpoints
Breakpoints are another useful feature when debugging code. While the application is running, the debugger checks if execution has reached a breakpoint. If so, the execution will pause. Click the bar to the left of the line that prints “Amazing!” This will show a red dot which indicates a breakpoint.
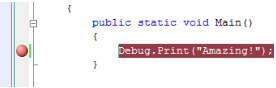
Now press F5 to run the software and when the application reaches the breakpoint, the debugger will pause, as shown in the image below
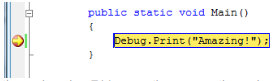
Now, you can step in the code using F11 or continue execution using F5.
4.3. Running on Hardware
Running NETMF applications on hardware is very simple. Instructions can be slightly different on different hardware. This book uses FEZ for demonstration purposes but any other hardware will work similarly.
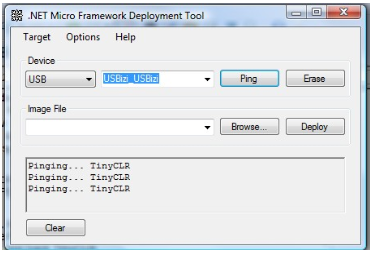
MFDeploy can Ping!
Before we use the hardware, let us make sure it is properly connected. The NETMF SDK comes with software from Microsoft called MFDeploy. There are many good uses for MFDeploy but for now we only need it to “ping” the device. Basically, “ping” means that MFDeploy will say “Hi” to the device and then checks if the device will respond with “Hi” back. This is good to make sure the device is connected properly and transport with it has no issues.
Open MFDeploy and connect FEZ using the included USB cable to your PC. If this is the first time you plugged in FEZ, Windows will look for the drivers and automatically find them. If not, supply the driver from the SDK folder and wait till windows is finished.
In the drop-down menu, select USB. You should see your device showing in the device list. In my example, I see USBizi. Select your device and click the “Ping” button. You should now see TinyCLR.
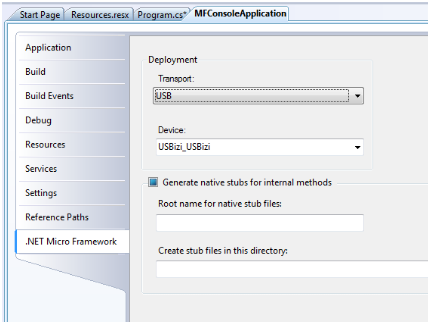
Deploying to Hardware
Now that we checked that the hardware is connected using MFDeploy, we need to go back to Visual Studio. From the project properties, select USB for transport and then your device (mine is USBizi). Make sure your setup looks similar to the image below.
Pressing F5 will now send our simple application to FEZ and it will run right inside the real hardware. Switching from emulator to real hardware is that simple!
Try the steps we did with the emulator, like setting breakpoints and using F11 to step in the code. Note that “Debug.Print” will still forward the debug messages from the hardware back to the output window on Visual Studio.
Describe what you're looking for in as much detail as you'd like.
Our AI reads your request and finds the best matching books for you.
Popular searches:
Join 2.9 million readers and get unlimited free ebooks