How to Create Personal Brand Entities by Will Troup - HTML preview
Download the book in PDF, ePub, Kindle for a complete version.
How to Make Personal Brand Entities
This guide was created to guide you through the process of creating the various Personal Brand Entities. These entities help Google identify who we are, eventually leading to a Knowledge Panel. It also helps with general SEO, since we are creating profiles on various platforms, linking our online identity.
Information that you will need:
-Desired usernames, email address, and passwords.
Tools that you will need:
1. Google Sheets for Template of Personal Brand Entities
2. Lastpass (optional)
3. Internet browser
Make a copy of this template and rename it with the client's name or brand. You will keep track of usernames and passwords here.
Table of Contents
Gmail
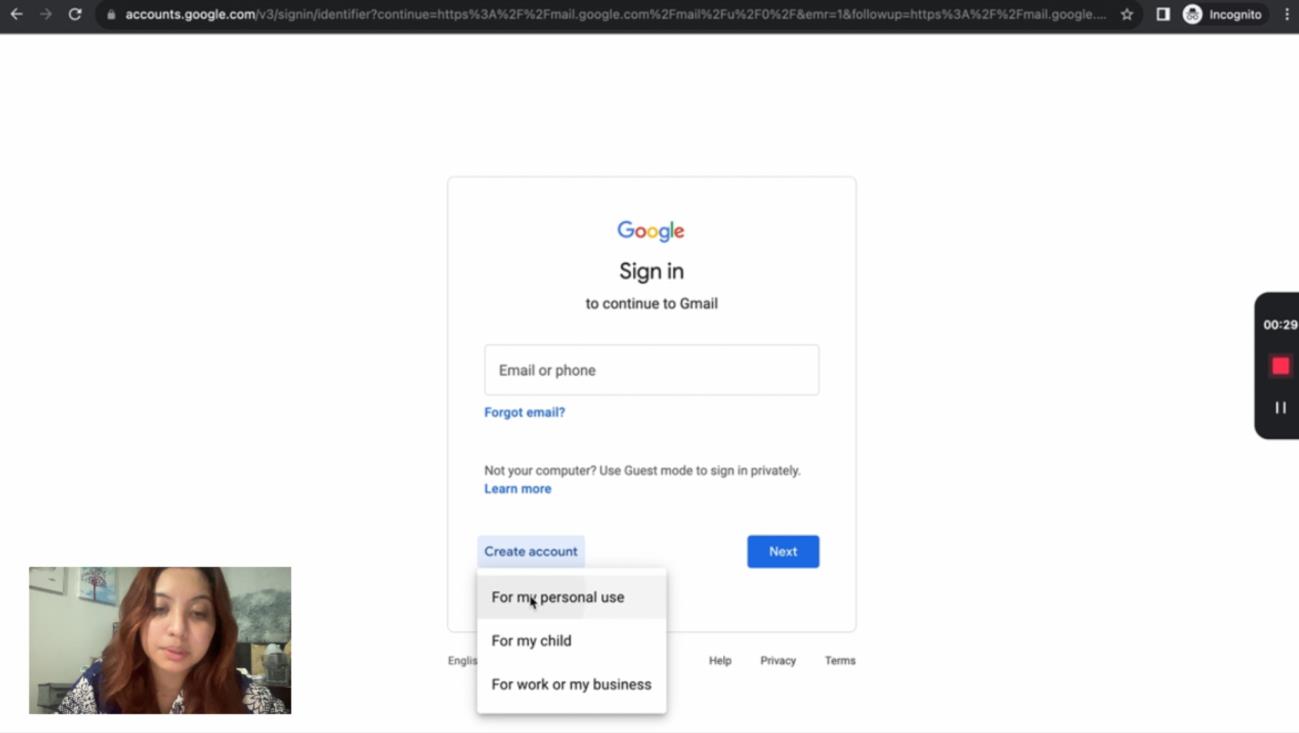
1. Go to gmail.com and click “Create Account” and select “For my Personal Use.


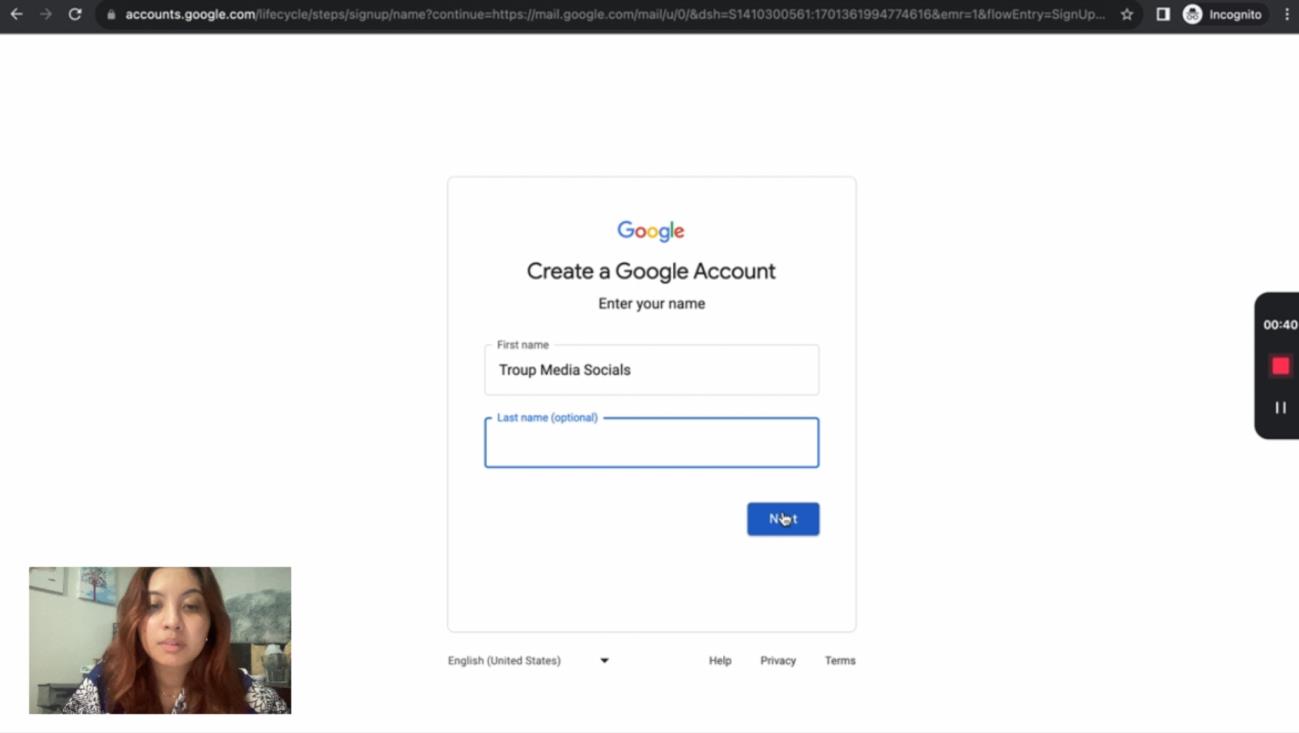

2. Type in the First Name of your Client. If it’s a brand, you can leave the last name optional.
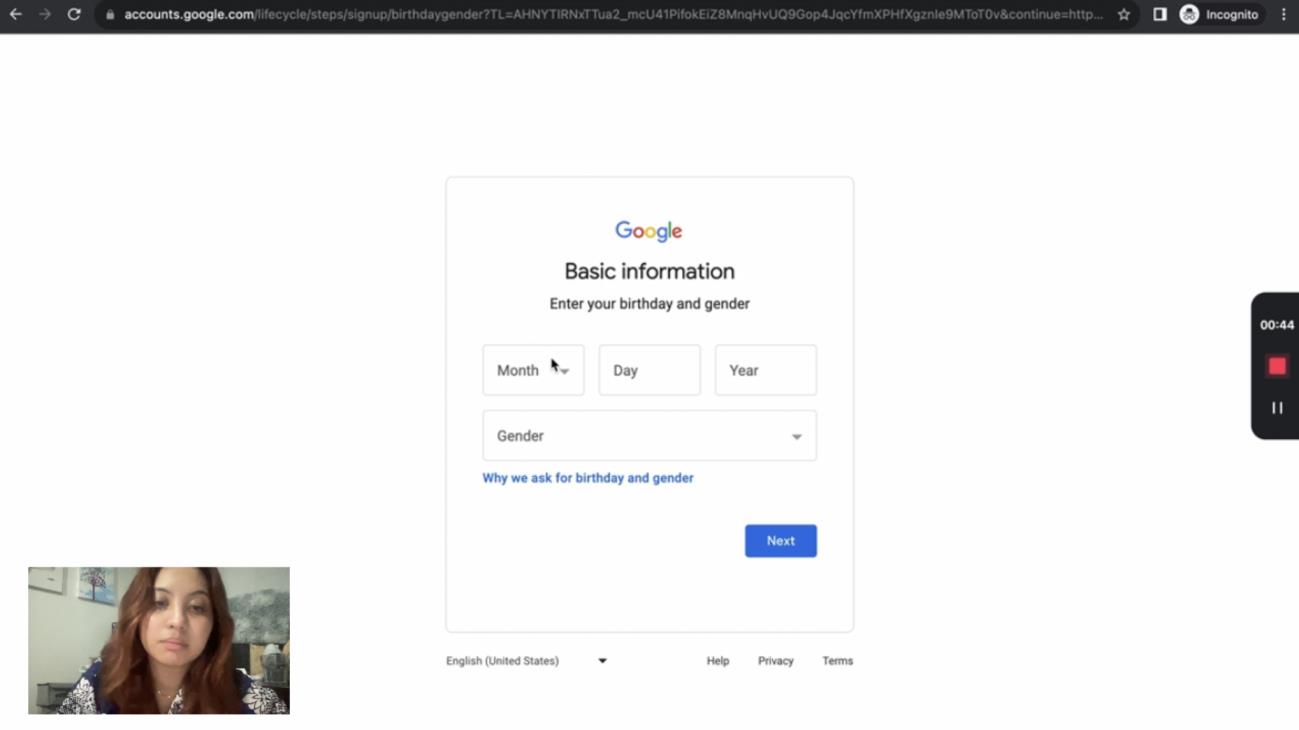
3. Enter basic information (birthday and gender) about the client or brand.

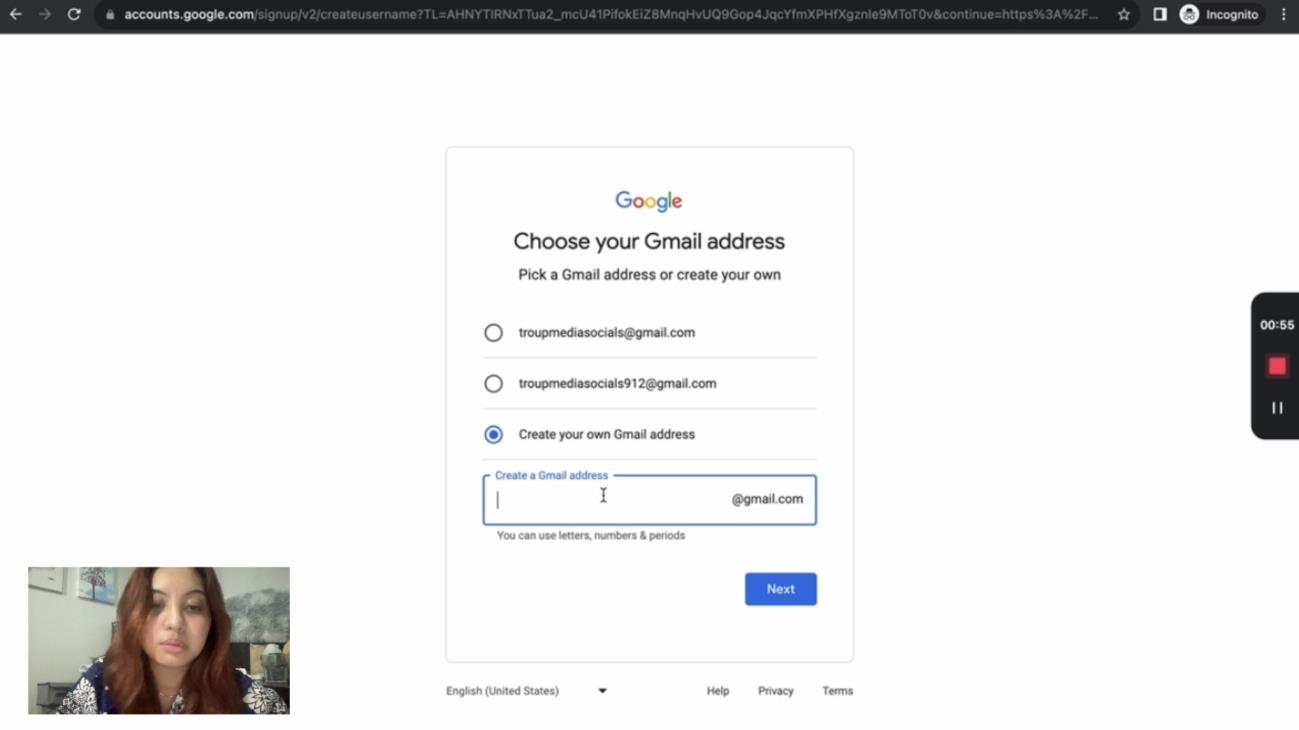

4. Pick a Gmail address or create your own.
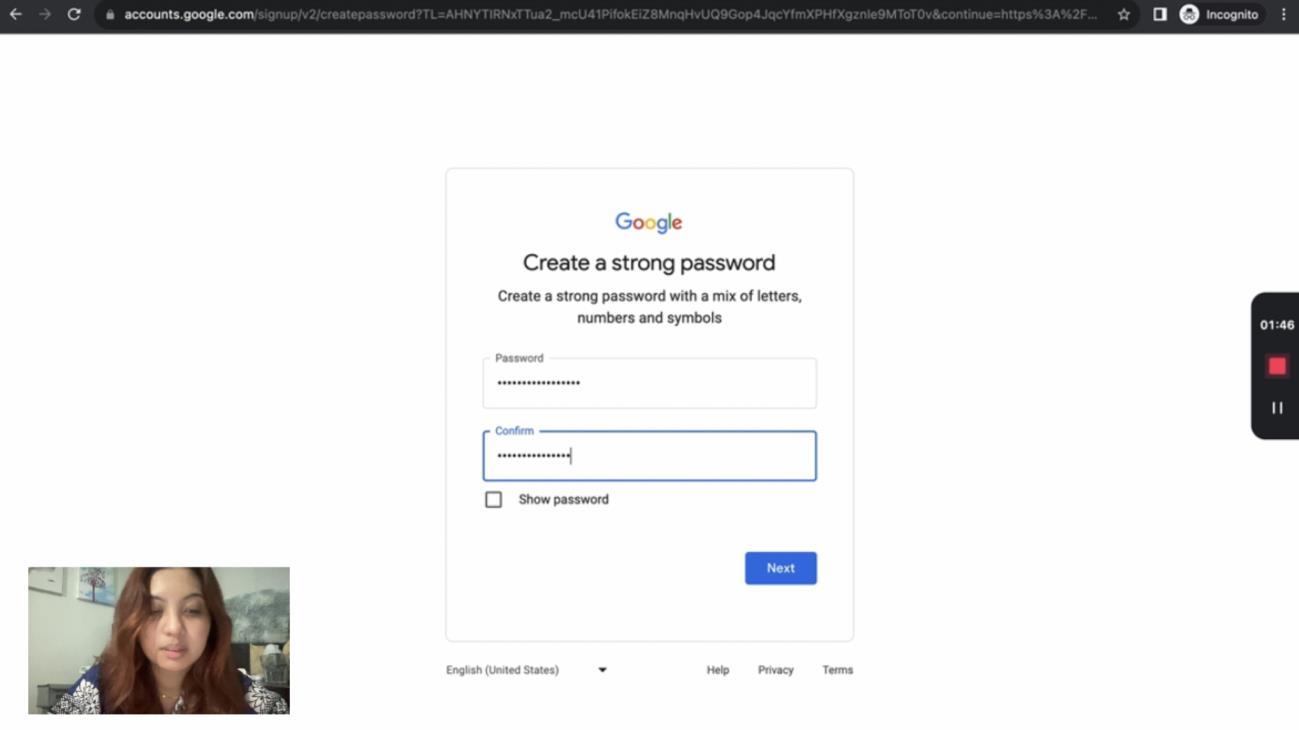
5. Create a strong password with a mix of uppercase and lowercase letters, numbers, and symbols. Retype the password and click “Next.”


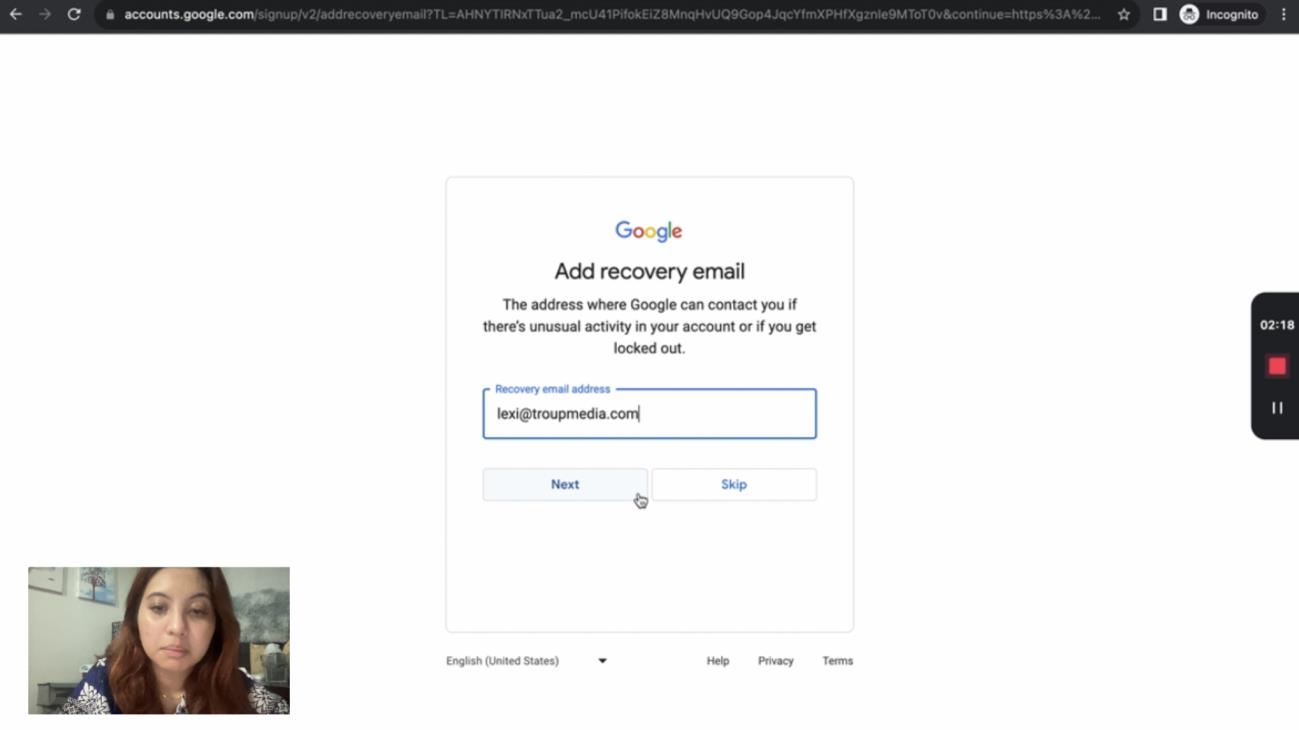
6. Add recovery email. This address is where Google can contact you if there’s unusual activity in your account or if you get locked out of. Click “Next” once done.
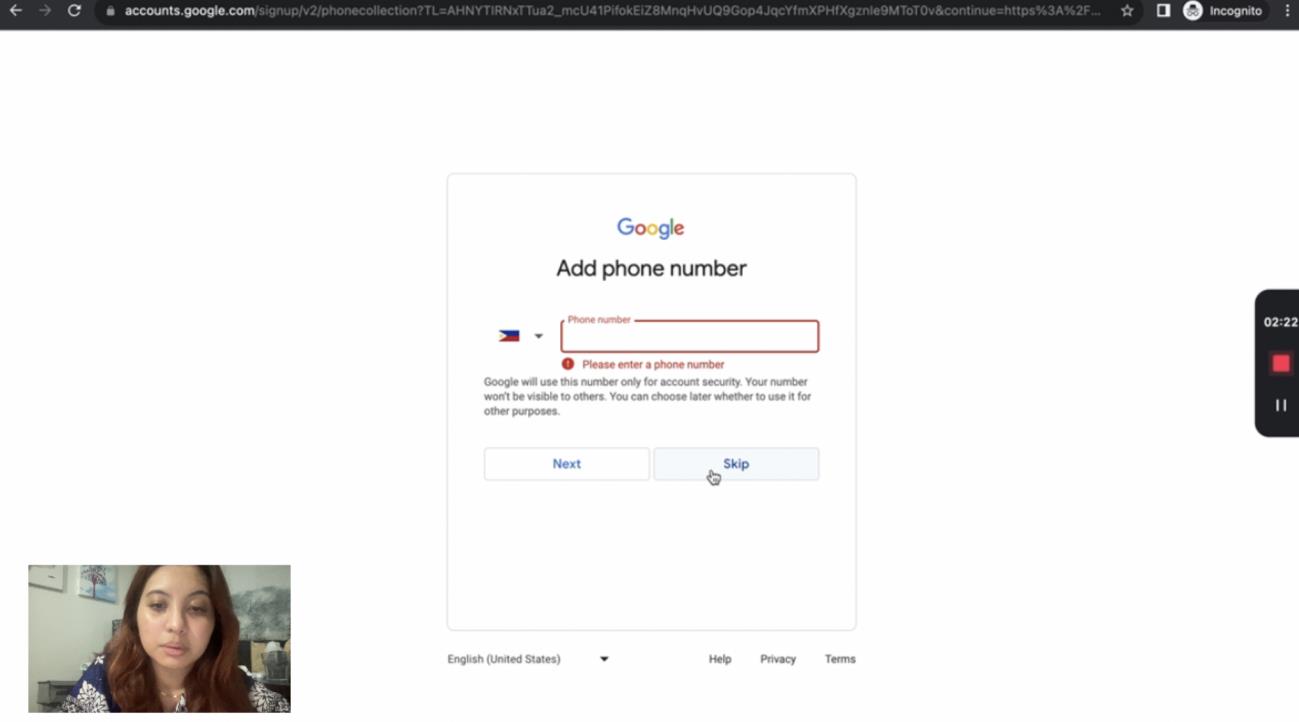


7. Add phone number. Select your country code and enter the rest of the phone number.
Google will use this number only for account security. This is optional but highly recommended. I opted to skip and add a phone number later on.
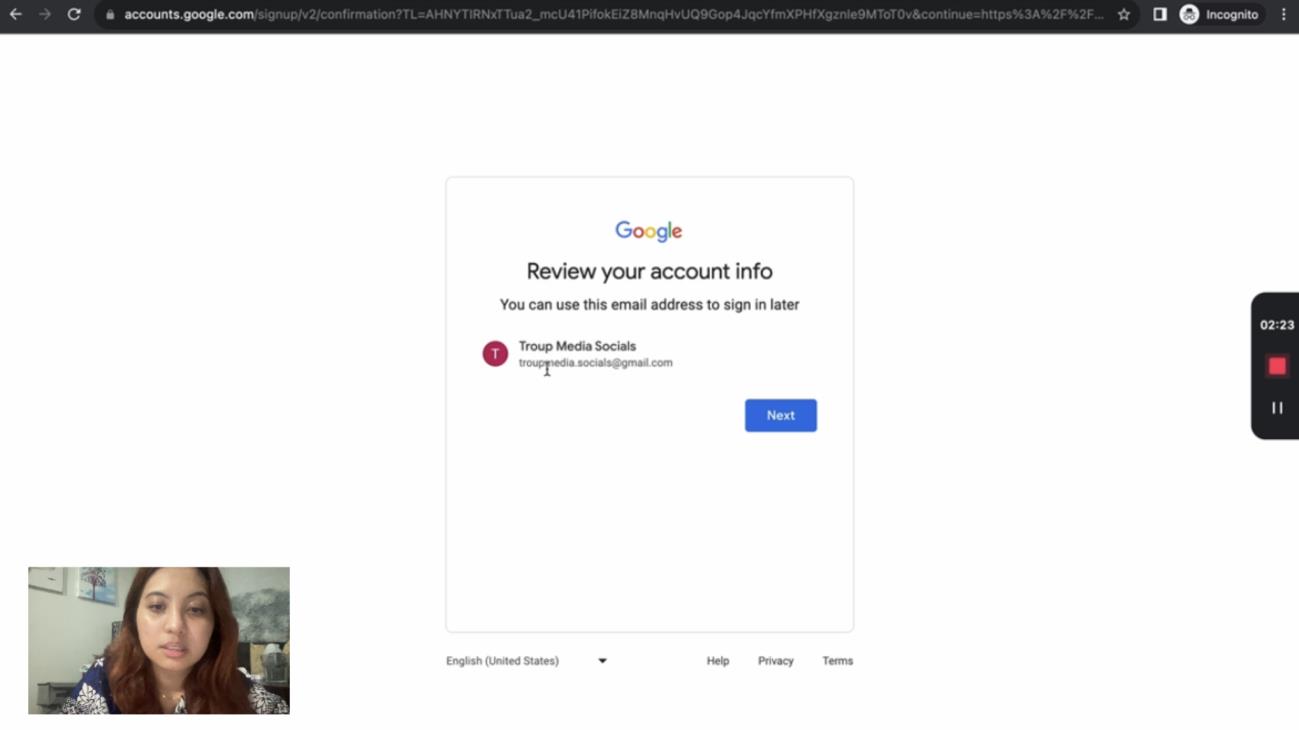
8. Review your account information. This is where you can confirm your email address.
Click “Next” once verified.
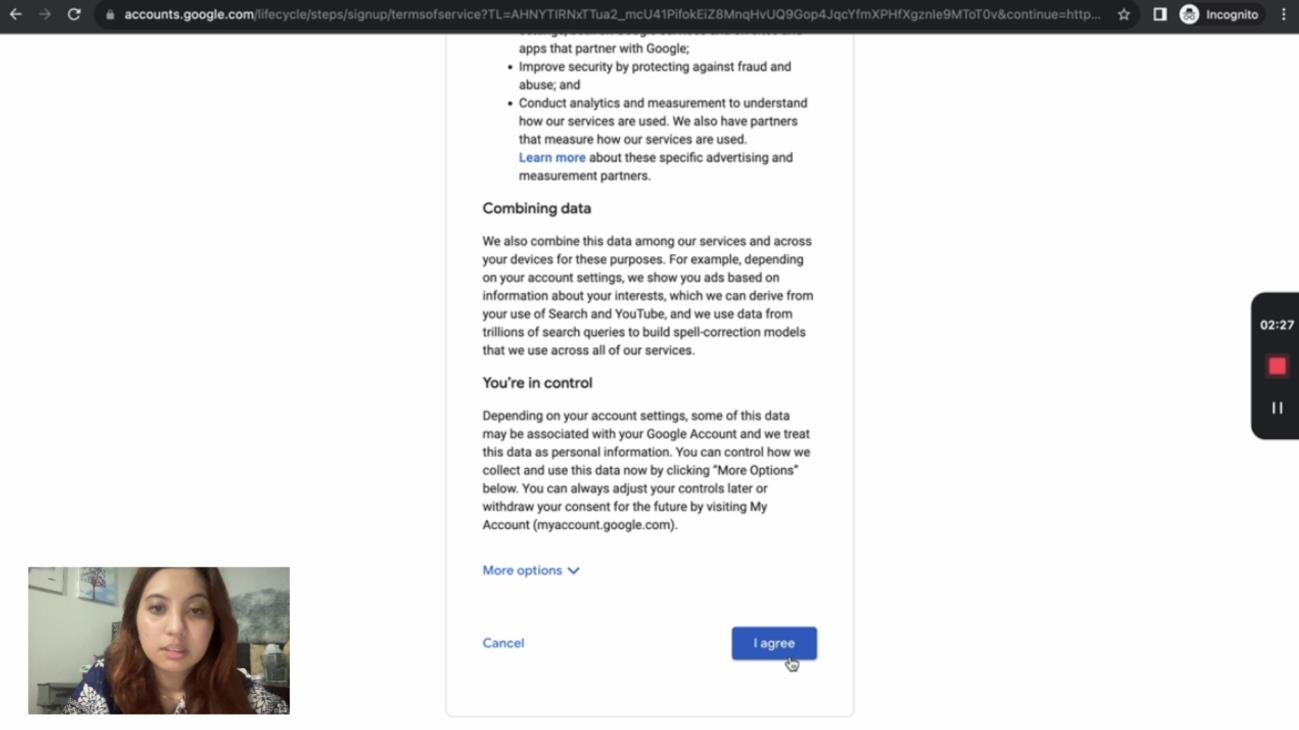


9. Scan through the privacy and terms of service and click “I agree.”
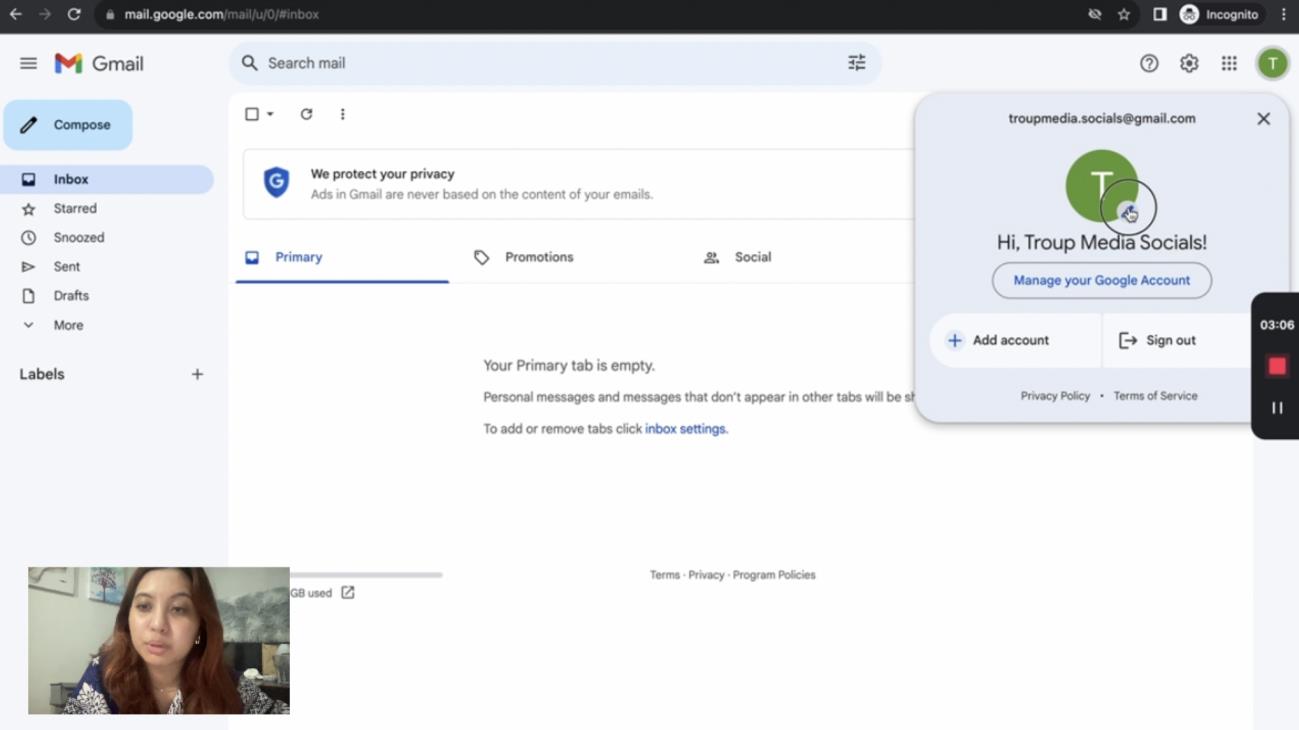
10. Now that you have a gmail account that you can use for the other social media platforms, you can change the profile photo of the account.


Facebook Profile
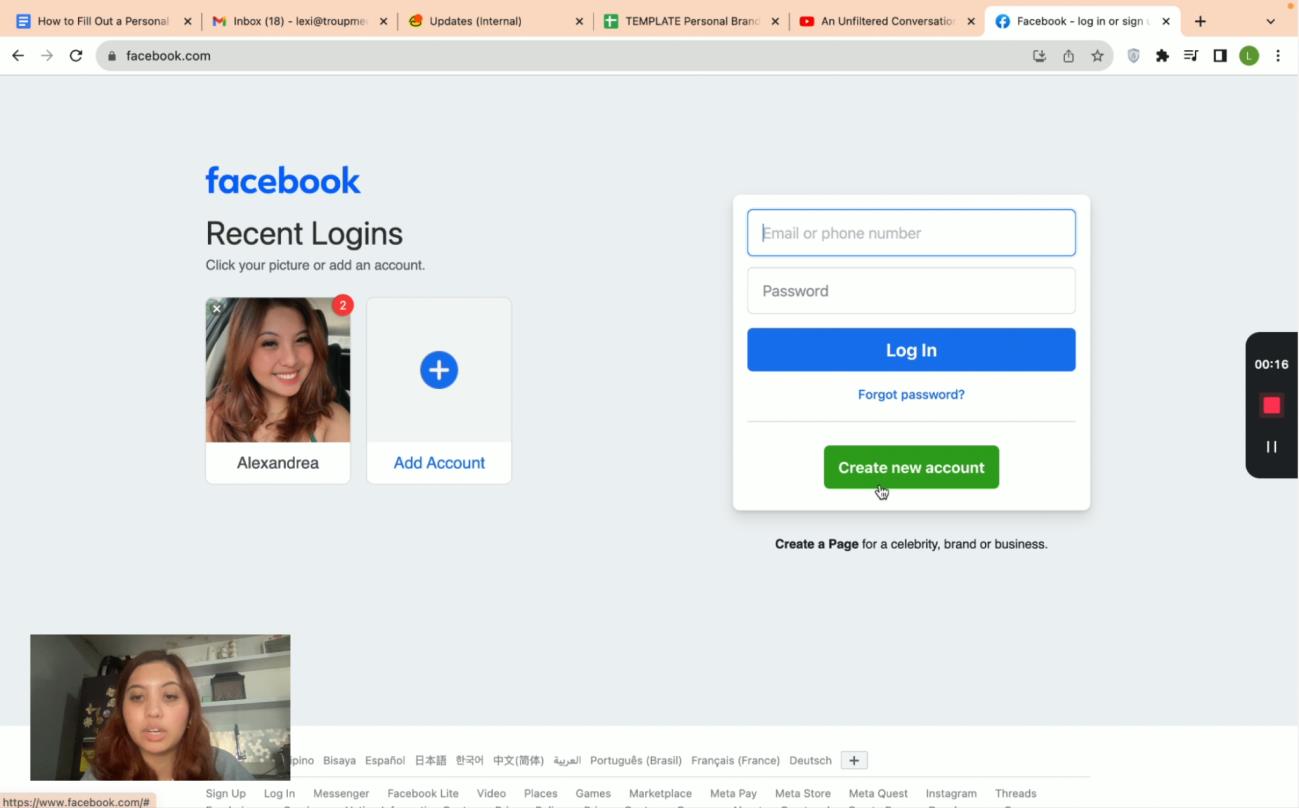
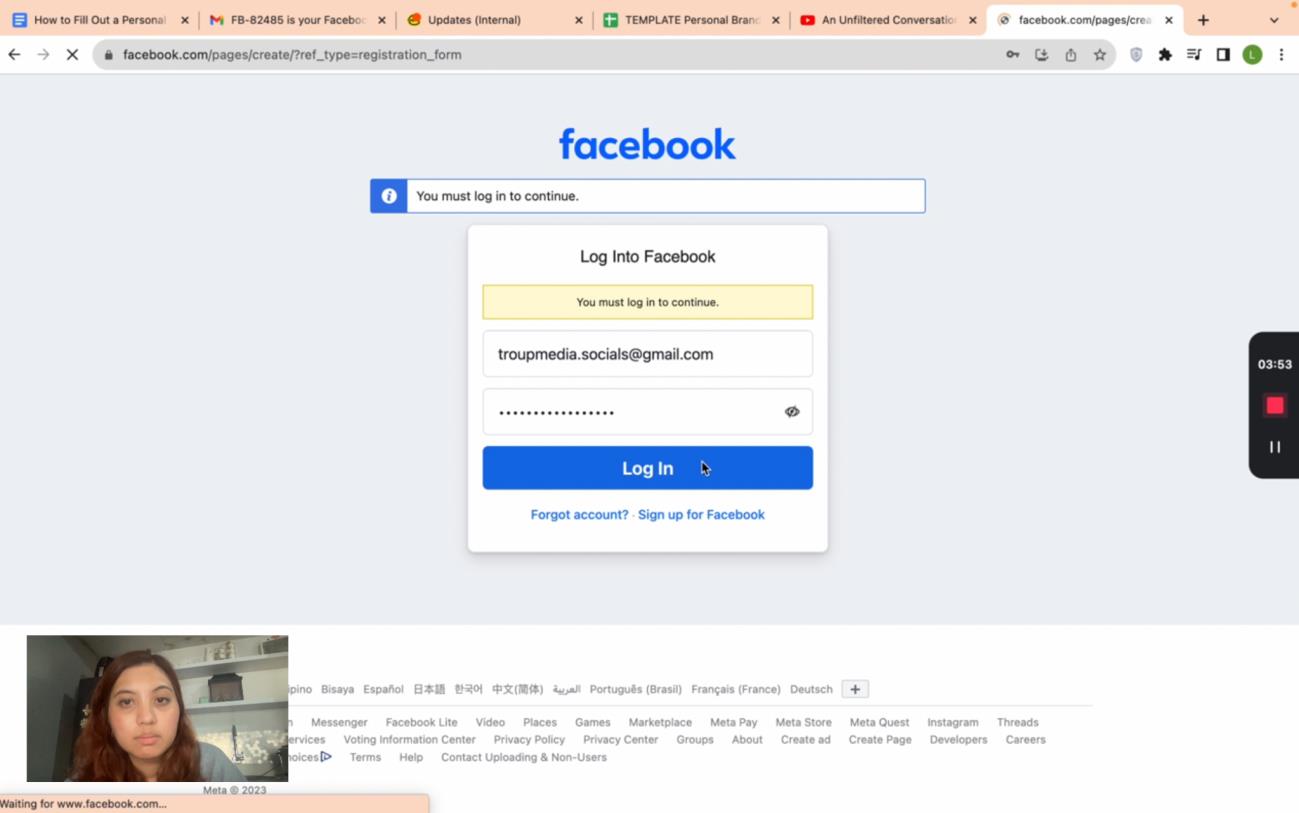
1. Go to facebook.com and navigate towards the bottom of the Log-in area box and click “Create New Account”
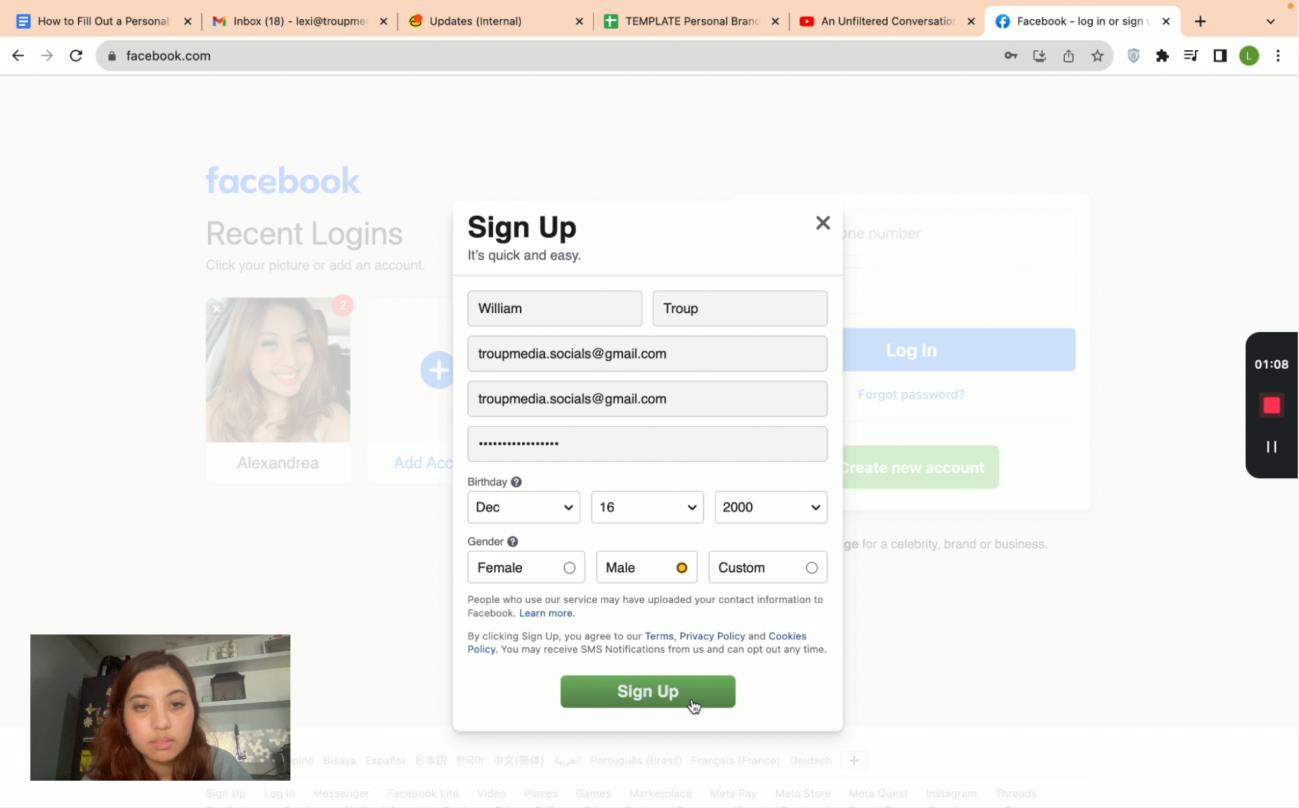
2. Fill-out the necessary fields. Click “Signup” once done.
● First name
● Last name
● Email Address
● Password
● Birthday (Month/Date/Year)
● Gender
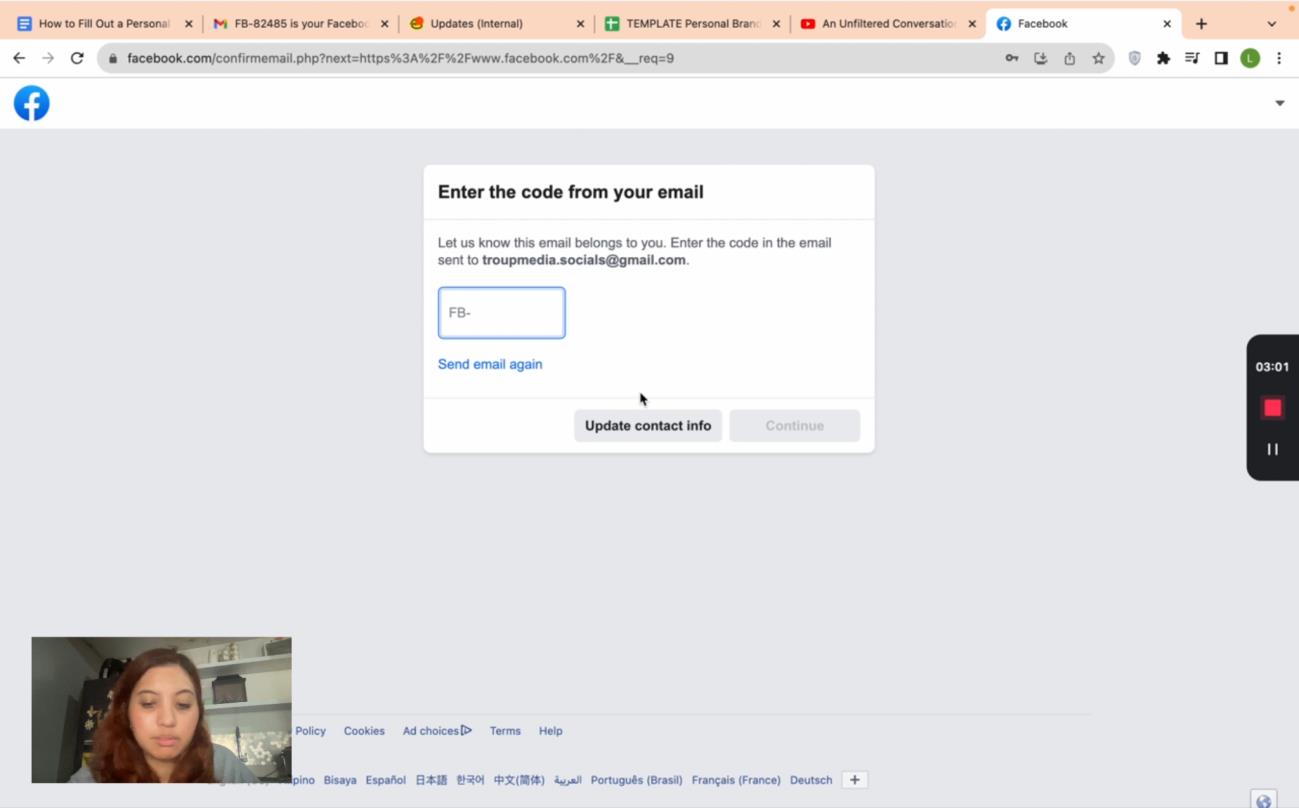


3. Enter the code from the email address and click “Continue” after.
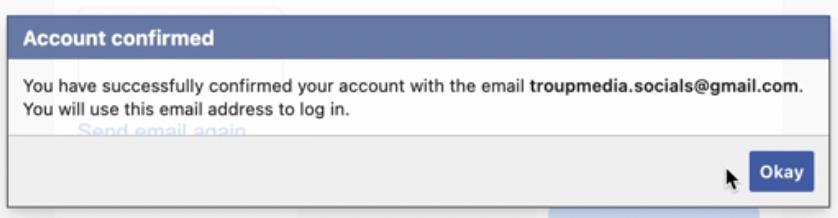
4. A pop-up window will appear confirming successful sign-up. Click “Okay.”
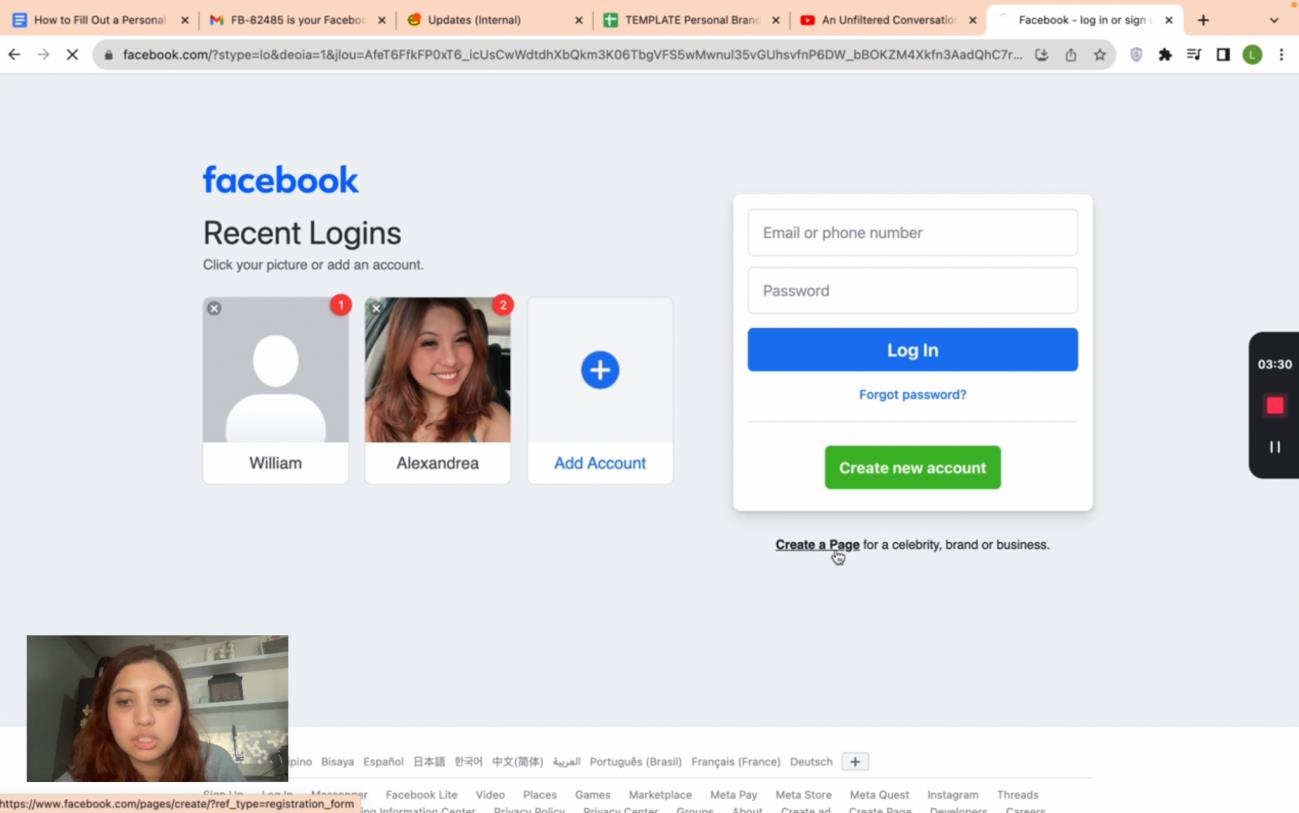


Facebook Page
1. Go to facebook.com and click “Create a Page” under the “Create new account” button.
2. Click “Get Started” on the Business and Brand side.
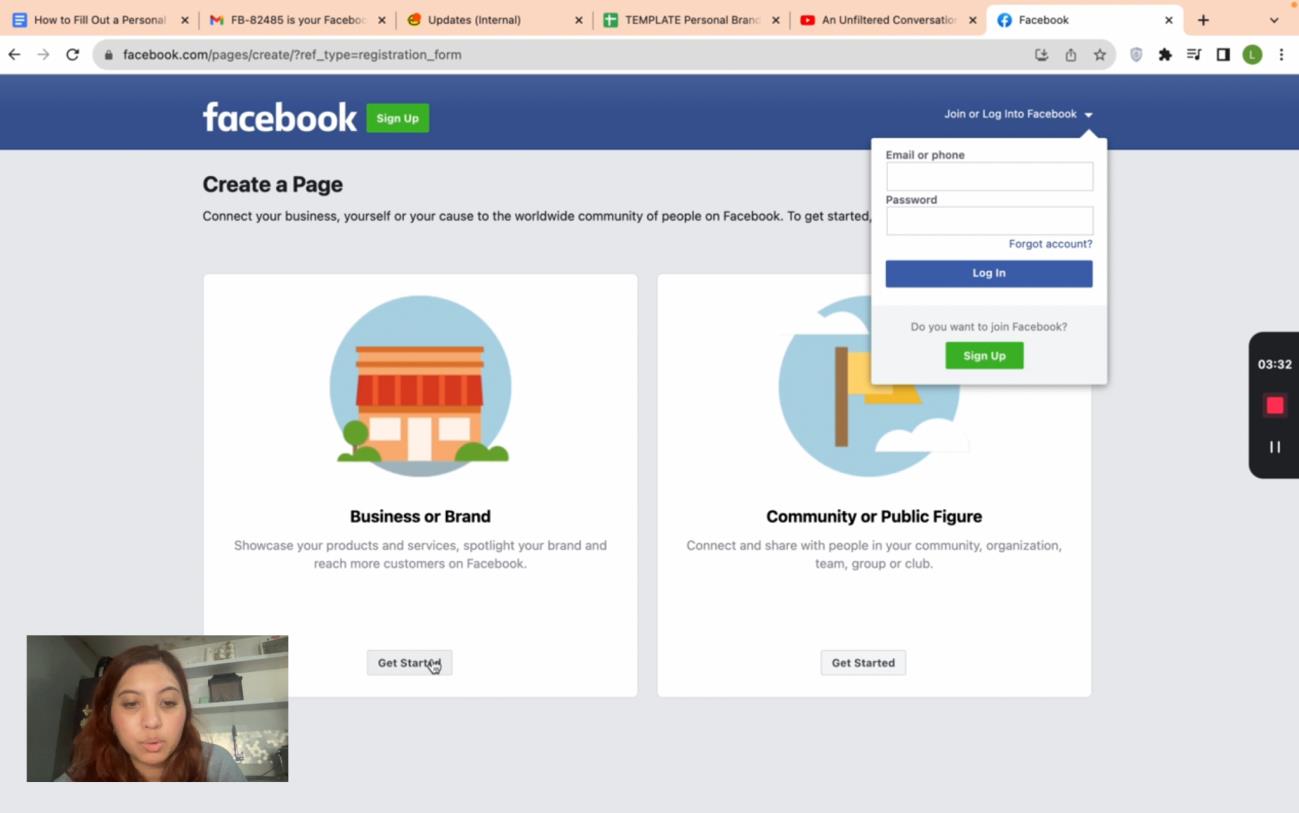


3. Log-in using the Facebook Profile made.
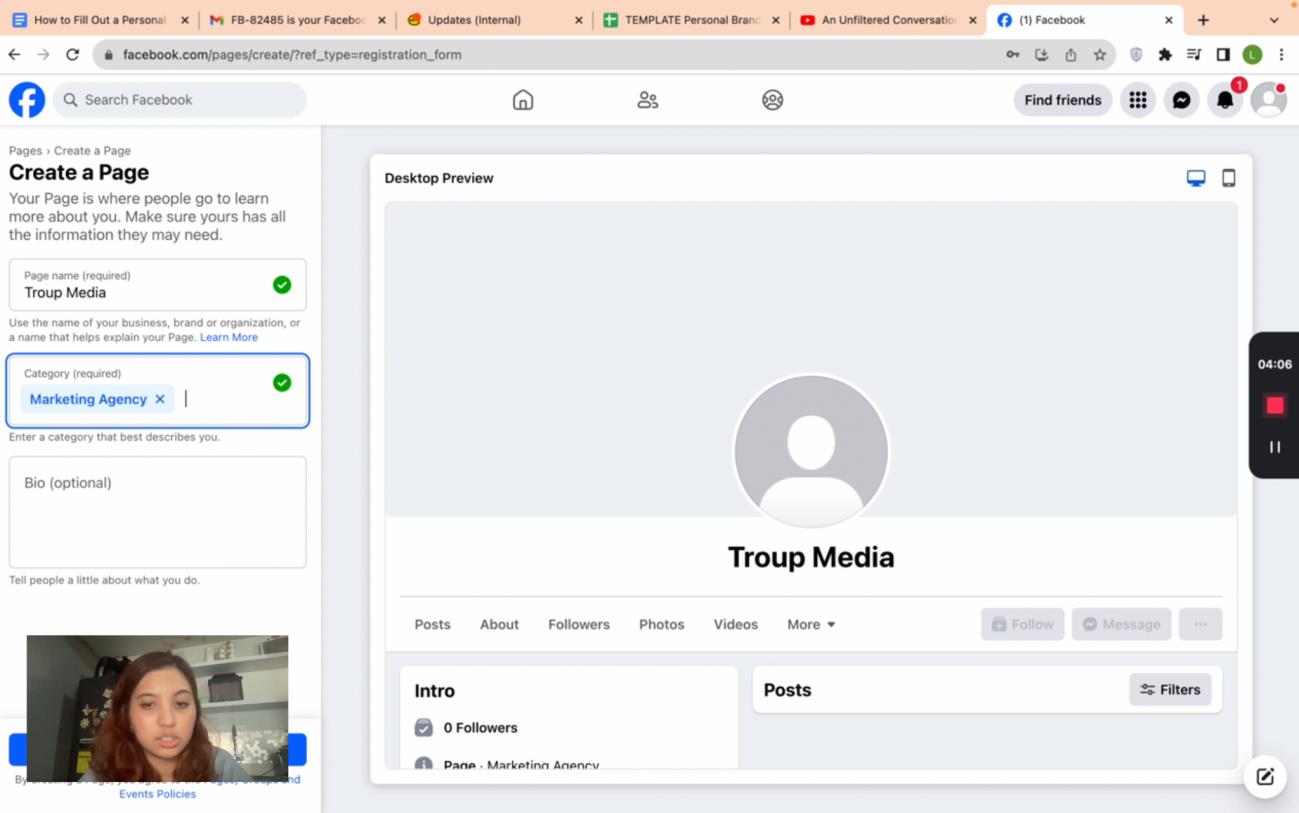

4. Input the Page name and select the right category for the brand and click “Save Changes.”
5. Finish Setting up the page.
Step 1 of 5 - Contact, E-mail address, Location, Hours Step 2 of 5 - Add Profile Photo and Cover Photo Step 3 of 5 - Connect Whatsapp to your Page Step 4 of 5 - Build your Page Audience
Step 5 of 5 - Stay informed about your Page (Turn on Page notifications on Profile and turn on Marketing & promotional emails about your page)


6. After completing setting up your Page, go to “Edit Page”
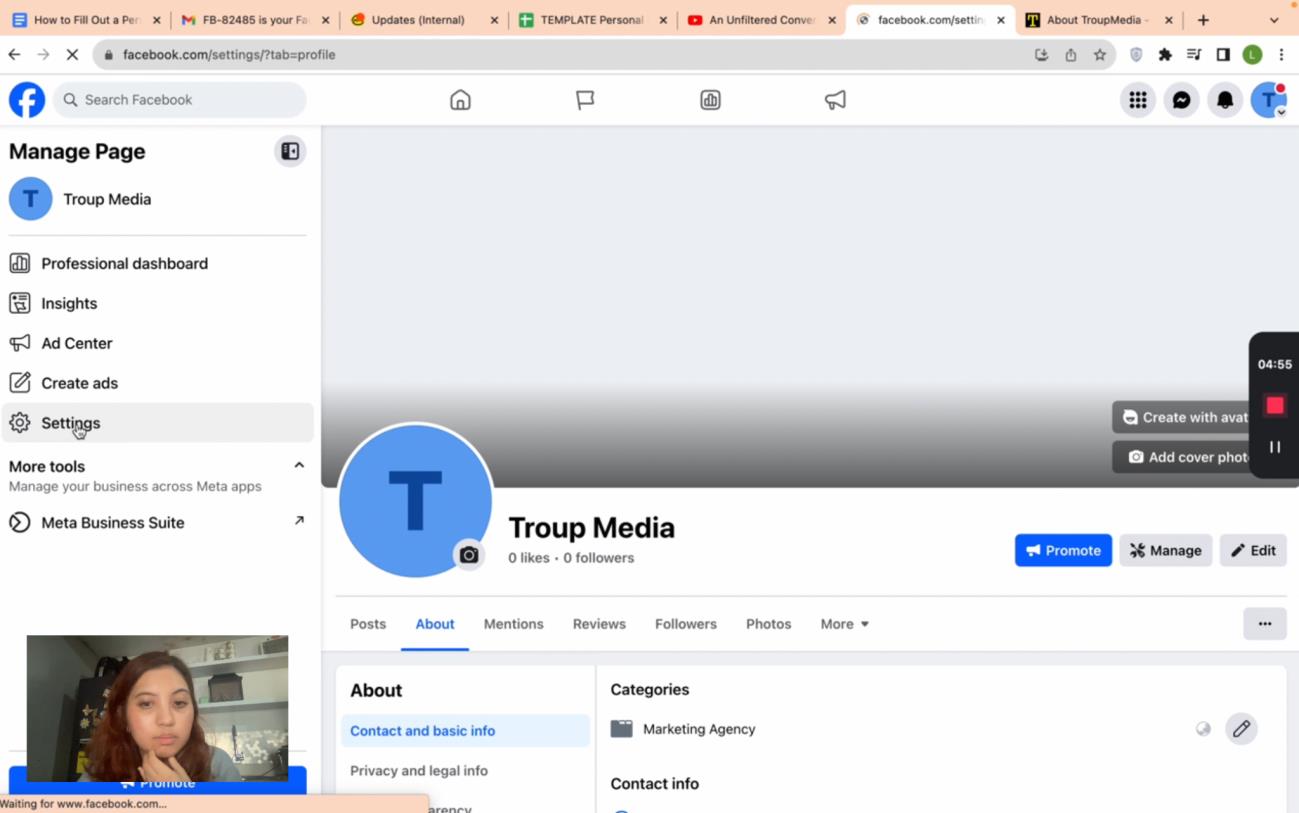


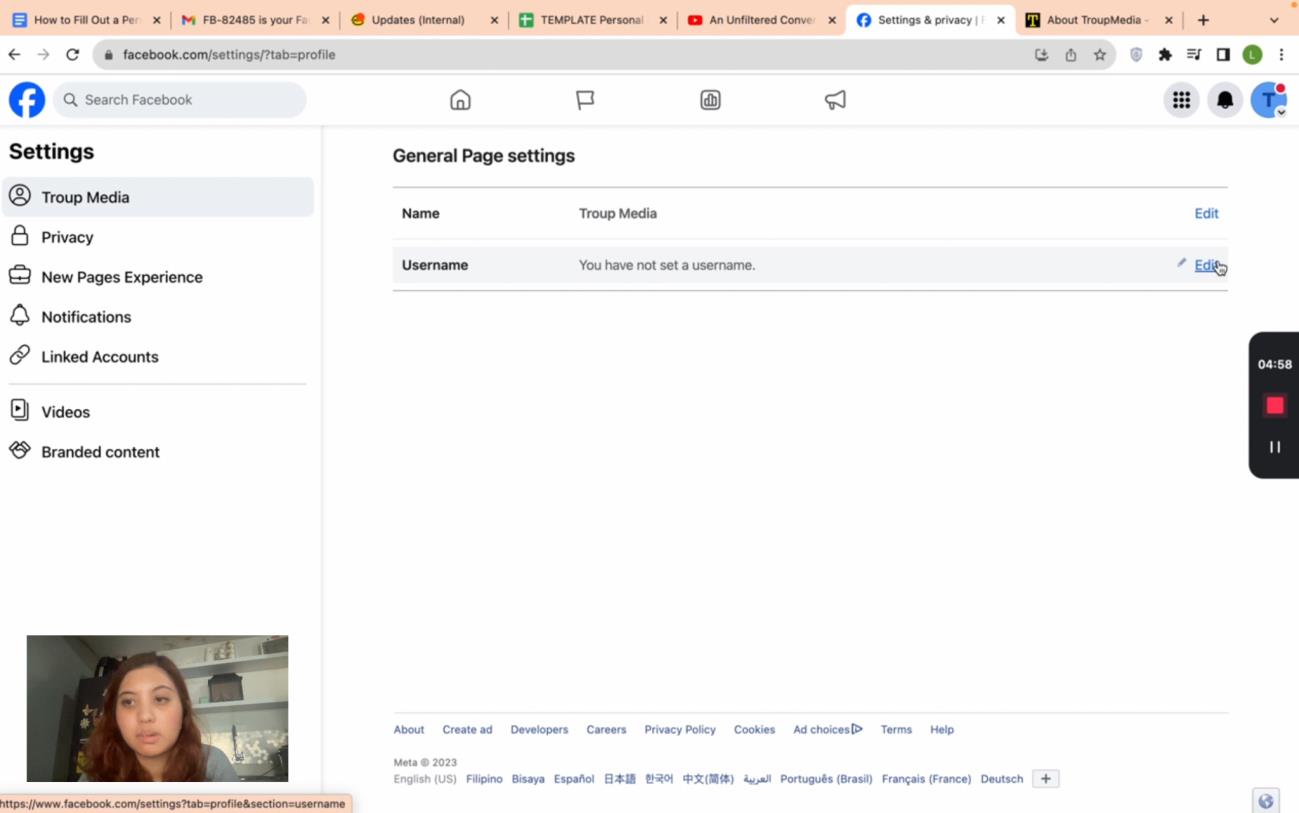
7. On the left task pane, click “Settings” and select “Edit” under
“Username.”
8. Set your username and click “Save.”

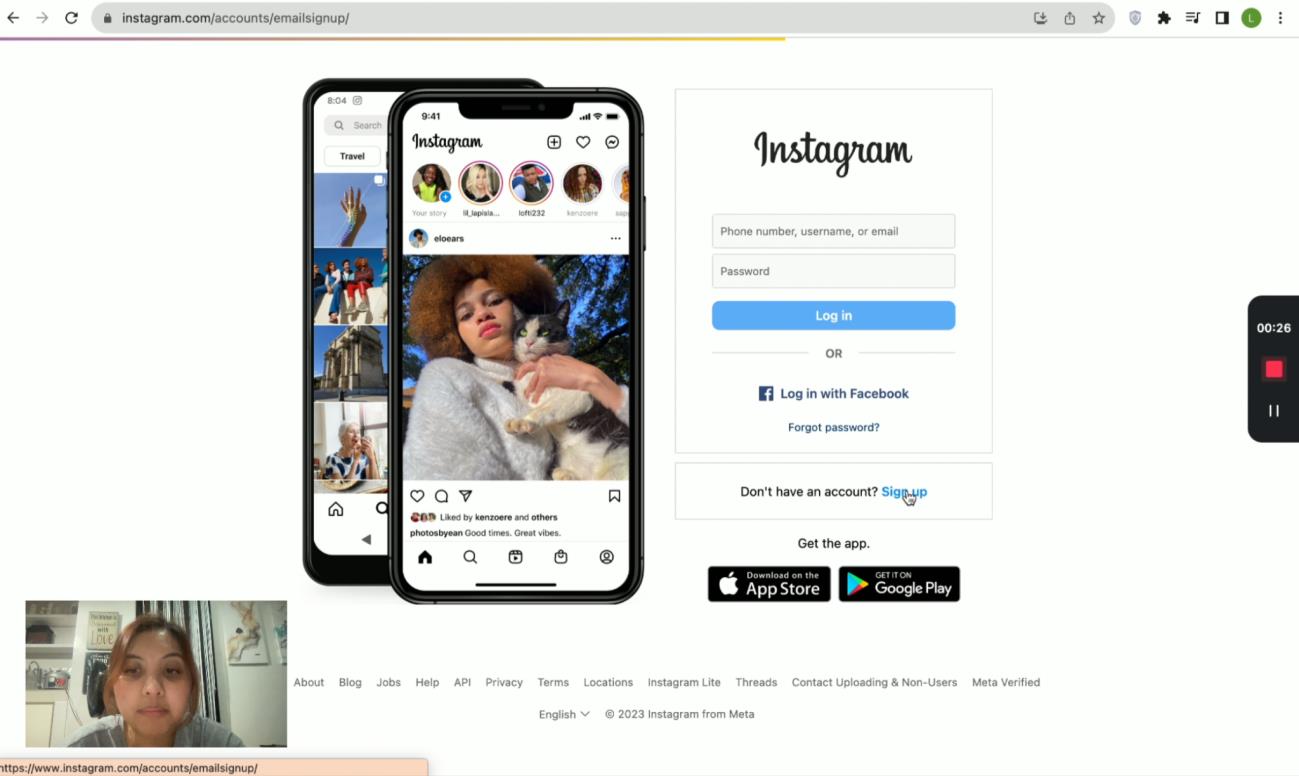
1. Go to instagram.com and on Don't have an account? Click “Sign up”


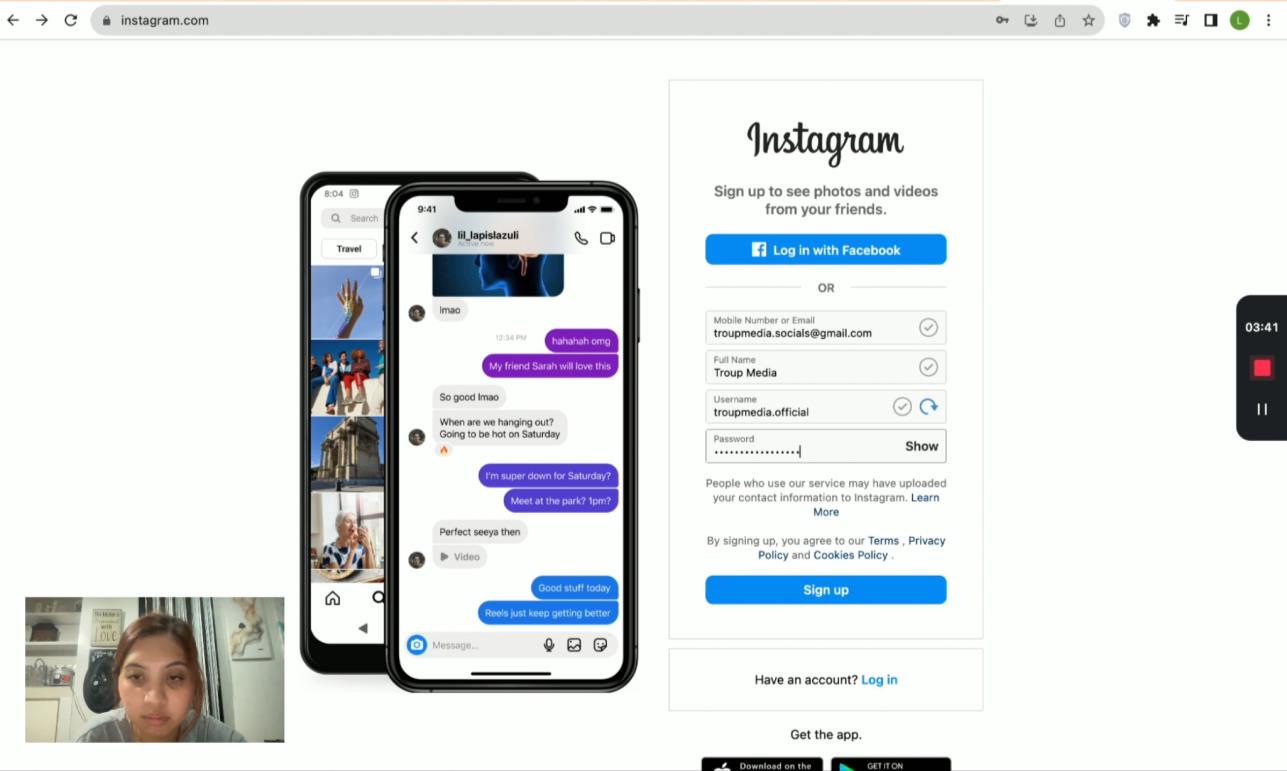

2. Fill-out the necessary fields. Input your mobile phone number or email, full name, username, and password. Then click “Sign up.”
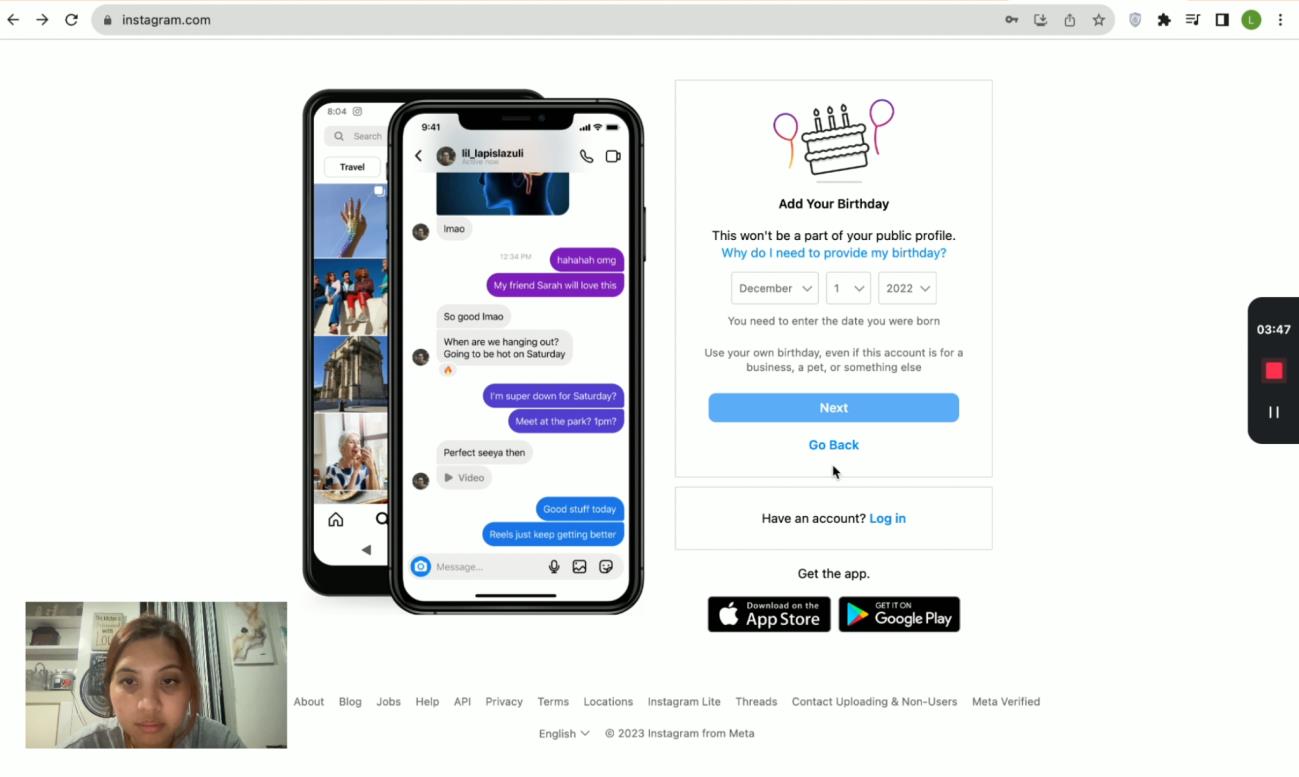
3. Add your birthday and then click “Next.”
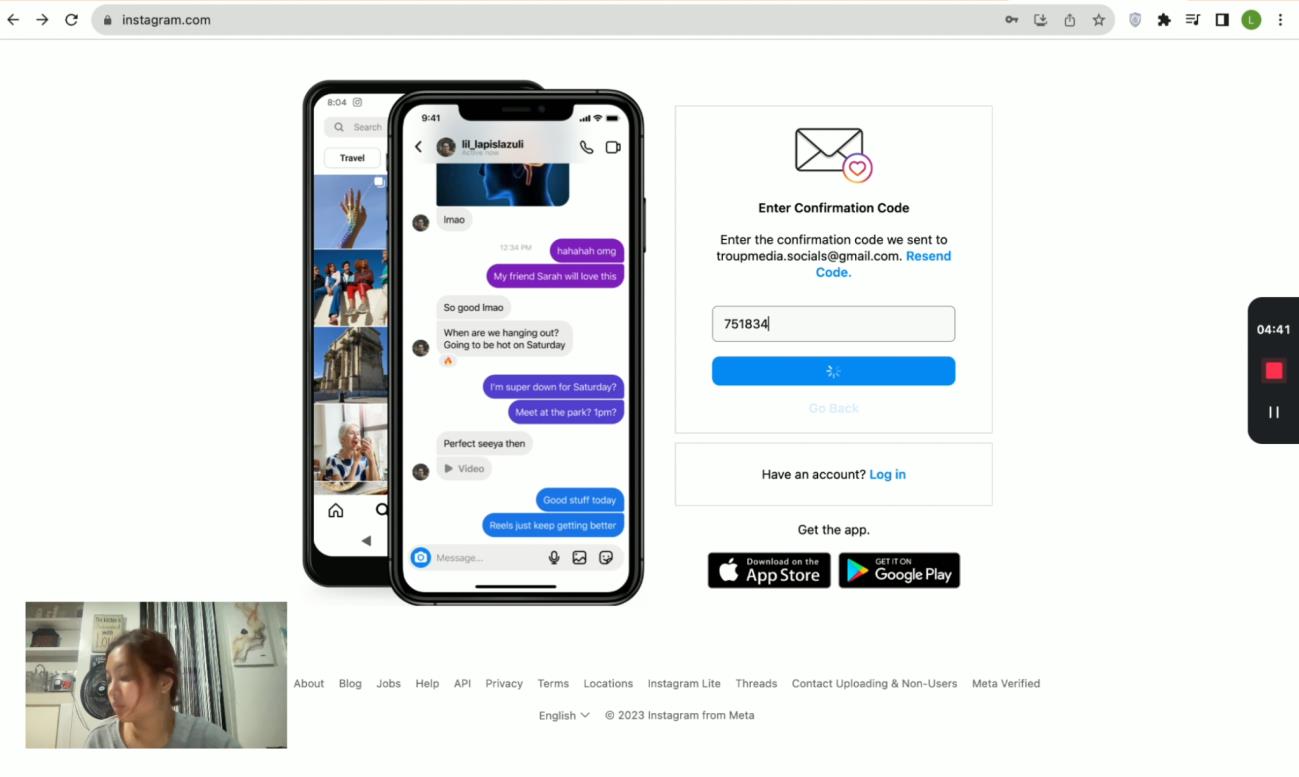


4. Enter the verification code sent in your email or contact number.
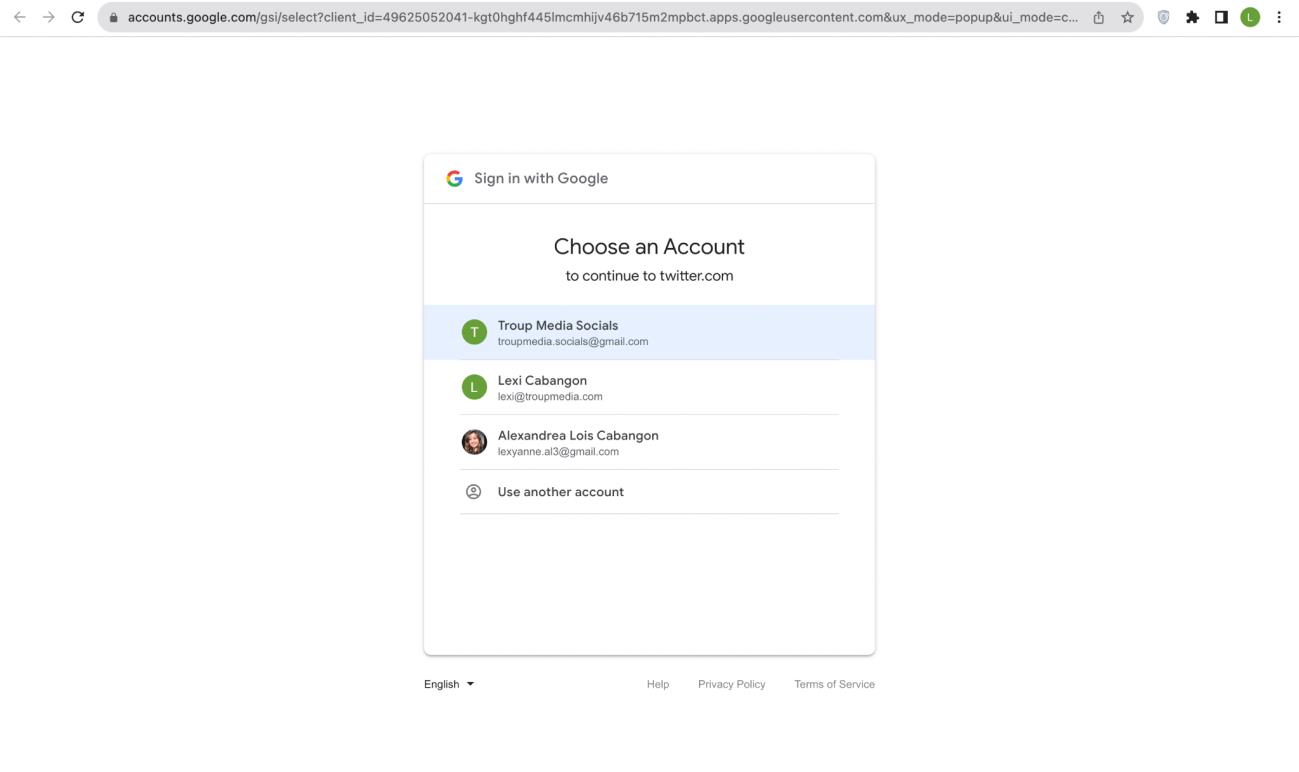
1. Go to twitter.com
2. Click “Sign Up via Google”
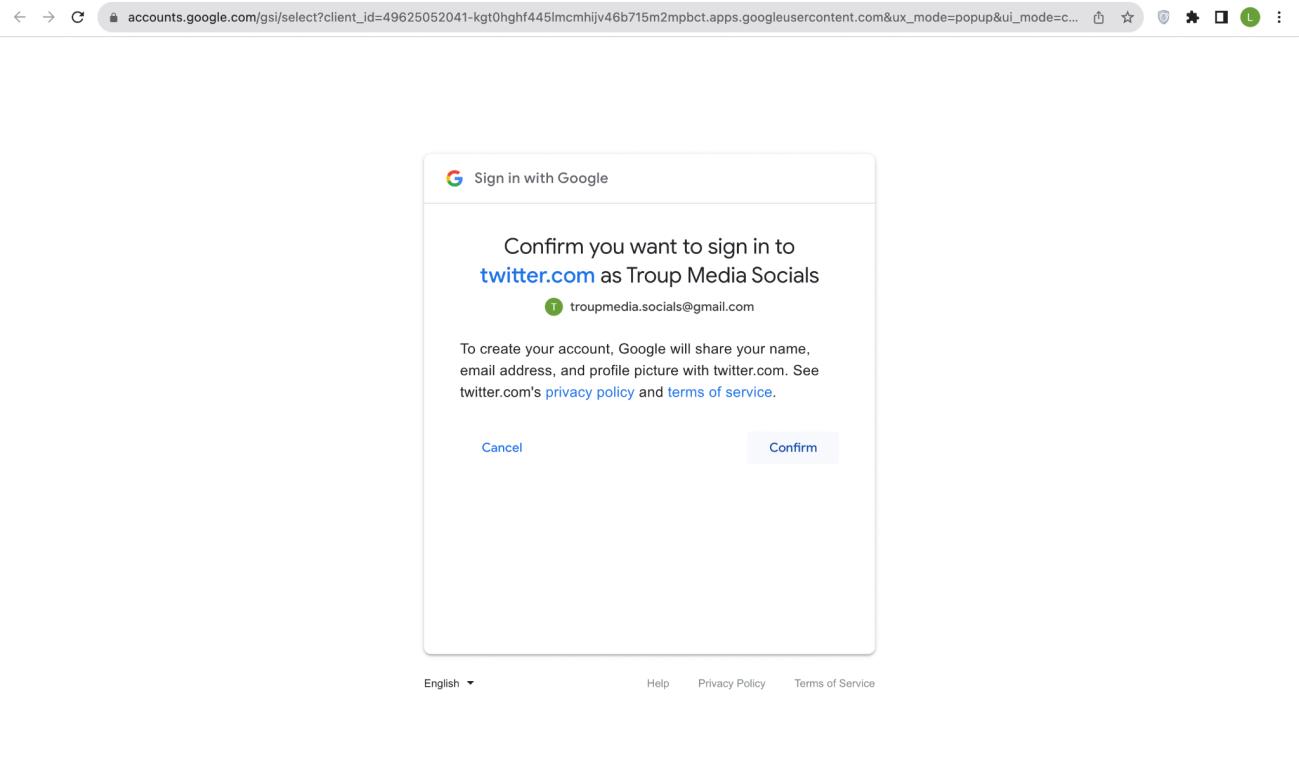
3. Click on the account that you will use to continue for Twitter.
4. Click “Confirm” when asked if you want to create account.
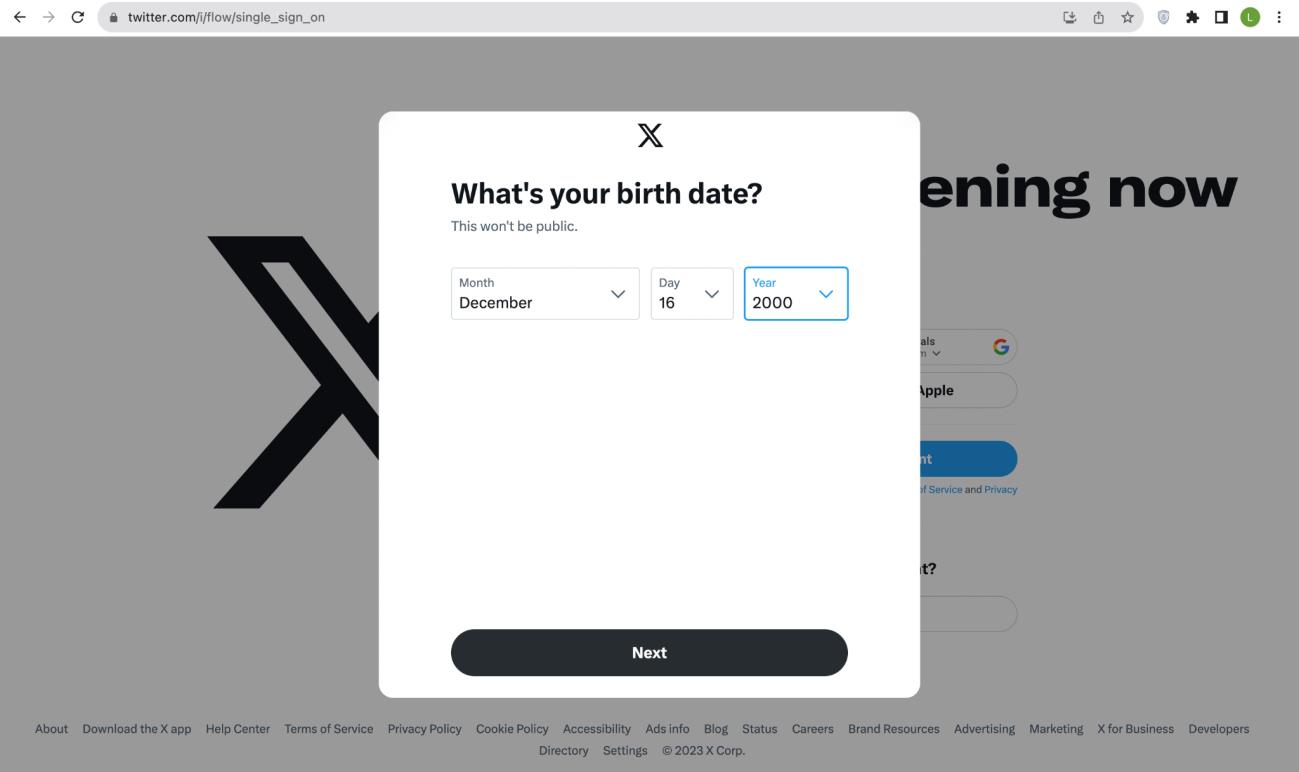
5. Input the birth date and click “Next”
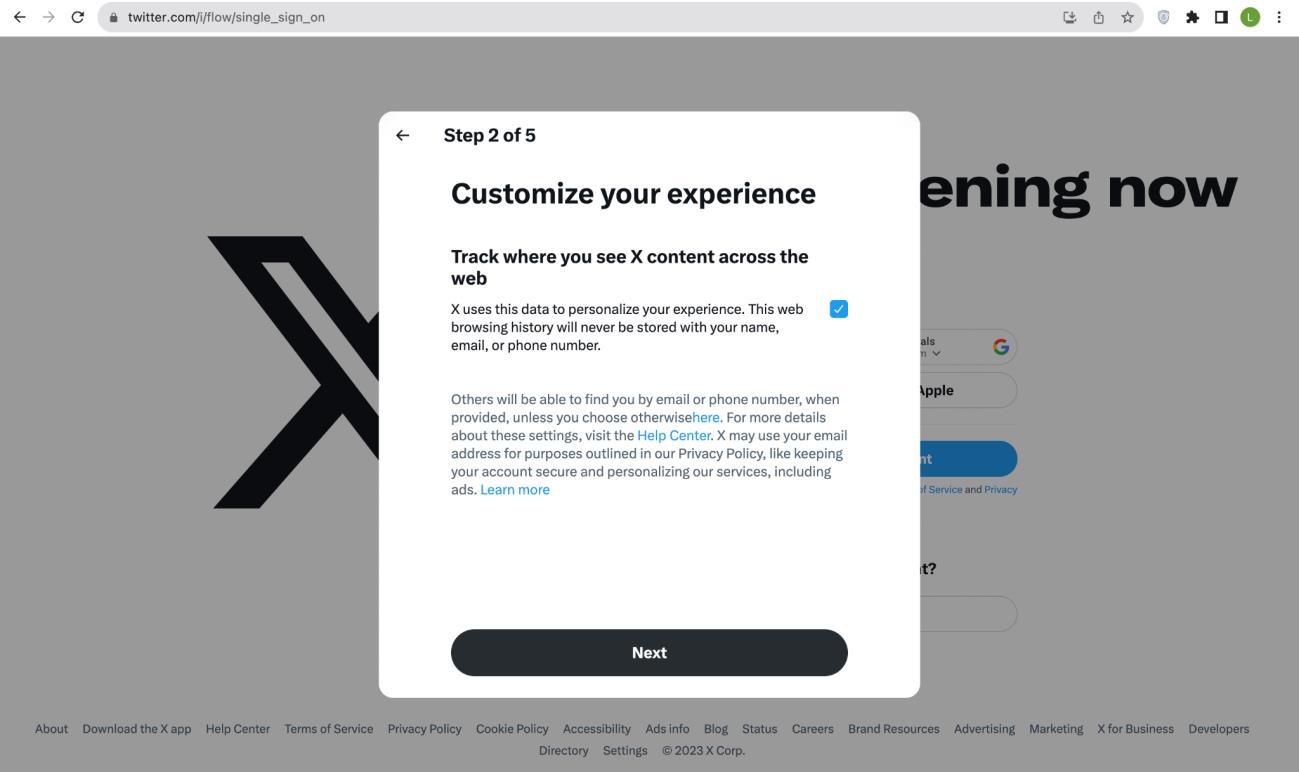
6. Customize your experience. Click on “Next.” Choose your language and interests.

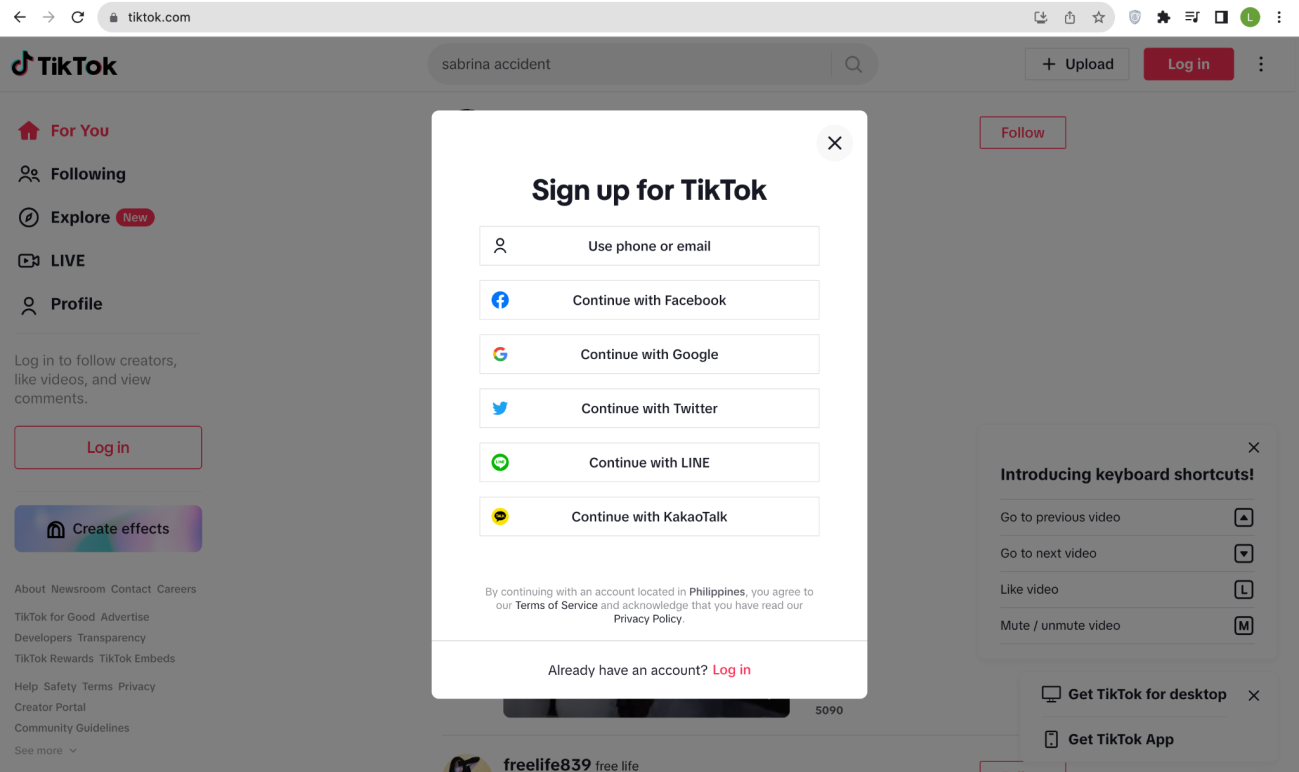
Tiktok
1. Go to Tiktok.com
2. Click “Sign up”
3. Click “Continue with Google”
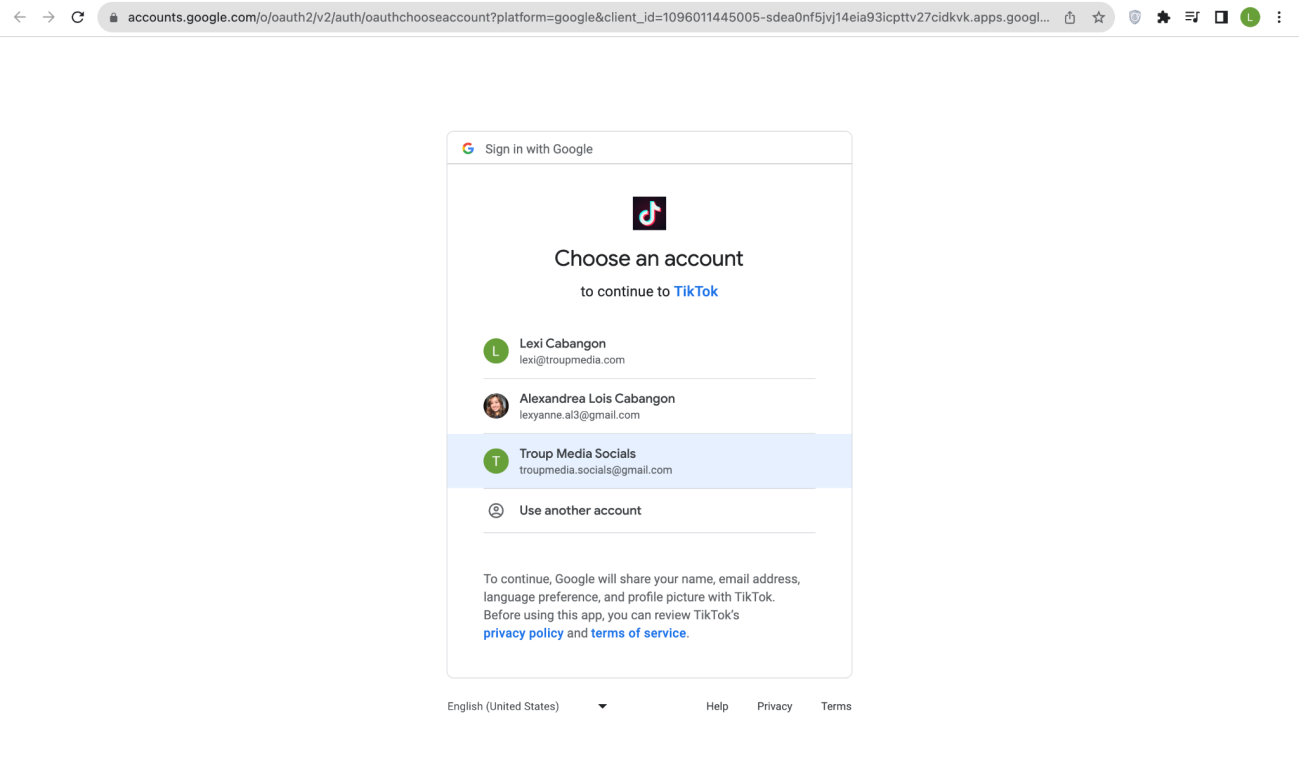
4. Click the Gmail associated with the client/’s brand.
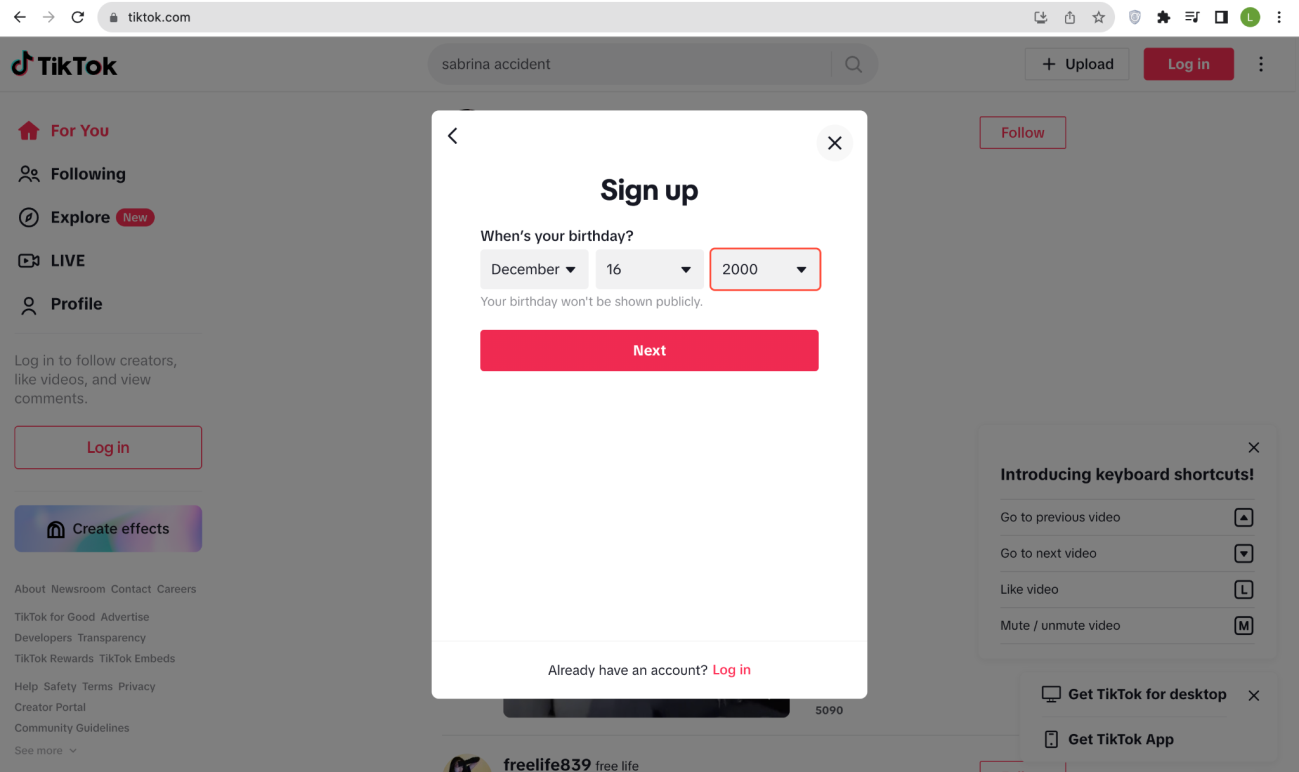
5. Input the birthday and click “Next.”
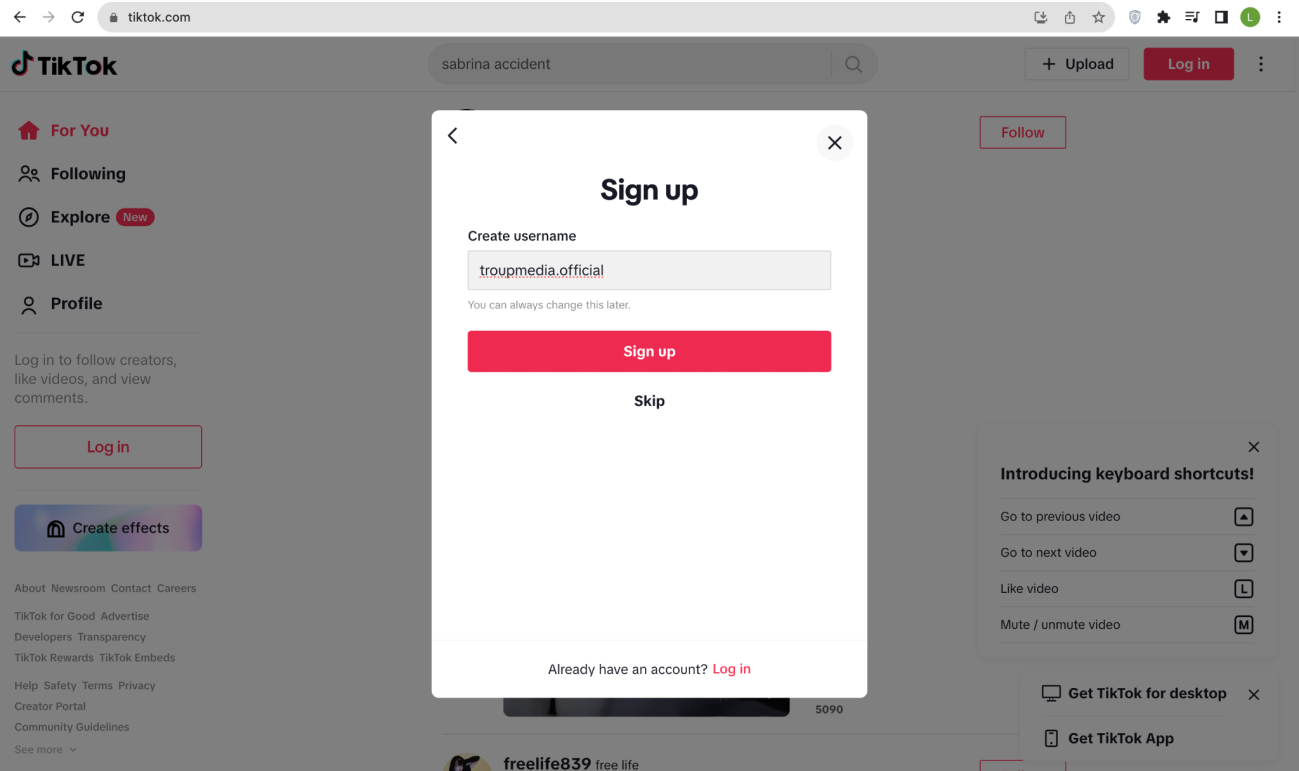
6. Create a username and click “Sign up”
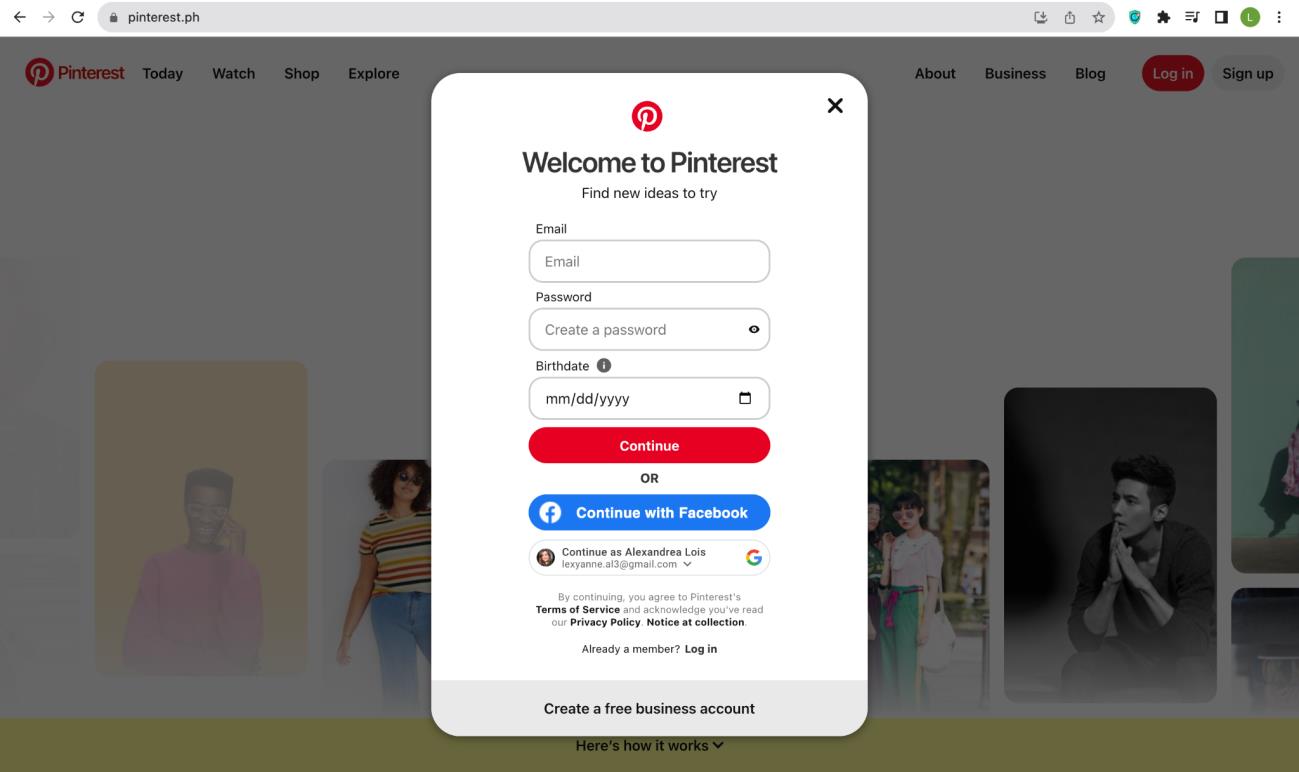
1. Go to pinterest.com
2. Click on “Sign-up with Google”
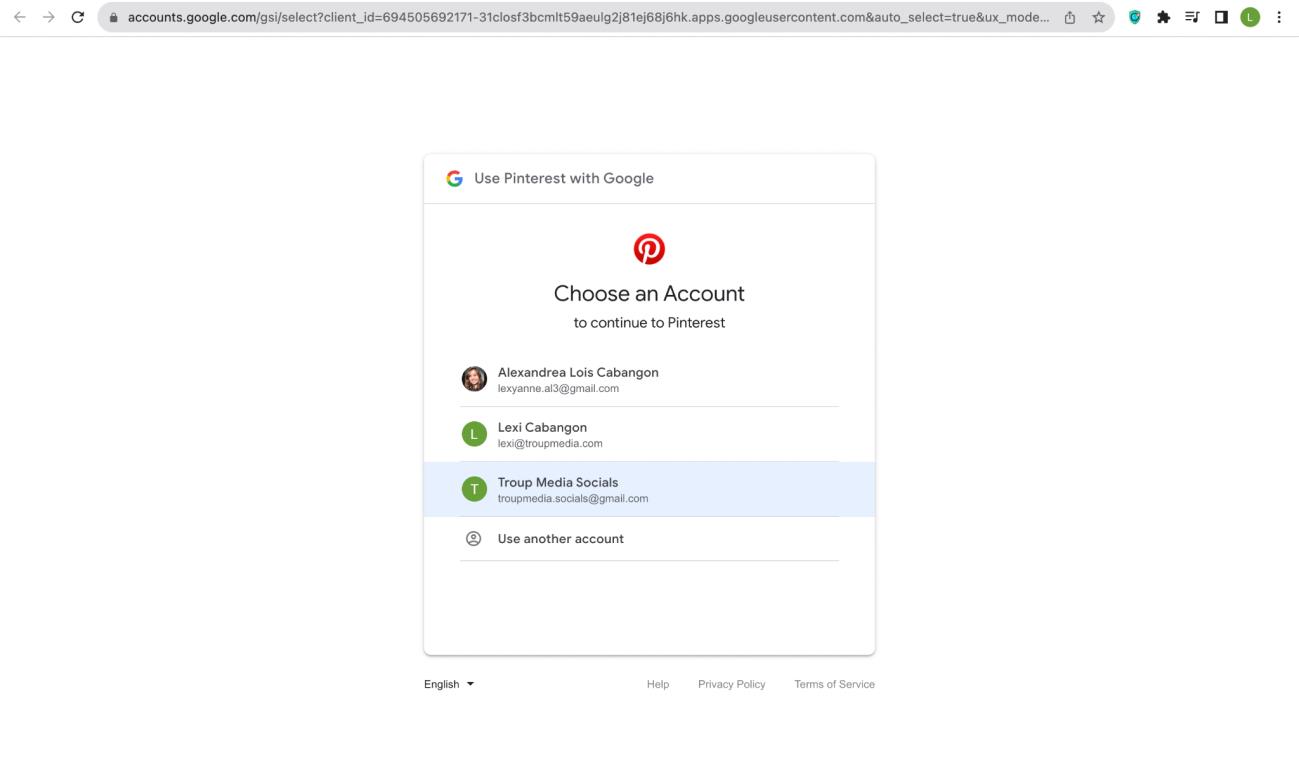
3. Choose the Gmail account that is associated with your client/brand.
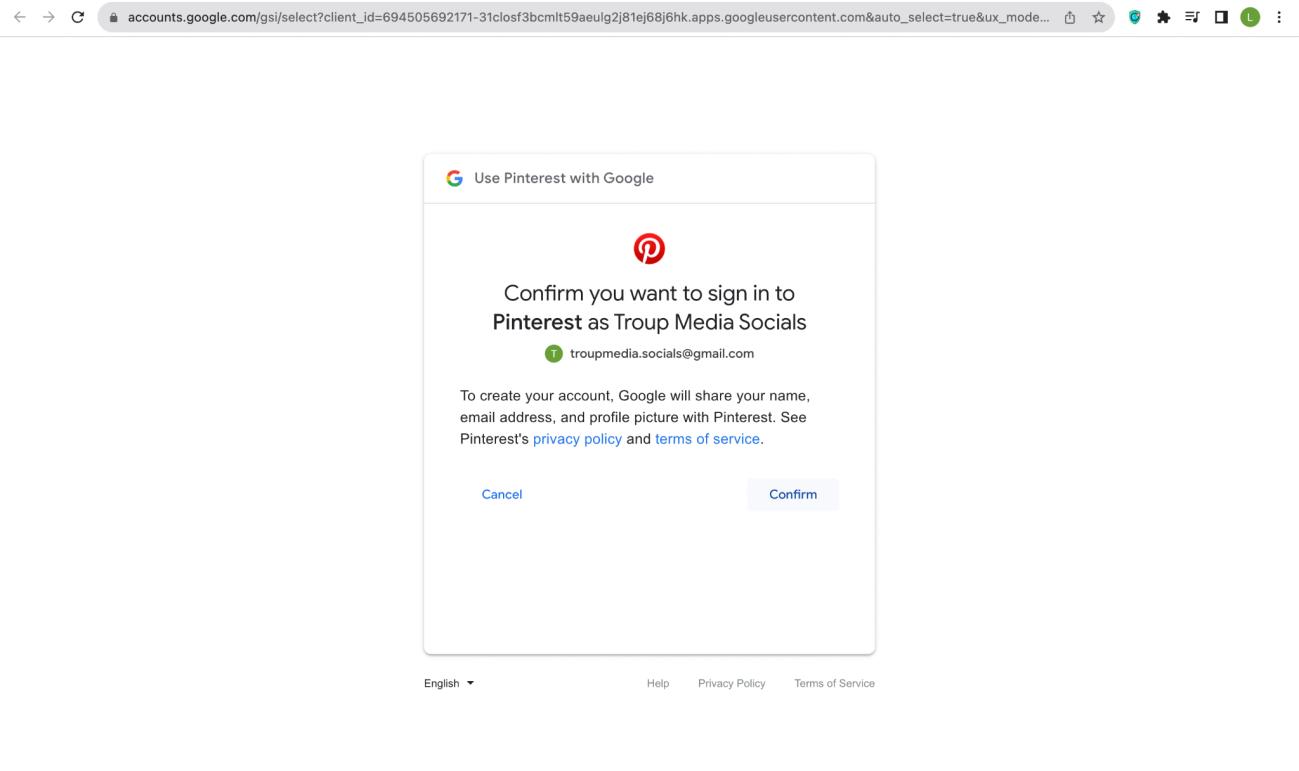
4. Confirm that you want to sign in with the said account and click
“Confirm.”
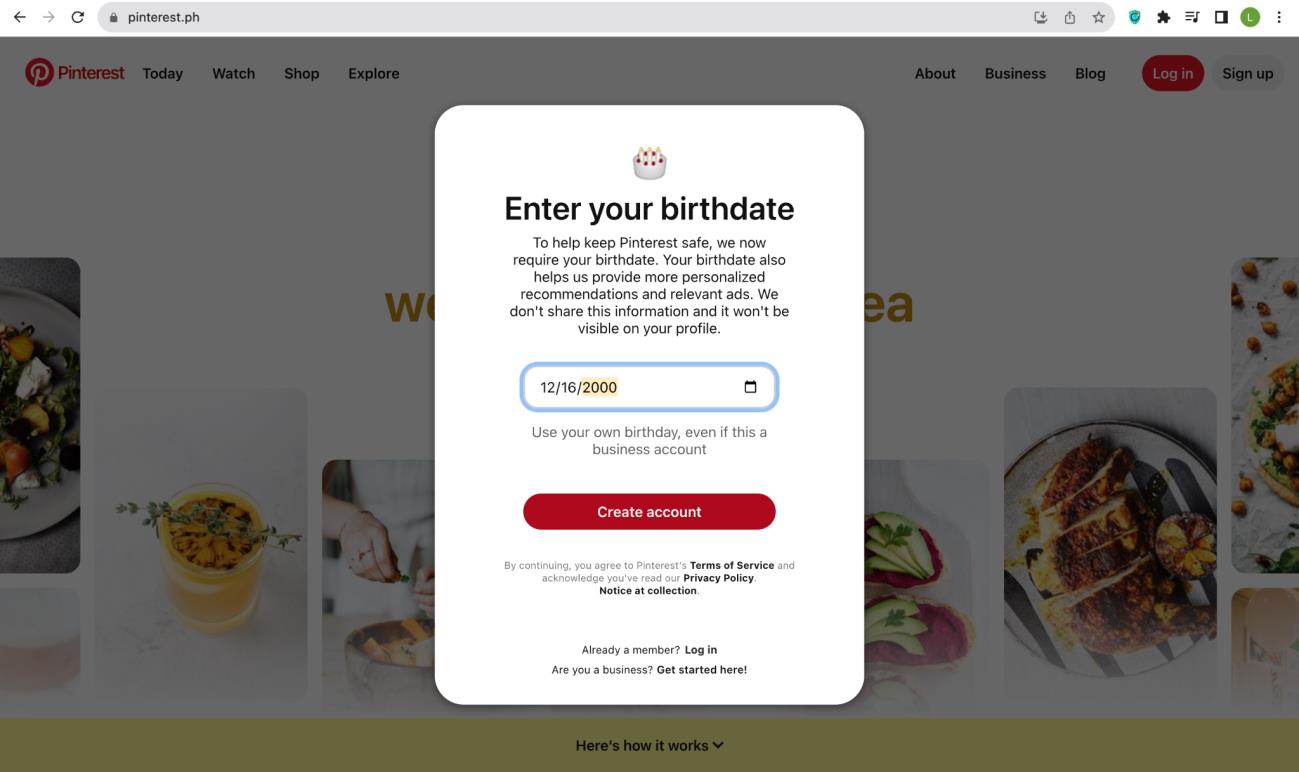
5. Enter birthdate and click on “Create account”
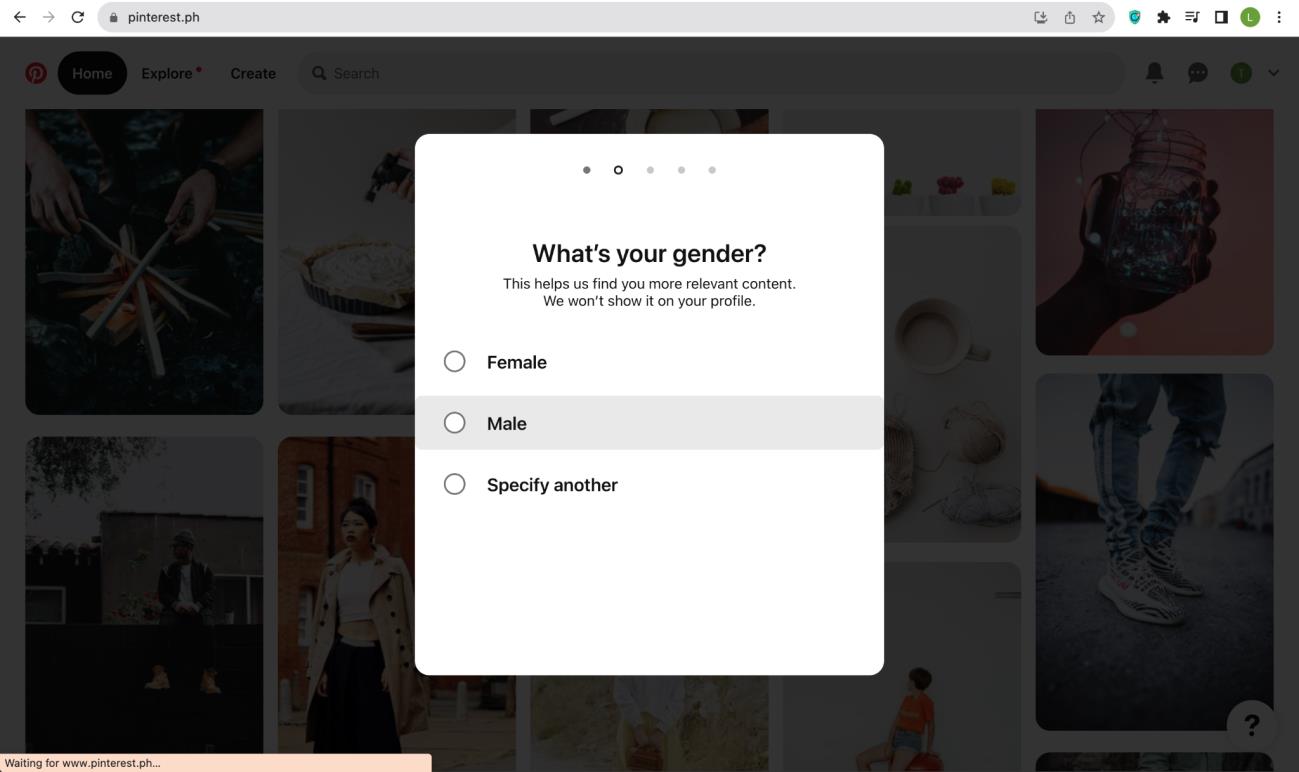
6. Choose Gender
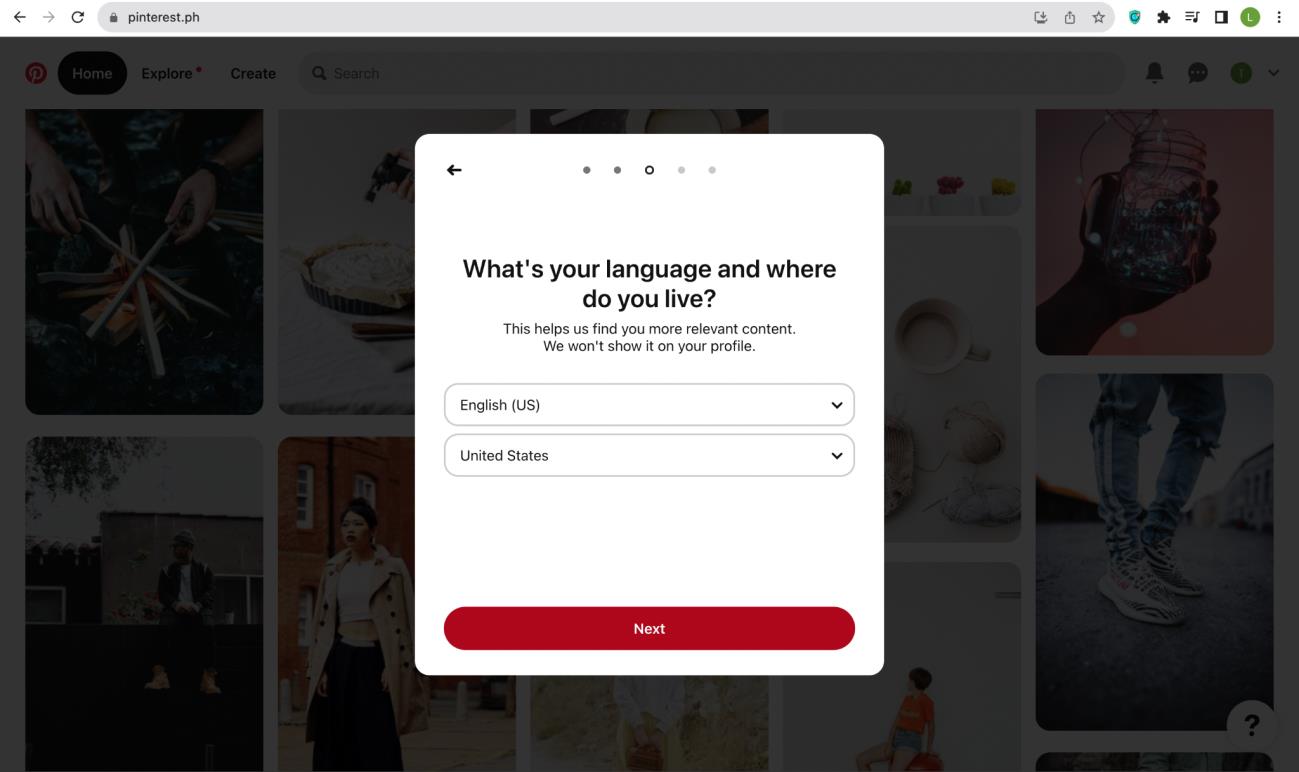
7. Specify your language and answer where you live.
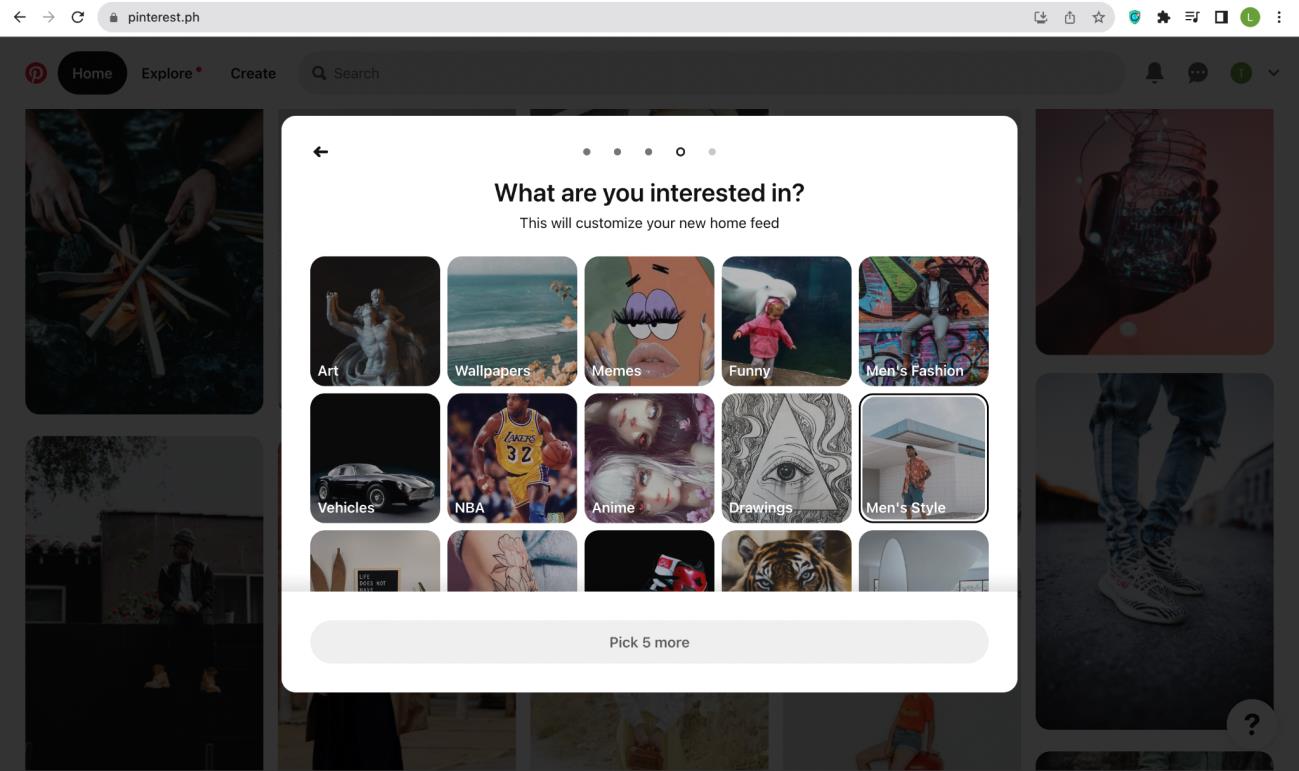
8. Choose what you are interested in or choose the niche close to your industry.
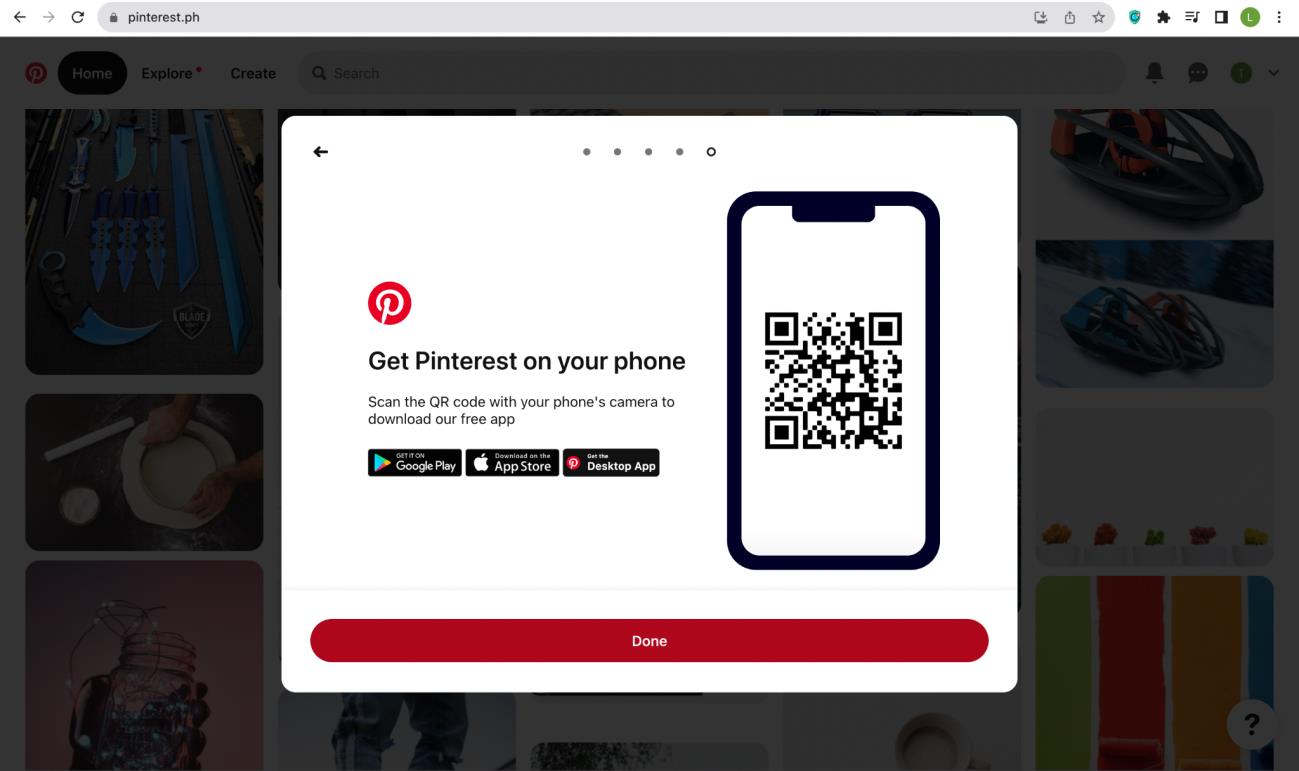
9. Click “Done.”
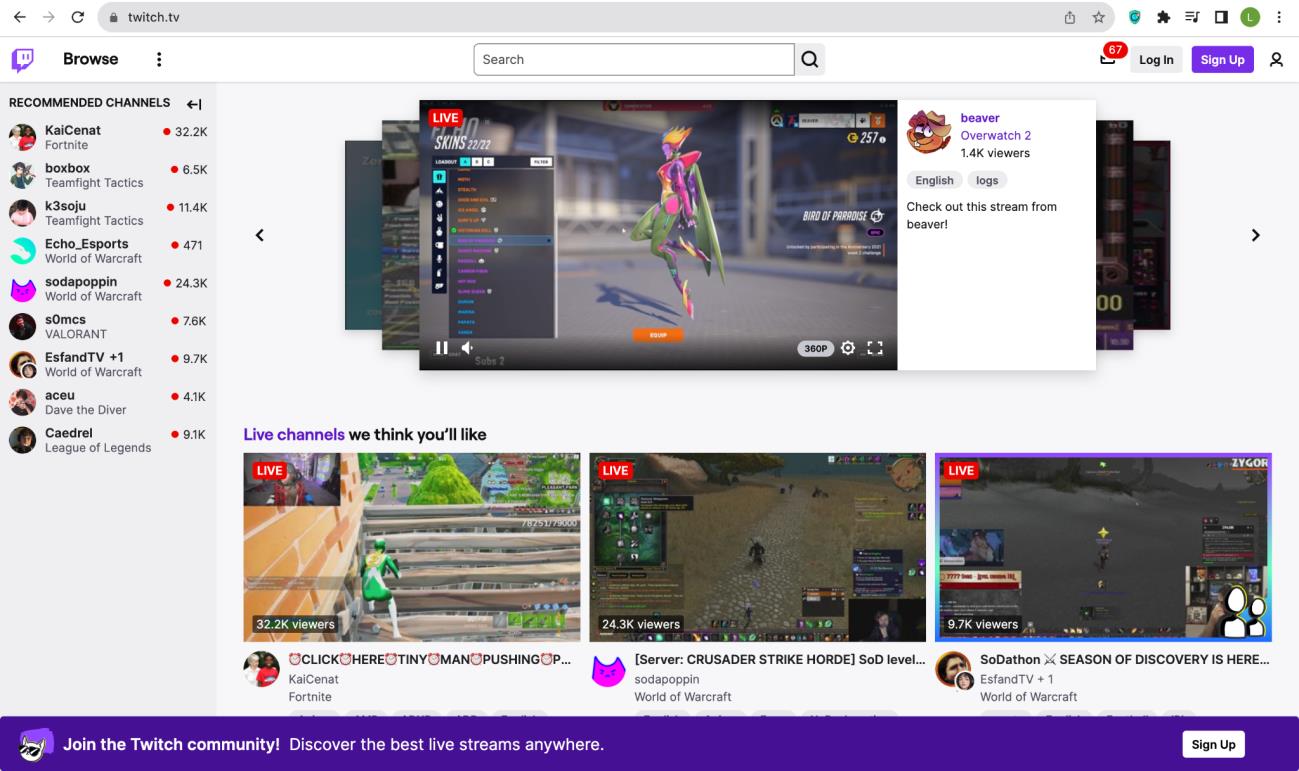
Twitch
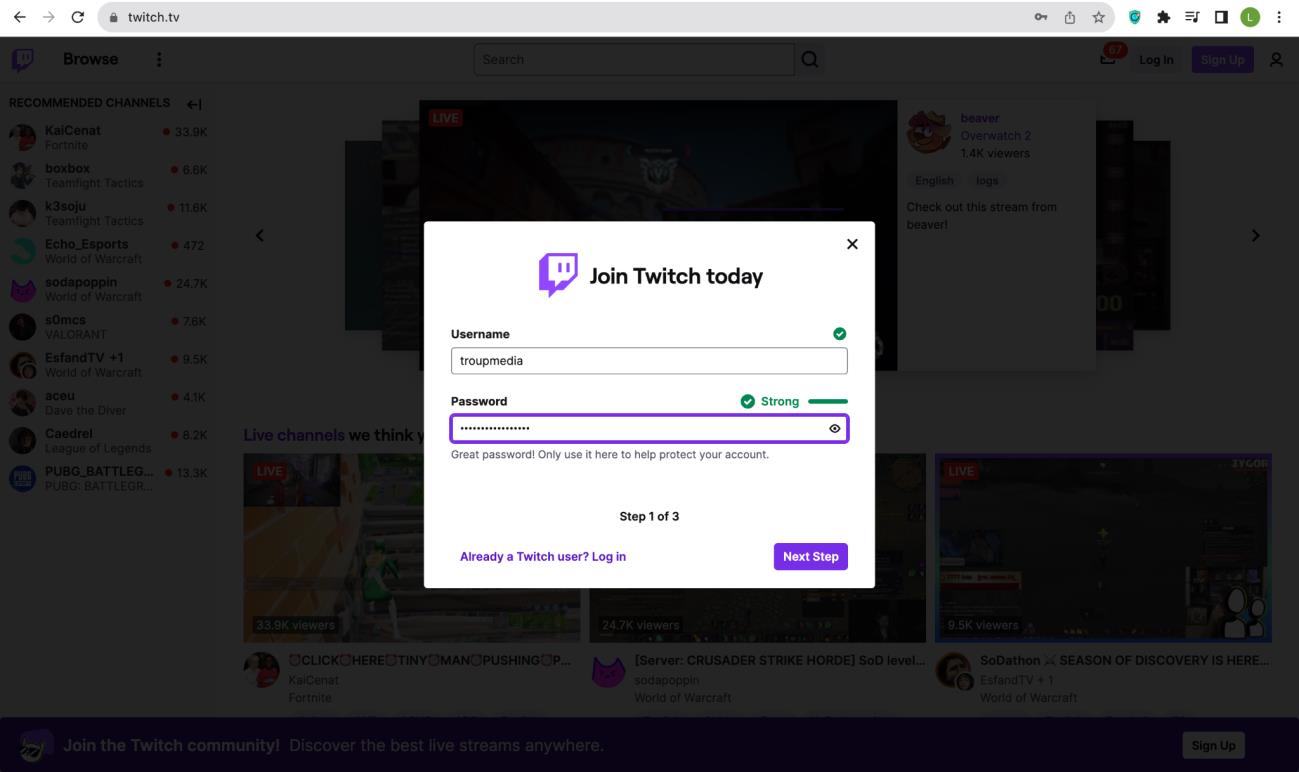
1. Go to twitch.tv and click on “Sign up.”
2. Input the desired username and password. Once done, click “Next Step.”
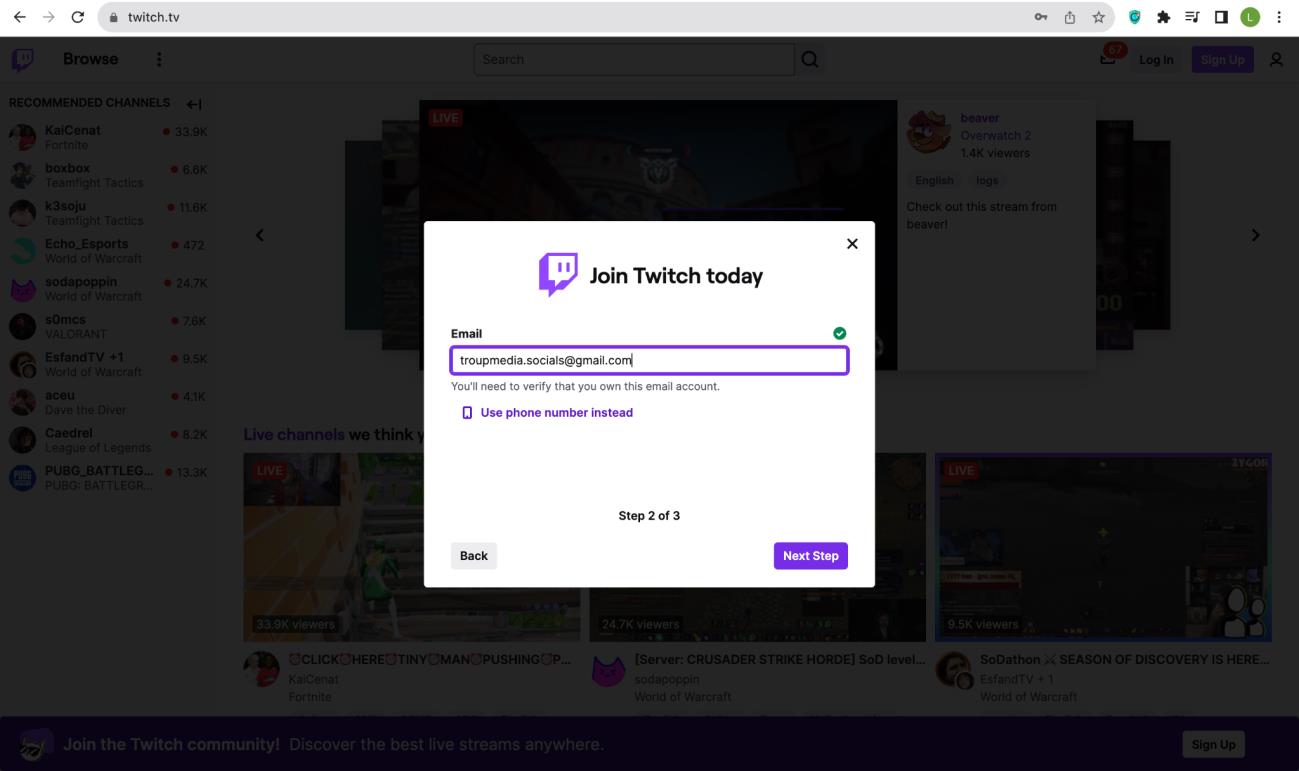
3. Type the email address for verification purposes. Once done, click
“Next Step.”
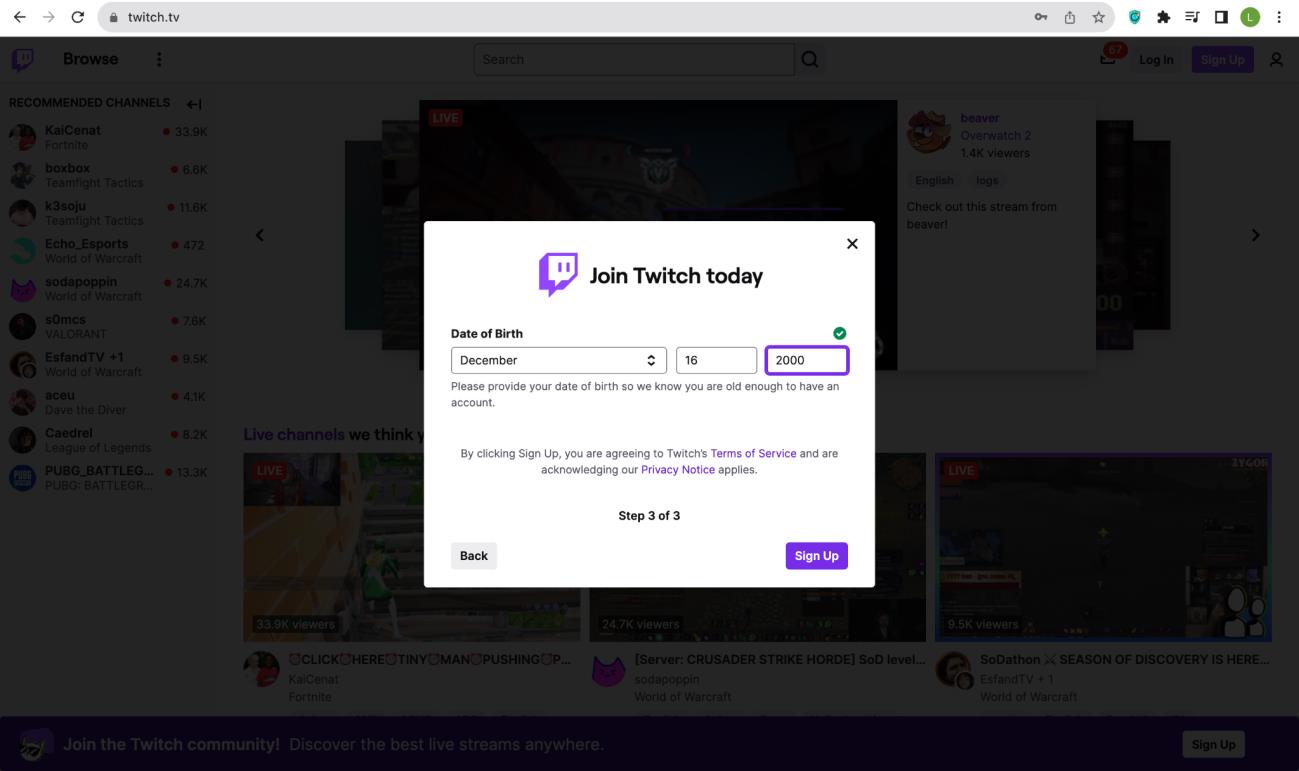
4. Input the birthday of the client and click on “Sign up” once finished.
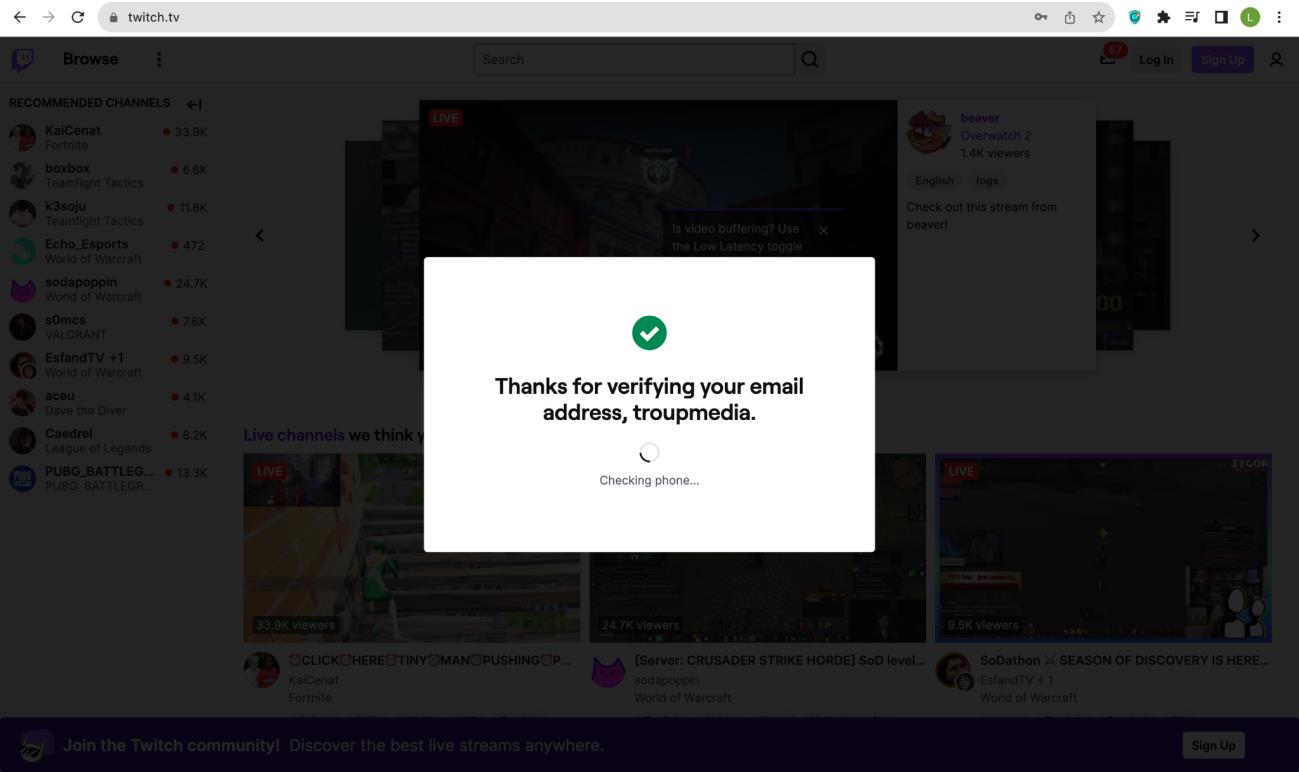
5. Input the verification code sent on the email address.
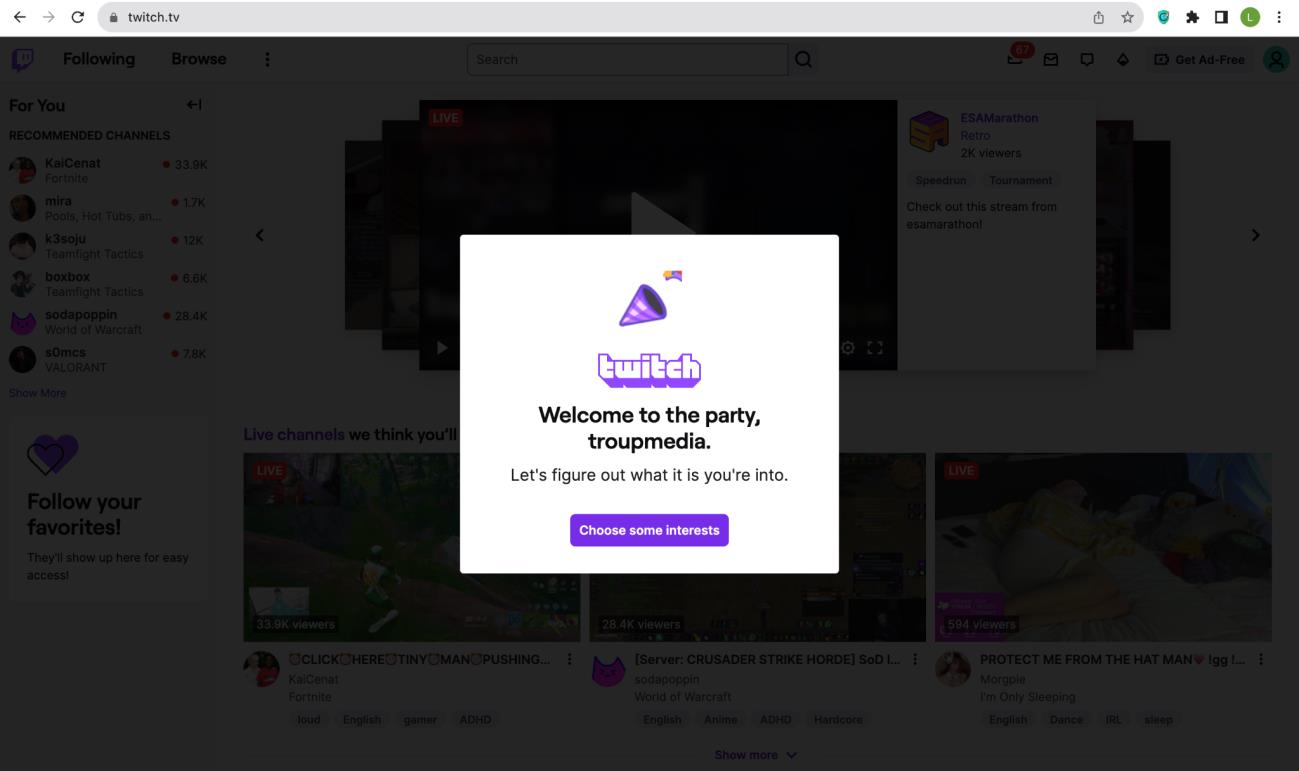
6. Choose some interest once verification is done.
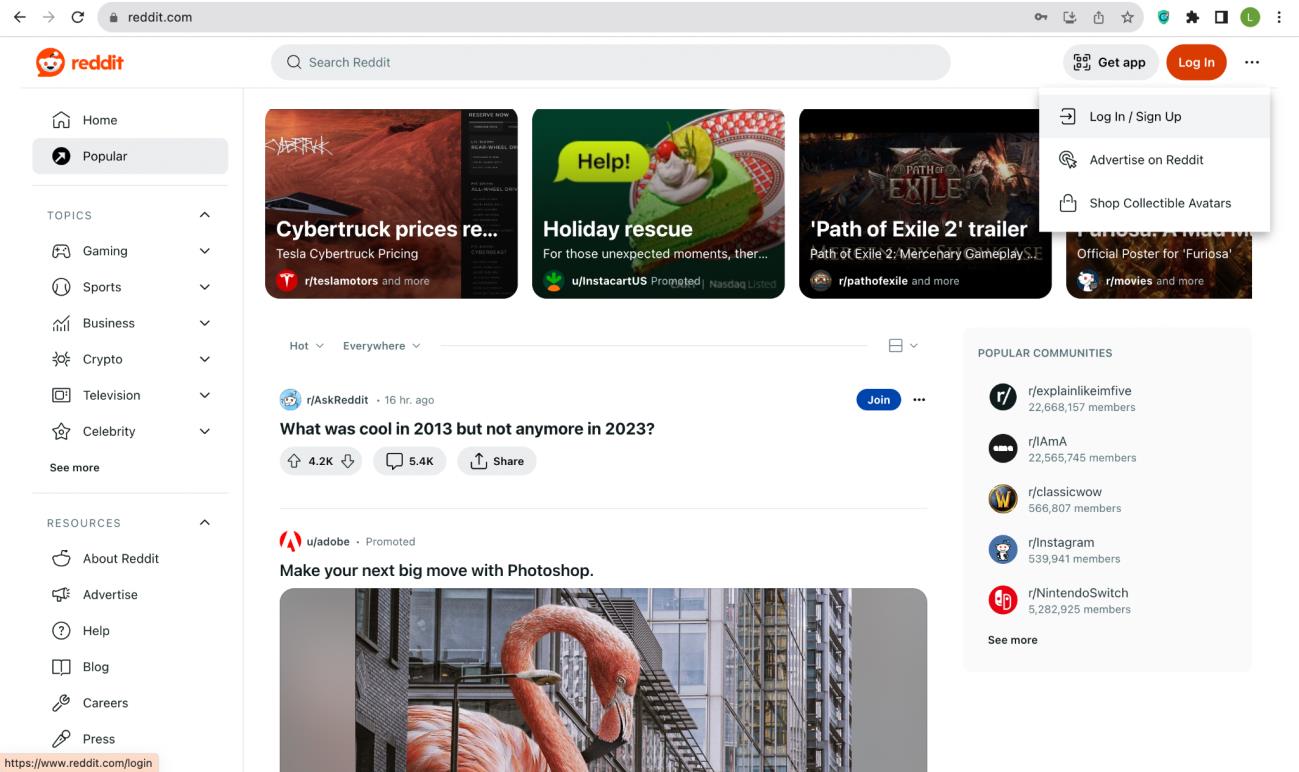
1. Go to reddit.com
2. On the upper right area, click “Log In/Sign Up”
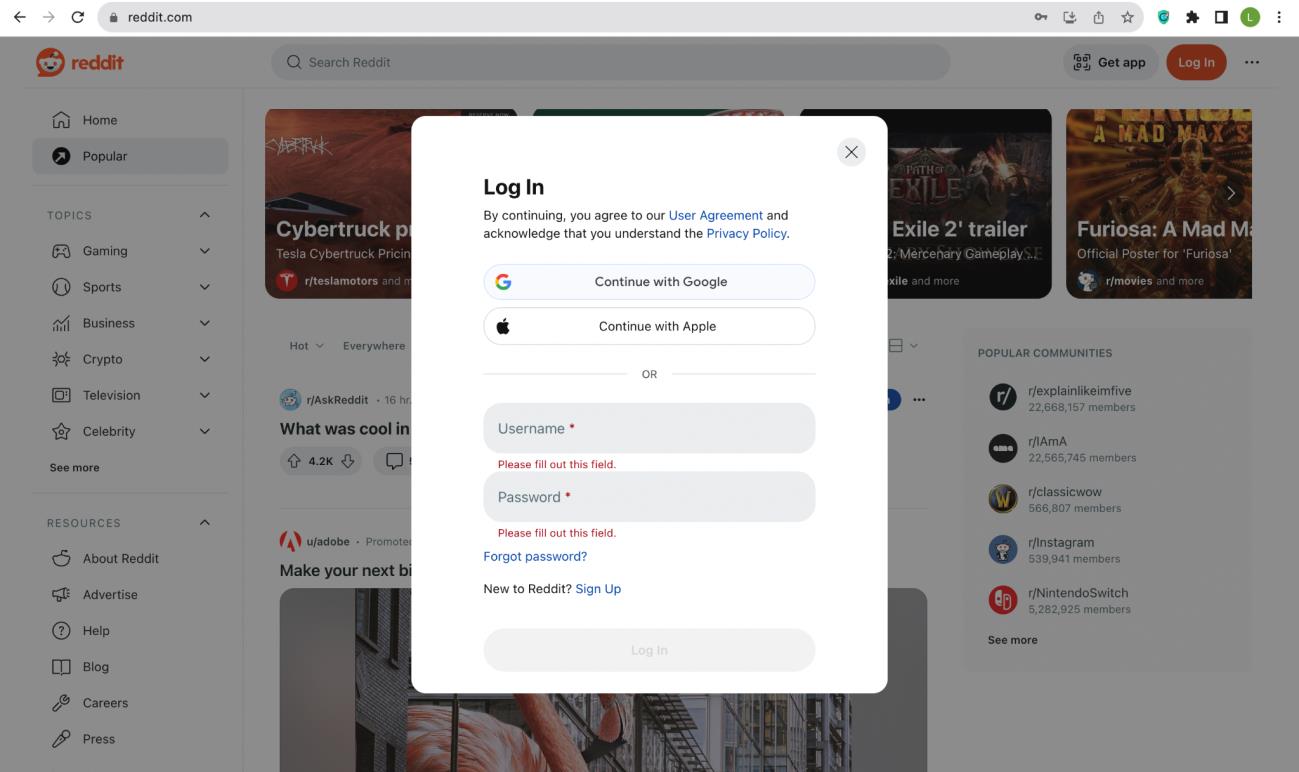
3. Click “Continue with Google”
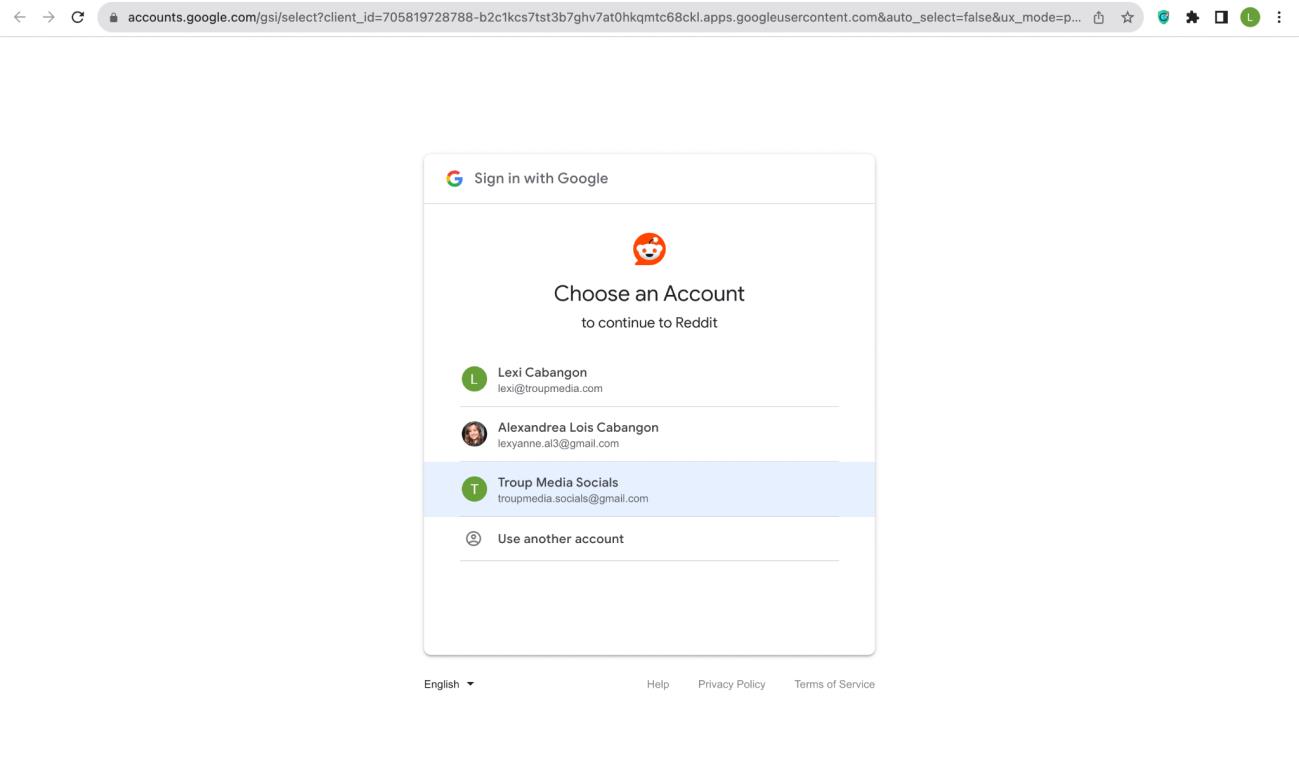
4. Choose client’s email address.
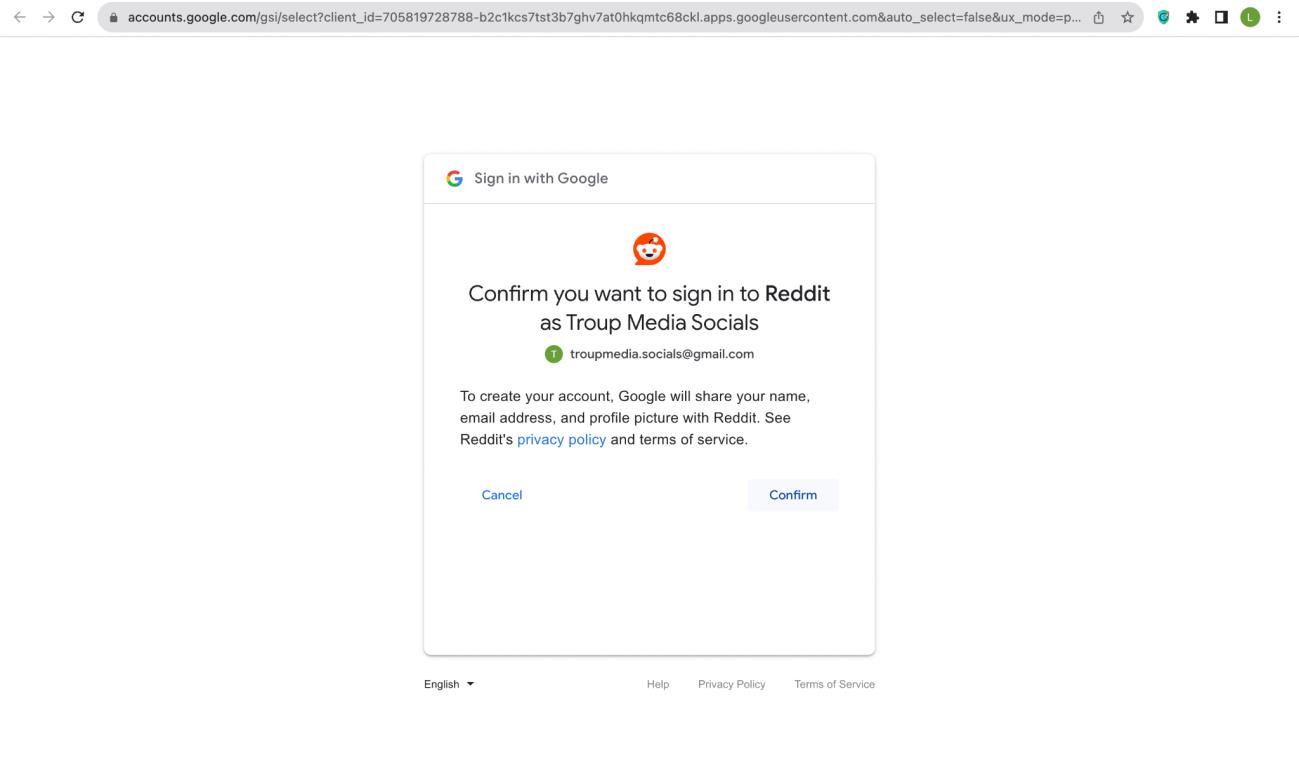
5. Confirm that you want to sign in using the gmail address.
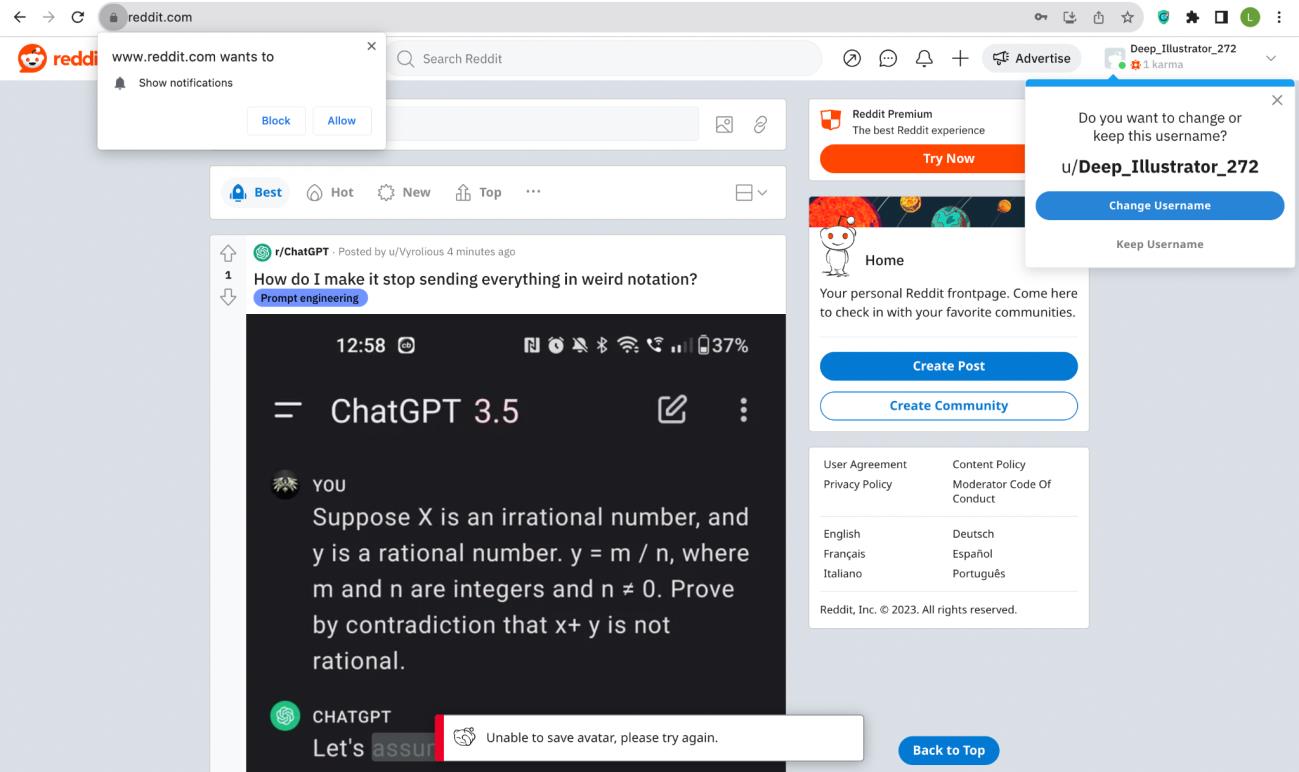
6. Change username.
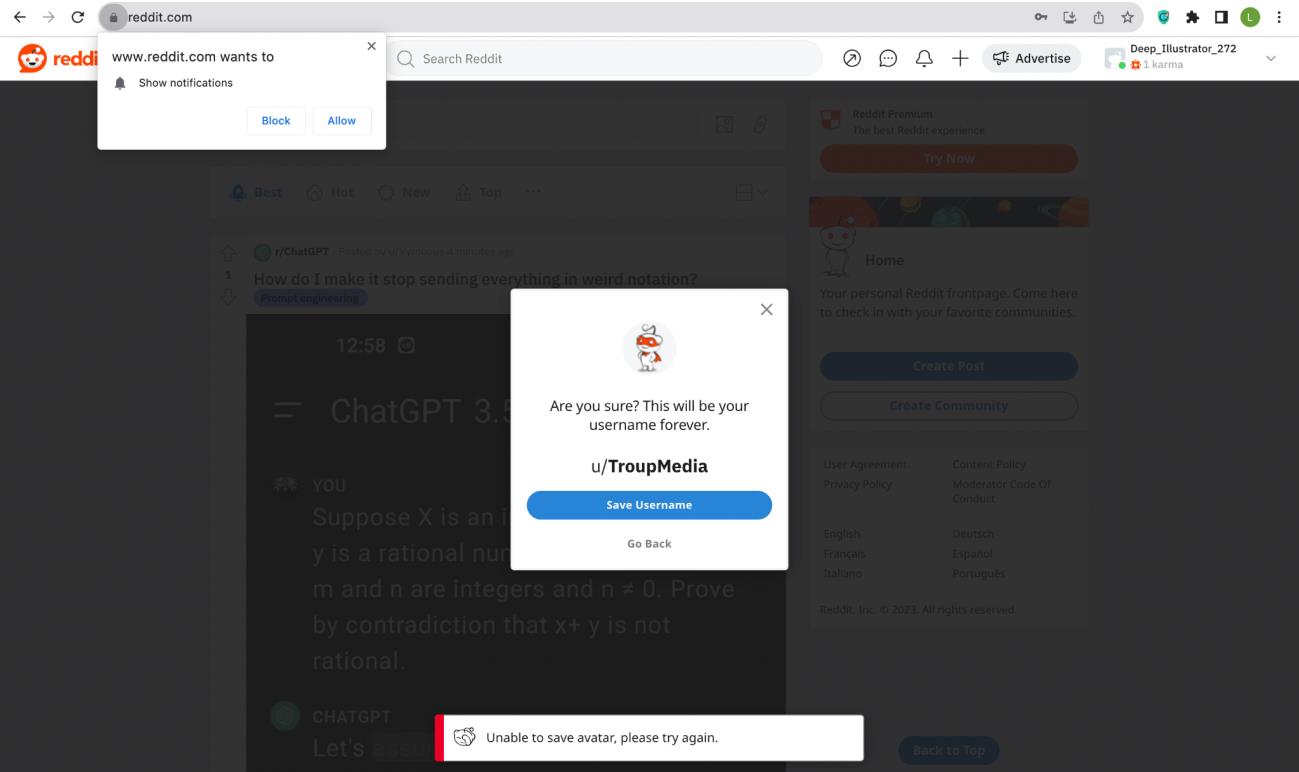
7. Save username.
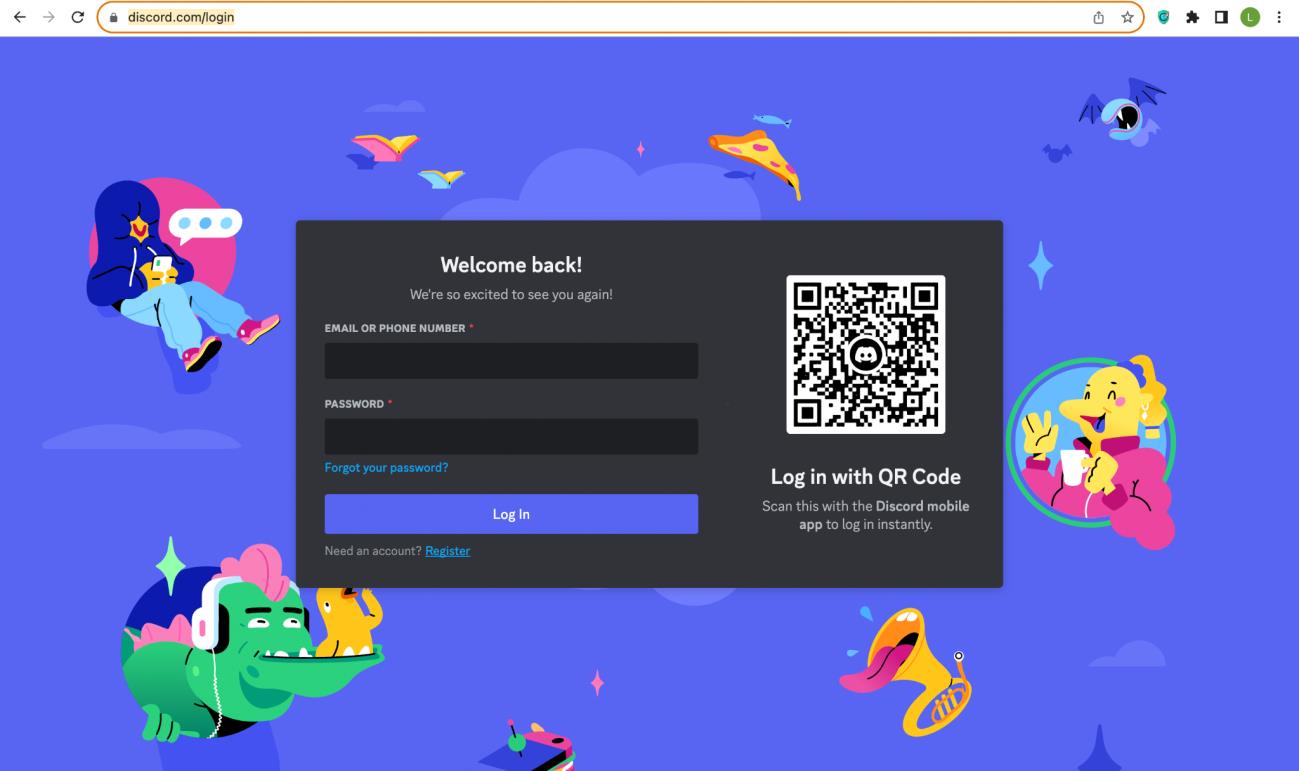
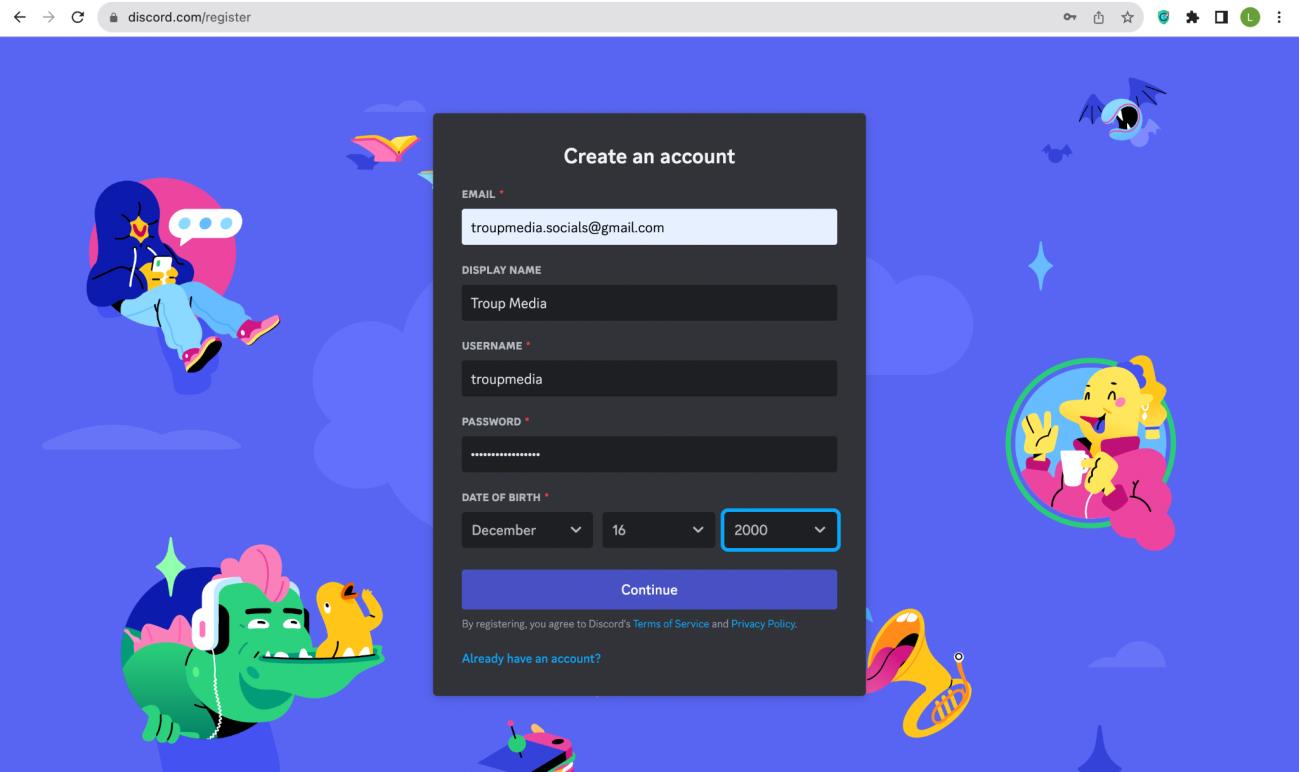
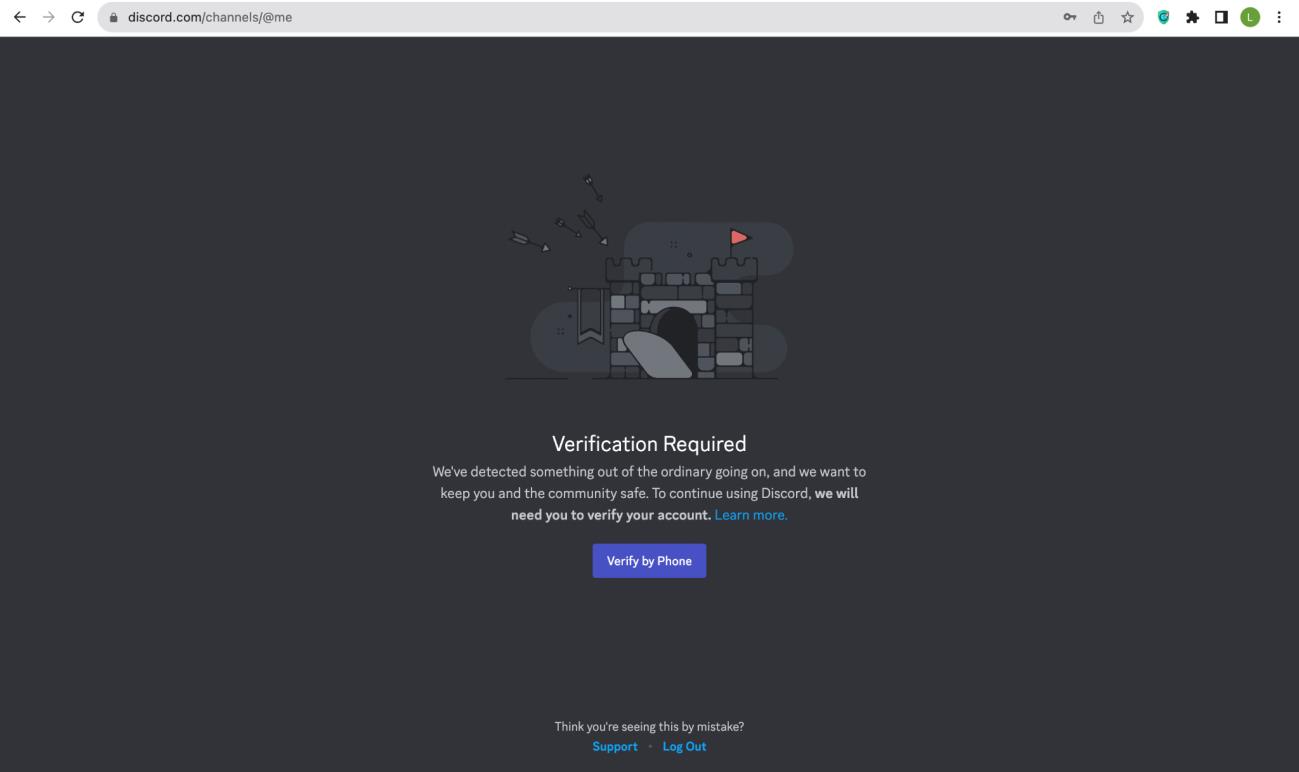
Discord
1. Go to https://discord.com/login and click on “Register”
2. Create an account by filling out the form providing the needed information. Once done, click “Continue.
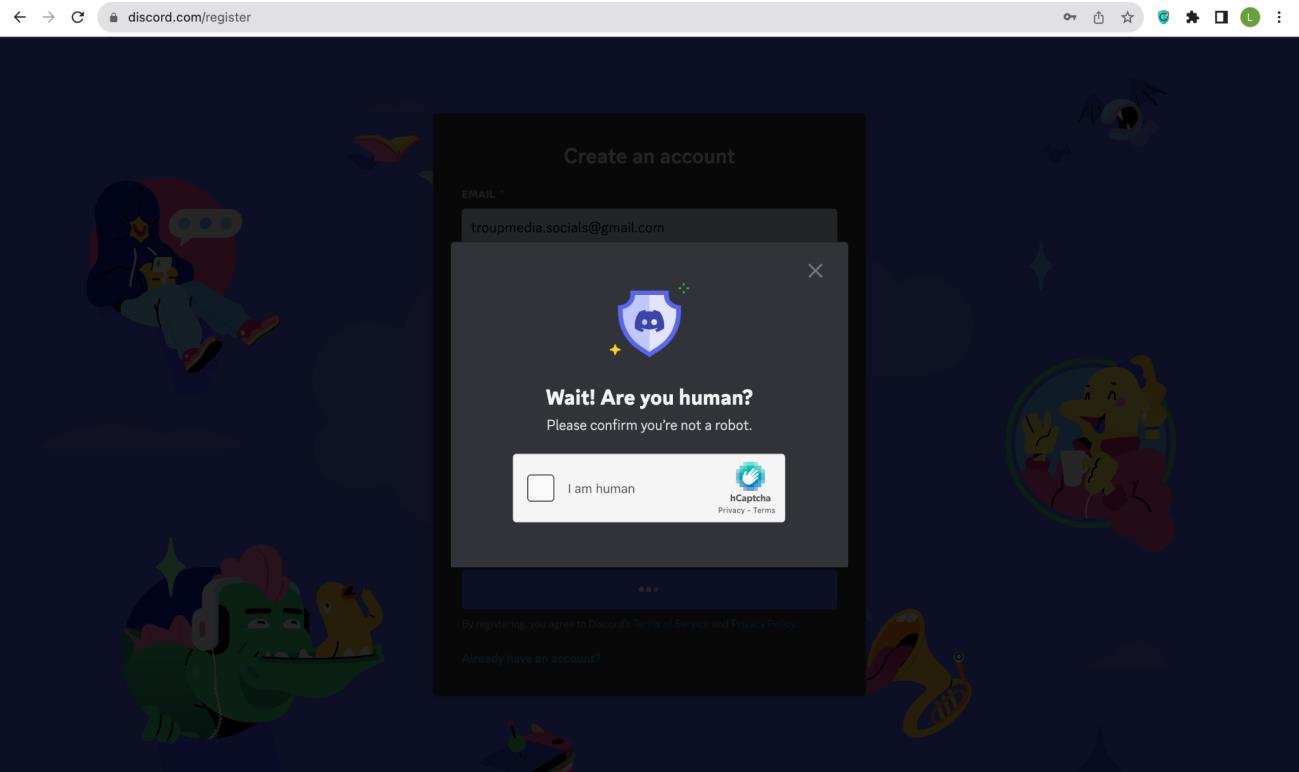
3. Complete the verification.
4. Verify via phone (if required).
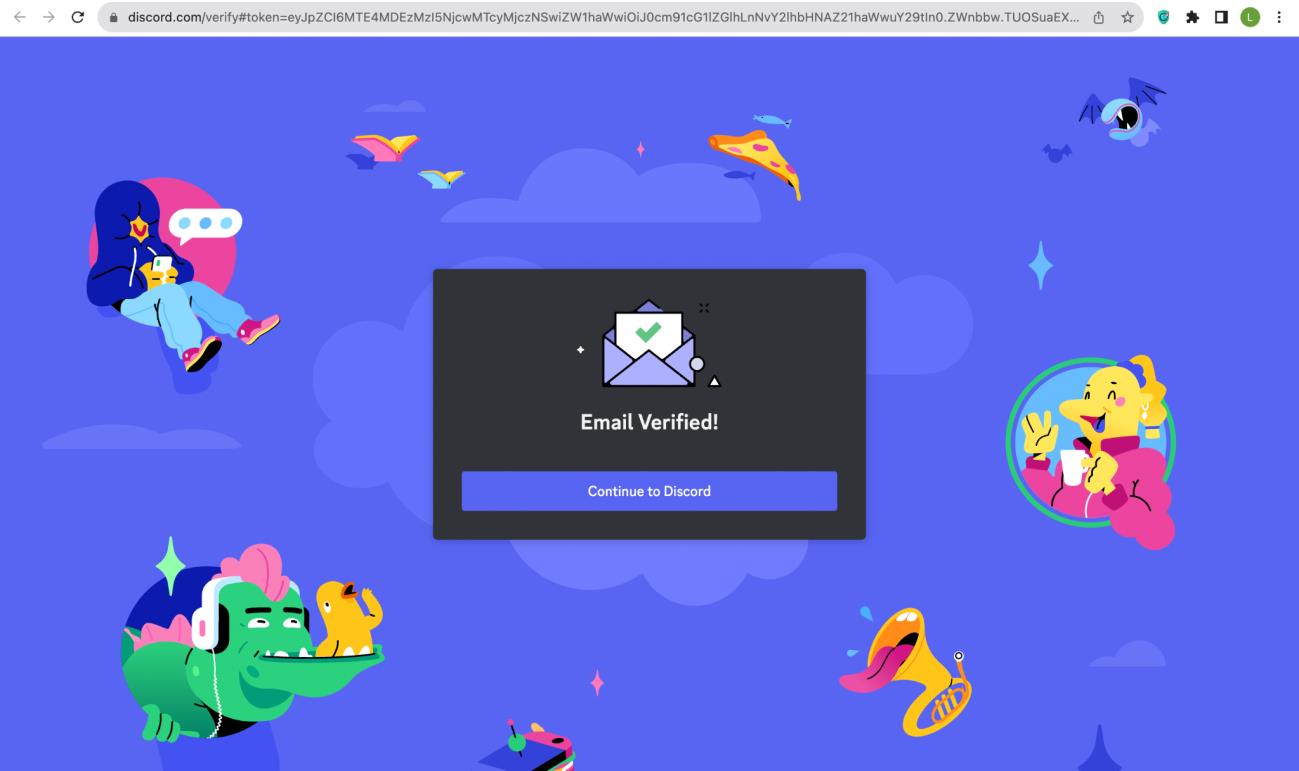
5. Verify the email address used to make the account. Click “Continue to Discord” once the verification in email is done.
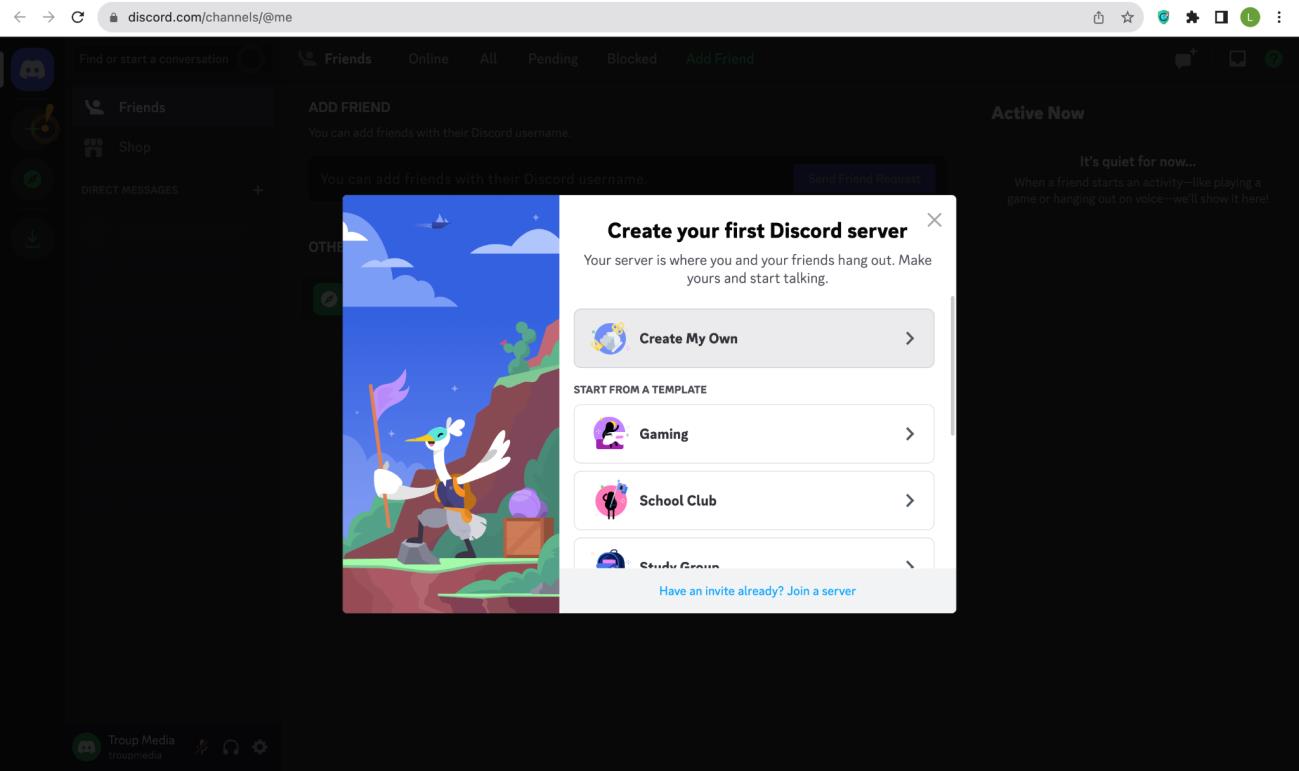
6. Click “Create My Own” for your first Discord server.
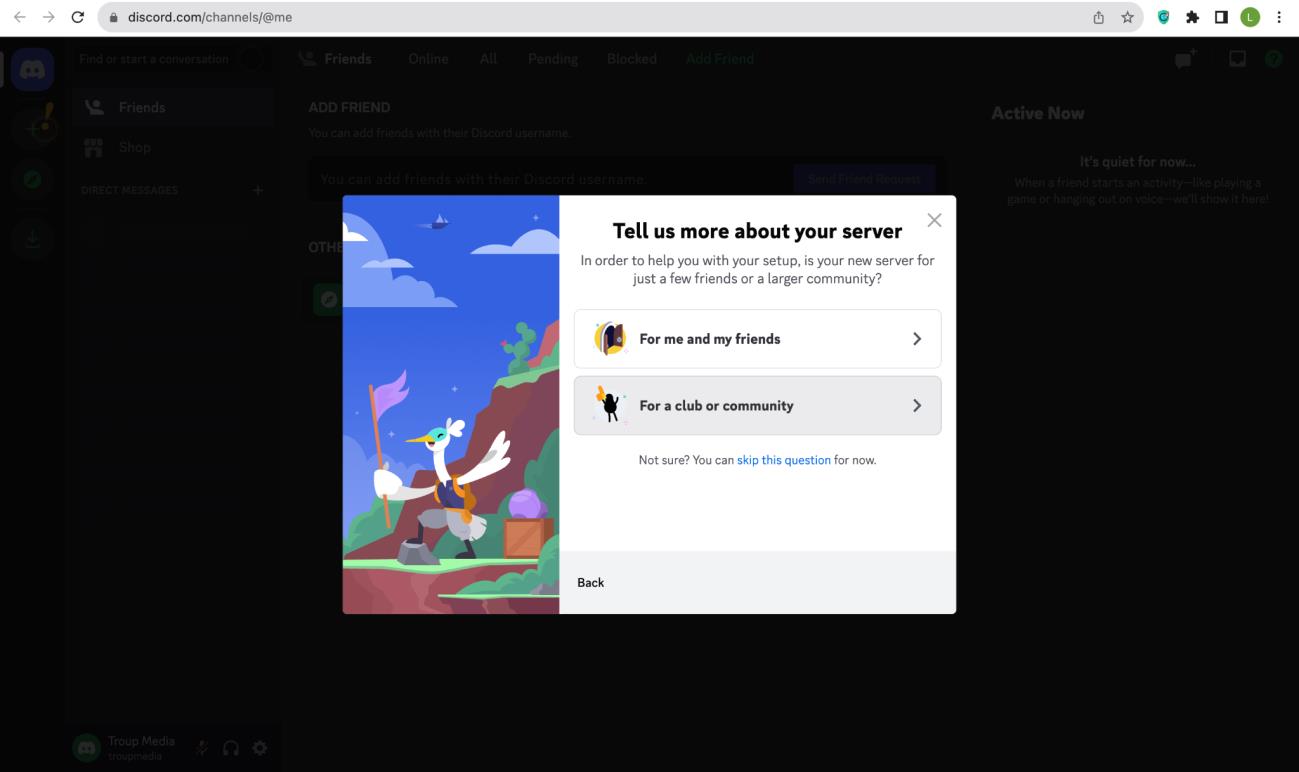
7. Click on “For a club or community.”
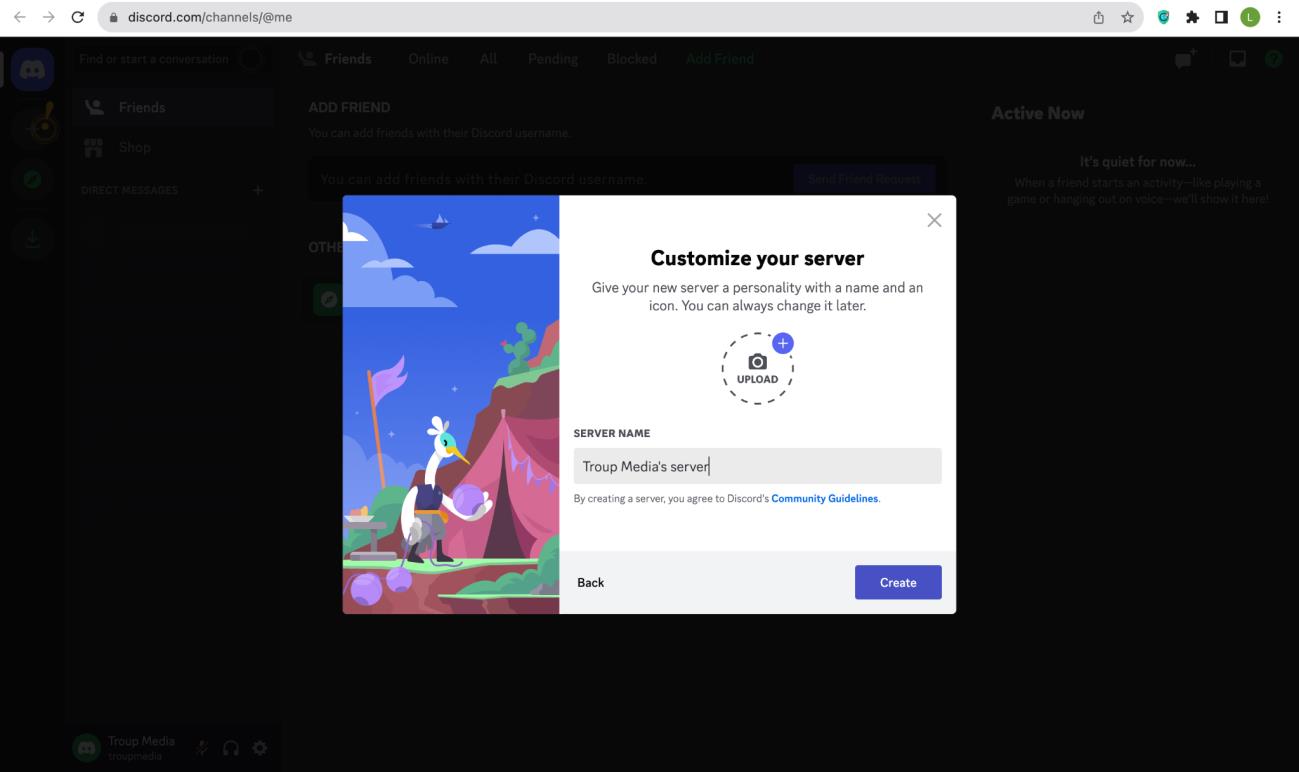
8. Customize your server by adding a profile photo and editing the server’s name.
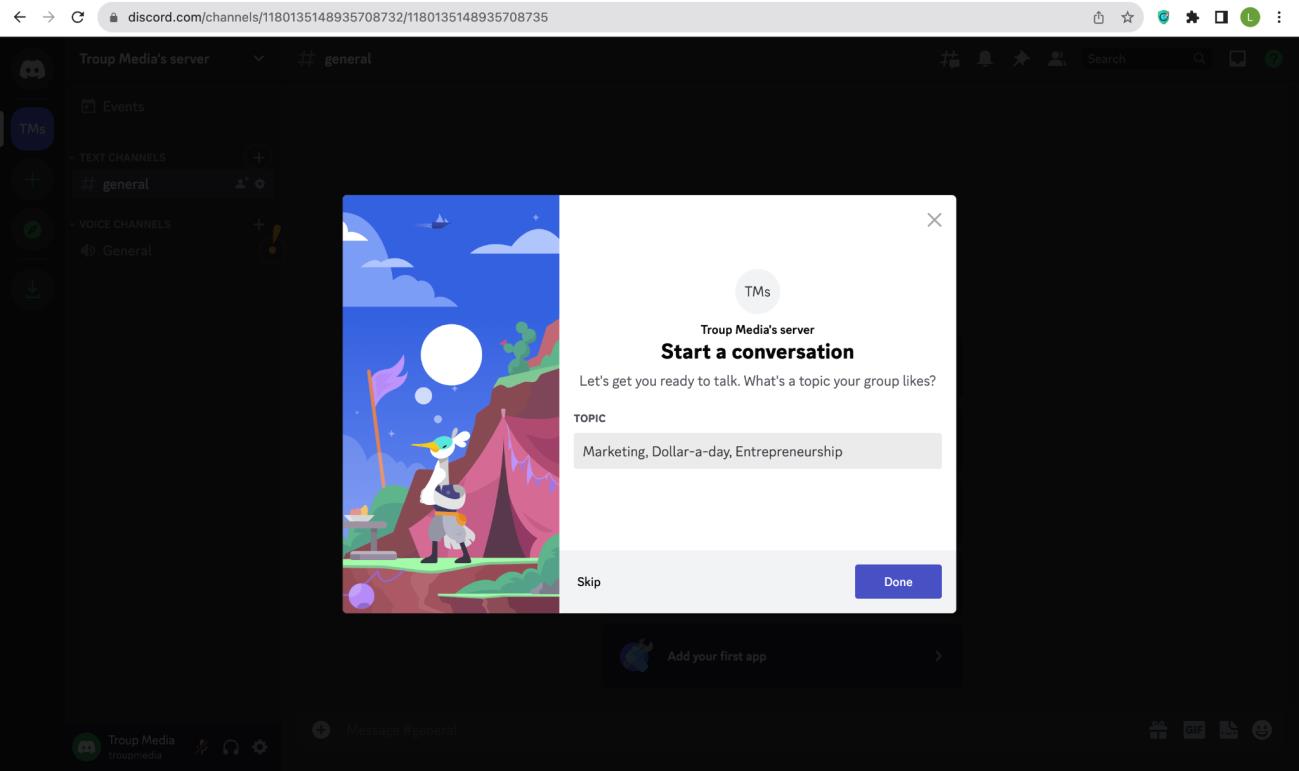
9. Start a conversation in the server. Add a few topics. Once finished, click “Done.”
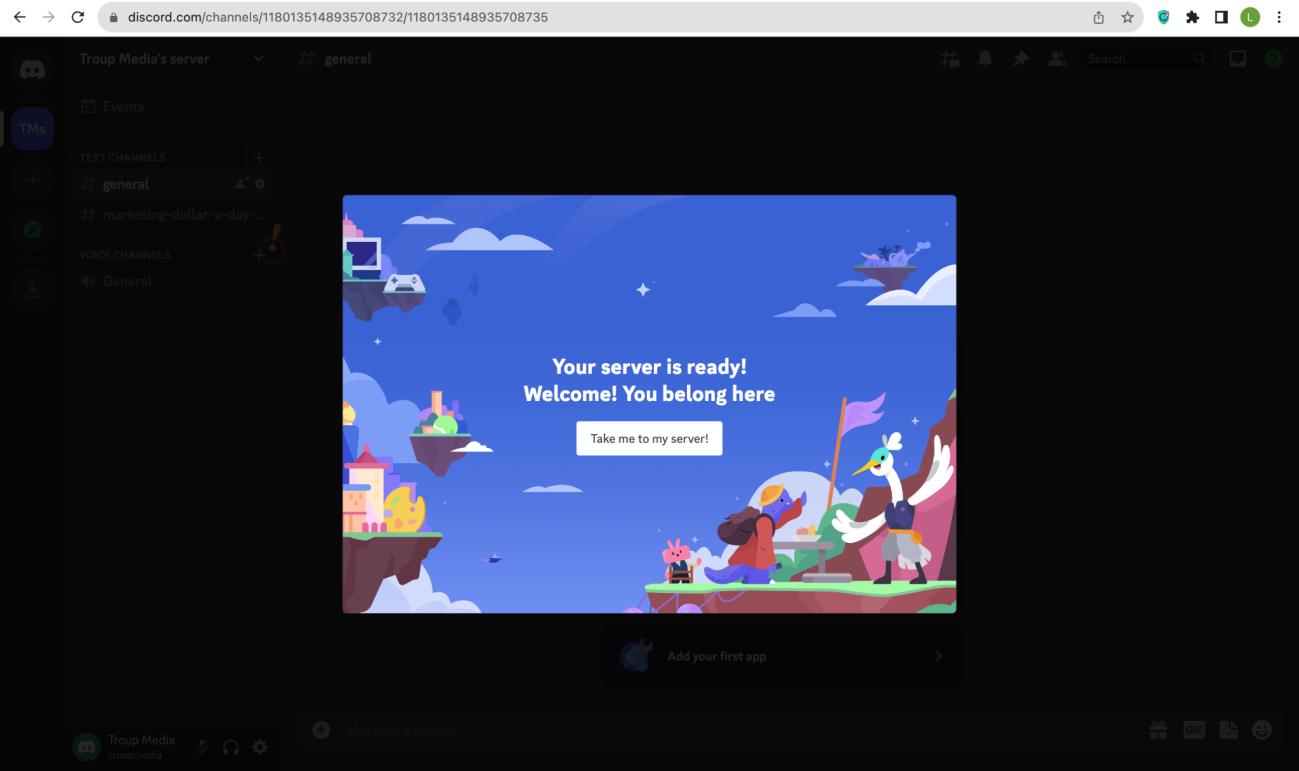
10.
Click “Take me to my server!”

Youtube
1. Go to https://www.youtube.com/
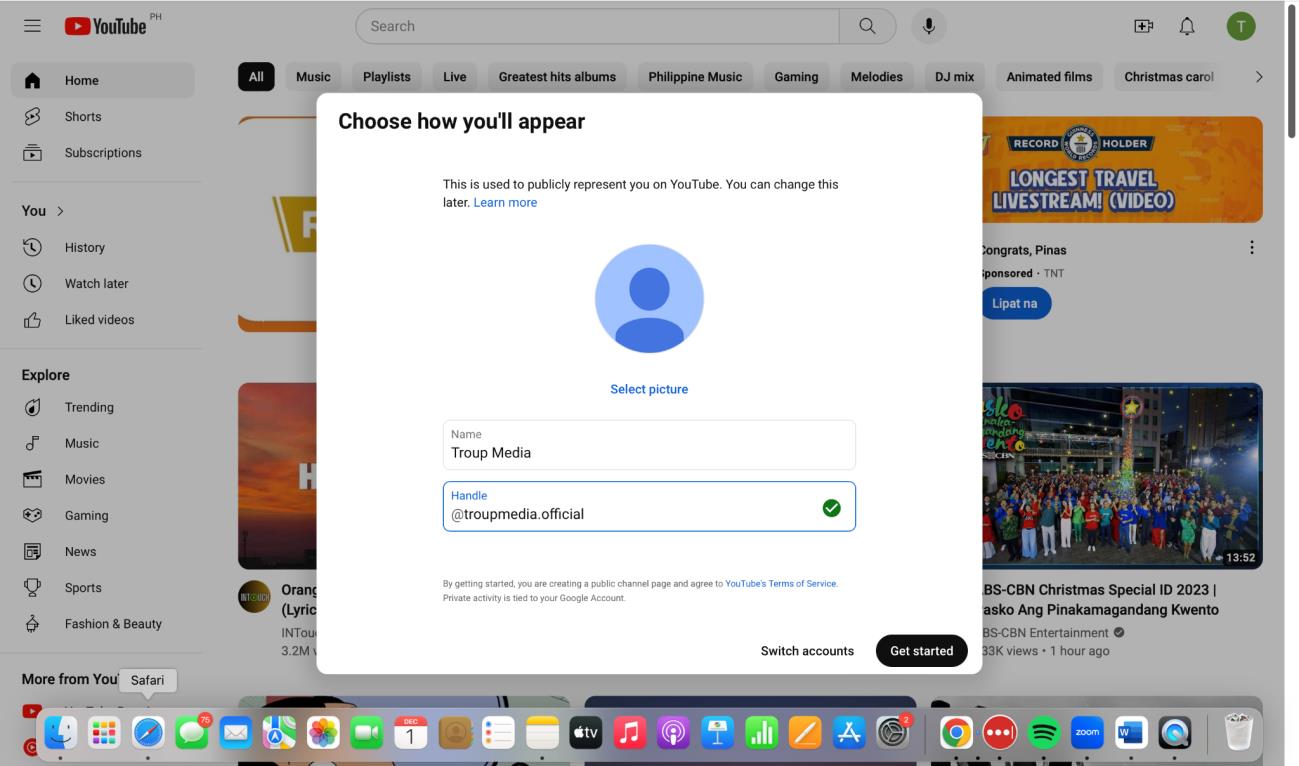
2. Choose which account you want to make a channel with.
3. Choose how you’ll appear.
Vimeo
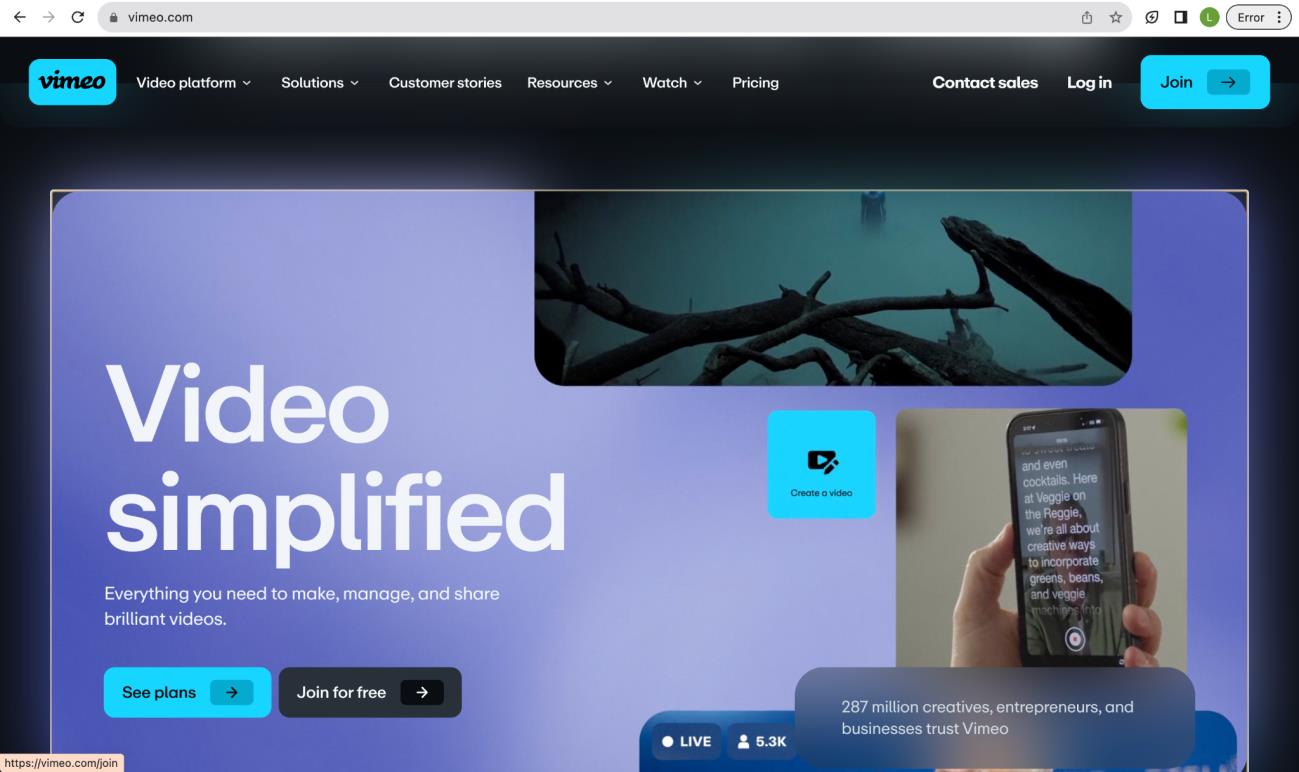
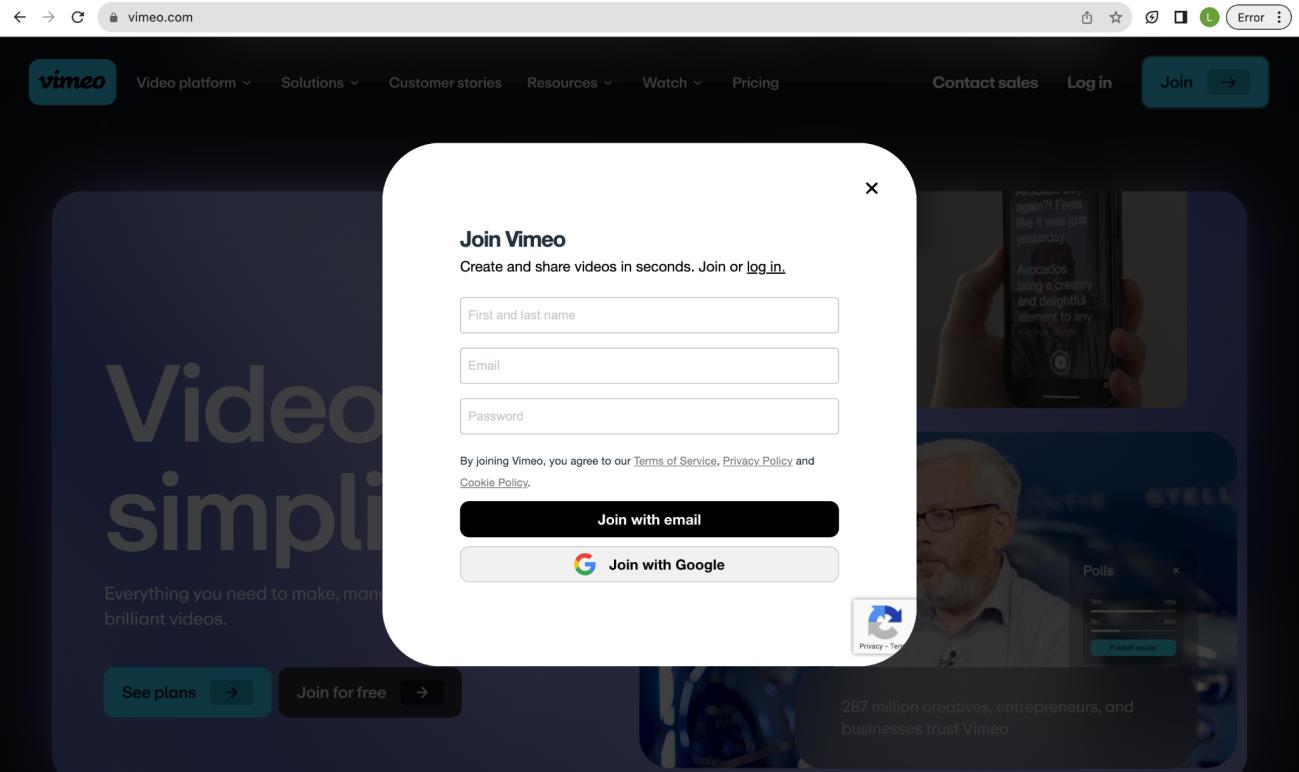
1. Go to https://vimeo.com/ and click on “Join” as seen on upper right corner.
2. Click “Join with Google” or manually input the details needed.
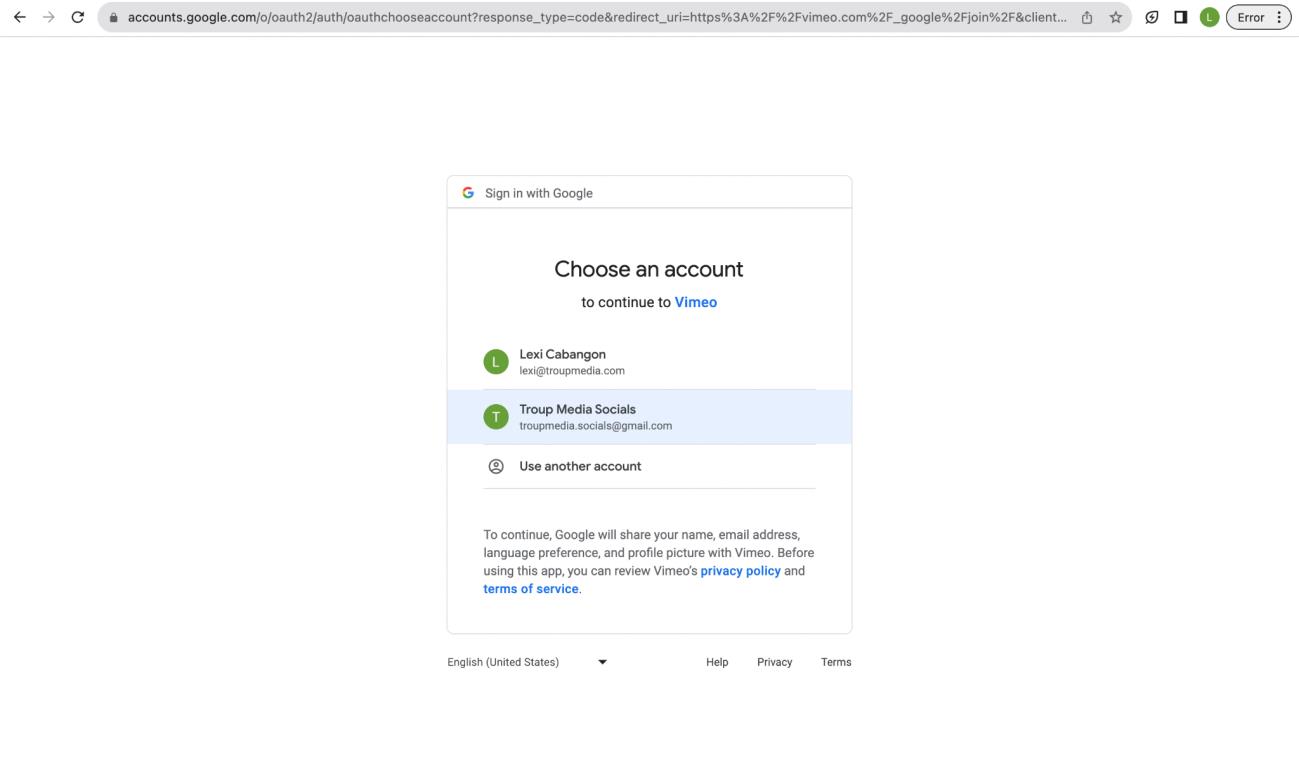
3. Choose an account to continue creating an account in Vimeo.
Flickr
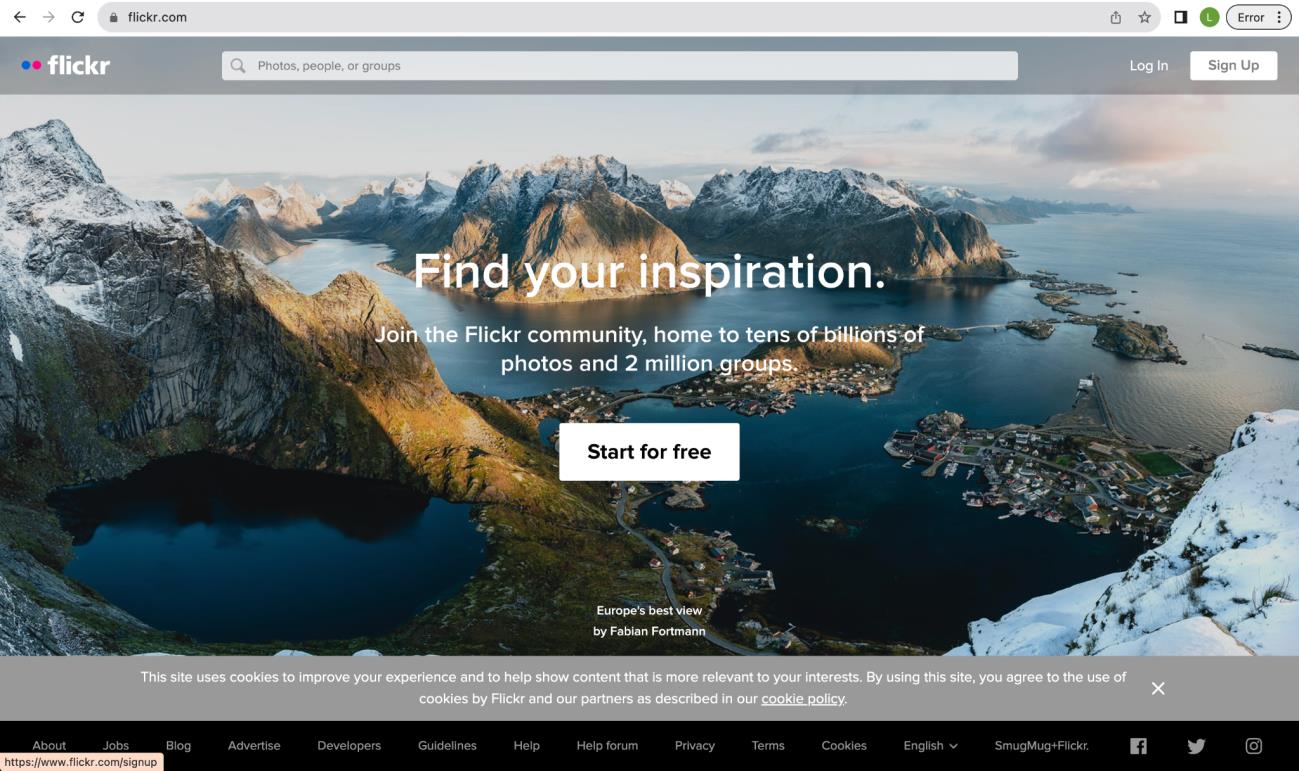
1. Go to flickr.com and on the upper right corner, click “Sign Up.”
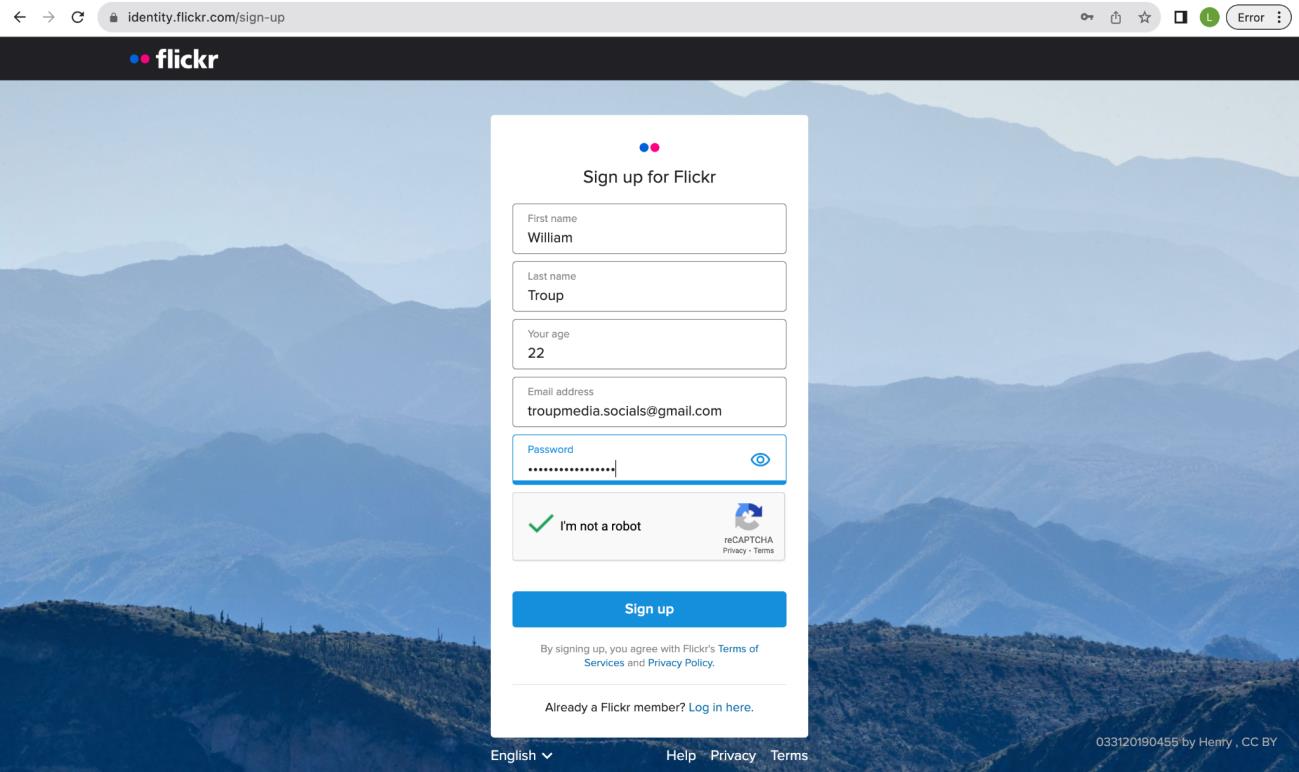
2. Fill-out all the necessary information. Once done, click “Sign Up”
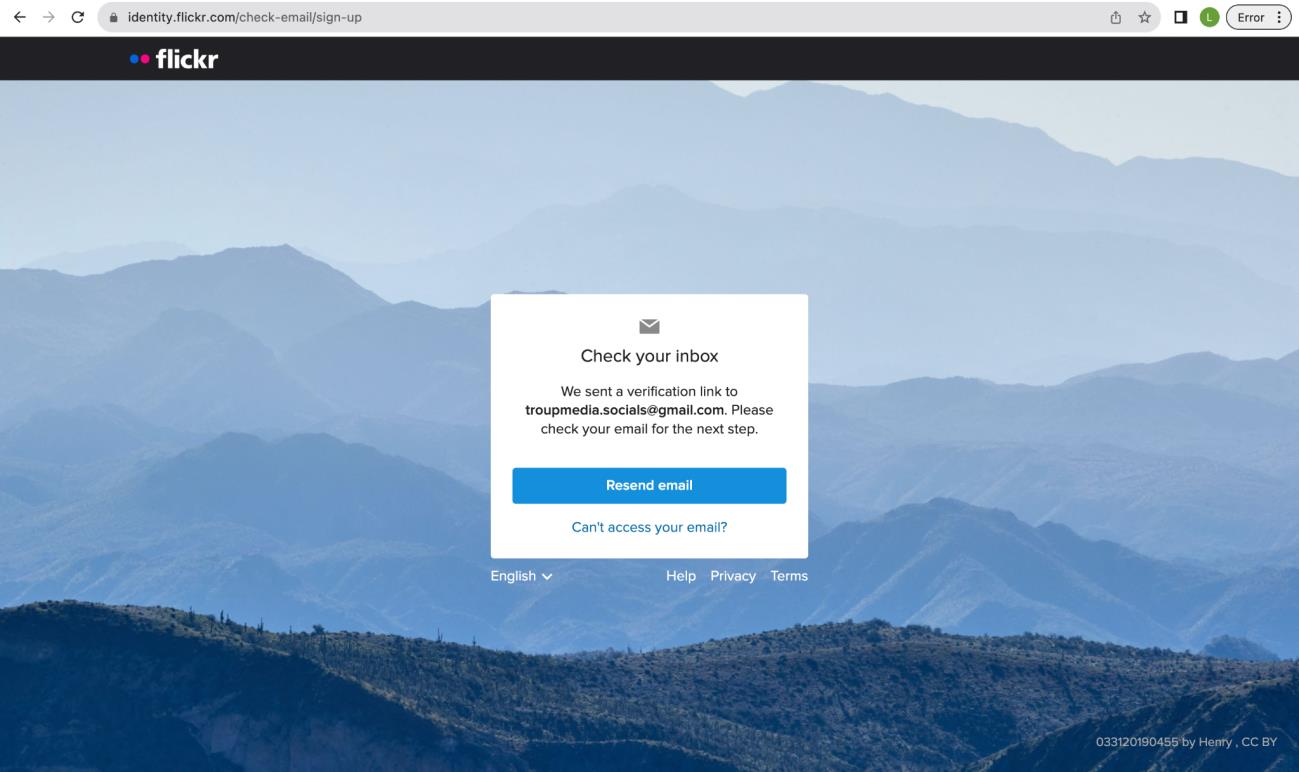
3. Check the verification link sent to email.
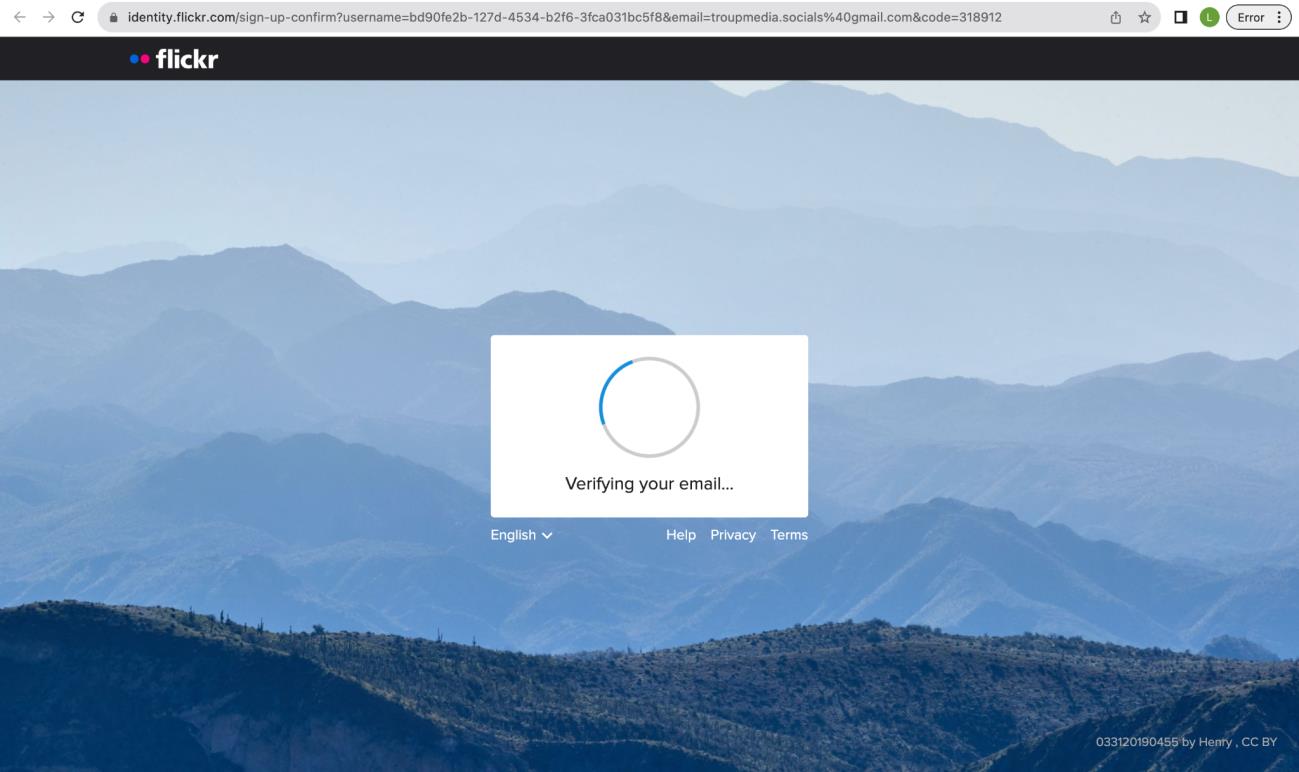
4. Click the verification link on the email.
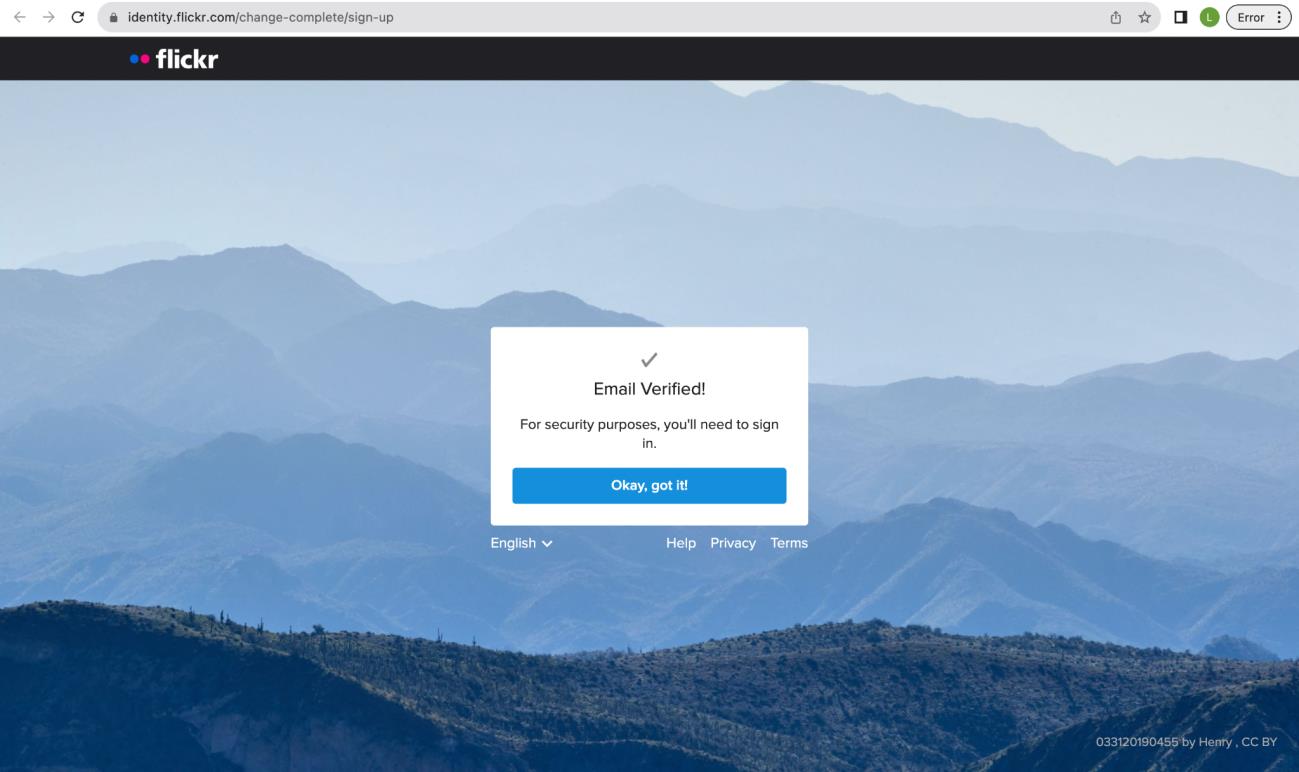
5. This message will pop up once verification is done.
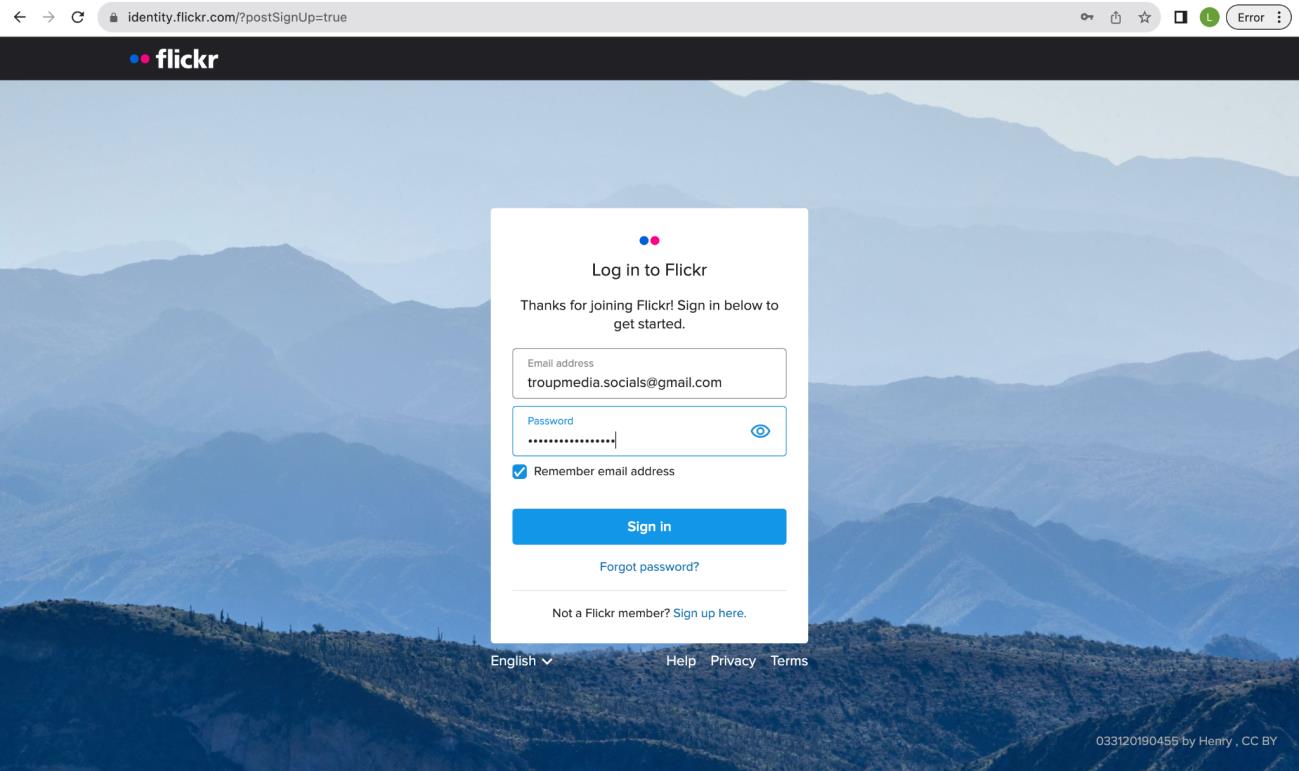
6. Log in to Flickr using the email address and password. Click “Sign In”
once done.
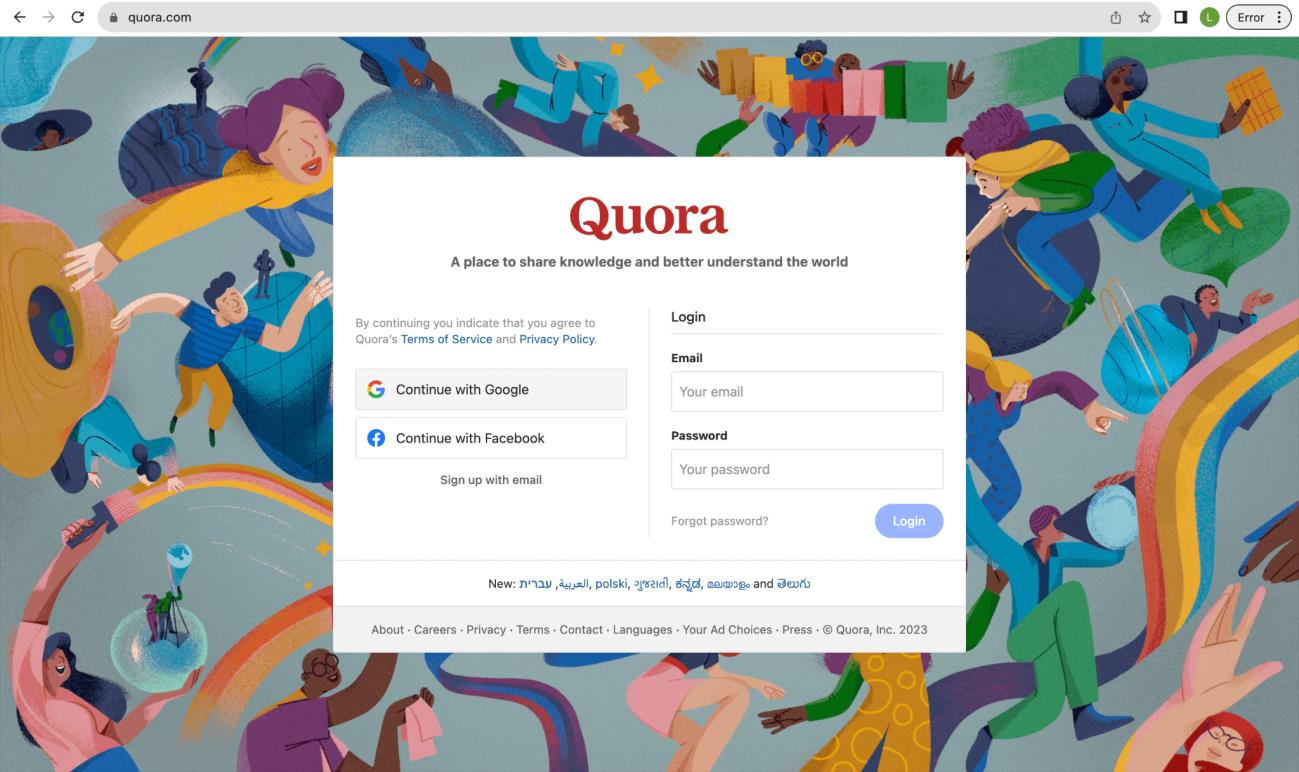
Quora
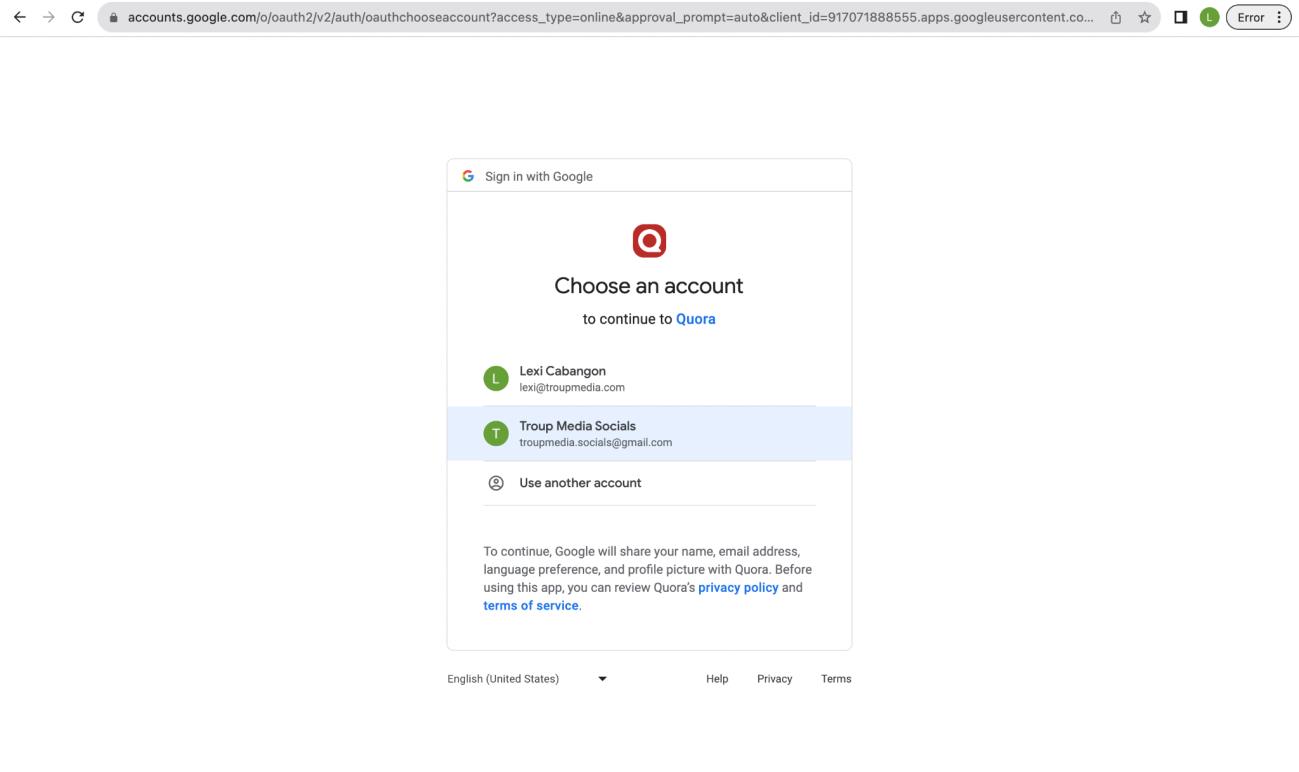
1. Go to quora.com and click on “Continue with Google” on the left side of the window.
2. Select the desired email of the client/brand.
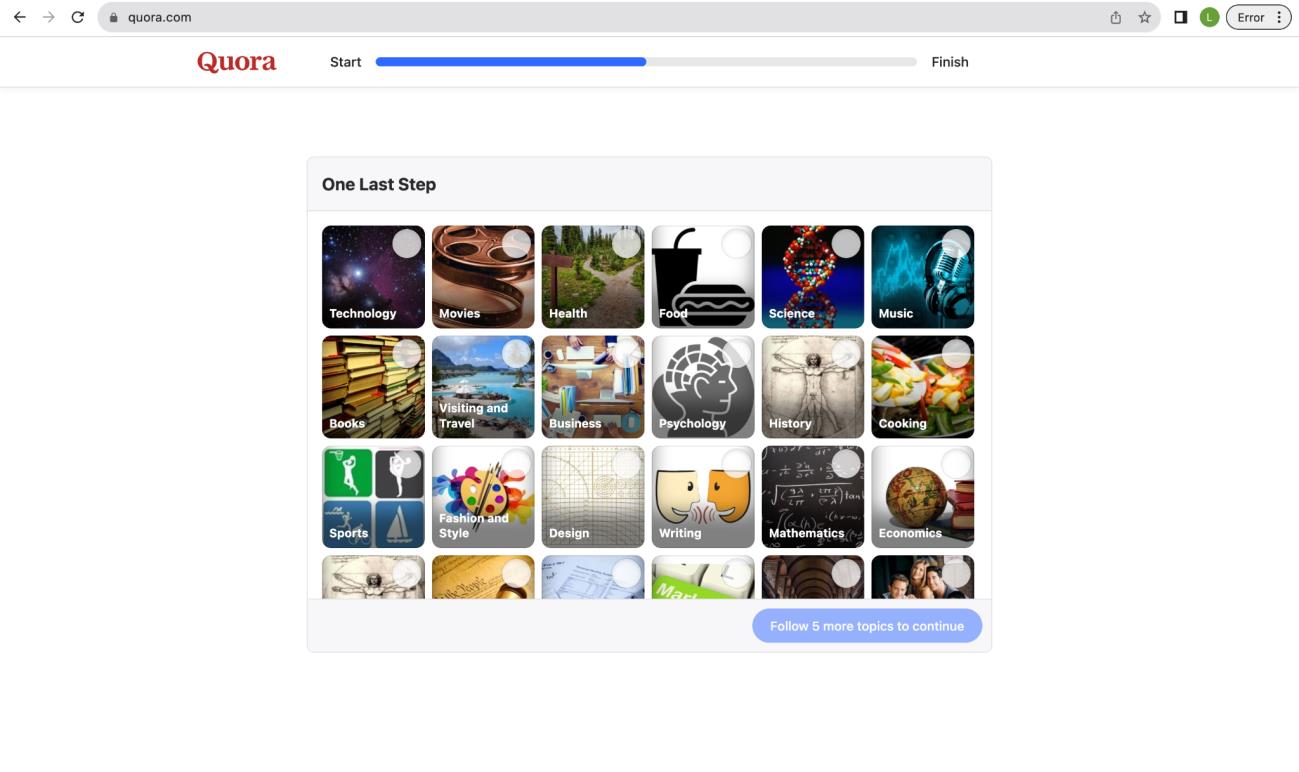
3. Choose 5 topics to continue. Once finished, click “Done”
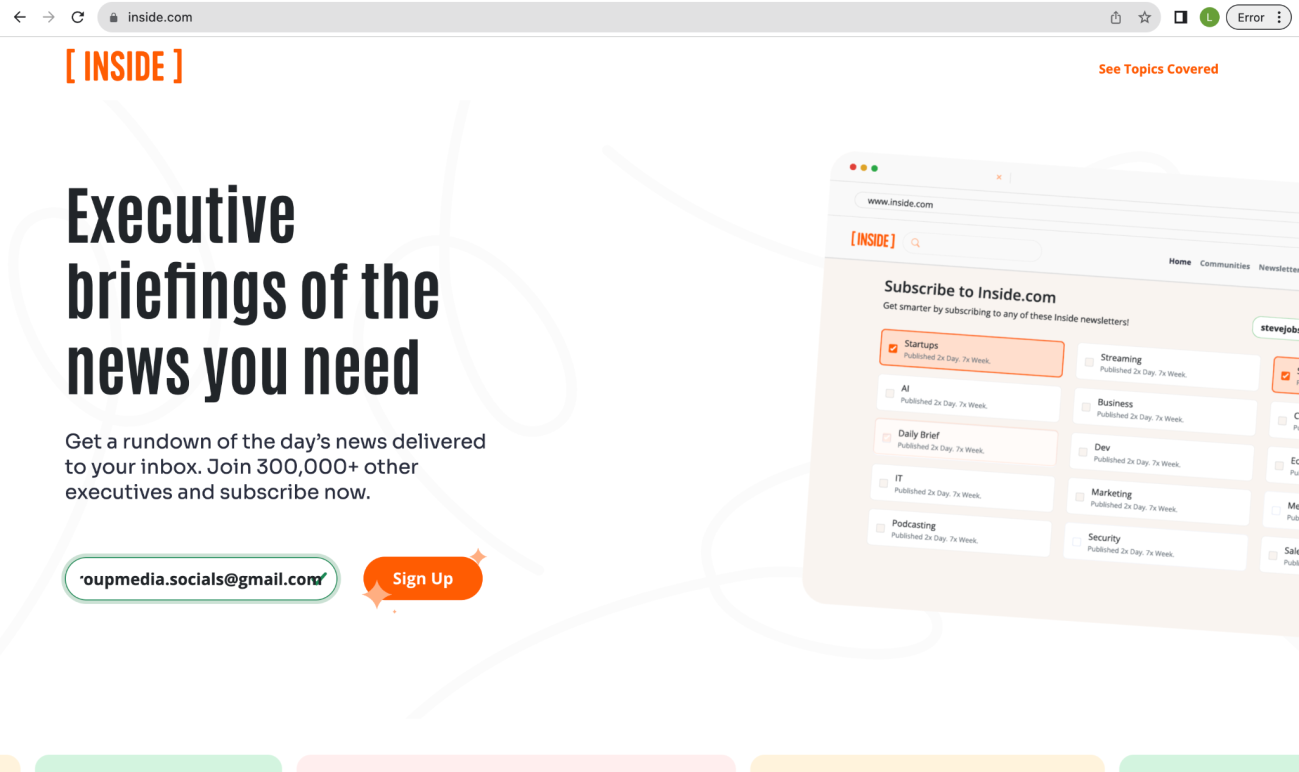
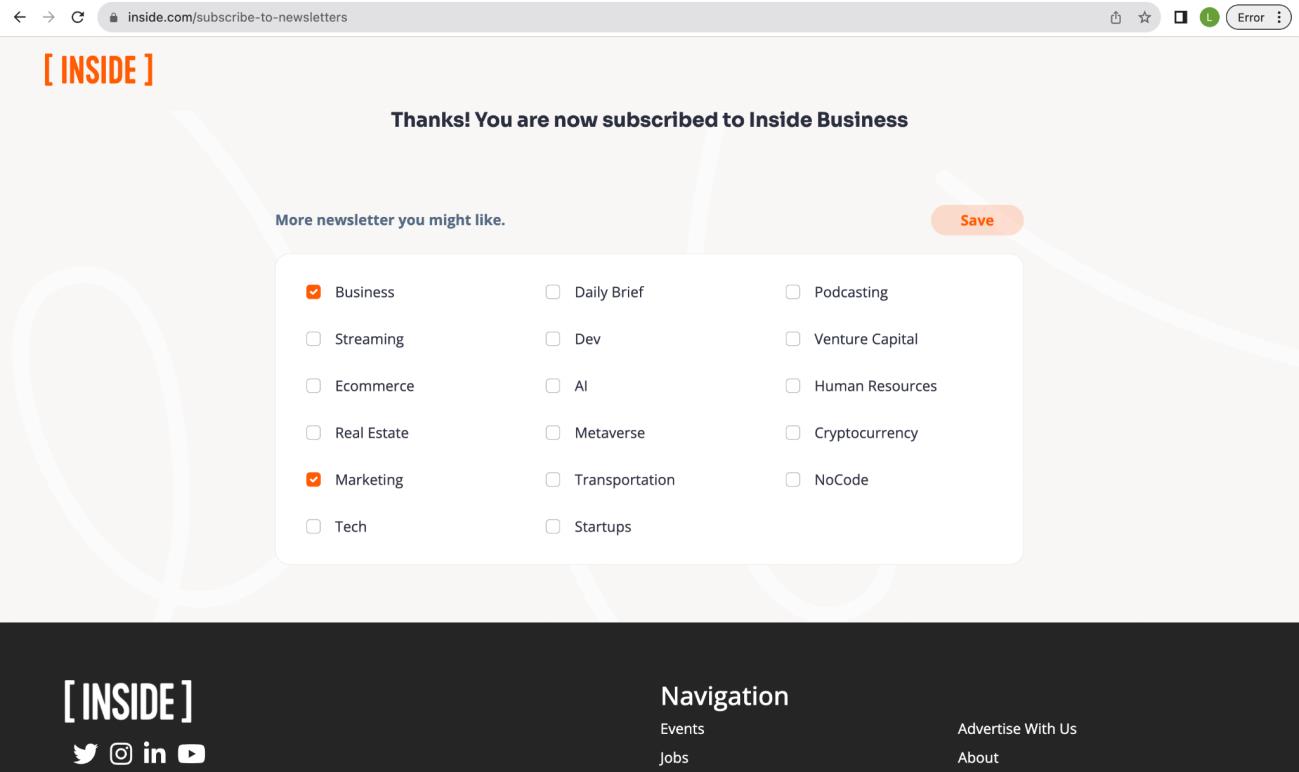
Inside.com
1. Go to inside.com and type in the client/brand’s email address and click “Sign Up”
2. Select topics for the newsletter.
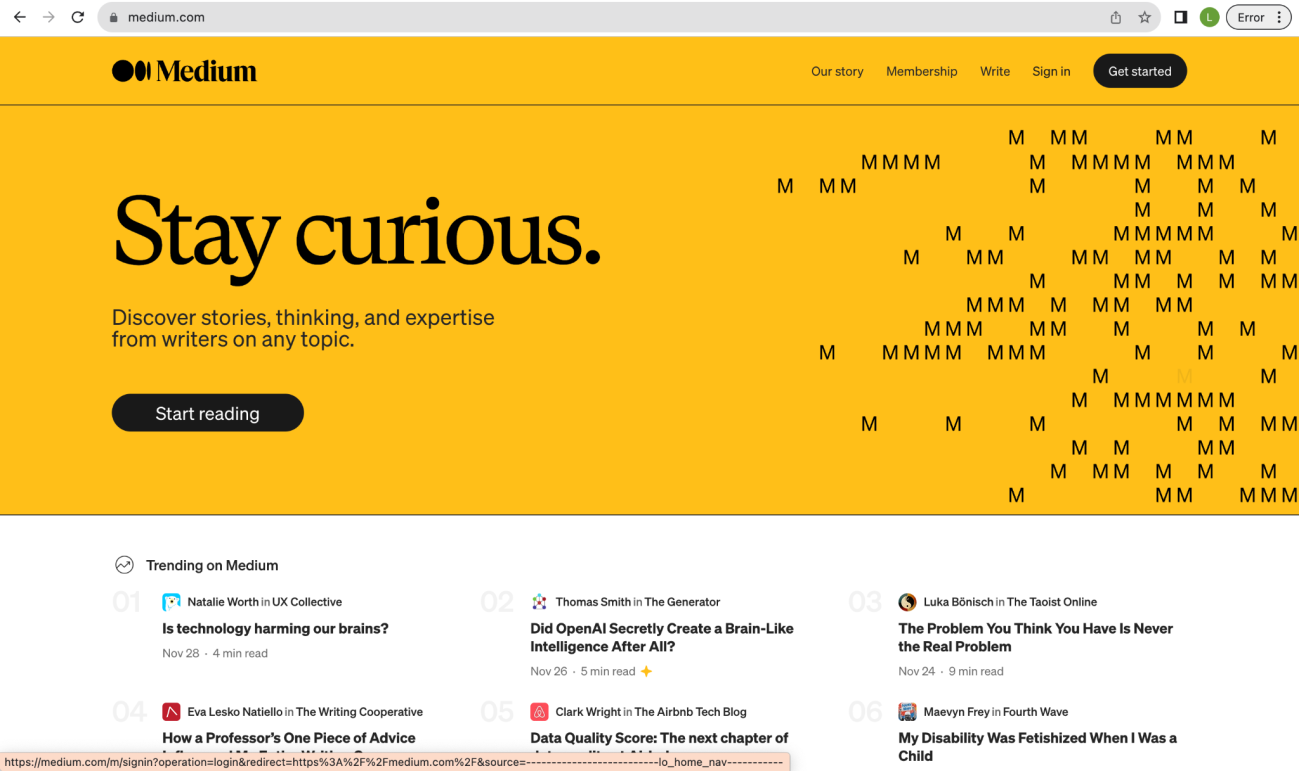
Medium
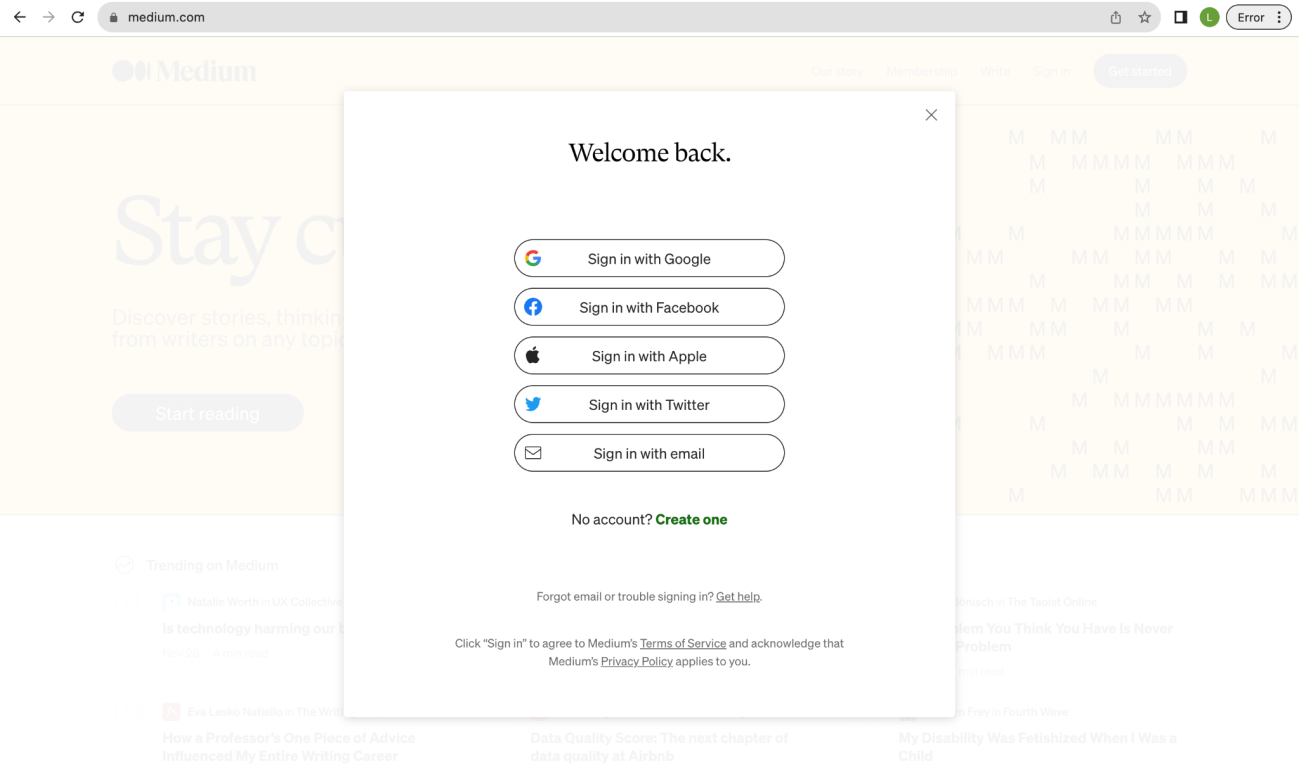
1. Go to medium.com and click “Get started” on the upper right corner.
2. Click “Create one” beside the “No account?”
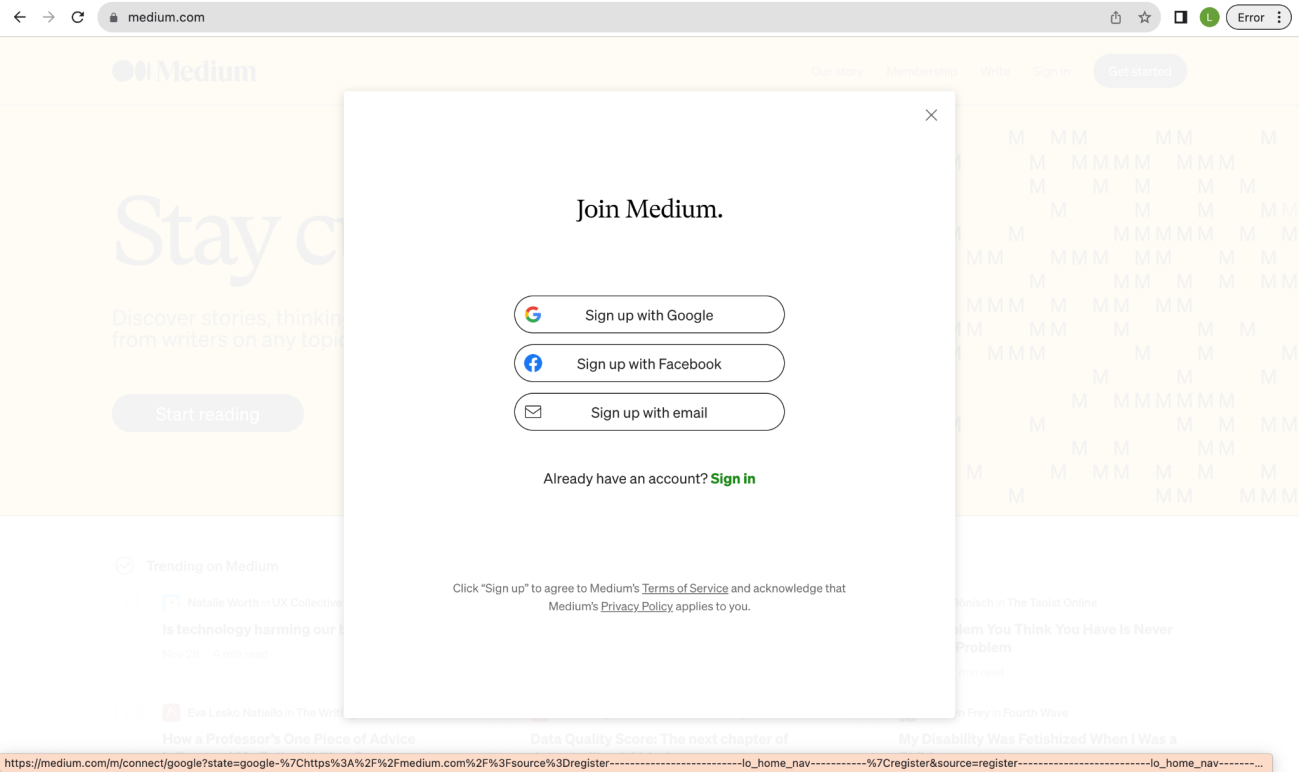

3. Click “Sign up with Google.”
4. Click the email connected to client/brand’s account.
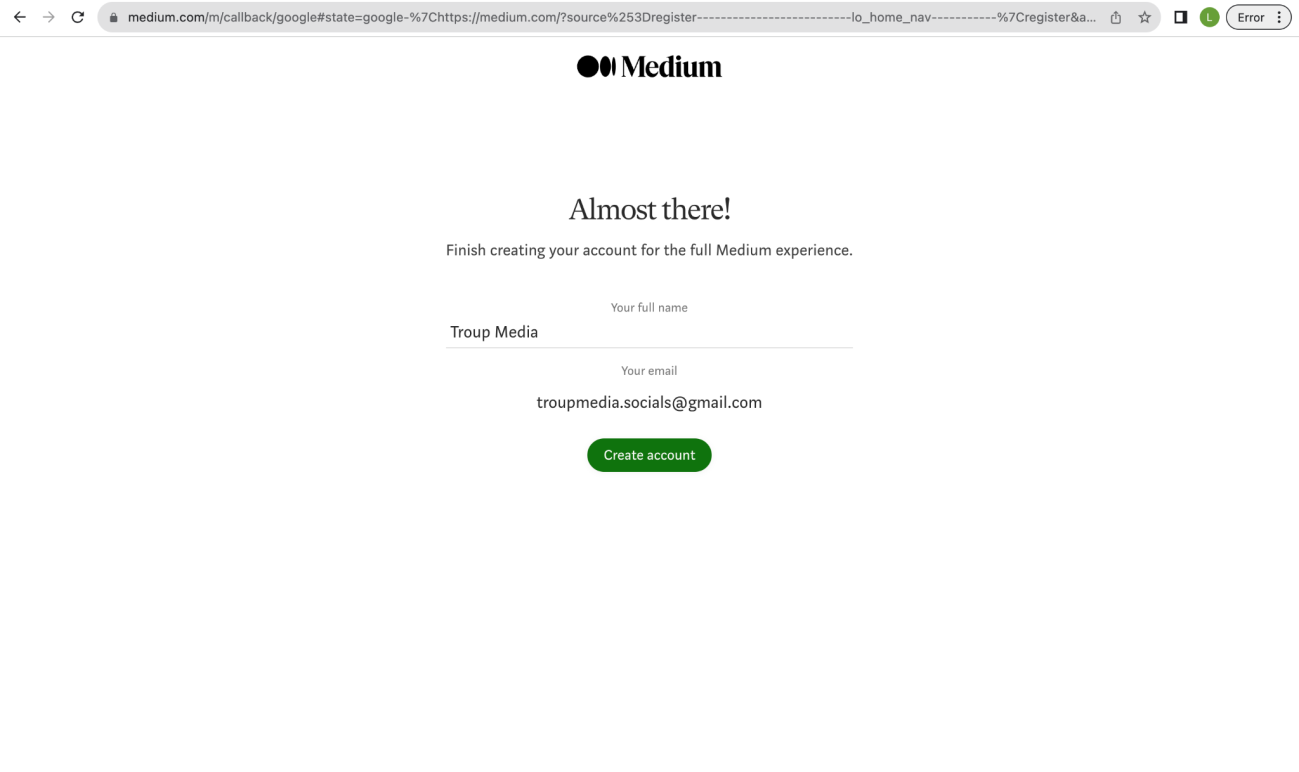
5. Input client’s full name and email address then click “Create account”
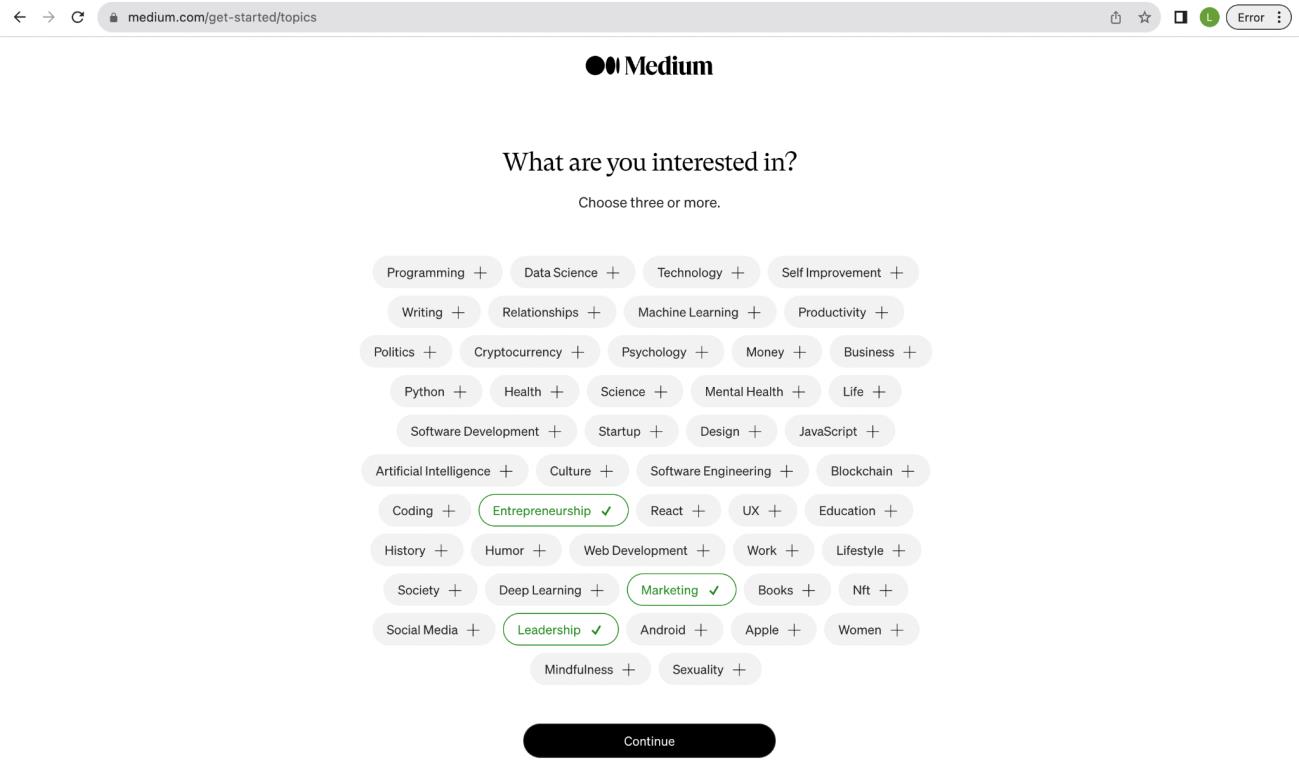
6. Choose three or more topics and then click “Continue.”
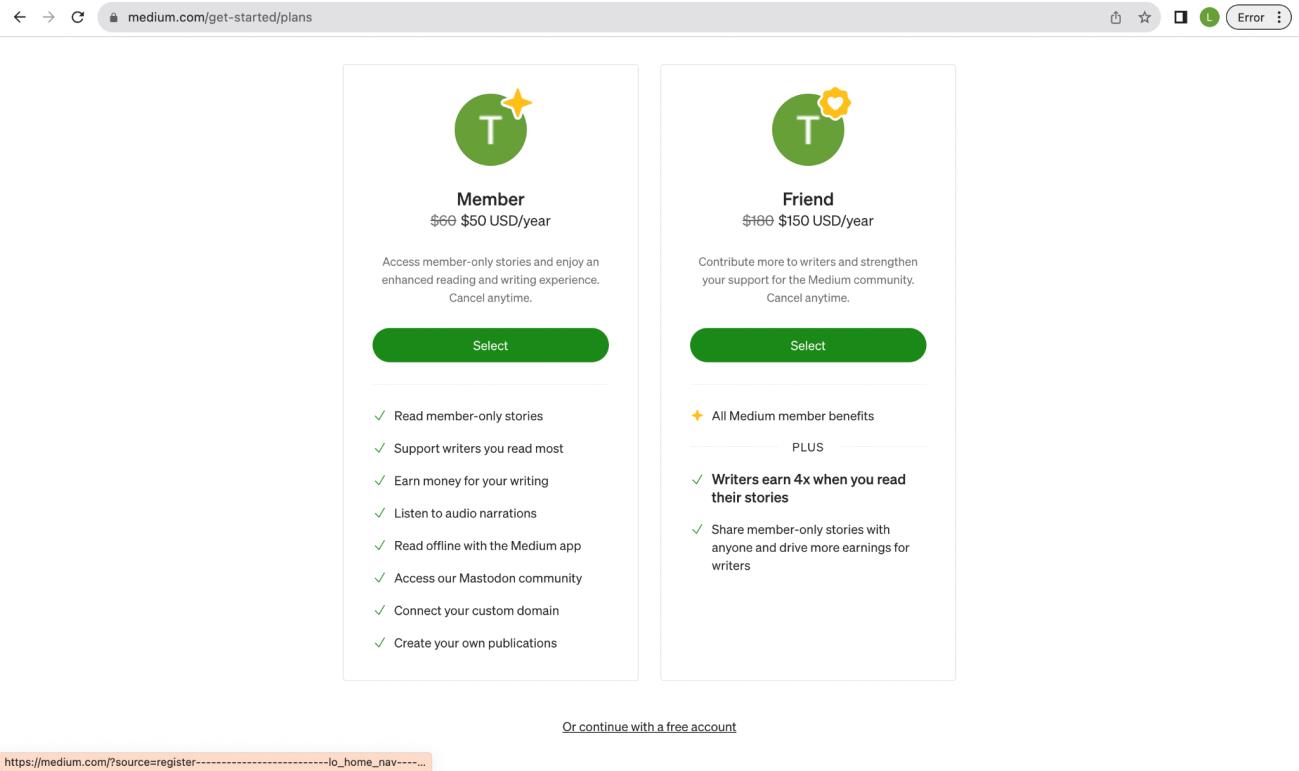
7. On the bottom part of the page, click “Or continue with a free account.”
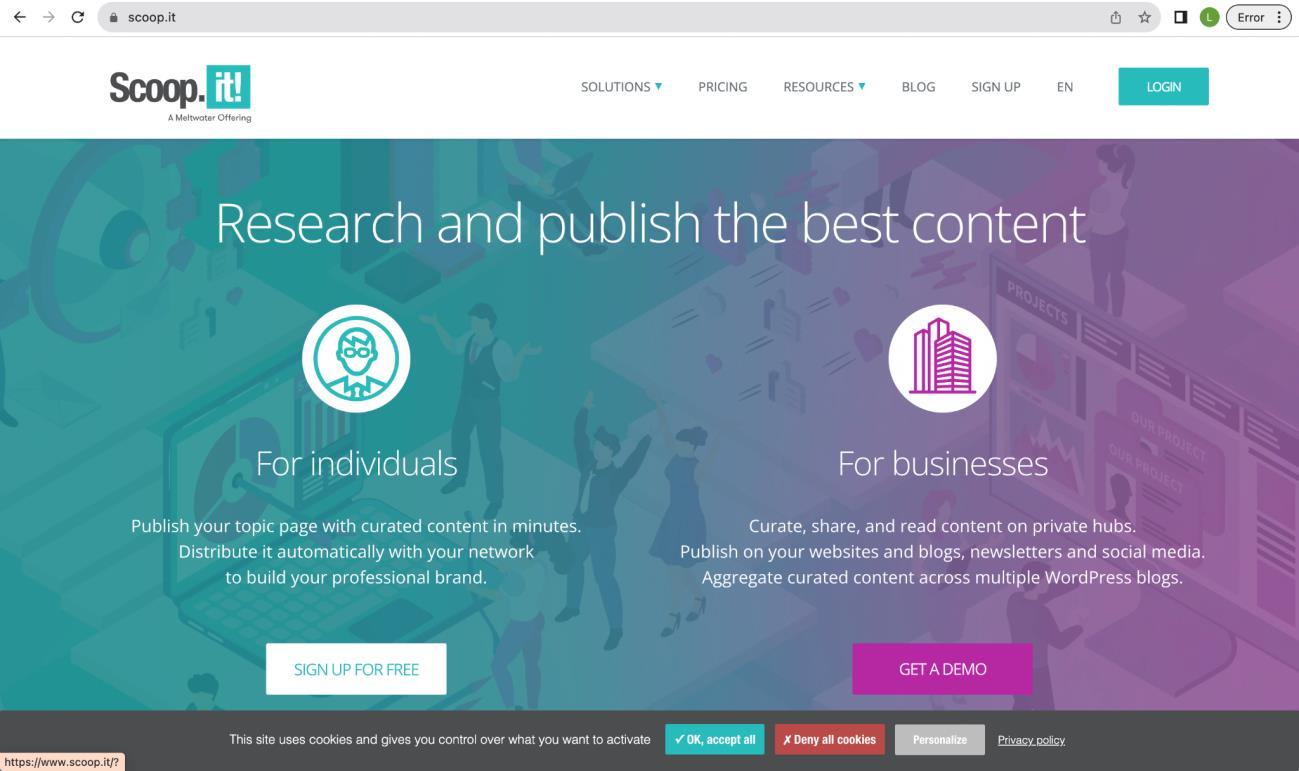
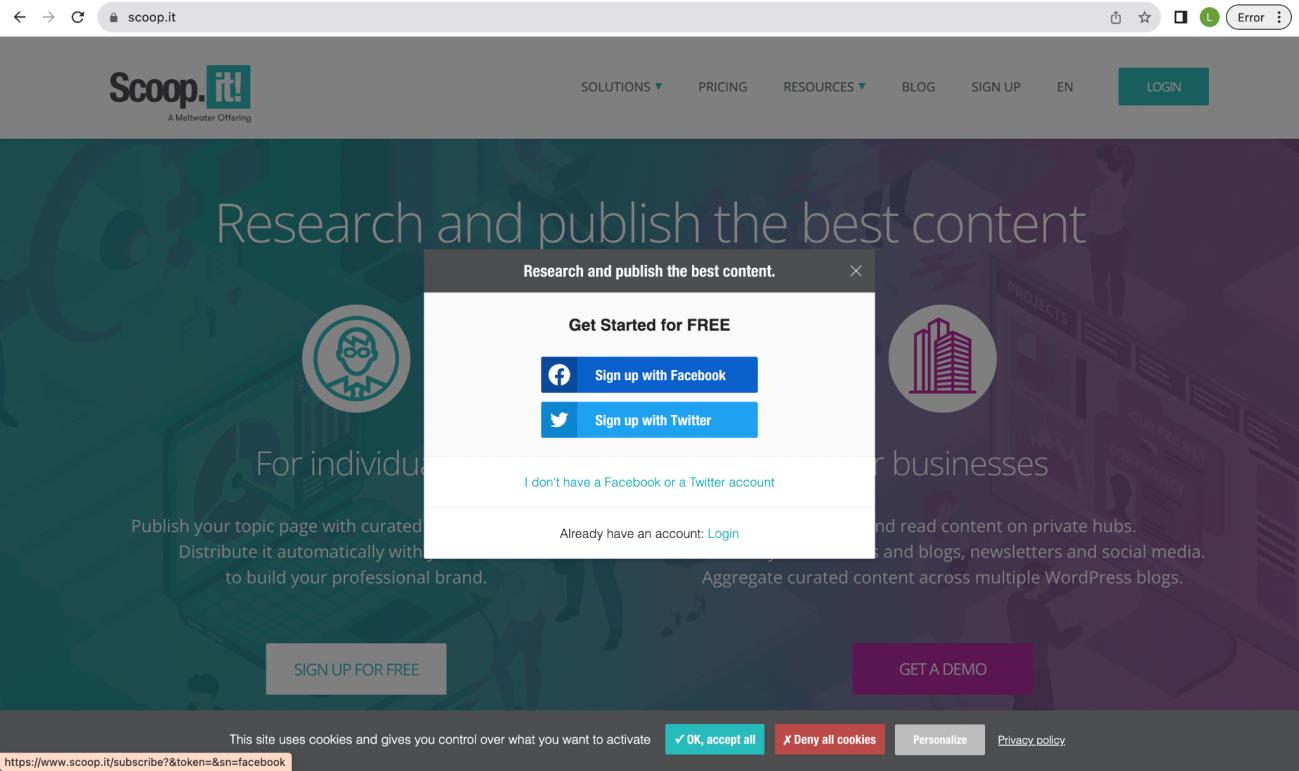
Scoop.it
1. Go to scoop.it and click “Sign Up”
2. Click Sign up with Facebook.
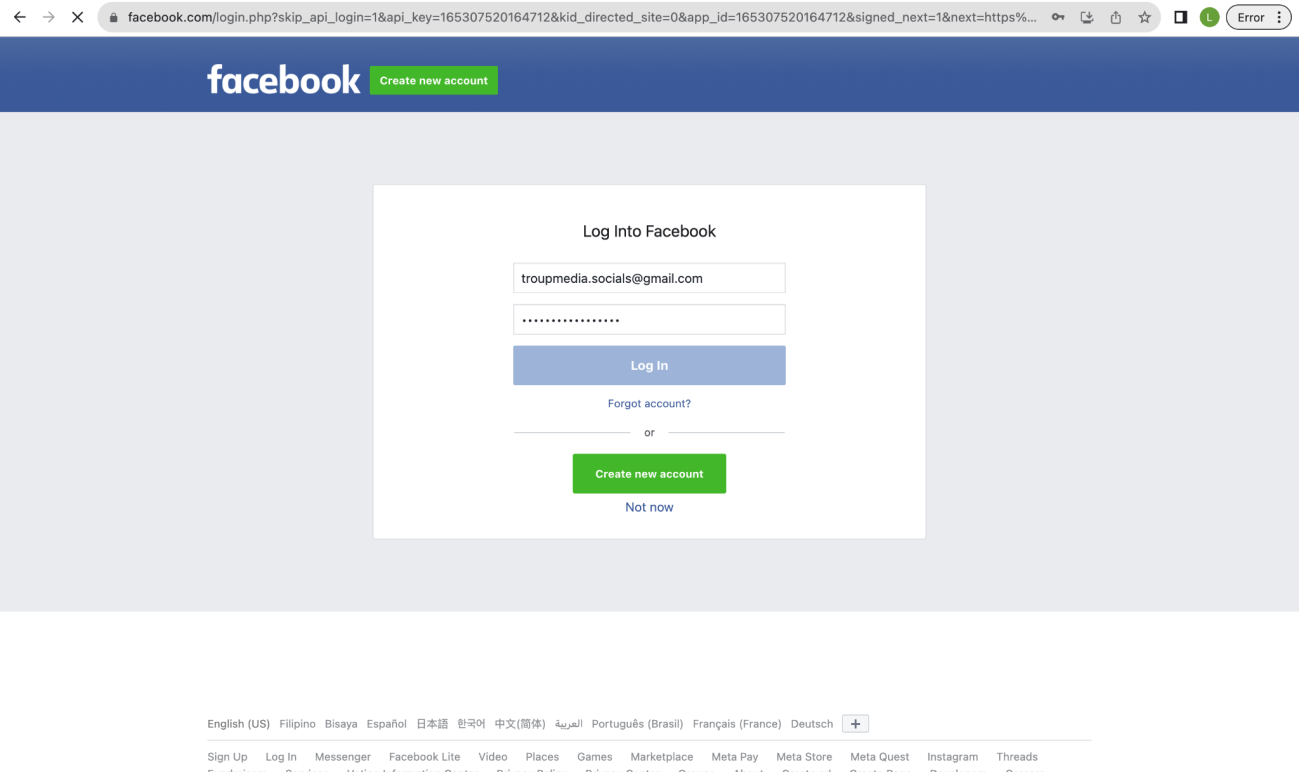
3. Log In with Facebook credentials.
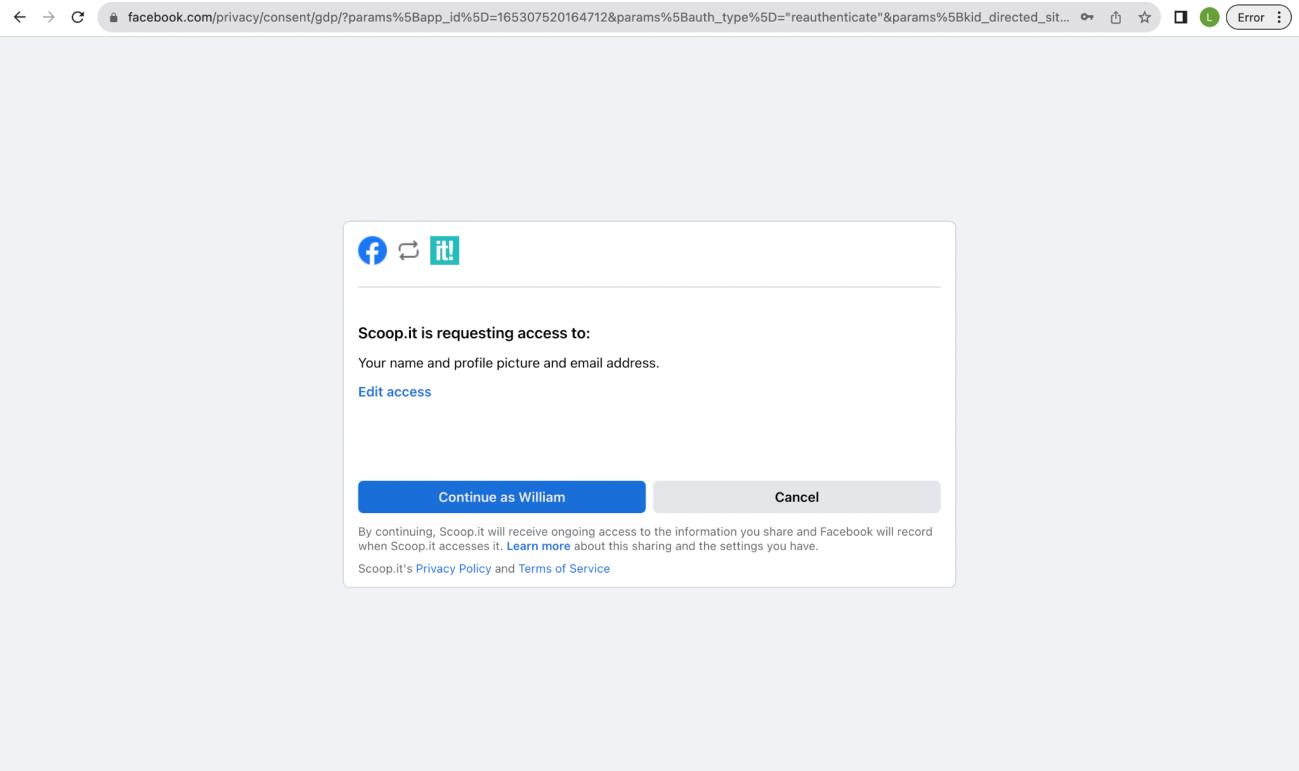
4. Click “Continue as …” to grant Scoop.it access to your name, profile picture, and email address.
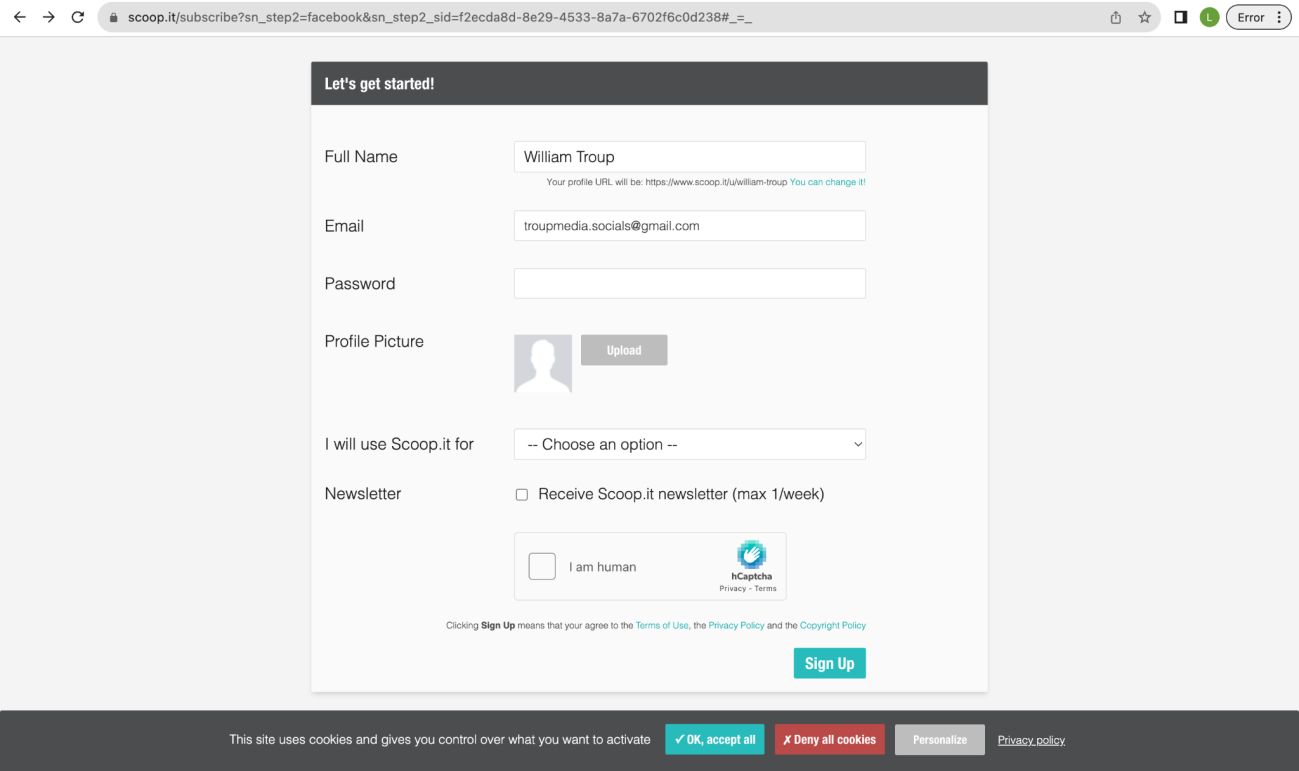
5. Type the client’s full name, email address, password, and choose the right option for what you will use scoop.it for.
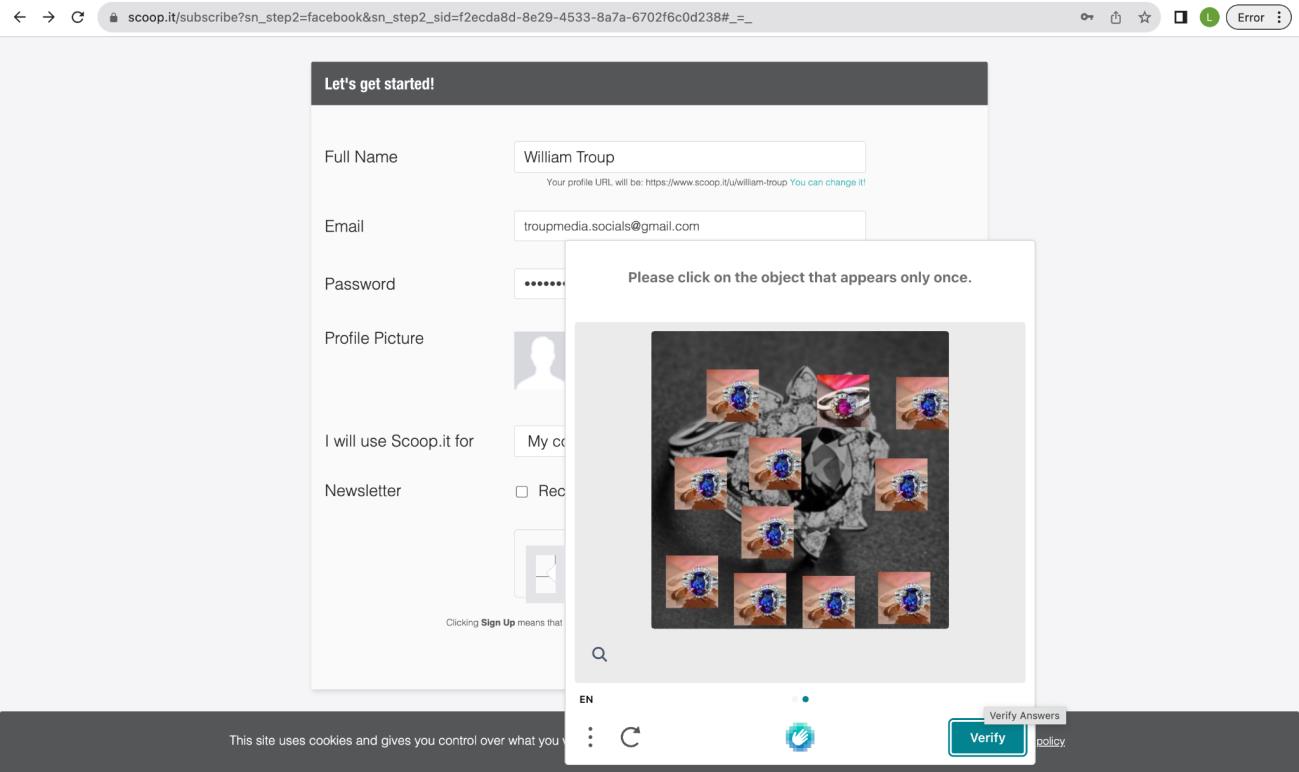
6. Do not forget the verification part. Once done, click “Verify” and “Sign up.”

7. Identify the correct category of how big is the client/company.
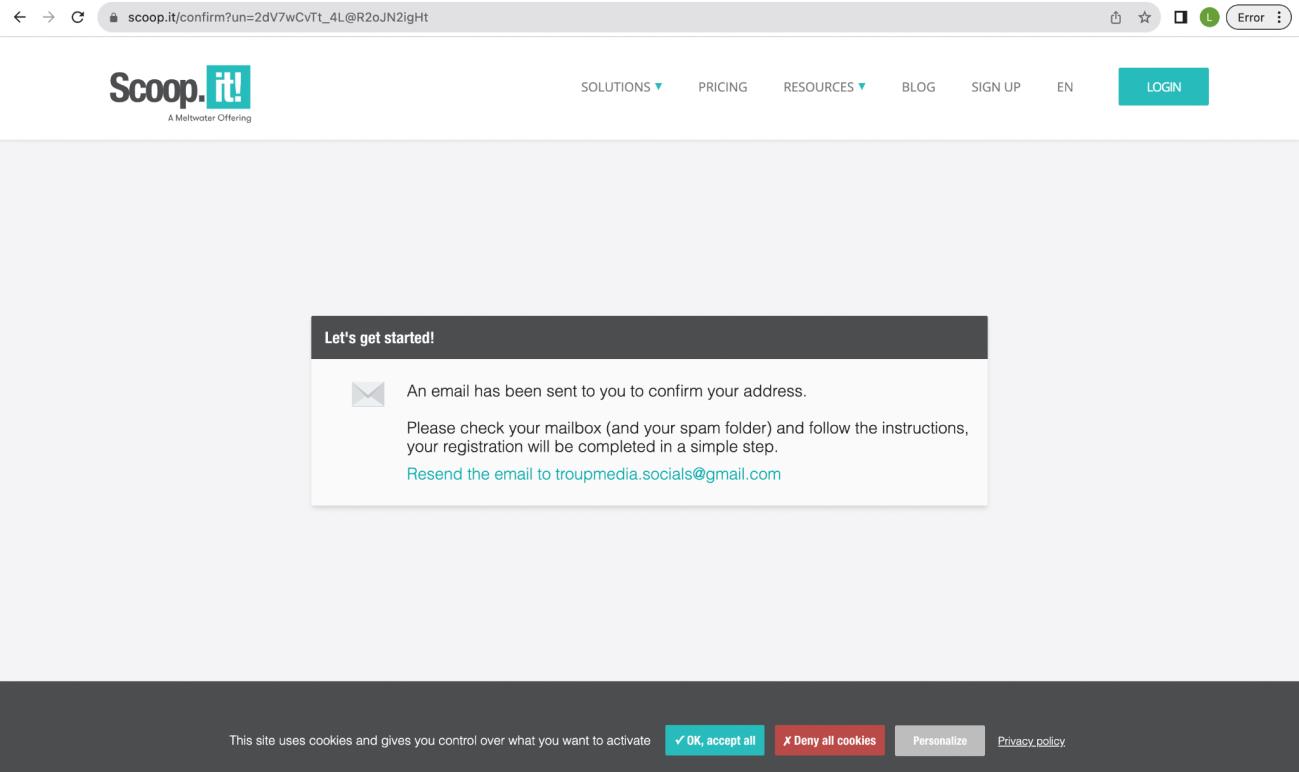
8. Confirm with the email address for verification purposes.
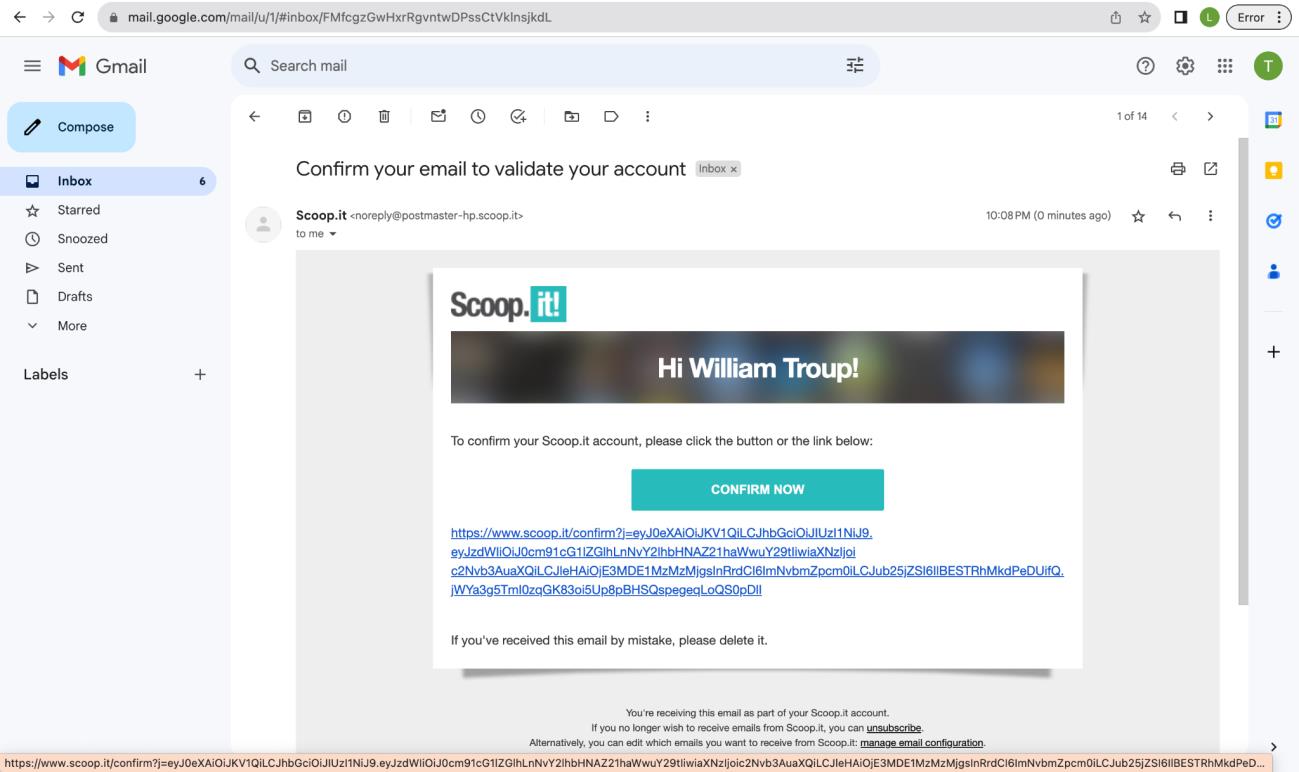
9. Click “Confirm Now” on the email sent for verification.
10.
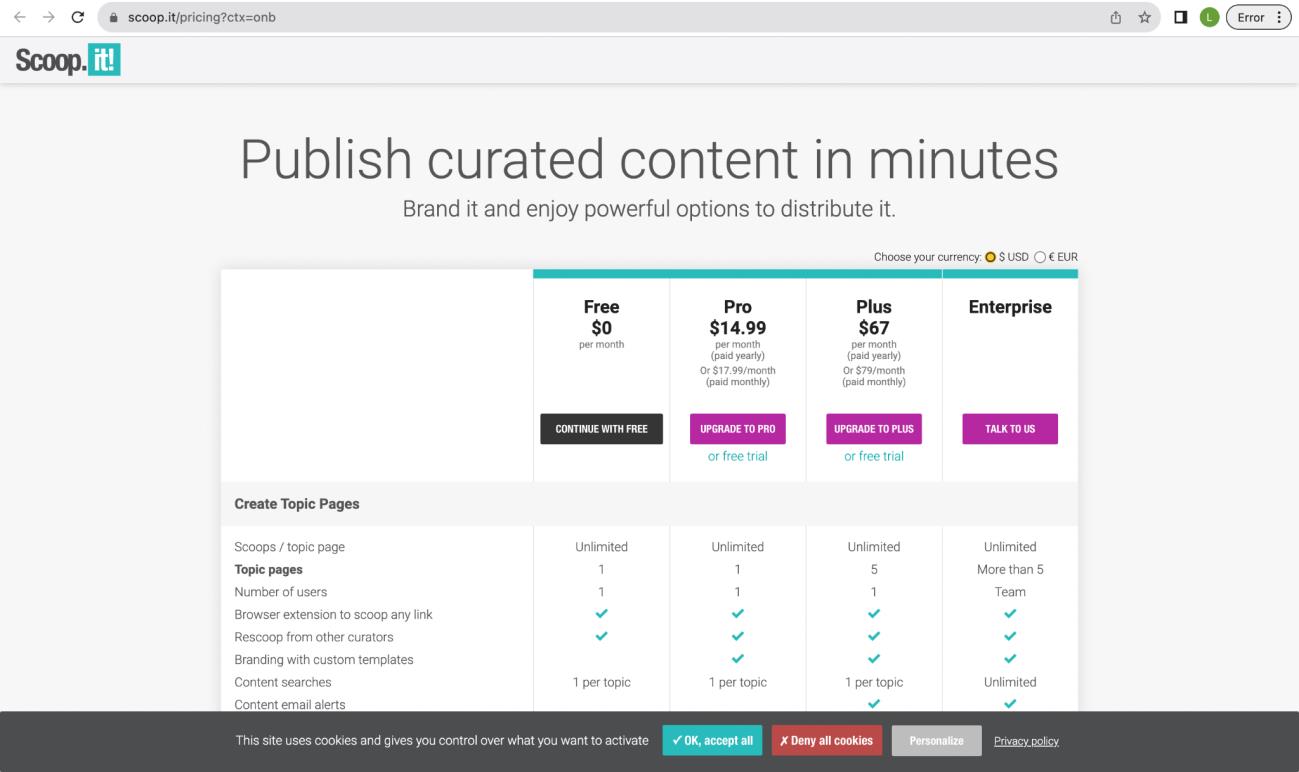
Click “Continue with Free”
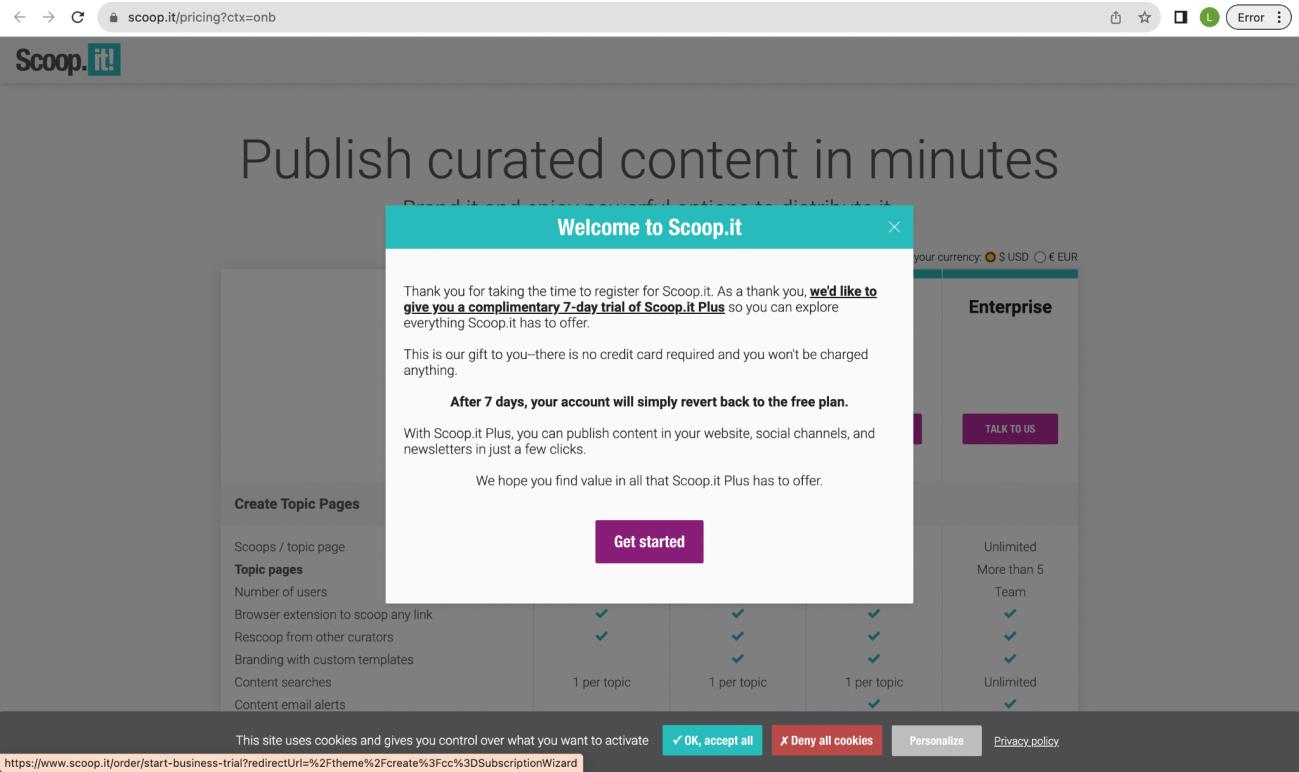
11.
Click “Get started”
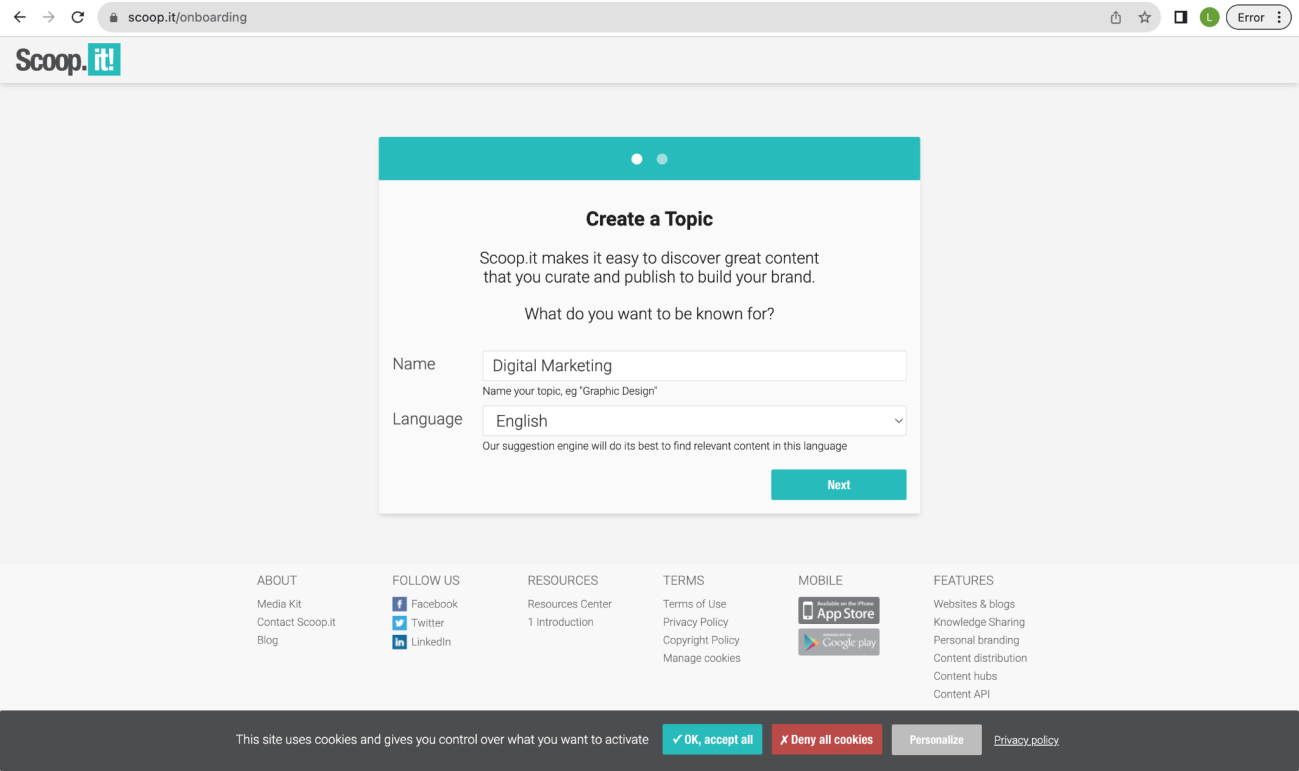
12.
Create a topic and choose the language. Once done, click
“Next.”
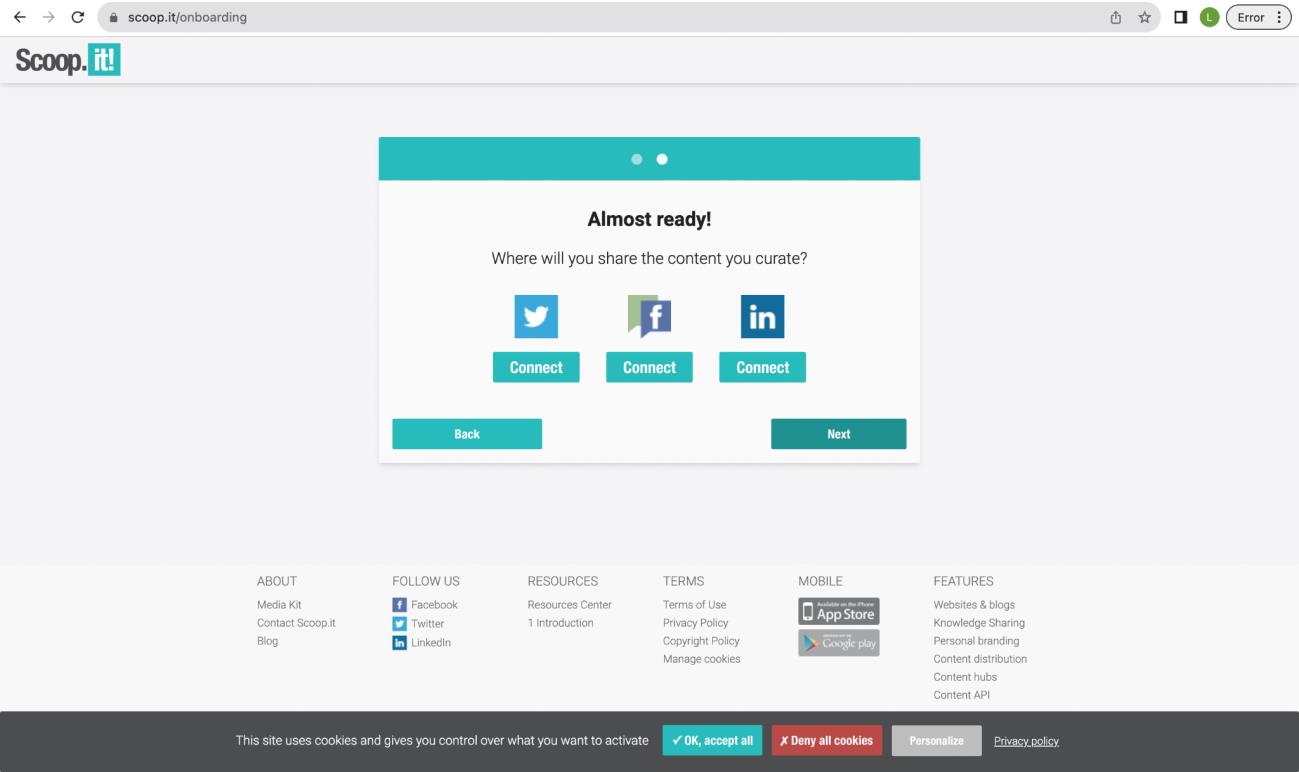
13.
Connect Twitter, Facebook, and/or Link-in or simply click “Next”
to skip.
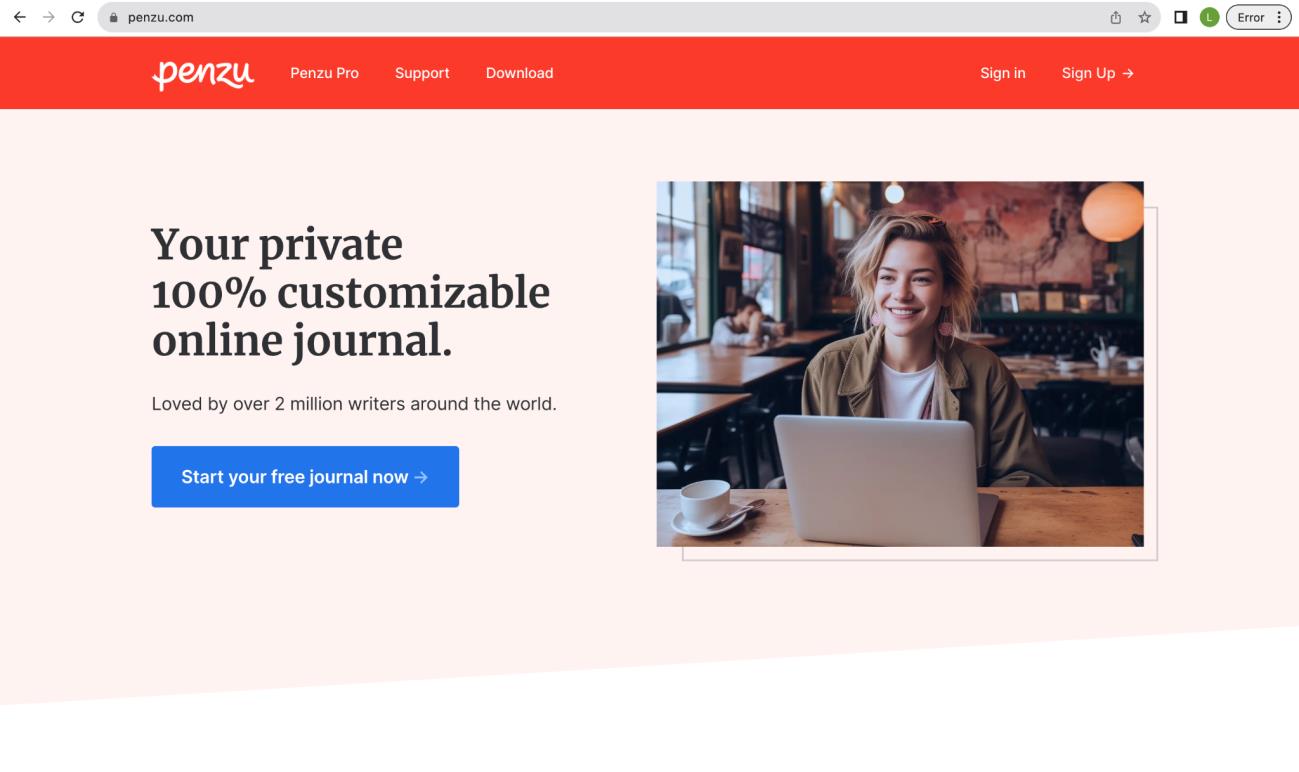
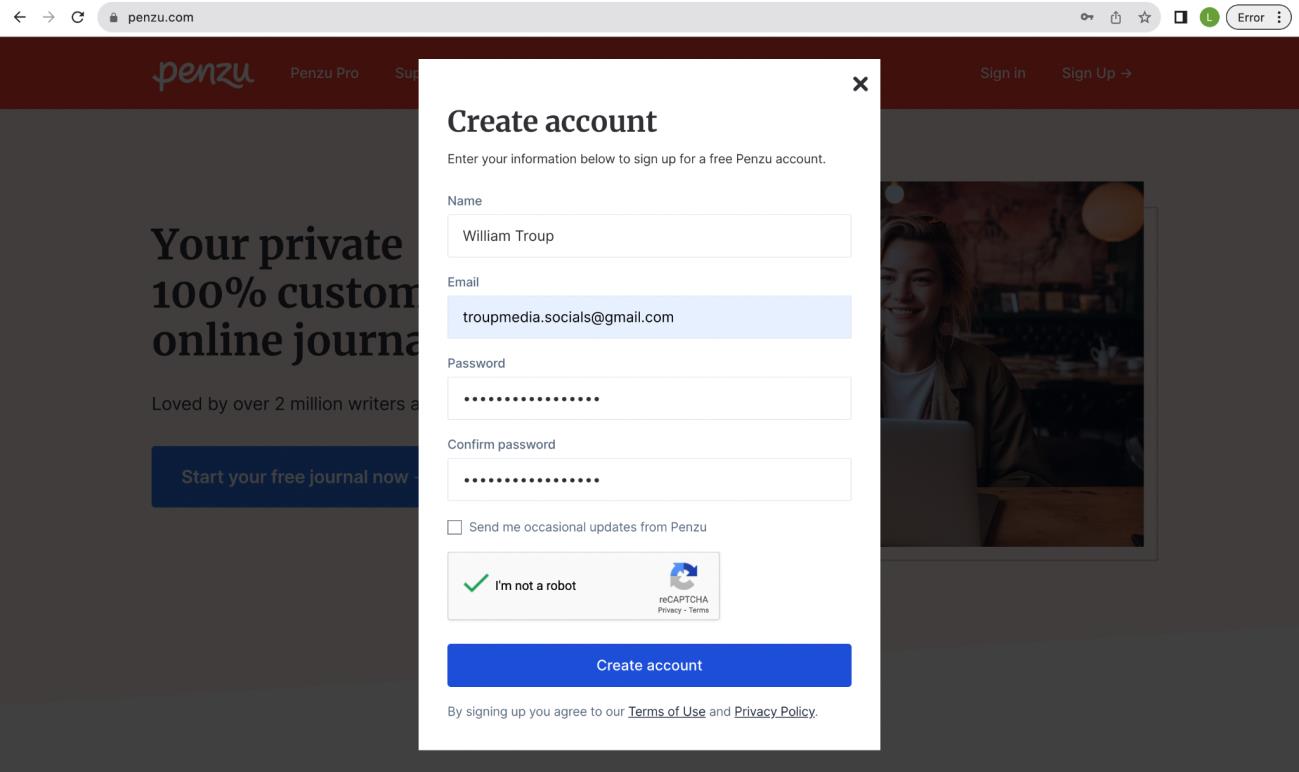
Penzu
1. Go to penzu.com and click “Sign Up” on the upper right corner.
2. Complete fill out all the information needed. Do not forget the verification part. Once done, click “Create account.”
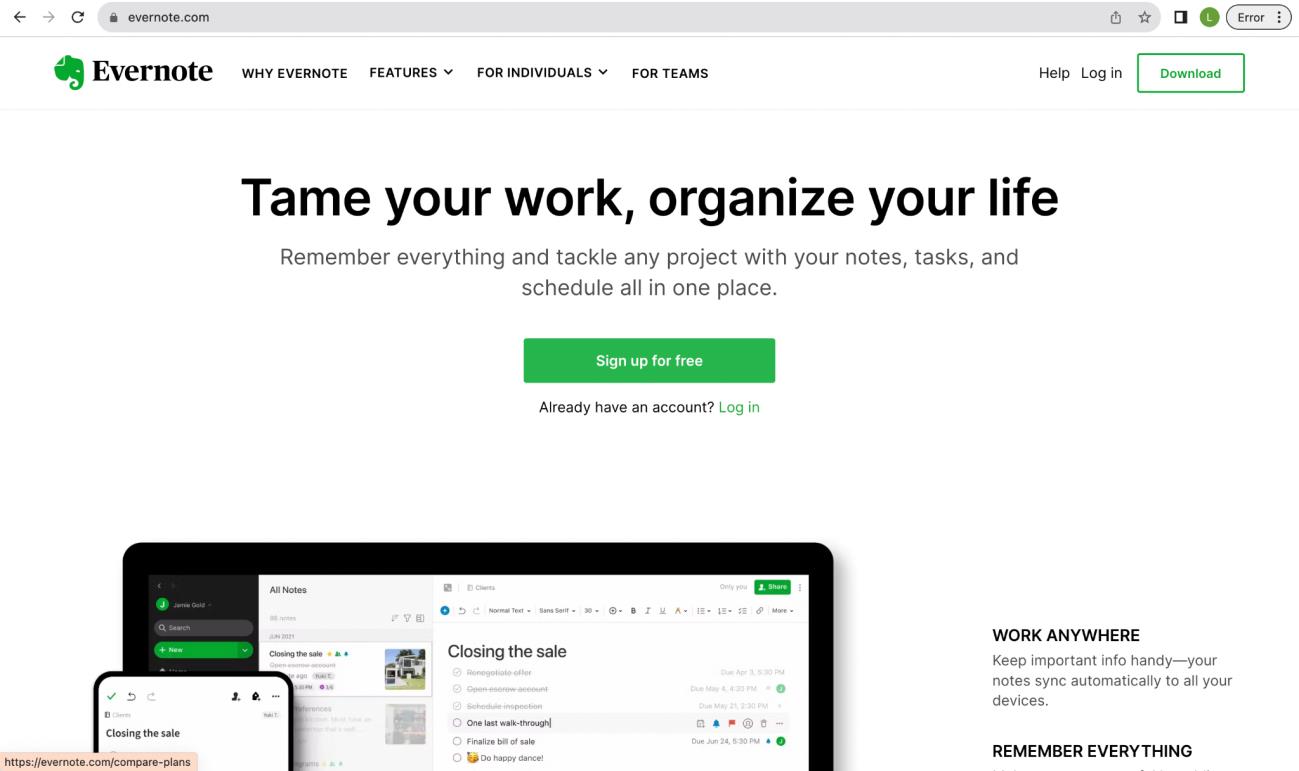
Evernote
1. Go to evernote.com and click “Sign up for free” on the middle of the page.
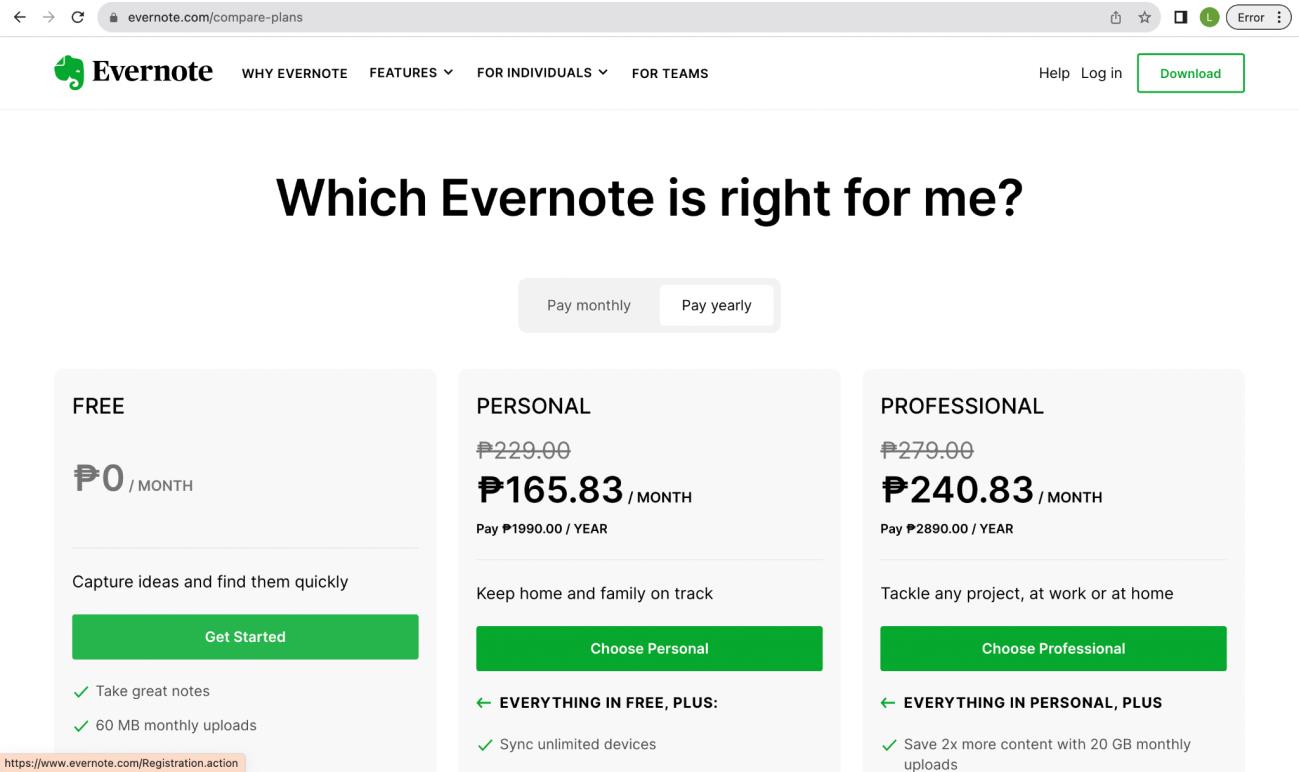
2. Choose “Get Started” on the left most option (free).
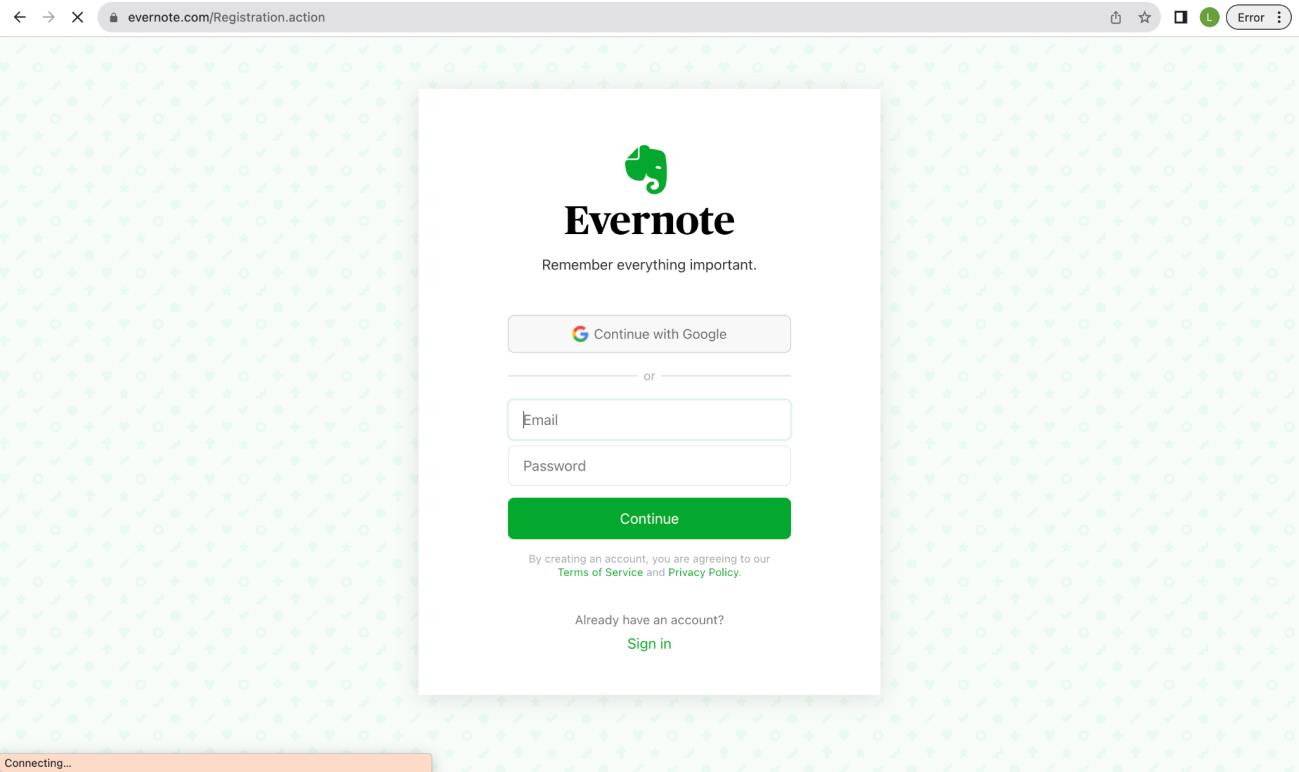
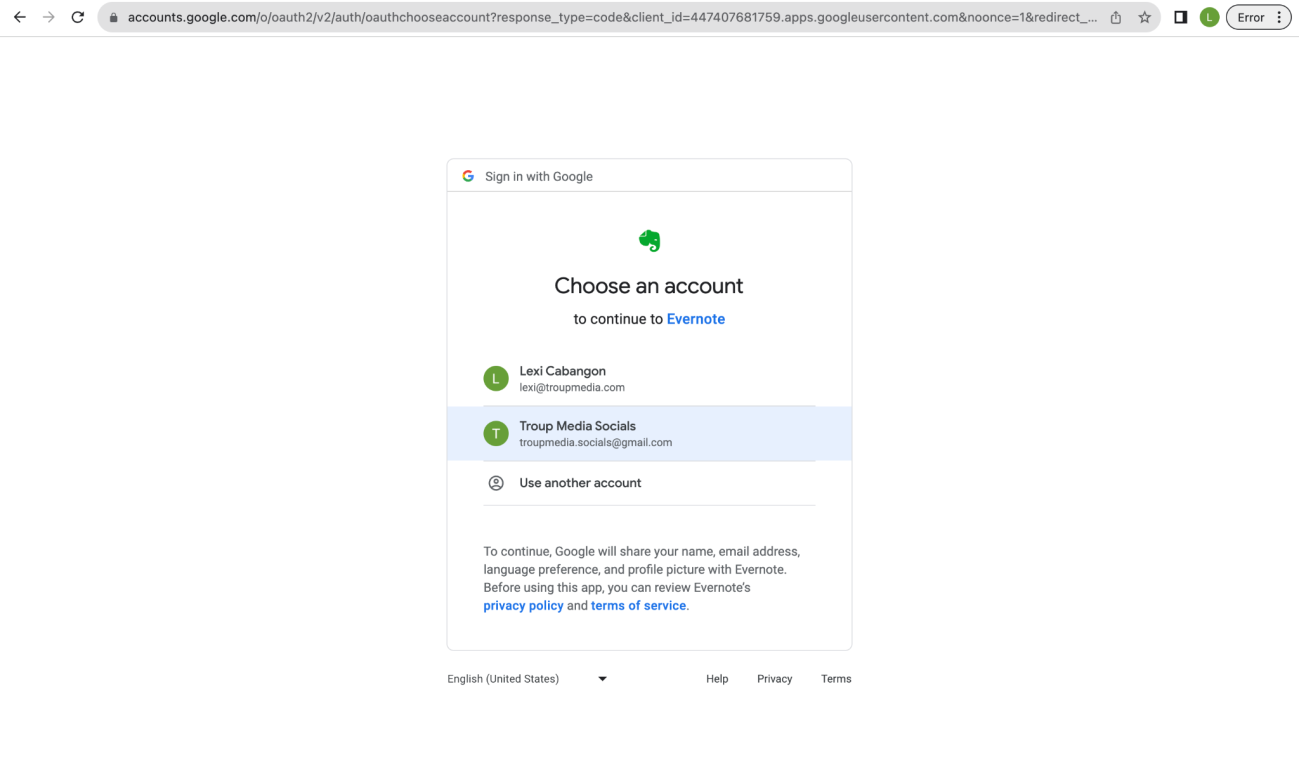
3. Click “Continue with Google.”
4. Choose an account to continue to Evernote.
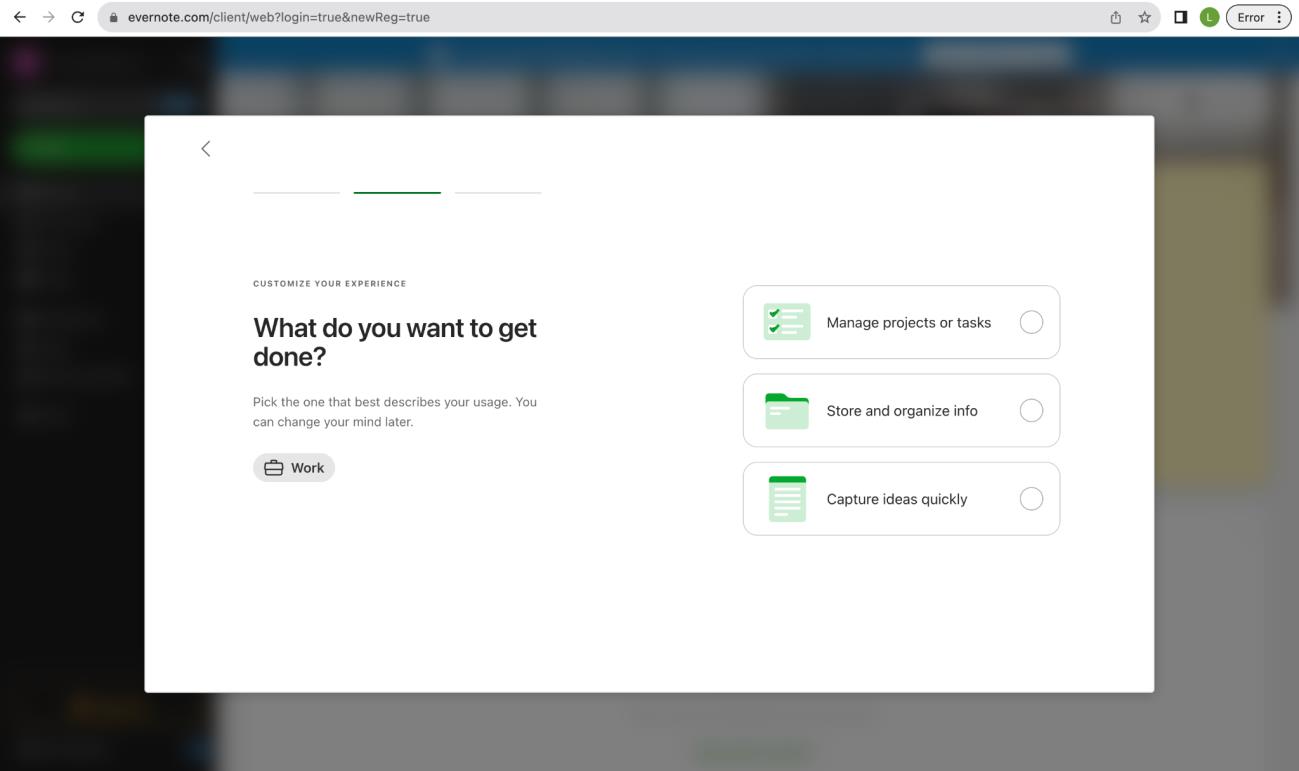
5. Answer the questions to customize your experience.

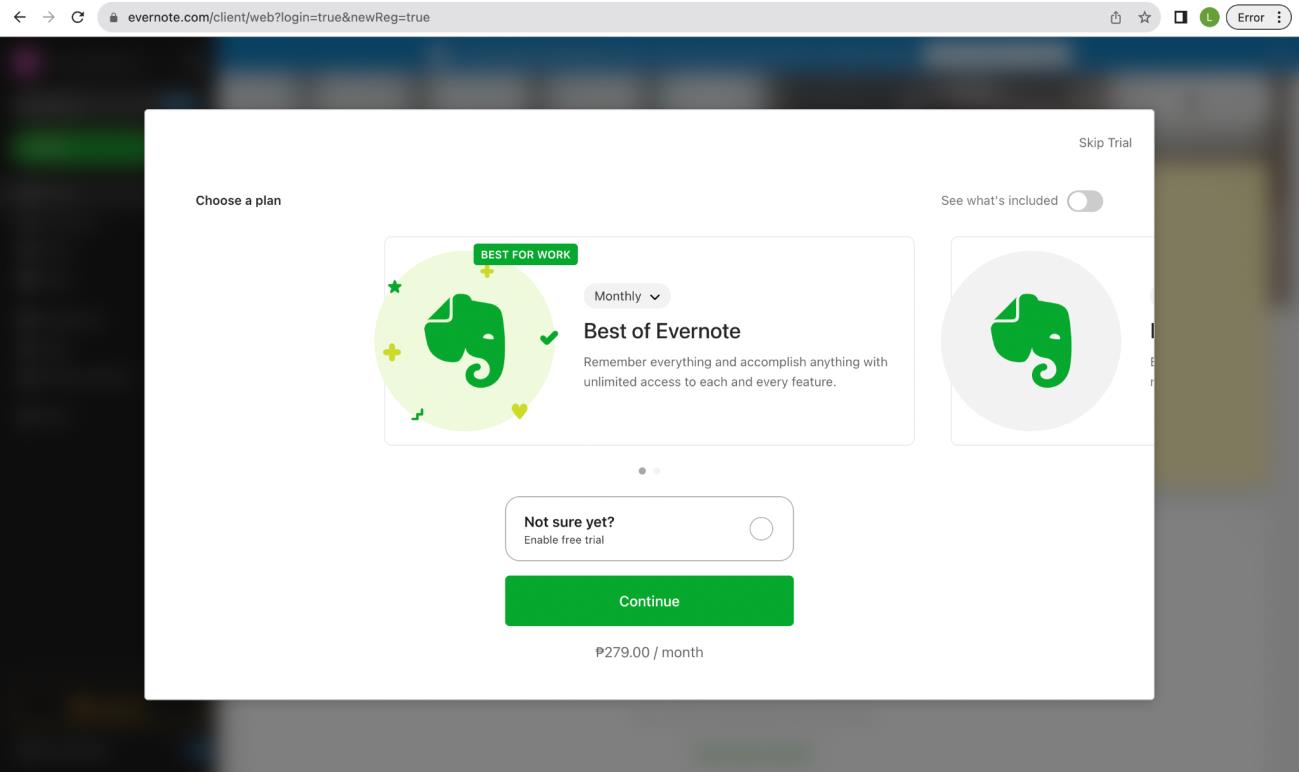
6. Click “Skip Trial” on the upper right most corner to continue using it for free.
About.me
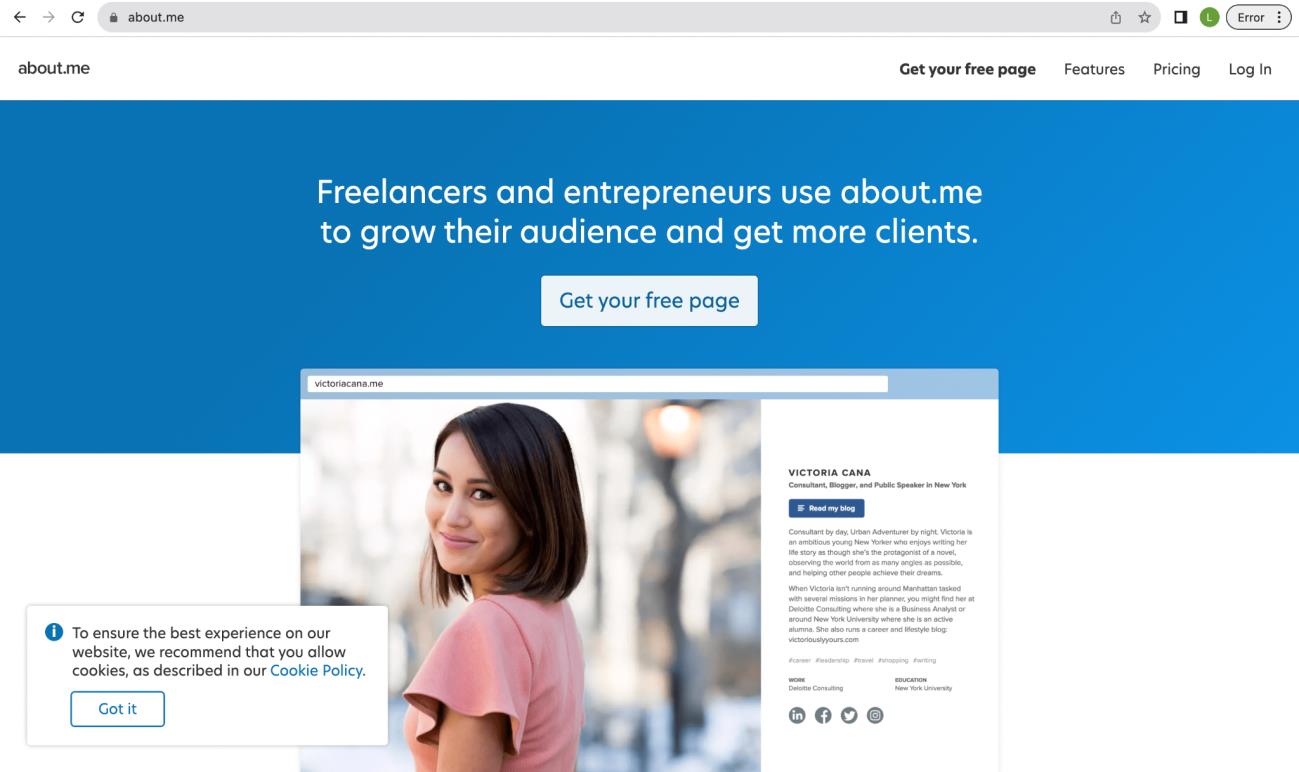
1. Go to about.me and click “Get your free page.”
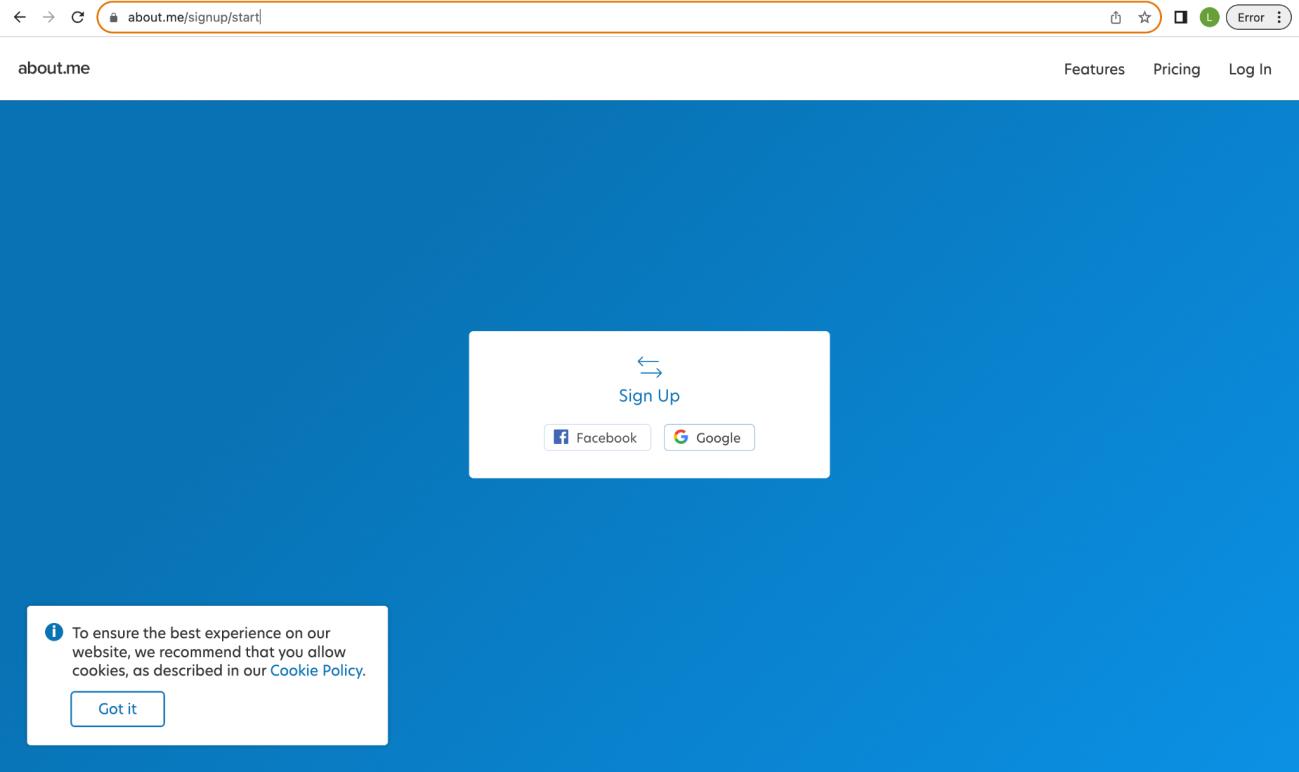
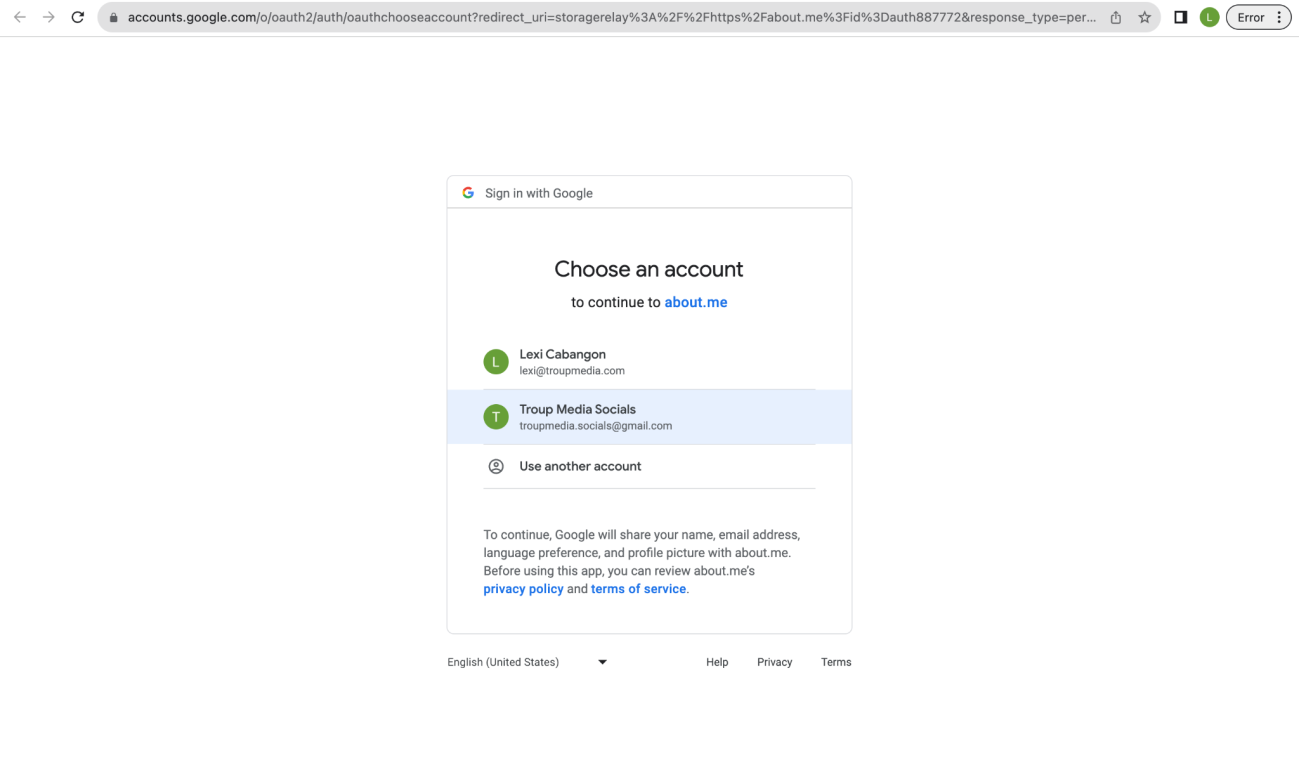
2. Click the “Google” option.
3. Select an account to continue to about.me
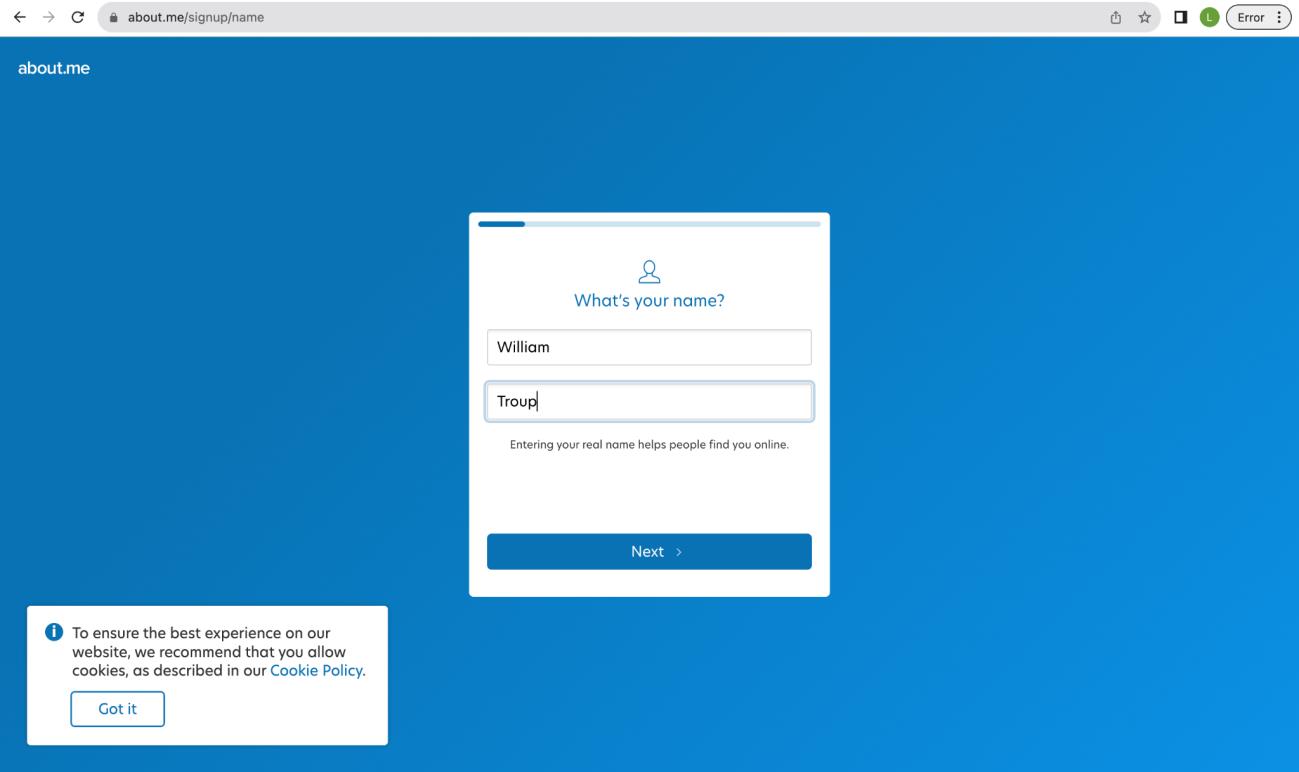
4. Type in the client’s full name and click “Next.”
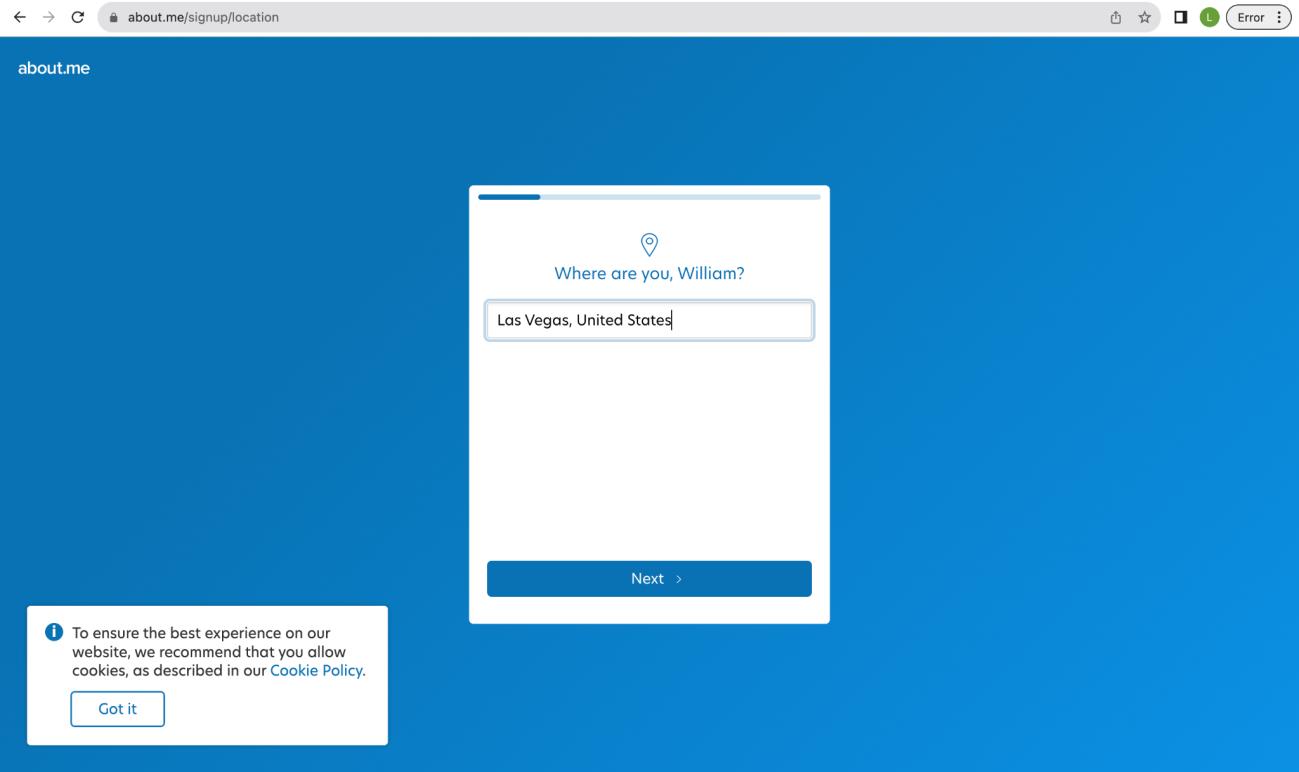
5. Type in where the client is located or based.
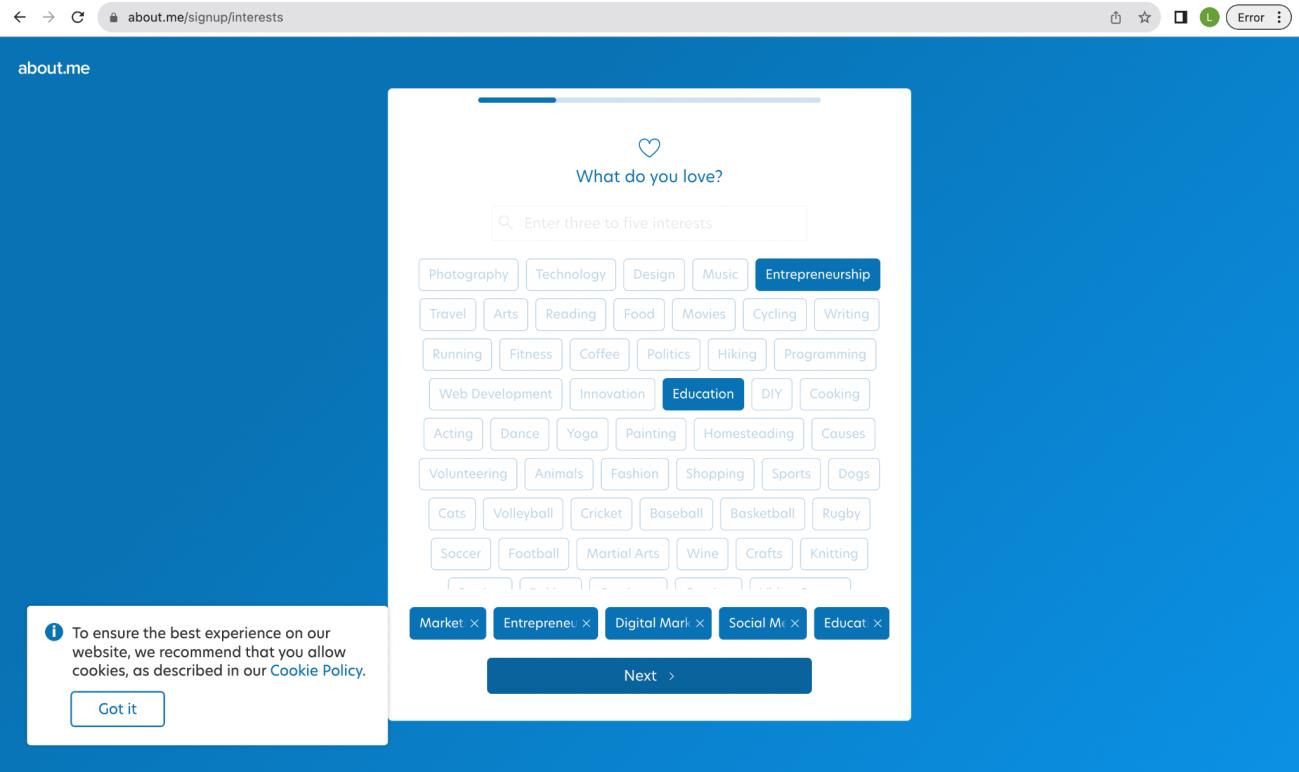
6. Choose 5 topics (required) that is in alignment with what the client’s career is.
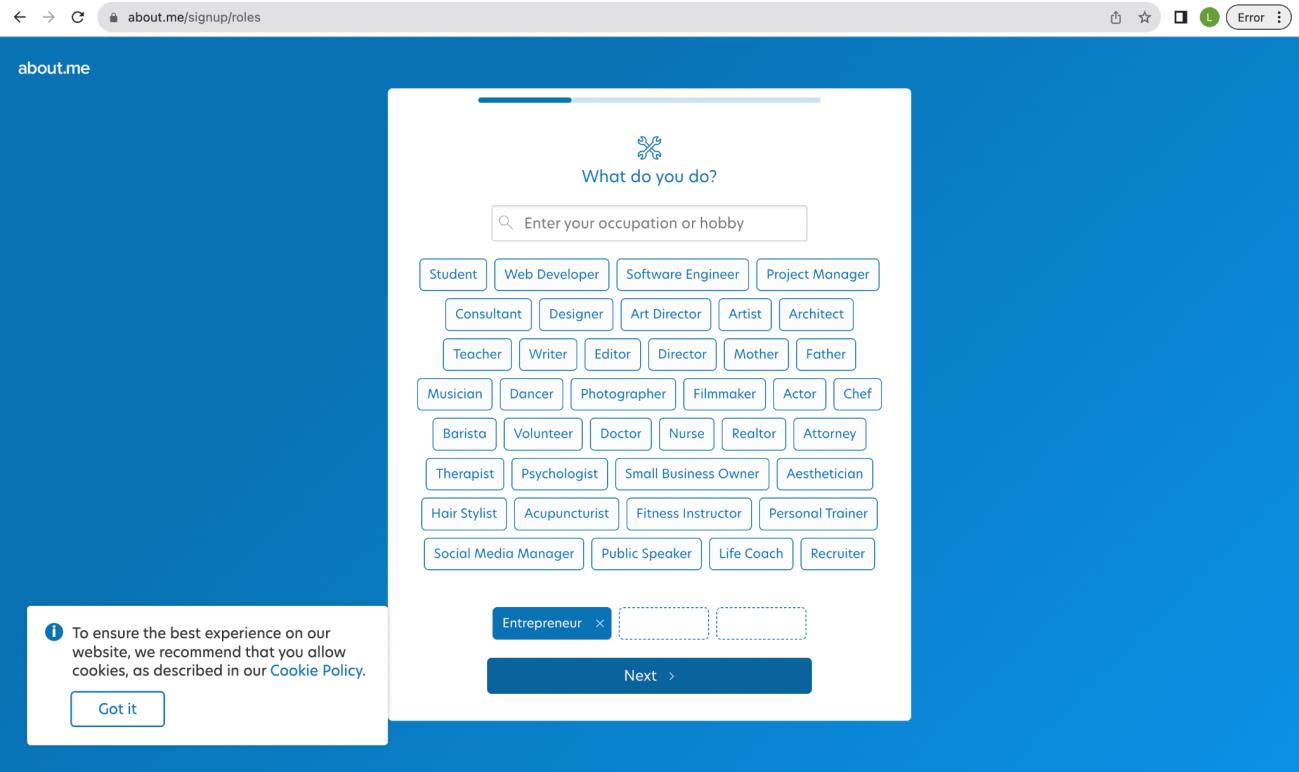
7. Click the job title or hobby of the client.
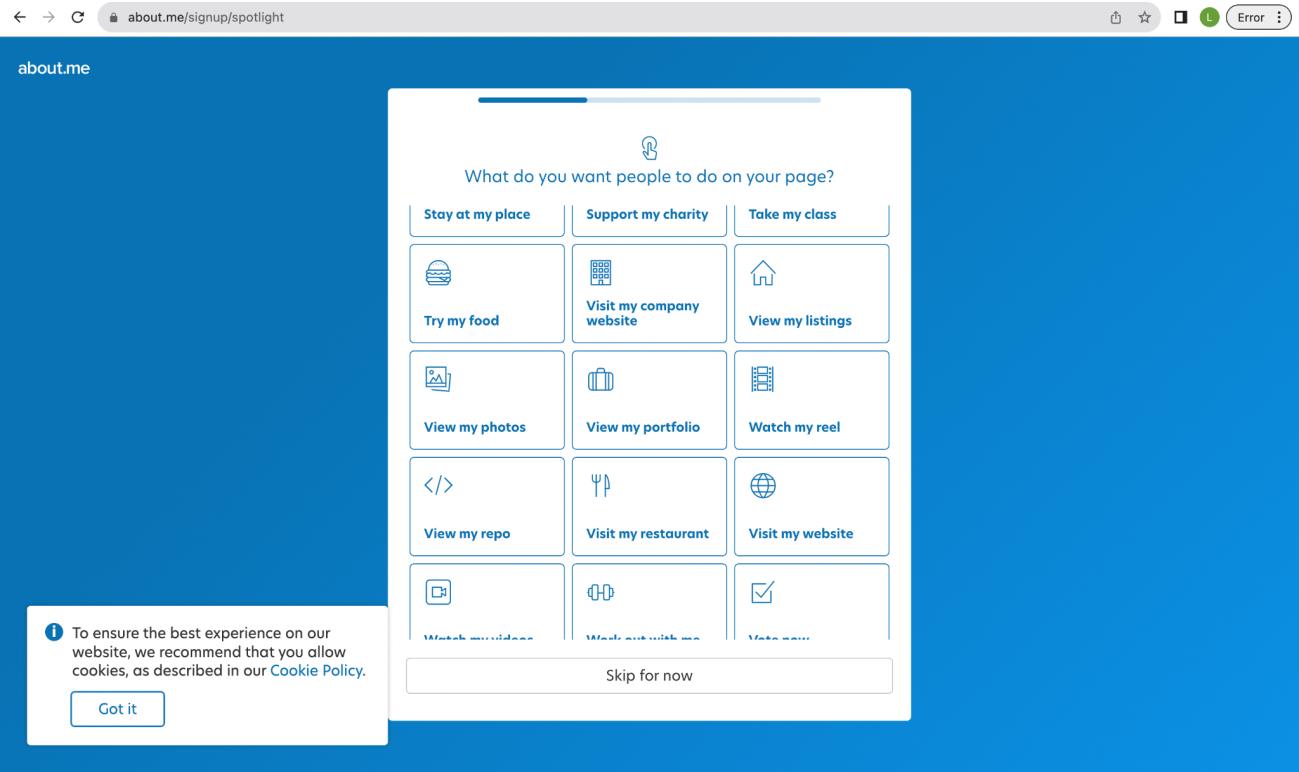
8. Choose what do you want people to do on your page or click “Skip for now.”
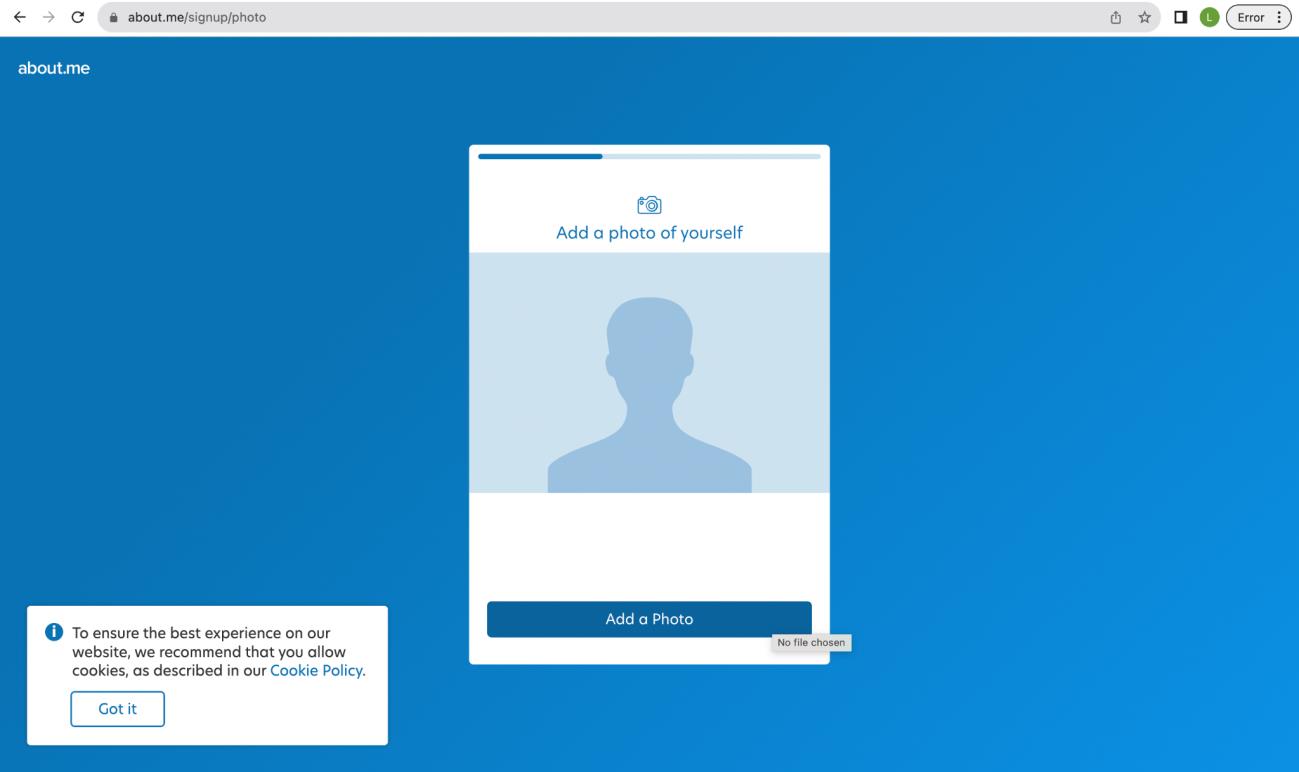
9. Upload a photo or logo of the client.
10.
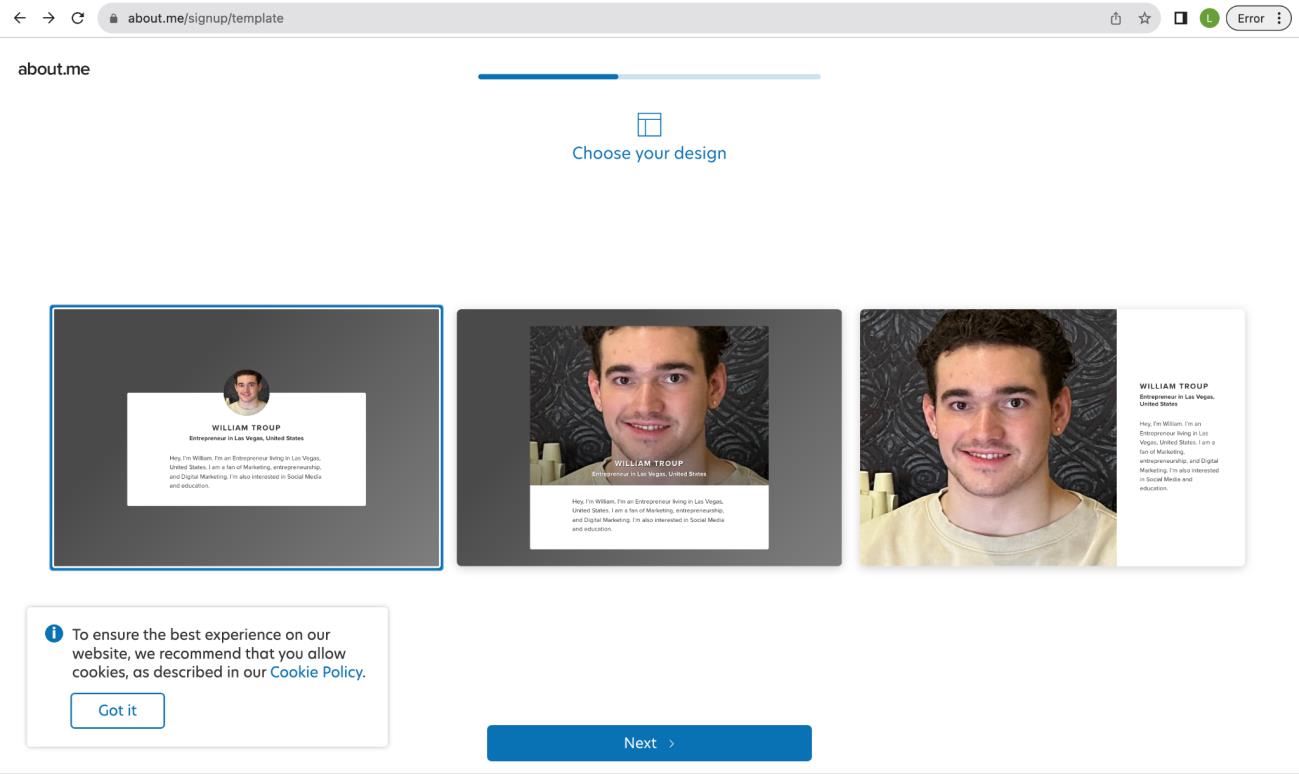
Choose the design.
11.
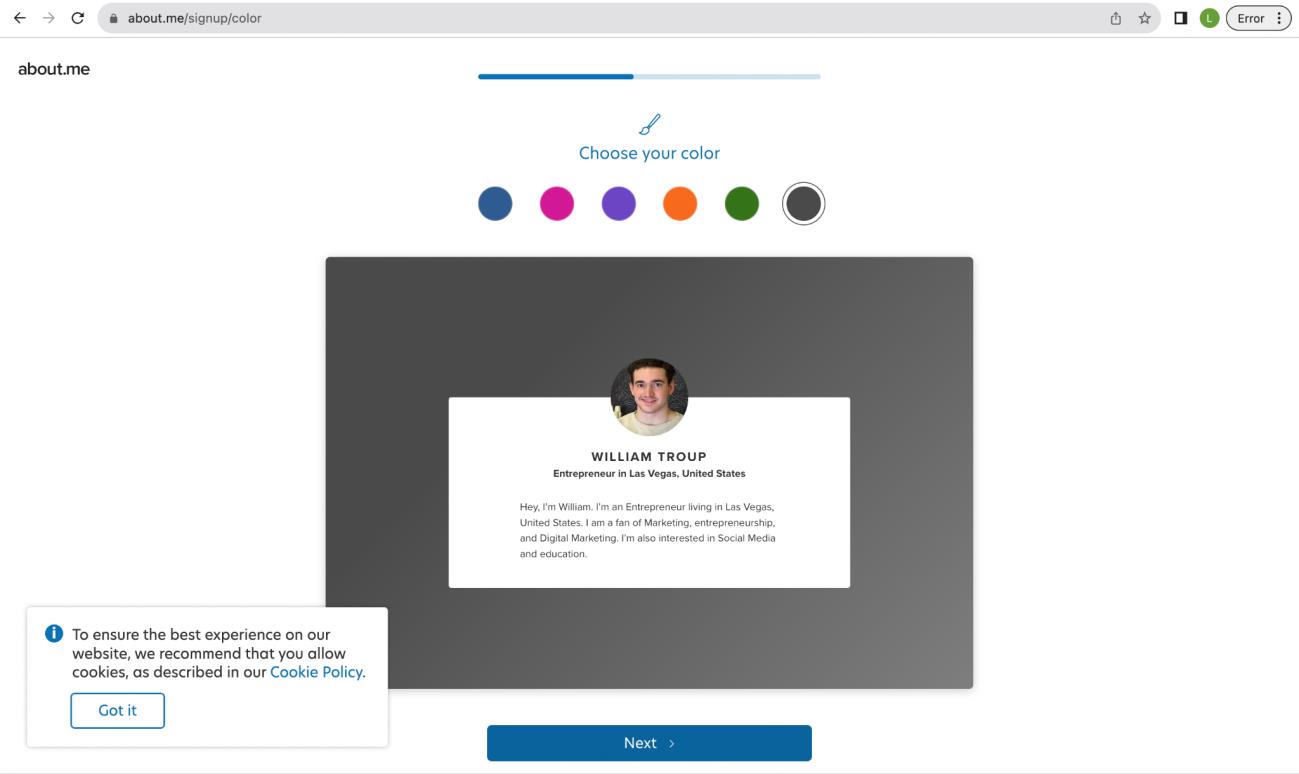
Choose the color.
12.
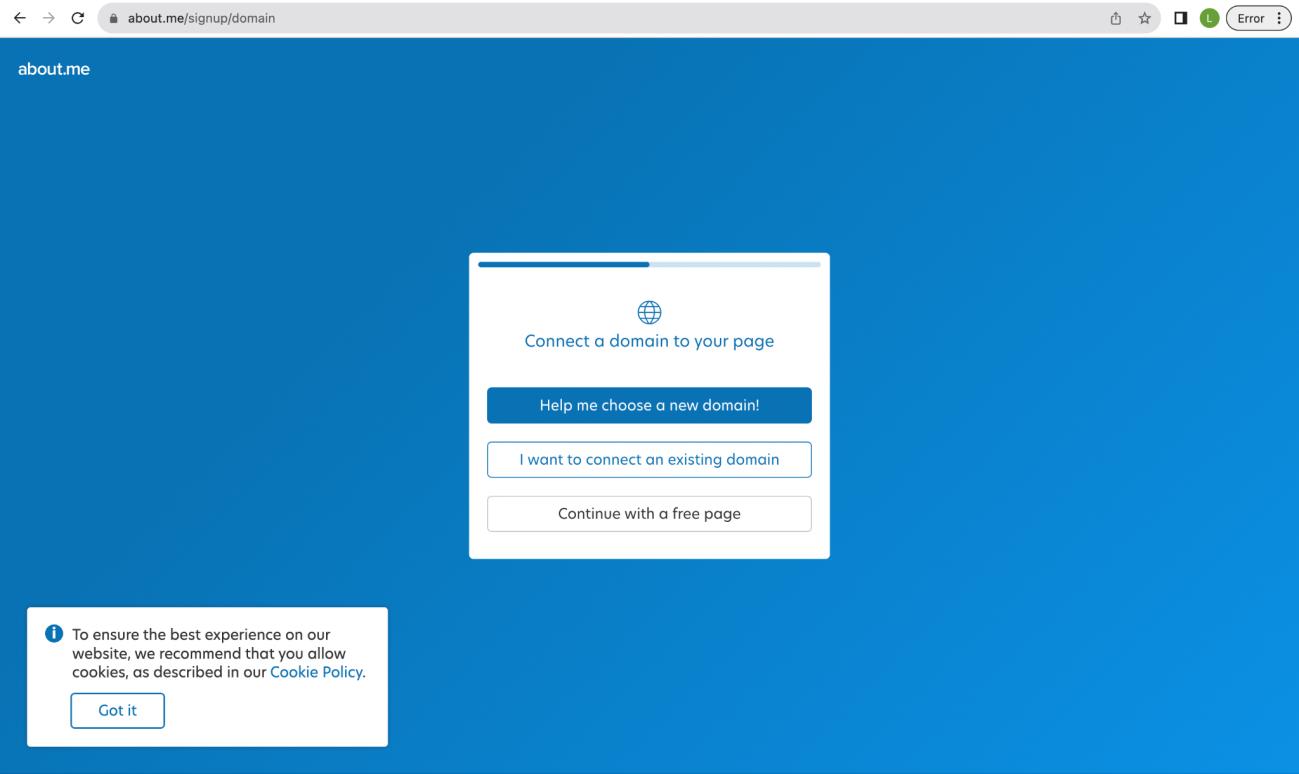
Connect a domain or continue with a free page.
13.
Choose a username and click “Next”

14.
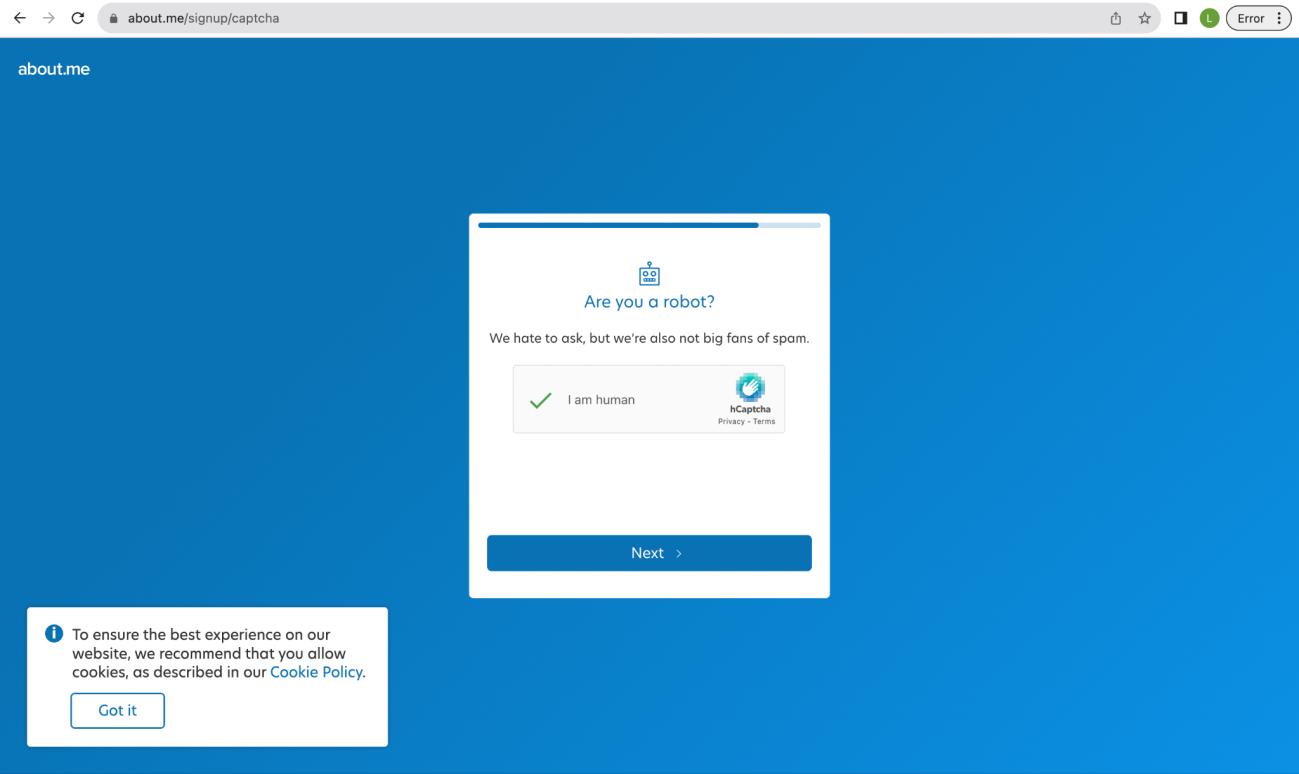
Accomplish the verification and click “Next.”
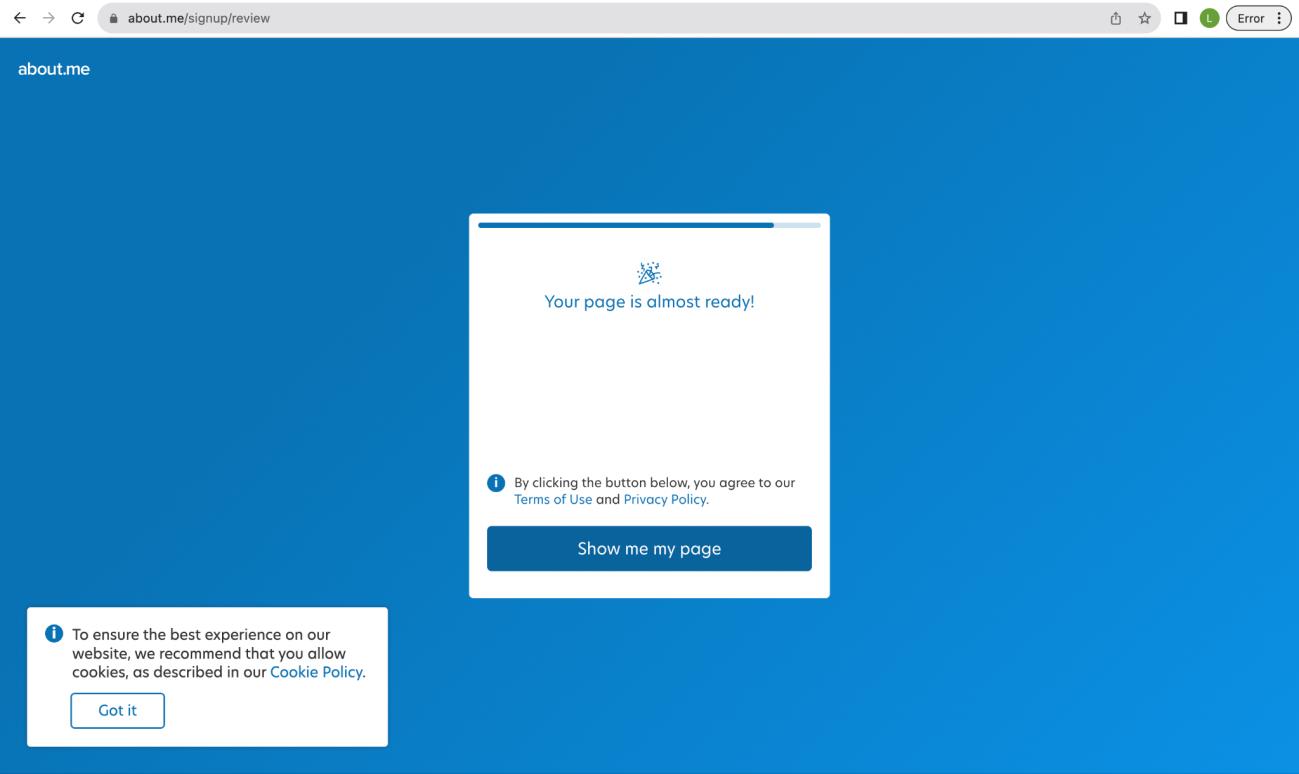
15.
Click on “Show me my page.”
16.
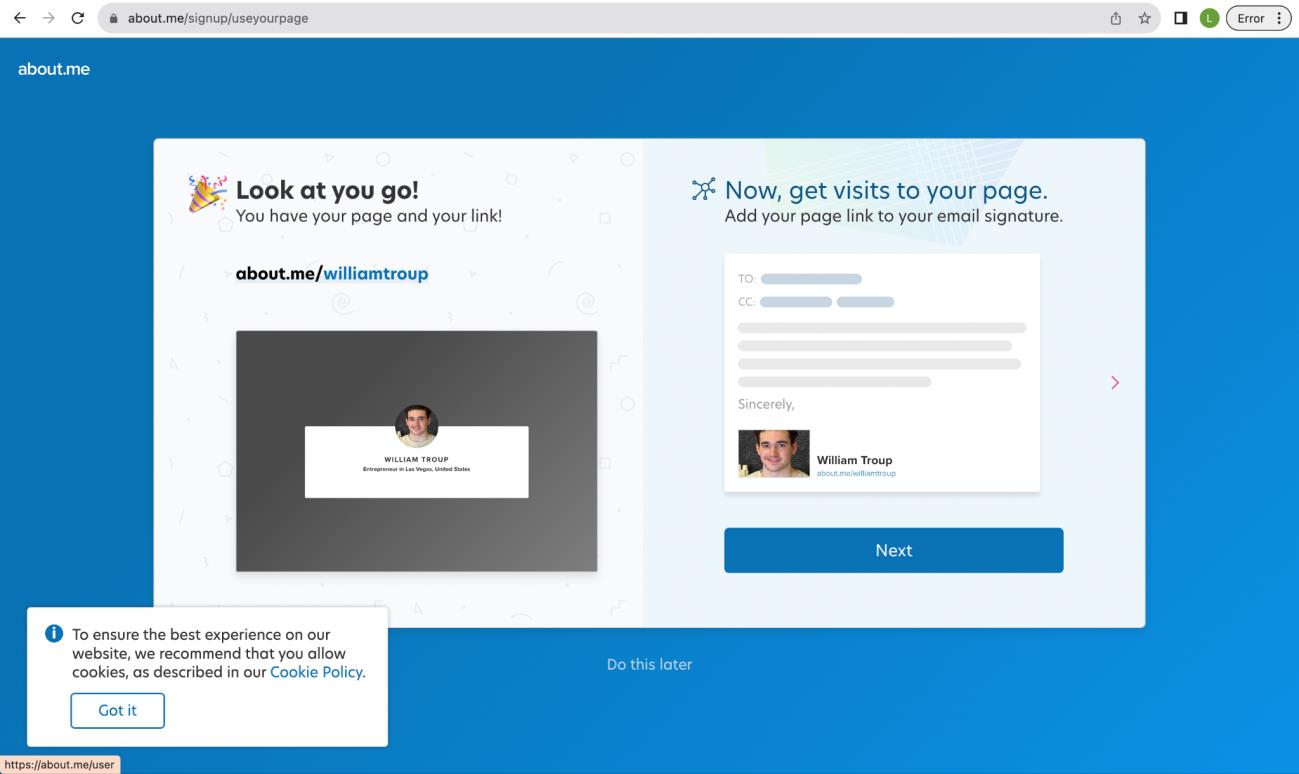
Click “Next” to add page link to email signature or click “Do this later.”
Personal Brand Entities Checklist:
● Gmail
● Facebook Profile
● Facebook Page
● Tiktok
● Twitch
● Discord
● YouTube
● Vimeo
● Flickr
● Quora
● Inside.com
● Medium
● Scoop.it
● Penzu
● Evernote
● About.me
You may also like...
-

Quick Guide to Local Service Ads: For Local Home Service Professionals Advertising by Will TroupQuick Guide to Local Service Ads: For Local Home Service Professionals
Reads:
77Pages:
40Published:
Aug 2024Are you tired of wasting money on ads that don't deliver real customers? Ready to discover the secret weapon that successful local home service businesses use...
Formats: PDF, Epub, Kindle, TXT
-

Master Youtube Influence Advertising by Vivek SinghMaster Youtube Influence
Reads:
331Published:
Nov 2022Master YouTube Influence is a new powerful eBook that reveals the money-making possibilities of becoming a YouTube influencer. Readers of the eBook will learn...
Formats: PDF, Epub, Kindle, TXT
-

Google Ads Tutorial - How to Make Profitable Google Search Ads - Download Free Ebook Advertising by Digipreneur3Google Ads Tutorial - How to Make Profitable Google Search Ads - Download Free Ebook
Reads:
349Published:
Oct 2022Billions of people are searching for something by typing keywords on Google. From simple things to finding the need for certain products and services.Imagine ...
Formats: PDF, Epub, Kindle, TXT
-

PAY PER VIEW MARKETING SIMPLIFIED! Advertising by Rodney PrattPAY PER VIEW MARKETING SIMPLIFIED!
Reads:
128Pages:
21Published:
Mar 2022Everything you need to know about PPV advertising!Inside this eBook, you will discover the topics about familiarizingyourself with the PPV target audience, wh...
Formats: PDF, Epub, Kindle, TXT