Once a suitable place has been found, it is time to make the car safe. Apply the hand brake and place a chock underneath the wheel. If you are working on the rear then chock the front, vise versa if you intend to work on the front like we are then chock both rear wheels. Look in the Ford owner’s handbook for the best place to jack up the car.
I have decided to change both struts together so after having secured the hand brake and chocked both rear wheels. I have jacked up the front and placed the two axel stands on the front chassis legs either side. I have ensured I have enough ground clearance to pull down on the bottom ball joints to release them from the front hubs.
This job can be archived in a few different ways. One way is remove the brake pipe and leave the front brake intact removing the whole strut. I prefer to remove the outer caliper and leave the hydraulic brake system un-touched; it will undo enough to slide out of a groove (see below).
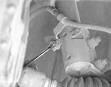


One-track rod end from either side will have to be undone. Simply undo the one nut. Place the ball joint splitter we purchased for a previous job and separate it from the suspension leg. I like to put the nut back on loosely for two reasons, one it protects the threads and two I then know where it is for reassembly.
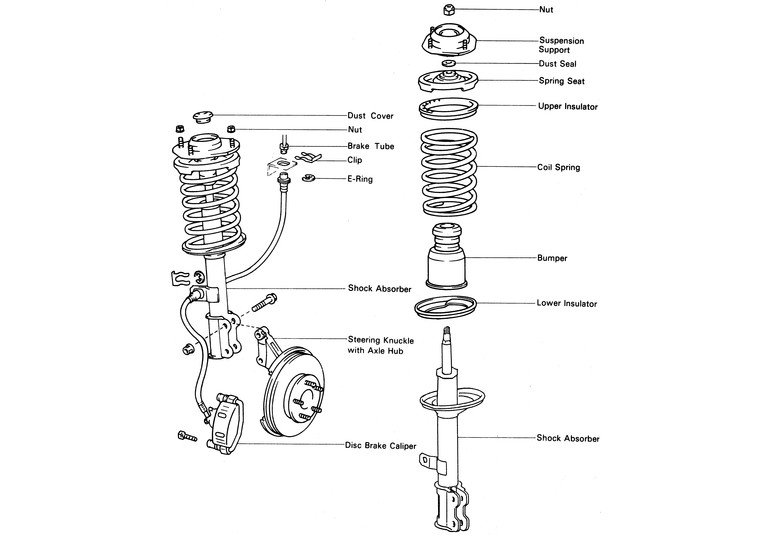
So after having removed the wheel and undoing the bottom ball joint. I undid the brake caliper. Moving under the bonnet you will see a ring of three bolts and one large nut in the middle on either upper inner wing.
These hold the strut to the inner wing. Undo the three outer nuts these are normally thirteen millimeters. Ensure you have the strut supported as soon as they are undone the strut will fall. I use a nylon strap with a hook on the end, this can be tied off and hold the strut in place until you are ready to lift it out of the way.
Once you are ready lift the strut away from the under wing section of the car.
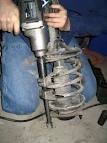
Be very careful at this point as the Macpherson strut is heavy. Once the strut is on your bench or garage floor it is time to use the spring compressors. Spread them equally on the spring. Start to tighten them at equal stages so the spring
compresses evenly. I like to use a power tool for this part of the job. It is quite hard to hold the strut and use a ratchet and socket. The power tool makes it an easier task.
Once the spring is to short to reach the top plate it is now time to loosen the top center bolt. Be very careful because if there is still tension it may result in the spring expanding quickly and forcing the top plate off and could cause injury and damage.
Consult the Ford owner’s handbook and manual for advice prior to the spring removal and as always read carefully the manufacturers guidelines for use when using any tools. Once the spring top retaining plate is loose, you can remove the large rubber shock absorber cover. If it is perished then replace it with a genuine Ford replacement part. It will protect your new Ford shock absorber.
Now is time to replace the rubber cover on the new Macpherson strut, then place the spring the same way it was taken off. Next relocate the spring in the top plate. You will see a small section where the end of the spring will slide into the plate. With this in site, replace the center nut and using your power tool to tighten it. Next loosen the spring compressors evenly whilst ensuring the spring stays in place, make sure the top and bottom keeps are located properly.
When the spring compressors are loose, remove them one by one. You are now ready to replace the strut.
Using your strap to hold it in place locate the top three bolts, re-place the nuts not forgetting the washers. Do not tighten these fully until the underneath is reassembled. Move to the lower section.
You will need a long bar to pull down the wishbone, then maneuver the bottom ball joint into place. When the bolt is through tighten the nut. It is now time to replace the track rod end, then the brake caliper and flexi pipe-retaining nut.
(Remember to pump the brake pedal prior to moving the car) It is time to ensure all the bolts, clips, pipes and nuts are tight. Systematically and methodically work your way around the whole strut tightening all of them to the correct torque settings, you will find all these in the Ford manual.
When you have completed this task, replace the wheels and tighten. Jack up the car and remove the axel stands. Lower the car and ensure the wheel nuts are tight. As normal be cautious when test driving the car.
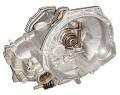
I went to drive off from my home this morning and I depressed the clutch and selected drive. As normal, I lifted my foot off the clutch and to my amazement, the car stayed where it was. I revved it but nothing. I tried it a few times but to no avail. I checked a few things and came to the assumption the gearbox was at fault. I had the weekend off so I had the time to do the job and be ready for work on Monday.
I checked at my local Ford dealer and they had a genuine Motor craft replacement Ford gearbox at an affordable price. It was an exchange unit so I needed to take my old gearbox or pay a huge deposit. I preferred to take my gearbox, this way if I need any other parts I could collect them at the same time and reduce the number of trips I need to make.
The first step is to find a suitable safe area to carry out the repair. It should be level and away from moving traffic. You may wish to cone off the area or use signage to warn people about the repair you are doing.
DO NOT LEAVE THE KEYS IN THE IGNITION AS THIS COULD
RESULT IN SOMEONE TRYING TO MOVE THE CAR AND CAUSE