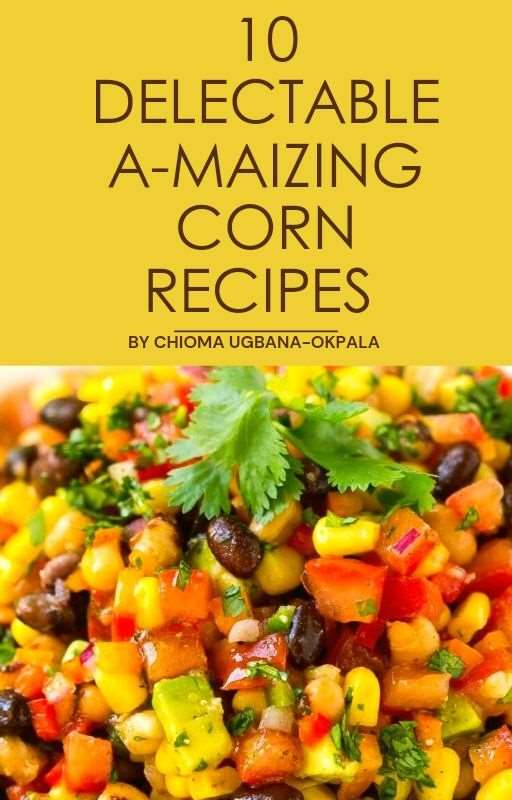
0
CONTENTS
SWEET CORN SHRIMP & RICE SKILLET
BRAZILIAN CORN PUDDING (CURAU DE MILHO)
PAMONHA DOCE (SWEET CORN MUSH)
SOUTHWESTERN SAUTEED CORN RECIPE
1
FOREWORD
I am a Nurse and Nutritionist with a deep love for cooking. Sharing my cooking ideas and teaching others how to cook has always been a joy for me. I enjoy experimenting in the kitchen, using valuable ingredients to create new recipes for my family. Through my culinary adventures, I constantly discover new tips, time-saving hacks, and creative ways to enhance the cooking experience.
To share my experiences and connect with others who share the same passion, I created the LEGITIMATE
KITCHEN TIPS GROUP on Facebook. This forum allows me to share daily updates, cooking ideas, and valuable insights with fellow cooking enthusiasts. Cooking to me, is not only about creating delicious dishes but also about putting love and care into every meal, considering the needs and preferences of others.
The corn recipes I’ve compiled here draw inspiration from cuisines around the world. They serve as a reminder of the benefits of using seasonal ingredients in our cooking. By incorporating seasonal foods, we save time on meal planning, reduce costs, and provide our bodies with highly nutritious options that promote cellular health and overall vitality. Moreover these are very easy to prepare and offer versatile ways to enjoy corn and break away from the monotony of repetitive meal choices.
I would greatly appreciate it if you could leave a comment and share your thoughts on these recipes. Feel free to invite your friends and family to join the LEGITIMATE KITCHEN TIPS GROUP where we can all exchange cooking ideas and inspire each other. Cooking is truly a joyful experience and together, we can create memorable meals filled with love and nourishment.
Chioma Ugbana-Okpala,
Founder, Legitimate Kitchen Tips
2

CORN PUDDING
Recipe adapted by Insanely Good Recipes
INGREDIENTS:
These are basic items you probably already have
in your kitchen:
i. Eggs: Make sure to let them sit at room temperature for about 30 minutes before using. This helps make the dish light and fluffy.
ii. Melted butter: Gives the pudding a rich flavour.
Margarine works too.
iii. White sugar: The recipe calls for a quarter cup, but if you don’t want it too sweet, you can use less.
iv. Milk: You can use whole, 1%, or 2% milk.
v. Corn-starch: This is what thickens the pudding and gives it a custard-like texture.
vi. Canned whole kernel corn: If you prefer, you can also use fresh or frozen corn.
vii. Canned cream-style corn: This is the “secret”
ingredient that makes the pudding wonderfully creamy.
5 eggs
1 cup of milk
1 cup of white sugar
1 cup of corn-starch
4 cups of kernels
2 cups of canned cream-style corn
[Scroll down to see how to make homemade cream-style corn]
INSTRUCTIONS:
1.
First, heat your oven to 400 degrees Fahrenheit. Grease a 2-quart casserole dish so the pudding doesn’t stick.
2.
In a big bowl, gently beat the eggs. Add sugar, milk, and melted butter. Add corn-starch and mix until everything is well combined. Add both types of corn and stir well. Pour this mixture into the greased casserole dish.
3.
Bake it in the oven for one hour at 400 degrees F.
4.
And that’s it! You’ve got yourself a super tasty holiday dish that your guests will absolutely love and finish in no time.
TIPS & NOTES:
If you don’t have corn starch, just use half a cup of flour instead.
If you don’t have canned corn, fresh or frozen corn can serve. Just remember to add a teaspoon of salt to the mixture.
A helpful trick to mixing corn-starch is to combine it with cold milk, whisk out any lumps, and then add it to the mixture. It saves time and works like a charm!
3
To reduce the liquid in your corn pudding, drain the canned kernel corn, but keep the creamed corn undrained.
For larger servings, double the ingredients and bake them in two separate dishes, to ensure thorough cooking.
To lower cholesterol, opt for a liquid egg substitute instead of five eggs.
You can use a 2-quart casserole dish, a glass baking dish, or an aluminium pan, but don’t forget to grease it with cooking spray – use fat free to keep it guilt-free!
4
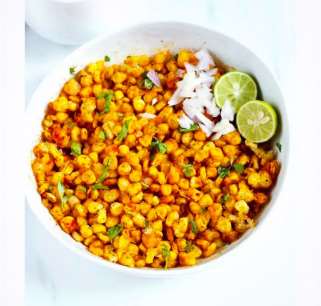
CRISPY CORN
A delightful and crunch snack perfect for lunch
INGREDIENTS
3 cups corn kernels
6 tablespoons corn flour
6 tablespoons rice flour
Or all-purpose flour
½ teaspoon chilli pepper powder
teaspoon salt (adjust to taste)
4 cups of water for parboiling corn
¾ teaspoon cumin powder
¾ teaspoon red chili powder
2 tablespoons chopped parsley
1 tablespoon lemon juice
INSTRUCTIONS
1.
Select corn with firm and plump kernels, avoiding those that are too young, tender, or overly juicy.
Hard kernels should also be avoided.
2.
Cut the corn into two parts and remove the kernels with a knife.
3.
Bring 4 cups of salted water to boil in a pot. Add the corn kernels and cook for 5-6 minutes. Drain the water and set the corn aside.
4.
Transfer the dry corn into a mixing bowl and season with salt and pepper. If using egg, add 5.
1 egg white to the corn and mix well using a spatula.
6.
Begin by sprinkling 3 tablespoons of corn flour and rice flour each over the corn.
7.
Toss the corn well to ensure even coating.
8.
Add the remaining 3 tablespoons of flour and corn-starch to coat the corn completely, ensuring they are dry and separated. Toss the corn again to evenly distribute the flour and spices.
9.
Heat oil in a deep pan for frying. To check if the oil is hot enough, drop 2 corn kernels into the oil. If it sizzles, then the oil is set to continue frying. Make sure to set the flame to medium-high.
10. Carefully drop the corn kernels into the hot boil, frying them until they turn golden brown and crispy.
Use a slotted spoon to remove them from the oil and place them in a colander. Paper towels makes them soft.
11. Repeat the frying process until all the corn is fried. Then, transfer the crispy corn to a large bowl and sprinkle with red chili and cumin. Toss the corn well to coat them evenly.
12. Final, add the finely chopped onions, coriander leaves, and lemon juice to the bowl for extra tanginess, when you’re ready to serve. Taste the crispy corn and adjust seasoning if needed.
Serve
5
13. Yoghurt dip: A cooling yoghurt dip with a hint of mint and cucumber complements the spiciness of crispy corn and balances the flavours.
14. Salads: serve crispy with salads to add a crunchy element. It works well with green salads, pasta salads, or even grain salads.
15. Sandwiches: add crispy corn to sandwiches or wraps for an extra layer of texture and flavour.
TIPS & NOTES:
You can also add other spices and seasonings of your choice, such as garlic powder, onion powder or ginger powder, to customize the flavour according to your preference. Also feel free to adjust the spices and seasonings
To get a crispy texture, make sure the corn is thoroughly coated with flour. The coating must be dry, not moist or sticky.
Substitute parsley with any leafy green of your choice, mint, basil, pumpkin leaf or scent leaf.
SAFETY PRECAUTIONS
Before preparing the dish, there are essential precautions to keep in mind:
While frying, it’s necessary to use a lid to prevent splattering and random kernel popping. Stay watchful from a safe distance.
Remember not to completely close the lid; keep it ¾ closed to allow steam to escape. If not, condensed steam may drop into the oil, causing spluttering.
To avoid corn bursting:
Cook the corn thoroughly before using it in the recipe.
Instead of peeling the sweet corn, use a knife to cut off the kernels from the cob. This helps release steam while frying and prevents bursting.
If you notice the kernels bursting, it’s likely due to the oil being too hot. When you hear a pop, immediately lower the flame as much as possible, or even switch it off and turn it back on after a minute.
To regulate the oil temperature:
When dropping the corn into the hot oil, it should sizzle and rise immediately.
After about 30-50 seconds, you can lower the flame or adjust the heat if any of the kernels start to pop. This helps maintain a safe frying temperature and prevents further bursting.
Servings: 3-4
Cuisine: Indian
6
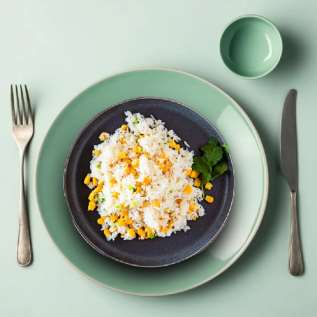
ARROZ CON MAIZ (RICE & CORN)
A simple and versatile dish with comforting flavours INGREDIENTS:
3 tablespoons of vegetable oil or butter
2 teaspoons of salt,
4 cups of water
3 cups of rinsed long-grain white rice,
1 can (15oz) of sweet corn (drained)
2 teaspoons of chopped green onions
INSTRUCTIONS:
1.
Take a big cast-iron pot and heat the oil, salt, and water on medium-high heat.
2.
Once the water starts boiling, add the rice and stir it every now and then to prevent it from sticking to the pot.
3.
When the rice has absorbed all the water and starts to dry up, add the corn. Mix it well. Reduce the heat to low, cover the pot, and let it cook for 25 minutes.
4.
After 25 minutes, carefully stir the rice to make it fluffy. Cover it again and let it sit for an extra 5
minutes.
5.
Finally, add the chopped green onions and mix them in.
6.
Serve the arroz con maiz warm alongside your favourite main dish.
Servings: 6
Cuisine: Latin
7

COWBOY CAVIAR
Recipe adapted by Insanely Good Recipes
INGREDIENTS:
1 can black beans, drained and rinsed
1½ cup black eyed peas (cooked)
1 can corn kernels, drained
1 bell pepper, diced (any colour you prefer)
⅔ teaspoon of dried cayenne pepper
1 small red onion, finely diced
1 large tomato, diced
½ cup chopped fresh cilantro
Juice of 2 limes
2 tablespoons olive oil
2 tablespoons white vinegar
1 teaspoon ground cumin
Salt and pepper to taste
Plantain chips, for serving
INSTRUCTIONS:
1.
In a large bowl, combine the black beans, corn, red onion, bell pepper, cherry tomatoes, avocado, and cilantro.
2.
Squeeze the lime juice over the mixture and season with salt and pepper.
3.
Gently toss everything together until well combined.
4.
Let the cowboy caviar sit for about 15 minutes to allow the flavours to meld.
5.
Serve as a dip with tortilla chips or as a topping for tacos, salads, or grilled meats.
6.
This simplified cowboy caviar recipe is quick to prepare and packed with flavour. Feel free to adjust the ingredients or add extras like dried cayenne pepper or diced mango to suit your taste preferences. Enjoy!
TIPS FOR THE PERFECT DISH
Any cowpea beans will make a heartier black beans substitute for this recipe.
Canned beans can also serve for this recipe, as they are convenient and easily accessible. Frozen beans as well.
Roma tomatoes is best for this recipe because they have less seeds and firm texture. You can also use half cherry tomatoes for a heartier feel.
Although the recipe includes jalapenos, the dip remains mild. To reduce their spiciness, remove the seeds and ribs from the peppers.
No lime juice on hand? Try using two tablespoons of red wine vinegar.
Alternatively, garnish with green onions.
Serve your caviar either as a dip with tortilla chips or as a salad on lettuce leaves. It also works well as a salsa-like topping for chicken, London broil or grilled salmon.
RECIPE VARIATIONS:
You can make this recipe more protein-rich by stirring in 1 ½ cup of diced cooked chicken or small shrimp.
8
For a spicier version, keep some jalapeno seeds and ribs and add a dash of hot sauce to the dressing.
If you prefer more vegetables, feel free to add green bell peppers, green zucchini, poblano peppers or cucumber to the mix. Enjoy!
Servings: 8
Cuisine: American
9

SWEET CORN SHRIMP & RICE SKILLET
Recipe adapted by Spruce Eats
INGREDIENTS:
½ cup of Basmati rice
1 bunch green onions (divided)
1 medium red bell pepper (chopped)
6 garlic gloves (5 roughly chopped, 1 minced)
4 tablespoons of white miso
2’’ piece ginger, (thinly sliced)
1 ¼ teaspoons of turmeric powder (divided)
1 teaspoon of kosher salt, plus extra for
seasoning
1 teaspoon of granulated sugar (optional)
½ teaspoon of ground cayenne pepper (optional)
4 tablespoons of extra virgin olive oil (divided)
1 cup of medium shrimp (peeled and cleaned)
Freshly ground black pepper
¾ cup of water
1 cup frozen corn rinsed in warm water and drained
Lime wedges for serving
INSTRUCTIONS:
1.
Rinse the rice until the water runs clear. Put it in a medium bowl and cover it with water. Preheat the oven to 375 degree.
2.
Cut off the roots of 4 ends of green onions and chop them into pieces.
3.
Put the chopped green onions, bell pepper, 5 roughly chopped garlic cloves, soy sauce, ginger, 1
teaspoon of turmeric, salt and optionally sugar, and cayenne, in a blender or food processor. Blend until everything is finely chopped and mixed. Slowly pour in 3 tablespoons of olive oil while blending until the mixture becomes smooth.
4.
Dry the shrimp with a paper towel and put them in a medium bowl. Add the remaining turmeric and minced garlic clove to the shrimp, and season with salt and pepper. Heat the remaining tablespoon of oil in a large oven-safe skillet, over medium heat. Cook the shrimp until they become opaque, about 2-3 minutes per side. Once cooked, transfer the cooked shrimp to a bowl and cover it with a plate to keep them warm.
5.
Put the skillet back on the heat and add the prepared puree. Cook it on medium-high heat, stirring often, until the liquid has dried and the paste has darkened, which should take around 8 to 10 minutes.
You’ll know it’s ready when the oil starts separating from the paste.
6.
Reduce the heat to medium and whisk in water until the mixture becomes smooth. Add the corn and rice to the skillet, and drain any cooking juices from the shrimp into the skillet, making sure to keep the shrimp covered with the plate.
7.
Stir everything together and bring the mixture to a simmer. Place the skillet in the preheated oven and cover it tightly with a lid or a sheet pan. Bake until all the liquid is absorbed and the rice becomes tender, which should take about 23 to 25 minutes. Meanwhile, thinly slice the remaining green onions for garnish.
10
Servings: 2
Cuisine: American
11

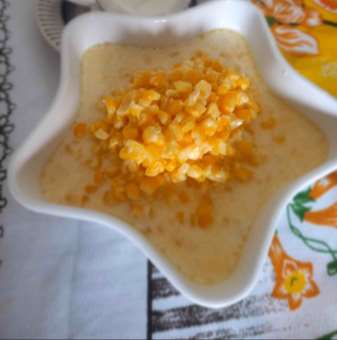
BRAZILIAN CORN PUDDING (CURAU DE MILHO)
An umami-rich treat that you can enjoy warm or cold!
INGREDIENTS
3 cups of fresh corn kernels (which is usually around 3
ears of corn, but it may vary depending on their size)
2 cups of whole milk
A pinch of salt
½ cup of sugar
Cinnamon (to sprinkle on top when serving)
That’s it! Just a handful of ingredients to make this delicious corn pudding.
HOW TO PREPARE THE CORN PUDDING
1. Start by cutting the corn kernels off the ears of corn.
Don’t forget to scrape the husk with a knife to get all the remaining bits out. These extra bits are starchier and help thicken the pudding.
2. Put the corn kernels in a blender along with the milk.
Blend everything together until it becomes smooth.
3. To separate the liquid from the solids, pour the corn milk through a strainer or a colander lined with cheesecloth. Do this gradually to prevent any overflow. While doing so, stir and press the corn solids to extract as much liquid as possible. Once you’ve strained most of the liquid, gather the corners of the cheesecloth and give it a good squeeze to get out any remaining liquid. If you prefer, you can also use a fine strainer, but using cheesecloth makes it easier to squeeze out all the liquid.
4.
That’s it! You’ve now prepared the corn mixture for the pudding.
INSTRUCTIONS:
5.
Take the strained corn milk and transfer it to a wide and relatively large pot. Add the sugar and give it a good stir to help dissolve the sugar.
6.
Put the pot over medium heat and let it come to a simmer. Keep stirring to ensure the sugar fully dissolves.
7.
Allow the mixture to simmer for about 15-20 minutes. At first, stir regularly, then towards the end, stir continuously to prevent it from sticking and burning at the bottom. The goal is to thicken the mixture until it reaches a semi-thick custard or pudding consistency.
8.
If you find that it’s not thickening as desired, you can dissolve a little corn starch in water (start with ½ teaspoon of corn starch in 1 teaspoon of water) and add it to the mixture. This will help it thicken.
9.
Once the pudding reaches the desired consistency, divide it into individual dishes. You can choose to serve it warm or chilled. When serving, sprinkle a bit of cinnamon on top for some extra flavour.
10.
Great job! Your delicious corn pudding is now ready to be enjoyed.
TIPS & NOTES
12
This corn pudding is similar to custard, so it might develop a skin as it cools. To avoid that, it’s a good idea to cover it with cling wrap or film right on the surface. After that, you can pop it in the fridge until you’re ready to serve.
Servings: 4
Cuisine: Brazilian
13
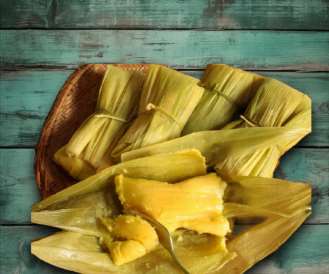
PAMONHA DOCE (SWEET CORN MUSH)
A traditional Brazilian savoury delicacy!
INGREDIENTS
4 sweet corn cobs (about 400g of corn kernels)
75 ml of milk (approximately)
150 g of sugar
1 tablespoon of melted butter
A pinch of salt
INSTRUCTIONS
1.
Lie the corn ears flat on a cutting bud. Using a sharp chef knife, cut off the bases of each ears of corn.
Remove the husks taking care not to rip them. Keep the nicest inner husks aside to use later. Remove and discard the silk.
2.
Use a knife to cut the kernels off the cob and put them in a blender with the milk. Blend until you have a smooth paste. If you prefer, you can grate the kernels and strain the pulp using a sieve.
3.
In a bowl, mix the corn pulp with the sugar, melted butter, and salt. Stir everything together until it becomes thick. If it’s too thick, you can add a little more milk.
4.
Take the corn husks and blanch them in boiling water for 2 minutes. Make sure the husks are well submerged in the hot water. This will make them easier to handle.
5.
Fold each husk to create a small cup, then fill it with a generous amount of corn batter. At this point, you can add the cheese. Form the filled husk into a package and secure it by tying it with twine or a thin corn straw.
How to fold Pamonha:
Take a corn husk and curl it lengthwise to form a tube, allowing about 1 inch of overlap at the seam.
Fold the tube in half to form a small cup.
Fill the tube with about ½ cup of filling, leaving an inch of space at the top.
Wrap with two additional husks, one on each side, making sure to line up the bottom edges.
Fold down the outer husks lightly to form a package.
Tie with twine. Starting from the middle and across the two ends. It’s time to boil!
6.
Fill a large pot with water and bring it to a boil. Place the wrapped pamonhas in the pot, making sure they are covered with water. Cover the pot and let them cook for about 45 minutes until the husks turn yellowish.
7.
Once cooked, take the pamonhas out of the pot and let them drain. You can serve them with coffee or milk as breakfast option – hot, warm or cold. To reheat, use hot water bath or steam.
8.
That’s it! Enjoy your delicious pamonhas.
VARIATIONS:
Salted pamonhas is made with a pinch of sugar and salt for flavour, and it can be filled with cheese before closing.
On the other hand, sweet pamonha uses coconut milk instead of regular milk and may include grated coconut.
14
If folding the husks to make a package is challenging, you can opt for small round disposable plastic container with lid.
Servings: 4
Cuisine: Brazilian
15
MILK-BOILED CORN
An addictive creaminess and deliciousness!
INGREDIENTS:
4 ears of corn
4 cups of milk
2 tablespoons of sugar (optional)
2 tablespoons of butter
1 cup of heavy cream (optional)
¼ teaspoon of salt
Pinch of black pepper (optional)
Grated coconut as garnish
HOW TO PREPARE MILK-BOILED CORN
1. Shuck the corn and remove the kernels from the cobs. You can do this by using a sharp knife to
carefully slice downward along the cob’s length, cutting the kernels off. Collect the kernels in a bowl.
2. In a large pot, pour enough milk to submerge the corn kernels. You can also leave the corn as whole ears or cut into half if you prefer.
3.
Combine the fresh corn kernels, whole milk, heavy cream (optional), butter and salt.
4.
Place the pot on the stove over medium heat and bring the mixture to a gentle simmer for about 15-20
minutes. Stir occasionally to prevent sticking. The milk will thicken slightly and coat the corn, creating a creamy texture.
5.
Once the corn is cooked, remove the pot from the heat.
6.
Serve the milk boiled corn in individual dishes and enjoy the creamy and delicious flavour of this classic treat.
Alternatively:
7.
If you’re using whole ears or cut corn cobs, add it to the pot once the milk starts to boil. Reduce the heat to low to maintain a simmer for 10-15 mins or until the kernels become tender.
8.
Using tongs, carefully transfer the corn ears to a serving platter or individual plates.
9.
Brush each ear of corn with melted butter. Season with salt and pepper to taste. Optionally, sprinkle fresh herbs over the corn for added flavour and garnish.
10.
Serve the milk-boiled corn immediately while it’s still warm. It can be enjoyed as a stand-alone dish or as a side dish to accompany other meals.
RECIPE VARIATIONS:
Add a sprinkle of sugar while cooking, for added sweetness.
Stir in a splash of heavy cream for a rich and creamy finish.
Sprinkle fresh grated coconut for added crispiness and delight.
Optionally, boil sweet corn on the cob with coconut milk for an enhanced overall flavour.
Servings: 4
Cuisine: American.
16
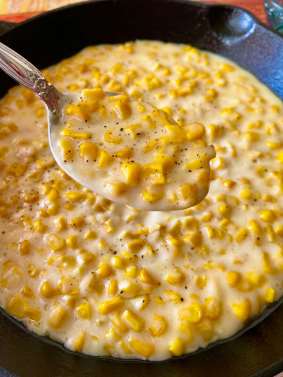
HOMEMADE CREAM-STYLE CORN
A creamy deliciousness perfect for family gatherings and special occasions INGREDIENTS
6 ears fresh corn
½ cup of unsalted butter
3 tablespoons of water
1 teaspoon of sugar
1 tablespoon of flour mixed with one tablespoon of water
½ teaspoon of salt
½ teaspoon of coarsely ground black pepper
1 cup of milk
INSTRUCTIONS:
1. Gather all the ingredients
2. Start by removing the husk and silk from the corn. Give them a good rinse.
3. To cut the kernels off the cob, stand an ear on a plate and use a sharp knife to cut downwards.
4. Don’t cut too close to the cob; leave about ¼ of the kernels attached. Scrape the cob with the back of the knife to get all the juicy bits.
5.
In a large skillet melt the butter over medium-low heat.
6.
Add the corn and its juices along with 3 tablespoons of water and the sugar, stir everything together and cook until the corn is tender, which should take about 6 minutes.
7.
Next mix the flour with water to create a paste. Stir this into the skillet, along with salt and pepper.
Make sure is everything is well blended.
8.
Keep stirring and cooking for an additional 2 minutes, gradually pour in the milk while stirring constantly. Cook for another 2 minutes, but be careful not to let it come to a boil.
9.
Now it’s time to serve and enjoy your delicious creamed corn!
TIPS & NOTES:
Freshly picked corn is the tastiest and freshest, and it has less starch.
If you can’t use the corn right away after picking or buying it from local farmers market, store it in the refrigerator while still in its husks.
If the husks are already removed, you can quickly boil the corn on the cobs for a minute or two and then refrigerate them for up to 3 days. The heat from boiling helps to preserve the natural sweetness and prevent the sugar from turning into starch.
RECIPE VARIATIONS:
If you can’t use milk and butter, don’t worry! You can try using plant-based alternatives like oat, soy, or almond milk, as well as plant-based butter. Just keep in mind that the texture might not be a creamy as with regular cow milk. If you go with a non-diary milk, you may need to add a little extra flour to 17
thicken it up. Play around with the amounts until you get the consistency you like. Even if it’s not perfect, it will still taste great!
Servings 4-6
Cuisine: American.
18
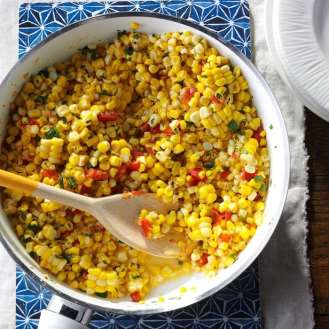
SOUTHWESTERN SAUTEED CORN RECIPE
Recipe adapted by Spruce Eats
INGREDIENTS
1 tablespoon of butter
3 and 1/3 cups of fresh corn
Or a 16-ounce package of frozen corn
1 plum tomato, chopped
1 tablespoon of lime juice
½ teaspoon of salt
½ teaspoon of ground cumin
1/3 cup of minced fresh cilantro
INSTRUCTIONS:
1.
Take a large cast-iron or heavy skillet and heat up the butter over medium-high heat.
2.
Add the corn to the skillet and cook it while stirring until it becomes tender. This should take around 3
to 5 minutes.
3.
Lower the heat to medium-low and mix in the chopped tomato, lime juice, salt, and cumin. Continue cooking until everything is heated through, which should take about 3 to 4 minutes.
4.
Once heated, remove the skillet from the heat and stir in the minced scent leaves.
5.
That’s it! You’re ready to enjoy your sautéed corn.
6.
Southwestern sautéed corn recipe is one of those simple recipes that prove why seasonal food is so good.
Servings: 5
Cuisine: American.
19
CORN TIPS & TRICKS
1. TO REMOVE CORN FROM THE COB:
Trim a small amount from both ends of the corn so you have two flat ends.
Hold the corn upright with one flat side on a cutting board.
Using a chef’s knife, carefully slice the kernels off the cob, turning it as needed to remove any remaining kernels.
Some people prefer to do this over a bowl instead of a cutting board to catch all the corn easily. You can choose whichever method works best for you.
2. CORN STORAGE TIPS
i.
In the fridge:
Keep your sweet corn in the fridge with its husk on and wrapped up with cling film or plastic wrap. It will stay fresh for about 7-10 days or even longer.
Cooked corn can stay fresh in an airtight container in the refrigerator for up to 4 days.
ii.
In the freezer:
Quickly blanch the whole corn cob before putting it in the freezer. It will last up to a year, so you can enjoy it after the harvest season is over.
Alternatively, freeze just the corn kernels. After blanching, cut the corn off the cob and store it in freezer bags for easy use later. Without blanching, uncooked corn can stay in the freezer for up to 3 months.
Cooked corn can last for about 2-3 months.
iii.
Under room temperature:
Uncooked corn still in the husk can be stored at room temperature for about a week. To maintain freshness, you may prefer to keep it in the refrigerator. However, it is not recommended to freeze corn with the husk still intact.
Canned corn is cooked corn that can last for up to 2 years. Although, it is important to check the expiration date or best if used by date on the can.
3. REMOVING CORN SILK
To remove the soft corn silk, use a vegetable brush.
Another way to remove corn silk is by wrapping a rubber band around your hand and rubbing it up and down the cob. The rubber band will catch all the silk leaving the corn ready to cook.
4. FOOD SAFETY TIPS
After peeling the husk from the corn, rinse in cold water before cooking.
When using packaged corn, look for the date labelled as ‘best by’ or ‘best if used by.’ It tells you the date before which the corn is expected to be at its best quality.
5. COOKING TIPS
Fresh corn should be boiled for no longer than 5-7 minutes from the time the water starts to boil. Set a timer because if you let your corn overcook, the kernels can become tough and chewy instead of crispy and tender. Use a tong to drop the corn inside boiling water.
When sweet corns are stored for too long under room temperature, they lose their juice and become tough. To make them soft and juicy again, simmer them in a solution of milk and generous quantity of butter or water. The butter makes the corn tender and delightful again to eat.
Sprinkle salt on sweet corn after it is tender not before, so the kernels do not harden.
6. BOILING TIMES FOR CORN
Unhusked fresh corn: 10 minutes
Husked fresh corn: 2-5 minutes
Frozen corn cobs: 5-8 minutes
Frozen corn kernels: 2-3 minutes
20
7. HOW TO REHEAT CORN
To reheat corn on the cob, you can use the microwave or a pot of boiling water.
For the microwave method, put the corn inside for 15-20 seconds at a time until it’s heated through.
Using the stovetop method, boil a pot of water. When the water is vigorously boiling, add the corn cobs, and heat them for about 3 minutes until they are warmed through.
8. HOW TO BLANCH CORN FOR FREEZING OR LONG-TERM STORAGE
Boil water in a big pot.
Put the corn in the boiling water and let it cook for 5 mins.
Prepare a bowl of ice water. Take the corn out of the boiling water and place it in the ice water for about 3 minutes.
Let the corn dry. If it is loose kernels, use a strainer to drain the water. If it is whole corn cobs, place them on a clean towel to dry.
If you want to freeze the corn, wait until it is completely dry, then pack it for freezing.
Don’t forget to label the packaging with the date for future reference.
9. HOW TO MAKE HARD CORN TENDER:
Sweet corn can become hard when it’s left out for too long or stored improperly. Exposure to air can cause it to loose moisture, resulting in a less juicy and firm texture. To keep raw corn sweet and tender, it’s best to store it in a cool, humid place or refrigerate it in an airtight container.
i.
Here’s a simple trick if you notice your corn has gone hard but you still want to enjoy it: a. The butter bath method – bring a big pot of milk or water to boil, add plenty of water, and put the shucked corn cobs in it. Let them cook for 5 minutes, making sure not to overcook them.
The aim is to have juicy crunchy kernels, not mushy ones. That’s it!
21
FUN FACTS ABOUT CORN
CORN IS CLASSIFIED AS A VEGETABLE, FRUIT, AND GRAIN.
THE USA LEADS AS THE LARGEST CORN-PRODUCING COUNTRY.
THE SCIENTIFIC NAME OF CORN IS ZEA MAYS.
CORN COMES IN VARIOUS COLOURS, FORMING A COLORFUL ARRAY.
EACH COB OF CORN TYPICALLY HAS AN EVEN NUMBER OF ROWS.
MANY EVERYDAY PRODUCTS LIKE COSMETICS AND ANTIBIOTICS, ARE DERIVED FROM
CORN.
A CUP OF CORN CONTAINS APPROXIMATELY 125 CALORIES.
EACH KERNEL ON AN EAR OF CORN IS ACCOMPANIED BY ONE SILK STRAND.
ONE BUSHEL OF CORN CAN SWEETEN AROUND 400 CANS OF COCA-COLA.
AN EAR OF CORN USUALLY HAS ABOUT 800 KERNELS ARRANGED IN 16 ROWS.
SWEET CORN IS RICH IN VITAMIN A, C, AND SOLUBLE FIBER.
FARMERS CAN GROW CORN ON EVERY CONTINENT EXCEPT ANTARTICA.
CORN HOLDS GREAT SYMBOLIC IMPORTANCE FOR SUSTENANCE AND LIFE IN VARIOUS
TRIBES.
THE ENTIRE CORN PLANT IS VERSATIE AND CAN BE USED FOR VARIOUS PURPOSES.
CORN IS ALSO EDIBLE IN ITS RAW STATE.
22

Reads:
14
Pages:
61
Published:
Apr 2024
Classic Homemade Slices is a book containing 50 Delicious Baked and Non-Baked Recipes
Formats: PDF, Epub, Kindle, TXT

Reads:
33
Pages:
79
Published:
Apr 2024
1500+ Days Of Effortless , Wholesome and Affordable Air Fryer Recipes for Beginners Homemade Meals!Are you looking for easy air fryer recipes? Well, your wait...
Formats: PDF, Epub, Kindle, TXT

Reads:
30
Pages:
32
Published:
Jan 2024
Are you tired of the endless cycle of diets that promise results but leave you feeling drained and unsatisfied? Have you been searching for a way to achieve y...
Formats: PDF, Epub, Kindle, TXT

Reads:
90
Pages:
30
Published:
Oct 2023
"TLC Diet Secrets" is your ultimate guide to transforming your health through the Therapeutic Lifestyle Changes (TLC) diet. Discover the proven strategies and...
Formats: PDF, Epub, Kindle, TXT


