Copyright © 2008 All rights reserved
- 43 -
" Quick and Easy Blogs " by John Williams
Page 44 of 100
Let Fantastico Set up Your WordPress Blog
You need to have CPanel available on your website to use Fantastico but
other Control Panel systems may also have an option which can install
WordPress onto your site for you.
Type this address into your web browser to open your CPanel Control Panel:
Of course, you replace example with the actual name of your website. If you
registered a different type of domain (not a .com) then you will change the
com to the appropriate suffix.
Type in your username and password to get access to your Control Panel.
The layout of these screens will vary if you are using a different version of
CPanel but all recent versions have had Fantastico and Wordpress available.
Copyright © 2008 All rights reserved
- 44 -
" Quick and Easy Blogs " by John Williams
Page 45 of 100
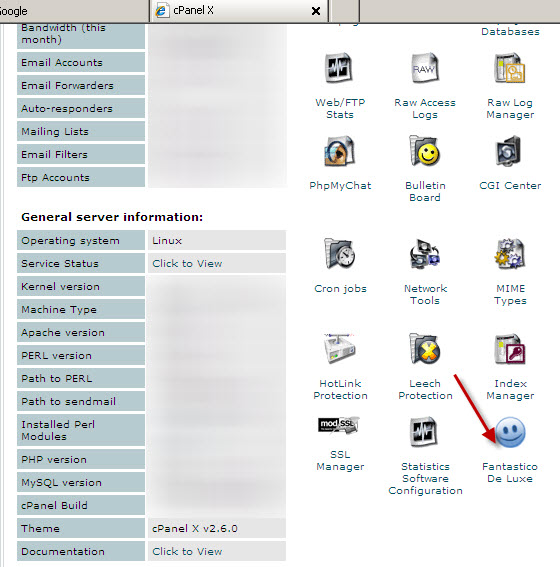
Scroll down and left click on Fantastico.
Copyright © 2008 All rights reserved
- 45 -
" Quick and Easy Blogs " by John Williams
Page 46 of 100
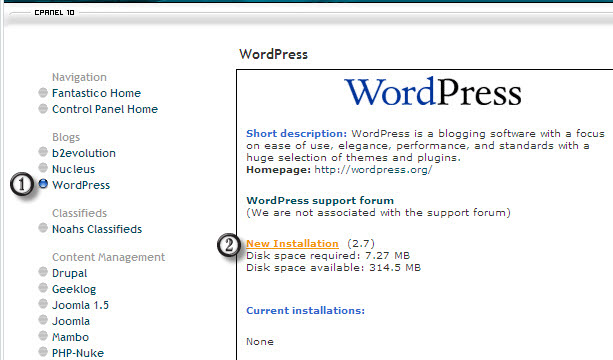
1) Select WordPress from the options listed under Blog.
2) Then, Click on New Installation
Copyright © 2008 All rights reserved
- 46 -
" Quick and Easy Blogs " by John Williams
Page 47 of 100
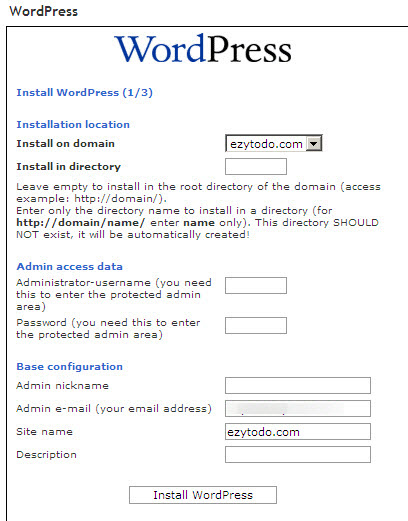
On the next screen, you fill in some details for your new WordPress blog.
This is the first of 3 screens.
Install on domain: Type in the name of your domain where you are using
Fantastico to install the new blog.
Install in directory: If your blog will be the main part of your web site,
leave this box blank and Fantastico will install the WordPress files in the
/public_html folder of your web site.
If you want the blog to be installed in a sub-folder, and not in the
/public_html folder, type the name of the sub-folder in this box. You must
not already have a sub-folder with that name on this web site.
Copyright © 2008 All rights reserved
- 47 -
" Quick and Easy Blogs " by John Williams
Page 48 of 100
Admin access data: Type a username and password for the Admin area into
these boxes. The password should be very hard to guess.
Admin Nickname: This name will appear on your posts in the blog.
Admin email: Type in the email address where you want to receive emails
from this blog. I strongly suggest that you create a special email address for
this blog, perhaps with a service like Google’s Gmail or Microsoft’s HotMail.
Never use your most important personal or professional email addresses for
any blogs.
Description: You can put a short, positive description of your blog here.
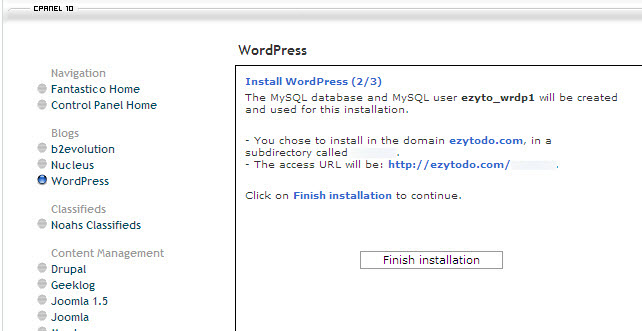
Now, Fantastico tells you the name of the Database which will be created to
hold all the information about your WordPress blog and the name of the User
who will be linked to that Database.
Fantastico will create both the Database and the User.
Write the information down with the other details you already have.
Then, left-click on Finish Installation.
Copyright © 2008 All rights reserved
- 48 -
" Quick and Easy Blogs " by John Williams
Page 49 of 100
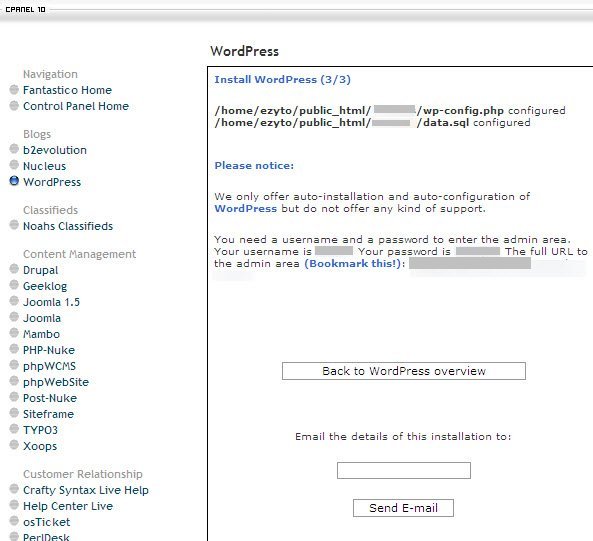
The next screen shows the other information you will need to use your new
WordPress blog.
It shows the WordPress configuration and the database set-up were
successful.
Then, you can see the admin username and password that you need to get
into the admin area and its web address (URL). Even though WordPress will
email you this information after you do the next step, write down these 3
pieces of information just in case the email is lost – you will need them.
Put your email address into the box at the bottom of that screen, then left-
click Send Email, and the system will email you the details you need.
Copyright © 2008 All rights reserved
- 49 -
" Quick and Easy Blogs " by John Williams
Page 50 of 100
Then, you can click on the Back to WordPress Overview button to return
to that screen. If you don’t need to do that, then you can click on either the
Home or Logout links at the top-right of the page.
Close the window in your browser that you used for setting up your blog
through Fantastico.
Check your email to see if you have got the email the WordPress installation
program sent you with the administration details of your new blog.
If you cannot find it, check your Spam filter and email Trash basket, just in
case.
Then, open a new browser window and type in the address Fantastico gave
you to get into the Administration area of your new WordPress blog.
When that page opens in your browser, type in the Username and Password,
and login.
Copyright © 2008 All rights reserved
- 50 -
" Quick and Easy Blogs " by John Williams
Page 51 of 100
Set Up Your WordPress Blog Yourself
We’ll start with the part which sounds challenging but it’s really easy.
Go to the Control Panel on your website.
My demonstration will use CPanel. If your hosting provider supplies a
different type of Control Panel, you will have to make some adjustments and
ask your hosting provider for assistance if necessary.
If you have CPanel, the address you type into your web browser is
http://www.example.com/cpanel Of course, you replace example with the
actual name of your domain.
Type in your username and password so that you get access to your Control
Panel.
The actual layout and pictures you see will vary depending
on the version of CPanel which your host provides.
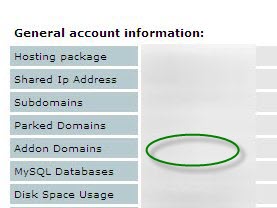
Check in the column at the left of the page that you are not already using all
of the MySQL® databases which your host provides.
You might see something like 0/4 or 8/unlimited depending on the hosting
package which you have.
If you see something like 4/4, then you need to add the details for your blog
to one of the databases you are already using or (preferable) to decide if you
need the programs which you are using the databases for as much as you
want a blog.
Copyright © 2008 All rights reserved
- 51 -
" Quick and Easy Blogs " by John Williams
Page 52 of 100
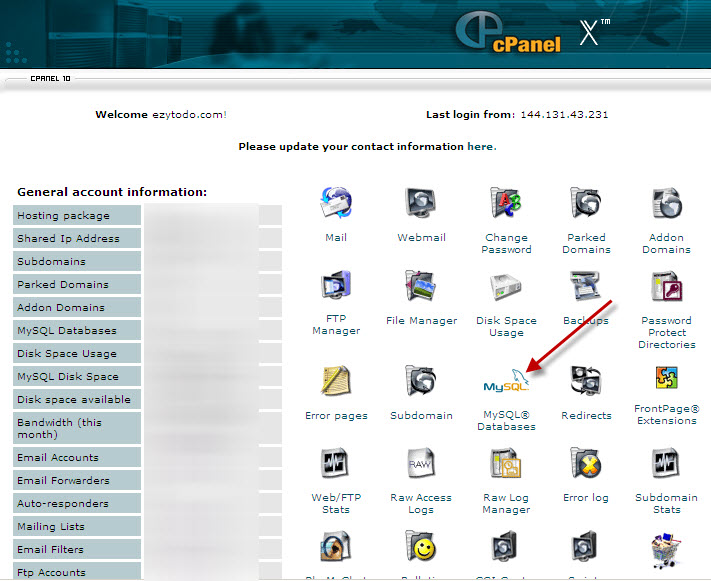
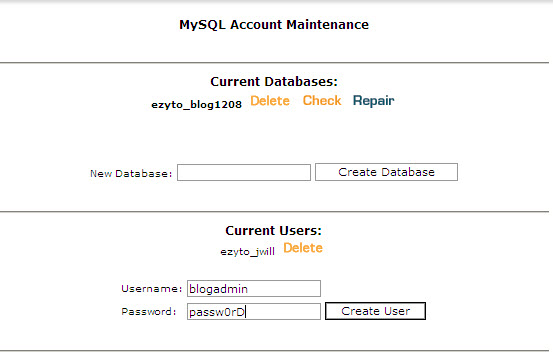
It’s much easier to have the blog on its own database.
If you have a spare database, just scroll down and left click on MySQL®
databases.
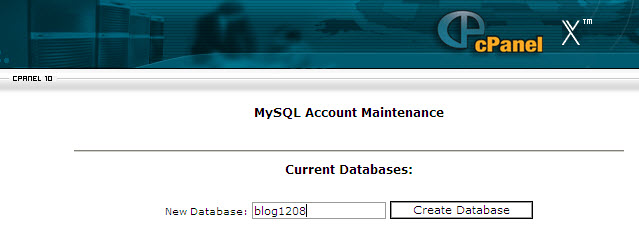
When the Database window opens, type in the name for your database
where the details of your blog will be stored.
Copyright © 2008 All rights reserved
- 52 -
" Quick and Easy Blogs " by John Williams
Page 53 of 100
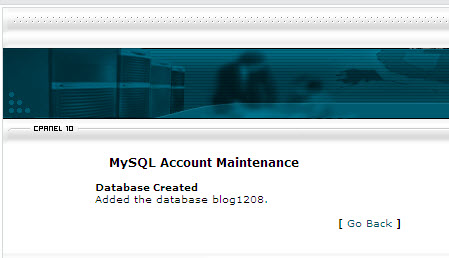
Then, left-click on the Create database button.
You will see a message confirming that your database has been created.
Click on the Go Back button.
Now, you will create a User for the new database.
Type the Username and Password for the User who will control the Blog into
the boxes under the Current Users heading. (These example entries don’t
exist on any of my databases).
Copyright © 2008 All rights reserved
- 53 -
" Quick and Easy Blogs " by John Williams
Page 54 of 100
When you get the message that your new user is created, left-click on the Go
Back button.
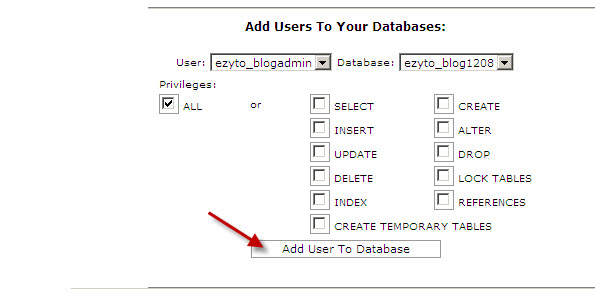
Now you will add this user to your blog’s database.
Left-click the Add User To Database button.
Your Control panel will add a short version of your domain name to the front
of each Username and Database which you create.
In this example the prefix is ezyto_ which is added by the system to each
user and database on this domain.
You need to type in the full name, including this prefix.
Copyright © 2008 All rights reserved
- 54 -
" Quick and Easy Blogs " by John Williams
Page 55 of 100
Setting up Your WordPress Files
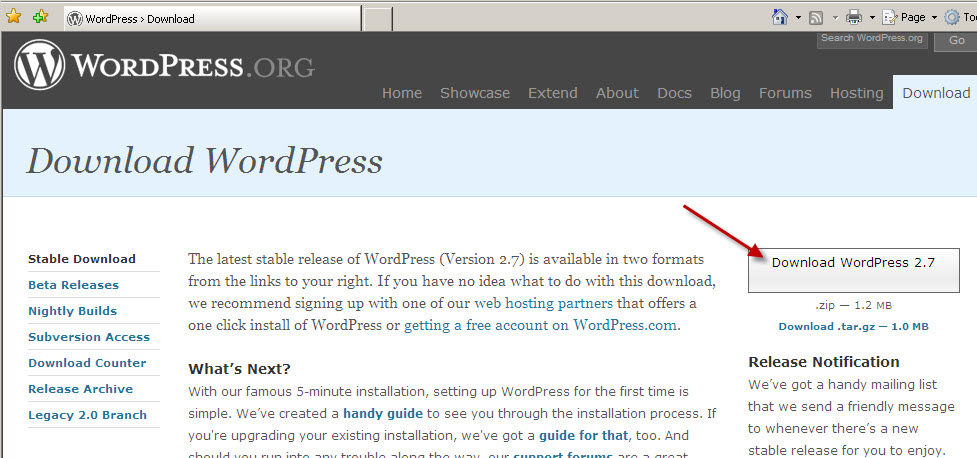
Your next step is to download the current version of the WordPress platform
(that’s 2.7 at the time of writing).
Do not download a version that is labelled “Beta” – these are experimental
versions which may contain minor or even major bugs and should not be
used on regular “live” web sites.
Left-click on the Download button at the far right of the Menu at the top of
the page. That will open this page in your web browser.
Left-click on the Download button to get the Windows version of the current
WordPress package (I’ve used a red arrow to point to it in the above picture).
If you use a Macintosh, the wordpress.org site will probably automatically
direct you to the page where you can download the Mac version.
Copyright © 2008 All rights reserved
- 55 -
" Quick and Easy Blogs " by John Williams
Page 56 of 100
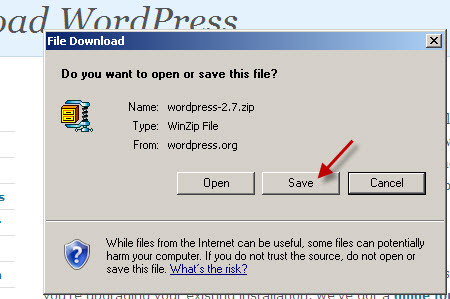
A box will appear on your monitor screen:
Left-click on Save.
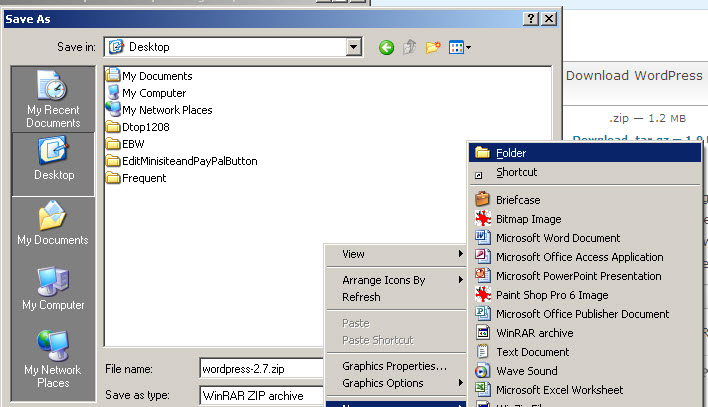
This box lets you browse to where you want to save the archive which
contains the WordPress files.
I suggest that you create a new folder on your Desktop to put this archive in.
But, you may choose to save it anywhere on your computer where you can
find it easily.
Copyright © 2008 All rights reserved
- 56 -
" Quick and Easy Blogs " by John Williams
Page 57 of 100
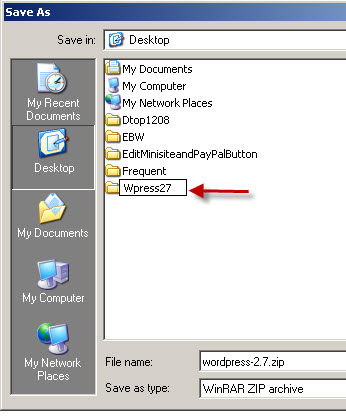
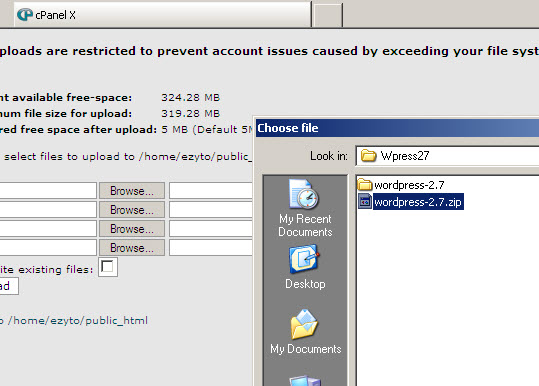
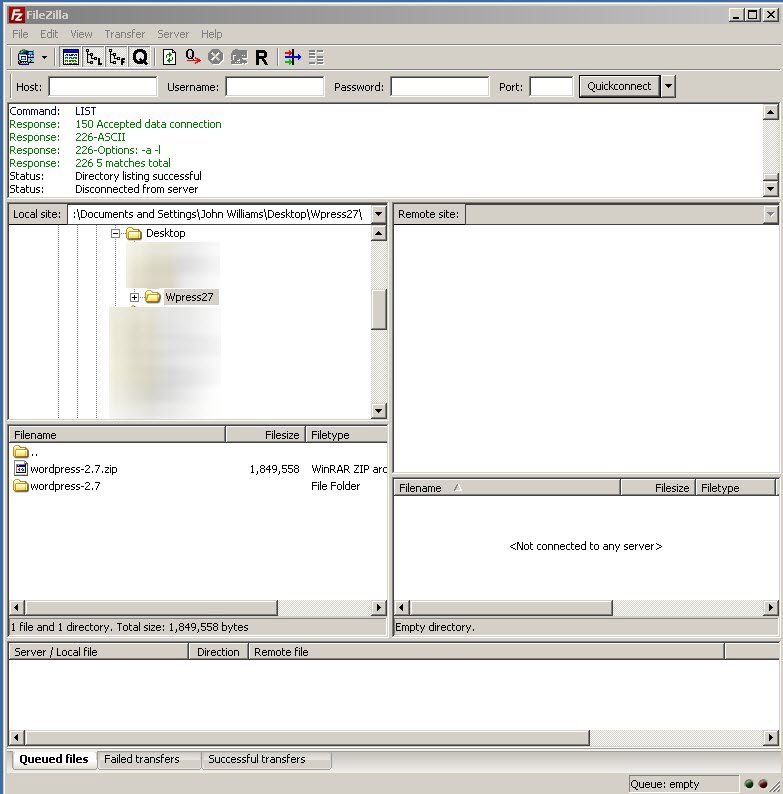
I created a folder on my Desktop and renamed it Wpress27
When the WordPress archive finishes downloading to your computer, you
should check the file with your anti-virus program before opening it. This is a
wise step to take with every file which you get on your computer, not just
those which you download from the Internet.
Copyright © 2008 All rights reserved
- 57 -
" Quick and Easy Blogs " by John Williams
Page 58 of 100
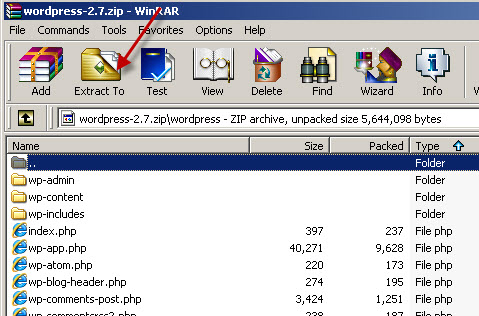
Then, you can use your archiving program (sometimes referred to as an
“unzipping” program) to extract the WordPress files from the archive. I use
WinRAR. Other good programs are 7-Zip (free) and WinZip (another excellent
commercial program like WinRAR). A program for the Mac is Aladdin Stuffit
but I think Macintosh computers have an archiving program supplied within
the system.
When the files are all extracted into the folder you created for them on your
computer, you will be ready to transfer them to your web site.
There are two ways that you can do this:
Use the Control panel on your website to bring the files from your computer.
Use your File Transfer (FTP) program to transfer the files to where you want
them on your web site. Two good FTP programs for Windows based
computers are Filezilla and Core-FTP. Both these programs are free to use.
Using Your Website Control Panel to FTP the Files
Go to the Control Panel on your website. My demonstration will use CPanel
which is one of the most popular Control Panels currently in use.
Copyright © 2008 All rights reserved
- 58 -
" Quick and Easy Blogs " by John Williams
Page 59 of 100
If your hosting provider supplies a different type of Control Panel, you will
have to make some adjustments and ask your hosting provider for assistance
if necessary.
If you do have CPanel, the address you type into your web browser is
http://www.example.com/cpanel
Of course, you replace example with the actual name of your website.
Type in your username and password so that you get access to your Control
Panel.
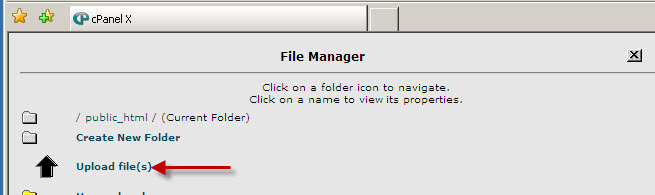
Scroll down and left click on File Manager. When the File Manager is
displayed in your web browser, left click on the small picture of a folder
beside /public_html.
This will display the files and folders in your /public_html folder.
If you want the blog to be the main part of this website, then you will
transfer all of the files within the WordPress archive into this /public_html
folder.
Doing this through the Cpanel File Manager will be a slow process. You will
save much time if you use your FTP program to transfer all those files.
If you intend to install the blog in a sub-folder below the /public_html folder,
you only have to transfer the archive to your /public_html folder.
Just left-click on the Upload Files text.
Copyright © 2008 All rights reserved
- 59 -
" Quick and Easy Blogs " by John Williams
Page 60 of 100
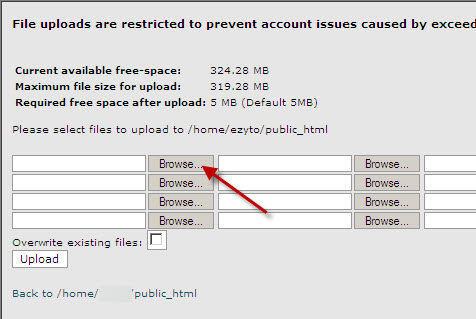
Then, left-click on the browse button beside the first box on the upload page.
When the browse window opens, navigate to the desktop on your computer
or wherever you put the WordPress archive.
Left click on the archive.
Copyright © 2008 All rights reserved
- 60 -

" Quick and Easy Blogs " by John Williams
Page 61 of 100
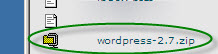
Then, you'll see the link appear in that first upload box.
Left-click on upload and the transfer from your computer to your website will
begin.
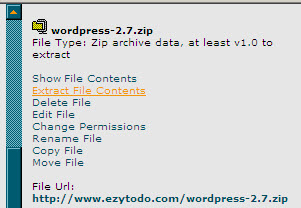
When the archive appears in the /public_html folder, click on the name of the
archive.
Then click on Extract Files in the menu at the top right corner of the File
Manager.
Copyright © 2008 All rights reserved
- 61 -

" Quick and Easy Blogs " by John Williams
Page 62 of 100
In a few minutes, you will have a WordPress folder inside the /public_html
folder.
Then, you can click on the name of the WordPress folder and select the
rename option from the Menu at the top right of the file manager.
Choose whatever name you want to use for the folder which contains your
WordPress blog. It could be something relevant to the topic which you will
focus on in the blog.
Using Your FTP Program to Transfer the Files
I will use Filezilla for this demonstration. It is a free program for computers
using the Windows operating system.
Copyright © 2008 All rights reserved
- 62 -
" Quick and Easy Blogs " by John Williams
Page 63 of 100
Open your File transfer program.
Copyright © 2008 All rights reserved
- 63 -
" Quick and Easy Blogs " by John Williams
Page 64 of 100
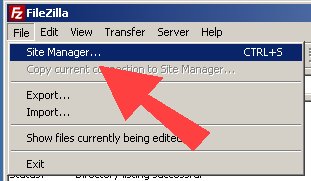
Left-click on File Manager in the Menu at the top left of the Filezilla screen
and then select “Site Manager”.
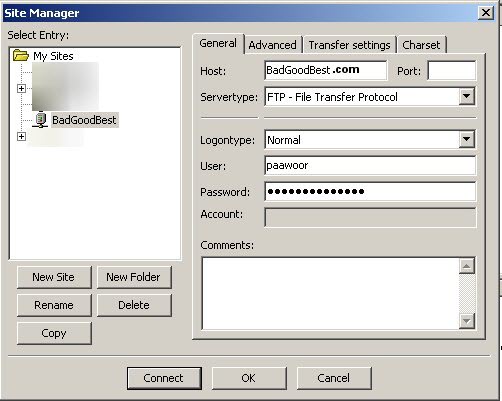
Select the web site you will transfer the WordPress files to and left-click the
OK button.
Copyright © 2008 All rights reserved
- 64 -
" Quick and Easy Blogs " by John Williams
Page 65 of 100
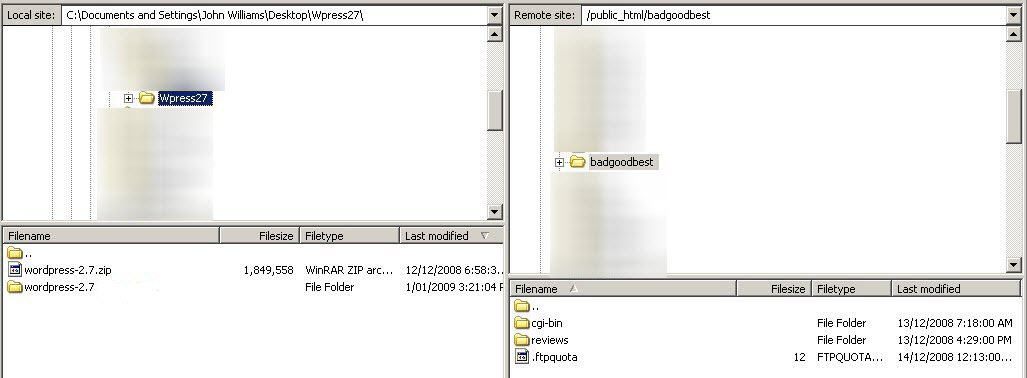
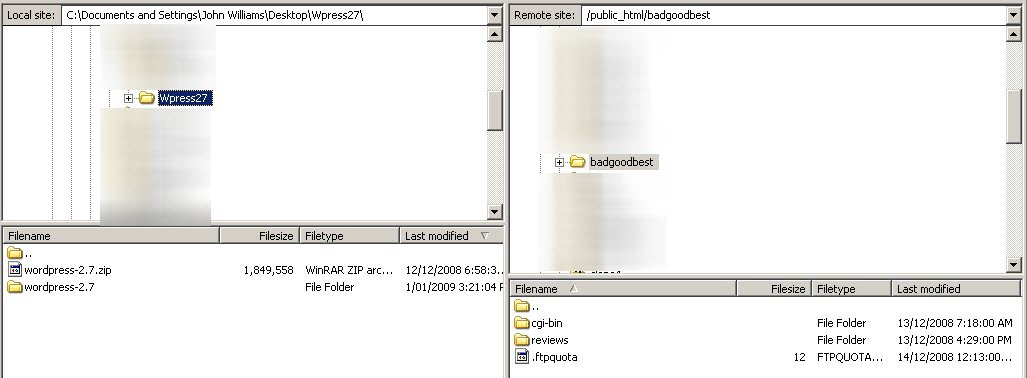
Your FTP program will display the contents of the selected web site in the box
on the right.
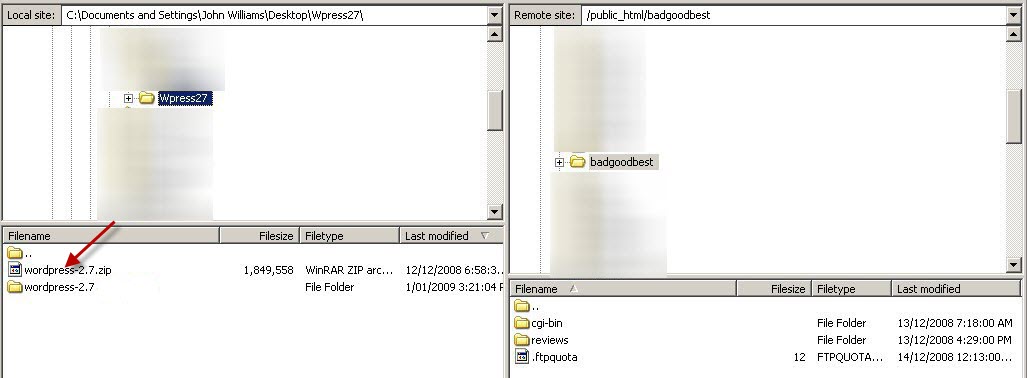
Scroll down in the “Local Site” box on the left and left-click on the folder
which contains the WordPress files.
Setting up your Blog in the /public_html Folder
If you are going to transfer the files to the /public_html folder on your
website, and make the blog the first thing your visitors see when they reach
your site, follow these steps.
Copyright © 2008 All rights reserved
- 65 -

" Quick and Easy Blogs " by John Williams
Page 66 of 100
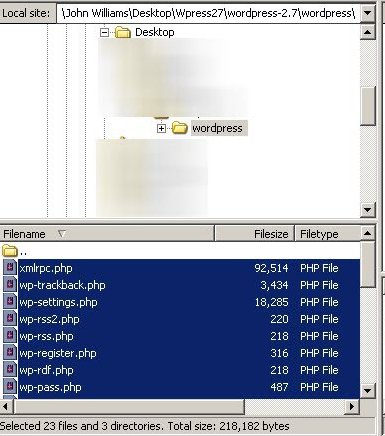
Left-click in the box which shows all the folders and files to be transferred.
Then, open the folder which contains the extracted files.
Then select all the files and folders there by holding down the Control key
and pressing A.
Copyright © 2008 All rights reserved
- 66 -
" Quick and Easy Blogs " by John Williams
Page 67 of 100
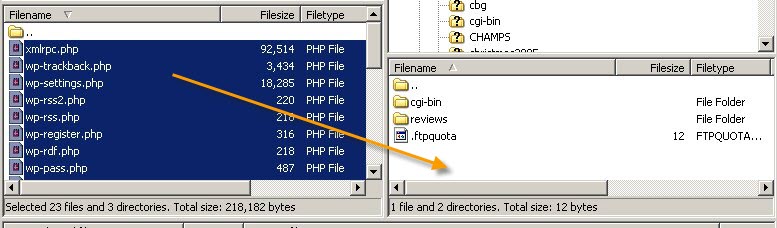
Left-click in the box and keep holding down the left mouse button. Then,
drag your mouse right into the box on the right which shows the contents of
the selected web site’s /public_html folder.
All the folders and files will be transferred to the /public_html folder on your
web site.
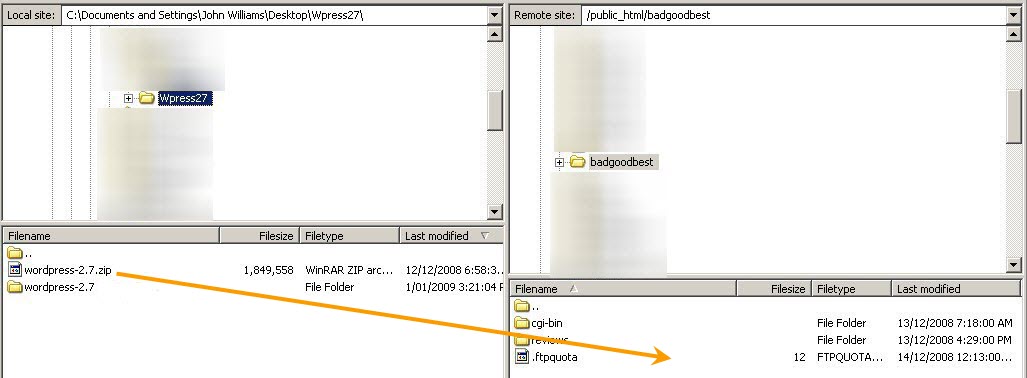
Setting up your Blog in a Sub-folder Below the /public_html Folder
If you are going to transfer the files to a sub-folder below the /public_html
folder on your website follow these steps.
Left-click on the WordPress archive which you downloaded from
http://www.wordpress.org/ and keep holding down the left mouse button.
Copyright © 2008 All rights reserved
- 67 -
" Quick and Easy Blogs " by John Williams
Page 68 of 100
Then drag your mouse into the box on the right which shows the contents of
the selected web site’s/public_html folder.
Filezilla will start to transfer the archive containing the compressed
Wordpress files to the web site.
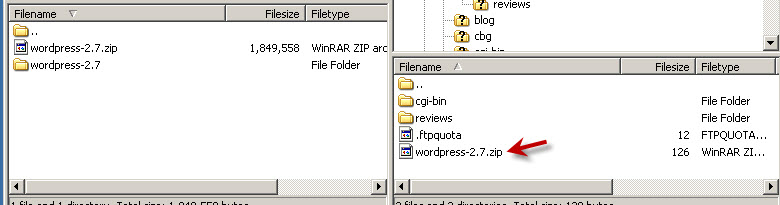
When the transfer is complete, you will see the archive in the /public_html
folder on the web site.
Close your File transfer program.
Open a new window in your web browser and type in the address of your
web site’s CPanel or whichever other Control Panel is provided by your
hosting company.
Copyright © 2008 All rights reserved
- 68 -
Describe what you're looking for in as much detail as you'd like.
Our AI reads your request and finds the best matching books for you.
Popular searches:
Join 2.9 million readers and get unlimited free ebooks