LESSON 01 – INTRODUCING TRAFFICWAVE
Although there are many good autoresponder tools out there I personally find that Trafficwave is the best one for ease of use, powerful features and a reasonable price tag. It comes with email and video tutorials to help you get started and is perfect for the complete beginner.
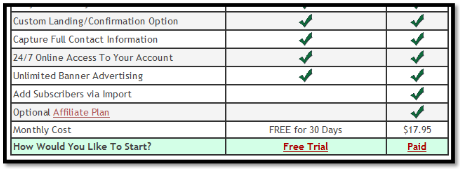
It also comes with a free trial which allows you full use of all its features for 30 days. If you wish to continue using it then you just pay a low monthly fee of $17.95.
An extra benefit of becoming a full member is the Affiliate Option which will allow you to earn a regular monthly income just by promoting Trafficwave to people such as family and friends. For each person who signs up for a full membership you will receive a Fast Track Bonus of $17.95 plus a continuing monthly commission. You will also earn extra bonuses from any members that your members bring in. For more information on how much you can earn - read the Trafficwave Income Opportunity page.
CLICK HERE TO JOIN TRAFFICWAVE
I will now take you through some of the features you can use in Trafficwave. Note you will find similar features in other autoresponder tools as well, so reading this lesson will be of benefit to you if you decide to use a different autoresponder. The screenshot below shows the Trafficwave Back Office.
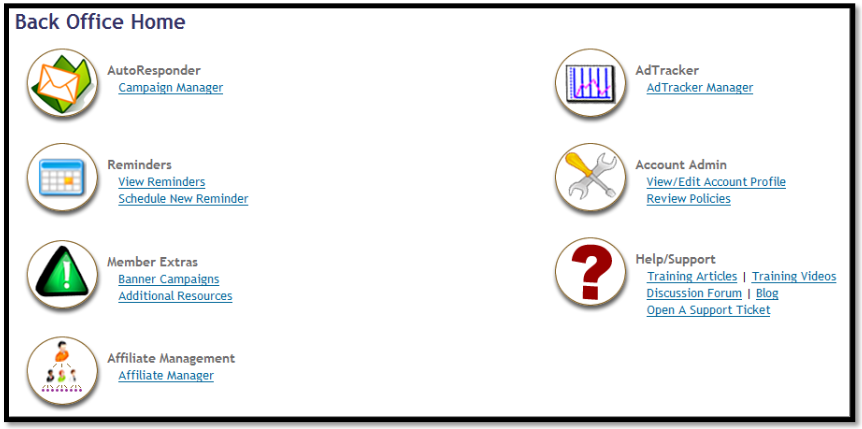
CAMPAIGN MANAGER
The Campaign Manager as you will have guessed allows you to create and manage your campaigns. You can also create a webpage to promote your campaign with the built in capture page creator. I will cover this feature in more detail in a later lesson.
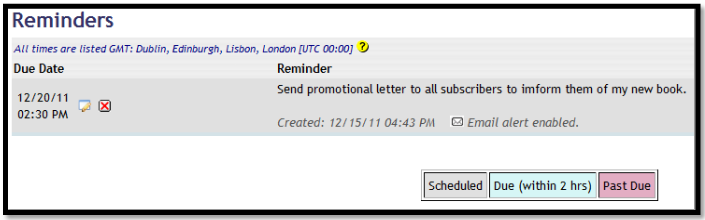
This is a very useful tool as it allows you to create little reminders about anything you want. An example could be to remind you to mail your subscribers about your latest product. You can set the date and time you want to be reminded and have Trafficwave send you an email when the time comes. The screenshot shows an example reminder which I have created to remind me to send a promotional email to all mysubscribers to inform them of my latest book.
BANNER CAMPAIGNS
These can be found under the Member Extras section and can be used to promote any banner you wish on your Trafficwave Affiliate website, allowing you to promote other programs as well.

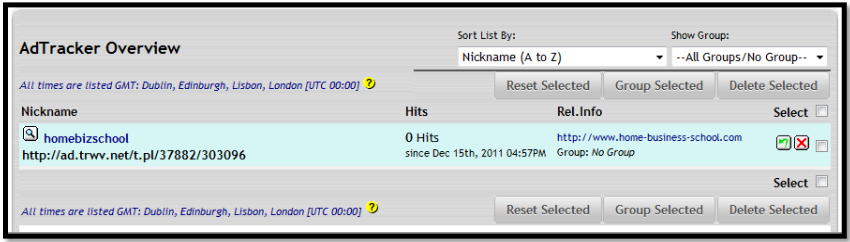
ADTRACKER MANAGER
When you use any form of email advertising such as Safelists it is useful to track how many times that someone has actually clicked on your link and visited your website. This way you will be able to see how many visitors you are actually getting from a particular advertising service.
The Affiliate Manager contains all the tools and WebPages you need to make money with Trafficwave which I will cover in detail in a later lesson. There is also a Help/Support section here with video and email tutorials and a forum where you can post messages for extra help.
In order to follow the rest of the lessons in this guide I recommend you sign up for your free 30 day trial in Trafficwave. I assure you that you will NOT be asked to spend any money unless you decide to become a full active member. You can use all the features (except for the Affiliate Option) for 30 days and you can cancel your membership at anytime.
Go back to the introduction lesson and click on the link to open Trafficwave. Next, click on the “Register” link at the top of the screen. This is where you can decide whether you want a free 30 day trial or a full active membership. You will see a list of features that you get with your trial or full membership.
If you decide to go for the full membership then you will be expected to set up your payment details. If you go for the free trial you can upgrade anytime during the trial process. Let’s get started – scroll down the bottom of the page and click the Free Trial link.
STEP 01 – ENTER YOUR DETAILS
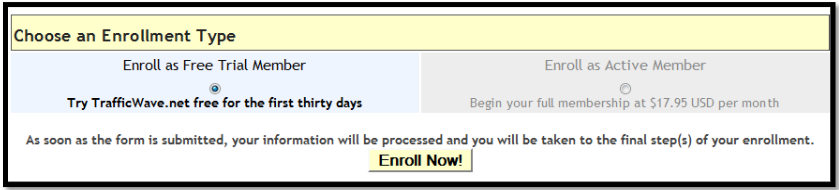
On the form that appears you will need to fill out a few details such as a username, email address and your name and home address. Once you have done this then scroll down the page to choose your enrolment type. Make sure you check the box to agree with their policies.
Sometimes Trafficwave will report an error which usually happens when there is a problem with your username. Make sure your username is between 3 and 15 characters and includes only letters and numbers. If you get an error message then just refresh the page and alter the error.
STEP 02 – VERIFY YOUR ACCOUNT
You will be told to check your email for a verification email. This email contains a long link which you must click to verify your new account. Once you have done this then you will receive a welcome email with your username and password so you can log in to your Trafficwave Back Office.
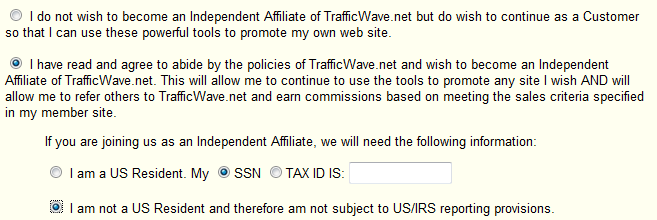
Log in to your Trafficwave Back Office and you will be presented with a form. This form will ask you if you want to use Trafficwave as a customer only or as an affiliate as well. If you are from the USA then you will need to enter your SNN and TAX ID IS.
When you have finished then click the button at the bottom of the screen to enter your Back Office.
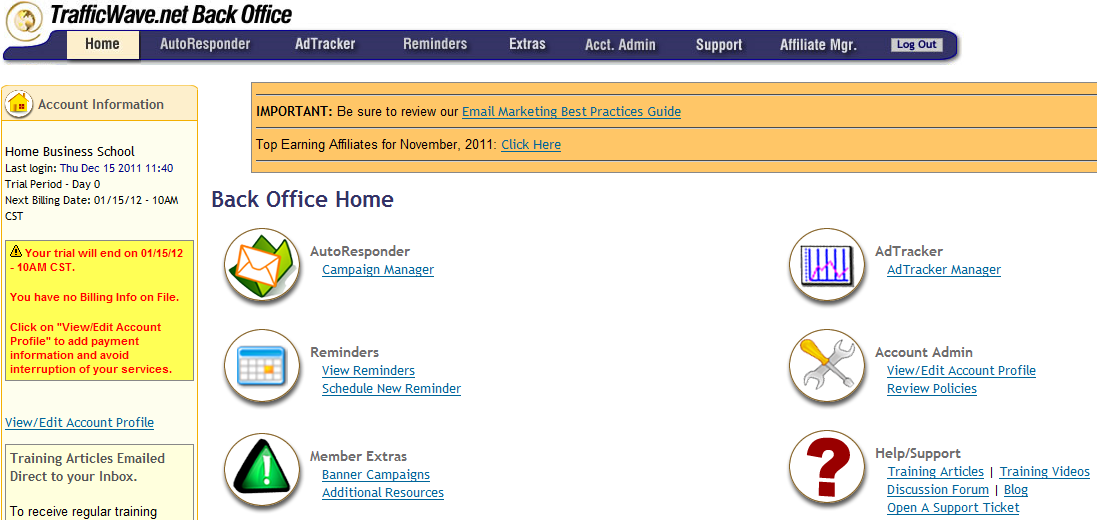
Notice the menu options at the top of the screen. You can use these menus to access different parts of your Back Office. They perform the same function as the links you see on this page. It is up to you which menu system you prefer to use.
On the left hand side of the screen you will see your account information. This tells you how many days are left of your 30 day trial. It also reminds you that you currently have no billing information on file. Unless you decide to add your billing information then all the features will stop working after 30 days and you will have to enter them and upgrade to an active member to continue usage.
Click on the link that says “View/Edit Account Profile” under the Account Admin section (or Acct.Admin) from the menu bar on the top of the screen).
This page allows you to change your personal settings such as your address and password. It also allows you to change your payment information. Look to the top left and you will see a small menu like the one below. These menus appear in other sections of your Back Office as well.
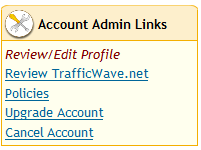
If you want to cancel your account then click on the “Cancel Account” link. You can also upgrade your account by clicking on the “Upgrade Account” link. Providing you have entered your payment information then you can become a full active member anytime you want.
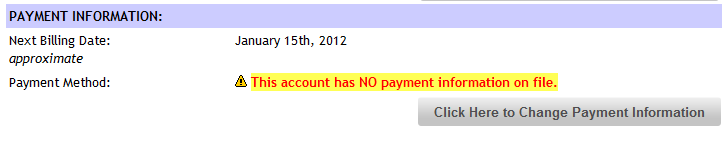
Locate the part of the page as shown below. As you have no payment information on file then you will be informed of this. When you are ready to add the information then click on the “Click Here to Change Payment Information” button and you will be taken to the next screen.
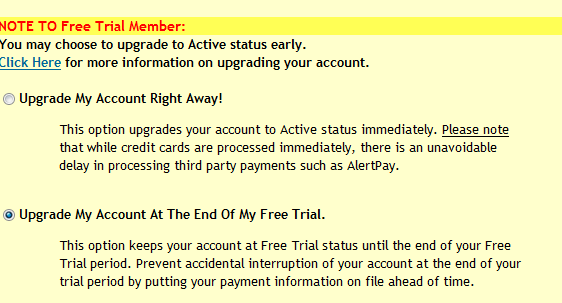
The top part of this page gives you the option to upgrade your account right now or automatically upgrade at the end of the 30 day trial. Choose the option you prefer.
Scroll down the screen and enter your payment details. You can choose between a credit card, PayPal or AlertPay. Once you have done this then your billing details will be safely stored and you will be billed a monthly membership fee of $17.95 - unless you cancel your account.